Table of Contents
Advertisement
CONTENTS
CONTENTS
THIS OPERATOR'S MANUAL MUST BE KEPT IN THE LIFT TRUCK AND MUST BE READ AND UNDERSTOOD BY OPERATORS.
THIS OPERATOR'S MANUAL MUST BE KEPT IN THE LIFT TRUCK AND MUST BE READ AND UNDERSTOOD BY OPERATORS.
MANITOU NORTH AMERICA, INC.
MANITOU NORTH AMERICA, INC.
6401 IMPERIAL DRIVE
6401 IMPERIAL DRIVE
WA
WACO, TX
CO, TX 76712-6803
For Parts Orders contact your Manitou North America Dealer or call:
For Parts Orders contact your Manitou North America Dealer or call:
Manitou North America, Inc. Parts Dept. (800) 425-3727 or (254) 799-0232
Manitou North America, Inc. Parts Dept.
Parts Dept.
Parts Dept. Fax (254)
Fax (254) 867-6504
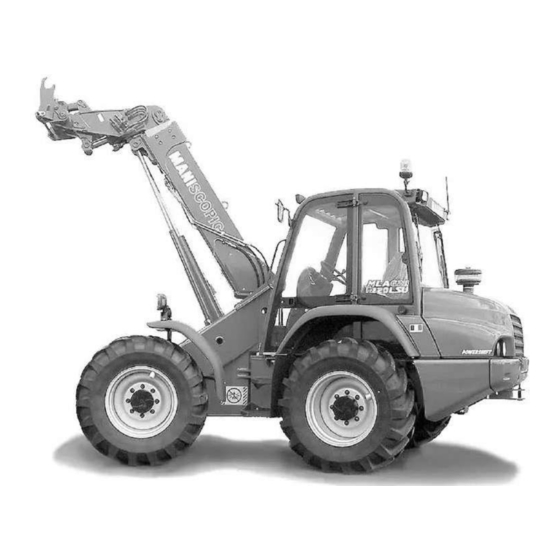
MLA 628 -120 LSU POWERSHIFT
MLA 628 -120 LSU POWERSHIFT
OPERATOR'S MANUAL
OPERATOR'S MANUAL
https://www.forkliftpdfmanuals.com/
76712-6803
(800) 425-3727 or (254) 799-0232
867-6504 Website: www.manitou-na.com
Website: www.manitou-na.com
Seri ries
Se
es 3- 3-E2
E2
547866AS
547866AS
R R
11-10
11-10
Advertisement
Table of Contents

Related Manuals for Manitou MLA 628 -120 LSU 3-E2 Series


Summary of Contents for Manitou MLA 628 -120 LSU 3-E2 Series
- Page 1 WACO, TX CO, TX 76712-6803 76712-6803 For Parts Orders contact your Manitou North America Dealer or call: For Parts Orders contact your Manitou North America Dealer or call: Manitou North America, Inc. Parts Dept. (800) 425-3727 or (254) 799-0232 (800) 425-3727 or (254) 799-0232 Manitou North America, Inc.
- Page 2 CONTENTS CONTENTS https://www.forkliftpdfmanuals.com/...
- Page 3 CONTENTS CONTENTS https://www.forkliftpdfmanuals.com/...
- Page 4 CONTENTS CONTENTS https://www.forkliftpdfmanuals.com/...
- Page 5 CONTENTS CONTENTS - IN - INTRO TRODUC DUCTIO TION T N TO SA O SAFET FETY Y - - - ROUGH TERRAIN FORKLIFT TRUCK - ROUGH TERRAIN FORKLIFT TRUCK GENERA ERAL L SAF SAFETY ETY ST STAND ANDARD ARDS - - S - - - - - - - - - - -...
- Page 6 CONTENTS CONTENTS https://www.forkliftpdfmanuals.com/...
- Page 7 CONTENTS CONTENTS ROUGH TERRAIN FORKLIFT TRUCK ROUGH TERRAIN FORKLIFT TRUCK GENERAL GENERAL SAFETY SAFETY ST STANDARDS ANDARDS https://www.forkliftpdfmanuals.com/...
- Page 8 Rough Terrain Forklift Safety Manual (part no. 422494) thoroughly and carefully before operating or servicing your forklift. operating or servicing your forklift. Contact your dealer or Manitou North Contact your dealer or Manitou North America, Inc. if you have any ques- America, Inc.
- Page 9 CONTENTS CONTENTS ROUGH TERRAIN FORKLIFT ROUGH TERRAIN FORKLIFT TRUCK GENERAL SAFETY STANDARDS (cont.) TRUCK GENERAL SAFETY STANDARDS (cont.) B.) GENERAL SAFETY PRACTICES (cont.) B.) GENERAL SAFETY PRACTICES (cont.) 7.) Where steering can be accomplished with either hand and the steering mechanism is of a type that pre- 7.) Where steering can be accomplished with either hand and the steering mechanism is of a type that pre- vents road reactions from causing the handwheel to spin (power steering or equivalent), steering knobs may vents road reactions from causing the handwheel to spin (power steering or equivalent), steering knobs may...
- Page 10 CONTENTS CONTENTS ROUGH TERRAIN FORKLIFT ROUGH TERRAIN FORKLIFT TRUCK GENERAL SAFETY STANDARDS (cont.) TRUCK GENERAL SAFETY STANDARDS (cont.) C.) OPERATING SAFETY RULES AND PRACTICES (cont.) C.) OPERATING SAFETY RULES AND PRACTICES (cont.) 19.) Do not use a rough terrain forklift truck for opening or closing railroad car doors. 19.) Do not use a rough terrain forklift truck for opening or closing railroad car doors.
- Page 11 ROUGH TERRAIN FORKLIFT ROUGH TERRAIN FORKLIFT TRUCK GENERAL SAFETY STANDARDS (cont.) TRUCK GENERAL SAFETY STANDARDS (cont.) C.) OPERATING SAFETY RULES AND PRACTICES (cont.) C.) OPERATING SAFETY RULES AND PRACTICES (cont.) 46.) When attachments are used, extra care shall be taken in securing, manipulating, positioning, and trans- 46.) When attachments are used, extra care shall be taken in securing, manipulating, positioning, and trans- porting the load.
- Page 12 D.) SUSPENDED LOADS D.) SUSPENDED LOADS A jib or truss boom should ONL A jib or truss boom should ONLY be used to lift and place loads when the machine is stationary and the frame Y be used to lift and place loads when the machine is stationary and the frame is level.
- Page 13 addition, addition, lift lift equipment equipment with with rated rated capacity capacity greater greater than than 2000 2000 lbs. lbs. (907 (907 kg), kg), employer employer must ensure that: must ensure that: a.) An accessible fire extinguisher is on the a.) An accessible fire extinguisher is on the forklift;...
- Page 14 If a question arises regarding your forklift, please consult your dealer or K-D Manitou, Inc. for the If a question arises regarding your forklift, please consult your dealer or K-D Manitou, Inc. for the latest information.
-
Page 15: California Proposition 65 Warning
Precautions which must be taken to avoid damage to the lift truck. Precautions which must be taken to avoid damage to the lift truck. CAUTION CAUTION Indicates a potentially hazardous situation which, if not avoided, may result in minor or Indicates a potentially hazardous situation which, if not avoided, may result in minor or moderate injury moderate... - Page 16 (Boom equipped models). (Boom equipped models). Location: on the brake Location: on the brake fluid cover panel (to fluid cover panel (to the left and below the dash panel). the left and below the dash panel). Safety Instructions - 420792 Safety Instructions - 420792 (Mast equipped m (Mast equipped models).
- Page 17 No Riders - 420732 No Riders - 420732 Location: on the cab entrance(s), and on or near wheel fenders and engine Location: on the cab entrance(s), and on or near wheel fenders and engine cover. cover. Informs: Informs: riders are not riders are not allowed on the allowed on the forklift.
- Page 18 Hydraulic Coupling - 234805 Hydraulic Coupling - 234805 Location: near the quick-disconnect adapters. Location: near the quick-disconnect adapters. Stop the engine and release hydraulic pressure before changing Stop the engine and release hydraulic pressure before changing attachments. attachments. Rotating Fan and Belt(s) - 801008 Rotating Fan and Belt(s) - 801008 Location: on the radiator near the fan, and on any fan belt/pulley cover(s).
- Page 19 221322 221322 Mineral Oil (Brake Reservoir) - 221322 or 234800 has Mineral Oil (Brake Reservoir) - 221322 or 234800 has been replaced by 164091. been replaced by 164091. Location: near the brake Location: near the brake fluid reservoir where fluid reservoir where applicable applicable.
- Page 20 Indicates required minimum to maximum anti freeze protection ( 22 Indicates required minimum to maximum anti freeze protection ( 22 F to 40 F to 40 F). Diesel Fuel - 161101 Diesel Fuel - 161101 Location: on the fuel tank, near the filler cap. Location: on the fuel tank, near the filler cap.
- Page 21 at eye level (4 required). at eye level (4 required). Instructs personnel not to travel beneath or upon the lift truck forks. Instructs personnel not to travel beneath or upon the lift truck forks. Pinch Point, Large, 2.5 x 4.5 in. - 426643 Pinch Point, Large, 2.5 x 4.5 in.
- Page 22 Important manufacturer Important manufacturer information about information about the the attachment. attachment. Record this Record this information for information for use when contacting the maufacturer for parts and service. when contacting the maufacturer for parts and service. Overhead Guard Data Plate - B6109 Overhead Guard Data Plate - B6109 Location: attached to the overhead guard.
- Page 23 1 - 1 1 - 1 CONTENTS CONTENTS https://www.forkliftpdfmanuals.com/...
- Page 24 1 - 2 1 - 2 CONTENTS CONTENTS TABLE OF CONTENTS TABLE OF CONTENTS I I 1 - 4 1 - 4 NSTR TRUC UCTIO TIONS NS TO TO TH THE E C C OM OMPA PANY NY MA MANA NAGE GER ...
-
Page 25: A - The Lift Truck's Suitability For The Job
C - ENVIRONMENT C - ENVIRONMENT 1 - 9 1 - 9 D - VISIBILITY D - VISIBILITY 1 - 9 1 - 9 E - STARTING THE LIFT TRUCK E - STARTING THE LIFT TRUCK 1 - 10 1 - 10 F - DRIVING THE LIFT TRUCK ... - Page 26 - MANITOU has ensured that this lift truck is suitable for use under the standard operating conditions defined in this operator's - MANITOU has ensured that this lift truck is suitable for use under the standard operating conditions defined in this operator's...
-
Page 27: Instructions For The Operator
1 - 5 1 - 5 CONTENTS CONTENTS INSTRUCTIONS FOR THE OPERATOR INSTRUCTIONS FOR THE OPERATOR P P R EAMBLE REAMBLE The risk of accident while using, servicing or repairing your lift truck can be restricted if you follow the safety instructions and safety mea- The risk of accident while using, servicing or repairing your lift truck can be restricted if you follow the safety instructions and safety mea- ... -
Page 28: D - Modification Of The Lift Truck
MANITOU for the purpose. platforms designed by MANITOU for the purpose. - MANITOU sells equipment specifically designed for lifting people (OPTION - MANITOU sells equipment specifically designed for lifting people (OPTION ORH lift ORH lift truck, truck, contact your contact your dealer). - Page 29 1 - 7 1 - 7 CONTENTS CONTENTS O O PERA RATI TING NG IN INST STRU RUCT CTIO IONS NS UN UNLA LADE DEN N AN AND D LA LADE DEN N A - BEFORE STARTING THE LIFT TRUCK A - BEFORE STARTING THE LIFT TRUCK - Carry out daily maintenance (see - Carry out daily maintenance (see : 3 - MAINTENANCE...
- Page 30 - The control levers must never in any event be used for any other than their intended purposes (e.g. climbing onto or down from - The control levers must never in any event be used for any other than their intended purposes (e.g. climbing onto or down from the lif the lift truck, t truck, etc.)
-
Page 31: Occasional Maintenance)
- Make s - Make sure that the ure that the scaffolding, scaffolding, loading platform, loading platform, pilings or ground pilings or ground is capable of is capable of bearing the load. bearing the load. - Never stack loads on uneven ground, - Never stack loads on uneven ground, they may tip over they may tip over. - Page 32 Check all control instruments when the I.C. engine is warm and at regular intervals during use, Check all control instruments when the I.C. engine is warm and at regular intervals during use, so as to quickly detect any pro so as to quickly detect any pro blems and to be able to correct them without any delay.
- Page 33 INSTRUCTIONS INSTRUCTIONS - Park the lift truck on flat groun - Park the lift truck on flat ground or on an incline lower tha d or on an incline lower than 15 n 15 %. - Place the forward/reverse lever in neutral. - Place the forward/reverse lever in neutral.
- Page 34 1 - 12 1 - 12 CONTENTS CONTENTS DRIVING THE LIFT DRIVING THE LIFT TRUCK WITH A FRONT-MOUNTED ATTA TRUCK WITH A FRONT-MOUNTED ATTACHMENT CHMENT - You must comply with current regulations in your country, ou must comply with current regulations in your country, covering the possibility of driving on the public highway with a front- covering the possibility of driving on the public highway with a front- mounted attachment on your lift truck.
- Page 35 A - CHOICE OF ATTACHMENTS A - CHOICE OF ATTACHMENTS - Only attachments approved by MANITOU can be used on its lift trucks. - Only attachments approved by MANITOU can be used on its lift trucks. - Make sure the attachment is appropriate f...
- Page 36 CAUTION CAUTION For loads with a moving center of gravity (e.g. liquids), take account of the variations in the cen- For loads with a moving center of gravity (e.g. liquids), take account of the variations in the cen- ter of gravity in order to determine the load to be handled and be vigilant and take extra care ter of gravity in order to determine the load to be handled and be vigilant and take extra care ...
- Page 37 - Tilt the carriage (1) forwards an - Tilt the carriage (1) forwards and move the lift truck slowly forw d move the lift truck slowly forwards (2), ards (2), to insert the fork to insert the fork under the load (fig. E4) (block the load if necessary). under the load (fig.
- Page 38 release the load. Retract (2) and lower the boom (3) to bring the load into the transport release the load. Retract (2) and lower the boom (3) to bring the load into the transport position (fig. F5). position (fig. F5). 1 - 16 1 - 16 ...
-
Page 39: Filling The Bucket
1 - 17 1 - 17 CONTENTS CONTENTS INST STR R UC UCTI TION ONS S F F O O R R US USE E A A S S A A L L O O AD ADER ... - Page 40 Raise and extend the boom (1) (2) (fig. A4) until the bucket is over the trailer, Raise and extend the boom (1) (2) (fig. A4) until the bucket is over the trailer, keeping an eye on the load. Move the forklift truck (3) forwards very gently and keeping an eye on the load.
-
Page 41: Maintenance Instructions Of The Lift Truck
1 - 19 1 - 19 CONTENTS CONTENTS MAINTENANCE INSTRUCTIONS OF THE LIFT TRUCK MAINTENANCE INSTRUCTIONS OF THE LIFT TRUCK G G E NE ENERAL RAL INSTR INSTRUCTION UCTIONS S - Ensure the area is sufficiently ventilated before starting the lift truck. - Ensure the area is sufficiently ventilated before starting the lift truck. - Page 42 - Use the recommended lubricants (never use contaminated lubricants). - Use the recommended lubricants (never use contaminated lubricants). - Do not fill the fuel tank when the I.C. engine is running. - Do not fill the fuel tank when the I.C. engine is running. - Only fill up the fuel tank in areas specified for this purpose.
-
Page 43: If The Lift Truck Is Not To Be Used For A Long Time
1 - 21 1 - 21 CONTENTS CONTENTS IF THE LIFT TRUCK IS NOT TO BE USED FOR A LONG TIME IF THE LIFT TRUCK IS NOT TO BE USED FOR A LONG TIME I I N TRODUCTION ... - Page 44 P P I.C. I.C. ROTEC TECTIN TING G THE THE ENGINE ENGINE - Fill the tank with fuel (see - Fill the tank with fuel (see : 3 - MAINTENANCE : 3 - MAINTENANCE : A - DAIL : A - DAILY OR EVERY 10 HOURS Y OR EVERY 10 HOURS SERVICE).
- Page 45 1 - 23 1 - 23 CONTENTS CONTENTS https://www.forkliftpdfmanuals.com/...
- Page 46 1 - 24 1 - 24 CONTENTS CONTENTS 2 - DESCRIPTION 2 - DESCRIPTION 2 - DESCRIPTION 2 - DESCRIPTION https://www.forkliftpdfmanuals.com/...
- Page 47 2 - 1 2 - 1 CONTENTS CONTENTS https://www.forkliftpdfmanuals.com/...
- Page 48 2 - 2 2 - 2 CONTENTS CONTENTS TABLE OF CONTENTS TABLE OF CONTENTS I I 2 - 4 2 - 4 DENT NTIF IFIC ICAT ATIO ION N O O F F TH THE E LI LIFT FT TR TRUC UCK ...
-
Page 49: Identification Of The Lift Truck
2 - 3 2 - 3 CONTENTS CONTENTS IDENTIFICATION OF THE LIFT TRUCK IDENTIFICATION OF THE LIFT TRUCK As our policy is to promote a constan As our policy is to promote a constant improvement of our products, t improvement of our products, our range of telesco- our range of telesco- pic lift trucks may undergo certain modifications without prior notice. - Page 50 T T ( ( . C) ) R ANSMISSION RANSMISSION F I FIG G - Type - Type - MANITOU reference - MANITOU reference - Serial No. - Serial No. F F ( ( . D) . D) RONT NT A A X X LE ...
- Page 51 Model Model - Serial No. - Serial No. - Year of manufacture - Year of manufacture 2 - 5 2 - 5 CONTENTS CONTENTS CHARACTERISTICS CHARACTERISTICS I.C. I.C. ENGINE ENGINE - Type - Type MLA 628 -120 LSU POWERSHIFT Series 3-E2 MLA 628 -120 LSU POWERSHIFT Series 3-E2 PERKINS 1104C-44TA RJ81416 PERKINS 1104C-44TA RJ81416...
- Page 52 Power ISO/TR 14396 Power ISO/TR 14396 124 cv/91 kw 124 cv/91 kw - Maximum torque ISO/TR 14396 - Maximum torque ISO/TR 14396 434 Nm à 1400 rpm (320 ft/lb) 434 Nm à 1400 rpm (320 ft/lb) - Air cleaner - Air cleaner Sec 3 µ...
- Page 53 2 - 7 2 - 7 CONTENTS CONTENTS CHARACTERISTICS CHARACTERISTICS MLA 628 -1 MLA 628 -120 LSU PO 20 LSU POWERS WERSHIFT Series HIFT Series 3-E2 3-E2 with simple carriage with simple carriage F F RON N T T A A N N D D R R E E A A R R TI TIR R ES ES ...
- Page 54 (44 PSI) (44 PSI) REAR UNLADEN REAR UNLADEN 4409 LB 4409 LB KG/CM2 KG/CM2 KG/CM2 KG/CM2 MICHELIN MICHELIN REAR LADEN REAR LADEN 1874 LB 1874 LB KG/CM2 KG/CM2 KG/CM2 KG/CM2 IMPORTANT IMPORTANT When changing or replacing the tires and When changing or replacing the tires and wheels;...
-
Page 55: Dimensions And Load Chart
. Unladen lowering . Unladen lowering 4 4 , , 6 6 s s 4 4 9 9 , , 3 3 m m / / m m n n ( ( 1 1 6 6 2 2 f f t t / / m m i i n n ) ) . - Page 56 V V K K O O 1200 mm (47.2 in) 1200 mm (47.2 in) 2500 mm (98.4 in) 2500 mm (98.4 in) 1419 mm (55.9 in) 1419 mm (55.9 in) 1821 mm (71.7 in) 1821 mm (71.7 in) 5394 mm (212.4 in) 5394 mm (212.4 in) 6594 mm (259.6 in) 6594 mm (259.6 in)
-
Page 57: Instruments And Controls
2 - 11 2 - 11 CONTENTS CONTENTS INSTRUMENTS AND CONTROLS INSTRUMENTS AND CONTROLS https://www.forkliftpdfmanuals.com/... - Page 58 2 - 12 2 - 12 CONTENTS CONTENTS D D E SCRIPTION ESCRIPTION 1 - DRIVER'S SEAT 1 - DRIVER'S SEAT 2 - SAFETY BELT 2 - SAFETY BELT 3 - CONTROL AND SIGNAL LIGHTS PANEL 3 - CONTROL AND SIGNAL LIGHTS PANEL 4 - N/A 4 - N/A 5 - SWITCHES PANEL...
-
Page 59: Adjusting Seat Tilt
23 - DOOR LOCKS 23 - DOOR LOCKS 24 - RELEASING BUTTONS FOR UPPER DOORS 24 - RELEASING BUTTONS FOR UPPER DOORS 25 - SIDE WINDOW OPENING HANDLES 25 - SIDE WINDOW OPENING HANDLES 26 - CIGAR LIGHTER 26 - CIGAR LIGHTER 27 - ARM REST LIFTING HANDLE 27 - ARM REST LIFTING HANDLE 28 - TOOL BOX AND DOCUMENT HOLDER... -
Page 60: Seat Height Adjustment
- Press the button 7 to reduce the pneumatic - Press the button 7 to reduce the pneumatic pressure. pressure. 1 - P 1 - P ' ' ( ( N EU NEUMAT MATIC IC DRI DRIVER VER S S S S E E A A T T O PTION ... -
Page 61: Operation
B4 - Red zone (221°F - 248°F) B4 - Red zone (221°F - 248°F) NOTE NOTE : Red indicator light “J : Red indicator light “J” comes on betw ” comes on between zone B3 and B4. een zone B3 and B4. C - FUEL LEVEL C - FUEL LEVEL Red zone C1 indicates that you are using the reserve supply and that time of use is limi-... - Page 62 - Faulty opera aulty operation tion : : All leds and sound alarm function intermittently (pa All leds and sound alarm function intermittently (park the lift truck and consult your dealer rk the lift truck and consult your dealer, , never attempt a never attempt a repair yourself).
- Page 63 See : 2 - DESCRIPTION See : 2 - DESCRIPTION : DESCRIPTION AND US : DESCRIPTION AND USE OF ELECTRIC AND HY E OF ELECTRIC AND HYDRAULIC OPTIONS. DRAULIC OPTIONS. J - TRANSMISSION CUT-OFF J - TRANSMISSION CUT-OFF The switch selects transmission cut-off to the servi The switch selects transmission cut-off to the service brake pedal or the hydraulic controls ce brake pedal or the hydraulic controls lever.
- Page 64 8 - B 8 - B - - ATTE TERY RY CU CUT T OFF F 9 - W 9 - W INDSC DSCREE REEN N WA WASH SHER ER TA TANK NK Located on the right side of the engine compartment. Located on the right side of the engine compartment.
- Page 65 K18 - Preheating I.C. engine. K18 - Preheating I.C. engine. K19 - K19 - Rear windscreen wiper. Rear windscreen wiper. K20 - K20 - T T ransmission cut-off relay module. ransmission cut-off relay module. K21 - Gear K21 - Gear reverser micro relay. reverser micro relay.
-
Page 66: Forward/ Reverse Lever
MLA 628 -120 LSU POWERSHIFT Series 3-E2 MLA 628 -120 LSU POWERSHIFT Series 3-E2 - OPTION Attachment hydraulic control forced operation + Cutting off - OPTION Attachment hydraulic control forced operation + Cutting off "aggravating" hydraulic movements (5A). "aggravating" hydraulic movements (5A). MLA 628 -120 LSU POWERSHIFT Series 3-E2 MLA 628 -120 LSU POWERSHIFT Series 3-E2 Lift the lid of the tool box for access to F33 fuses. - Page 67 When operating this control, When operating this control, the lift truck should be trave the lift truck should be travelling at low speed and not acce- lling at low speed and not acce- lerating. lerating. During the direction change, depeding on the original selection the speed During the direction change, depeding on the original selection the speed ...
- Page 68 4th if the conditions and state of the road permit it. 4th if the conditions and state of the road permit it. • With a trailer on the road : Set off in 2nd gear and go up to 3rd and then to 4th if the conditions and state of the road permit •...
- Page 69 - The button C up or down. - The button C up or down. KICK-DOWN OR OPTION KICK-DOWN OR OPTION BOOM HEAD BOOM HEAD ELECTROV ELECTROVALVE ALVE - Button D (see : 2 - DESCRIPTION - Button D (see : 2 - DESCRIPTION : 5 - SWITCHES P : 5 - SWITCHES PANEL).
- Page 70 IMPORTANT IMPORTANT NOTE : Possible losses of water under the forklift truck are due to condensate discharges caused by the drying effect of the ins- NOTE : Possible losses of water under the forklift truck are due to condensate discharges caused by the drying effect of the ins- Possible losses of water under the forklift truck are due to condensate discharges caused by the drying effect of the installation, Possible losses of water under the forklift truck are due to condensate discharges caused by the drying effect of the installation, tallation,...
- Page 71 29 F 29 F RONT NT LI LIGH GHTS TS A - Left A - Left front indicator. front indicator. B - Left front dipped headlight. B - Left front dipped headlight. C - Left front main beam. C - Left front main beam. D - Left front sidelight.
- Page 72 34 - R 34 - R EAR R REF REFLEC LECTOR TORS S 35 - S 35 - S TEER ERIN ING G WH WHEE EEL L RE REGU GULA LATI TING NG HA HAND NDLE LE This handle enables the angle and height of the steering wheel to be adjusted. This handle enables the angle and height of the steering wheel to be adjusted.
- Page 73 2 - 27 2 - 27 CONTENTS CONTENTS TOWING PIN AND HOOK TOWING PIN AND HOOK Located at the rear of the lift truck, Located at the rear of the lift truck, this device is used to attach a trailer this device is used to attach a trailer.
-
Page 74: Coupling And Uncoupling The Trailer
COUPLING AND UNCOUPLING THE TRAILER COUPLING AND UNCOUPLING THE TRAILER - To couple the trailer o couple the trailer, , position the lift truck as close as possible to the trailer ring. position the lift truck as close as possible to the trailer ring. - Put the handbrake on and switch off the I.C. - Page 75 2 - 29 2 - 29 CONTENTS CONTENTS DESCRIPTION AND USE OF ELECTRIC AND HYDRAULIC OPTIONS DESCRIPTION AND USE OF ELECTRIC AND HYDRAULIC OPTIONS 1 - R 1 - R ( ( E VERSE EVERSE BU BUZZ ZZER ER ...
- Page 76 4 - P 4 - P R EH REHEAT EATIN ING G ROD ROD Enables the motor unit to be kept warm during prolonged periods of stoppage and thus, Enables the motor unit to be kept warm during prolonged periods of stoppage and thus, ensures the improved start-up of the I.C.
- Page 77 Enables attachment locking to be controlled on the carriage and the use of a hydraulic Enables attachment locking to be controlled on the carriage and the use of a hydraulic attachment on the attachment on the same hydraulic circuit same hydraulic circuit (see : 4 (see : 4 - ADAPTA - ADAPTABLE ATT BLE ATTACHMENTS IN OPTION...
- Page 78 10 - P 10 - P REAR ARRA RANG NGED ED TR TRAI AILE LER R LOCK LOCKING ING Enables the hydraulic connection of a braked trailer (see : 2 Enables the hydraulic connection of a braked trailer (see : 2 - DESCRIPTION : TOWING PIN - DESCRIPTION : TOWING PIN AND HOOK).
- Page 79 12 - B 12 - B OOM M SUS SUSPEN PENSIO SION N The boom is suspended to reduce shaking of the lift truck on rough ground (e.g. moving The boom is suspended to reduce shaking of the lift truck on rough ground (e.g. moving straw in a field).
- Page 80 2 - 34 2 - 34 CONTENTS CONTENTS 3 - MAINTENANCE 3 - MAINTENANCE 3 - MAINTENANCE 3 - MAINTENANCE https://www.forkliftpdfmanuals.com/...
- Page 81 3 - 1 3 - 1 CONTENTS CONTENTS https://www.forkliftpdfmanuals.com/...
- Page 82 3 - 2 3 - 2 CONTENTS CONTENTS TABLE OF CONTENTS TABLE OF CONTENTS MANITOU MANITOU 3 - 5 3 - 5 ORIG IGIN INAL AL SP SPA A RE RE PA PART RTS S AN AND D EQ...
- Page 83 C - E C - E 3 - 22 3 - 22 V ERY VERY HOUR HOURS S SE SERV RVIC ICE E D - E D - E 3 - 24 3 - 24 V ERY VERY HOUR HOURS S SE SERV RVIC ICE ...
-
Page 84: Manitou Original Spare Parts And Equipment
CONTENTS CONTENTS MANITOU ORIGINAL SPARE PARTS AND EQUIPMENT MANITOU ORIGINAL SPARE PARTS AND EQUIPMENT OUR LIFT TRUCKS MUST BE SERVICED USING ORIGINAL MANITOU PARTS. OUR LIFT TRUCKS MUST BE SERVICED USING ORIGINAL MANITOU PARTS. I I MANITOU MANITOU F F Y Y O O U U U U SE SE P P A A R R T T S S W W H H I I C C H H A A R R E E N N O O T T O O R R I I G G I I N N A A L ... - Page 85 - Operator training. - Operator training. - Only the MANITOU network has detailed knowledge of the design of the lift truck and therefore the - Only the MANITOU network has detailed knowledge of the design of the lift truck and therefore the best technical ability to provide maintenance.
-
Page 86: Filters Cartridges And Belts
3 - 6 3 - 6 CONTENTS CONTENTS FILTERS CARTRIDGES AND BELTS FILTERS CARTRIDGES AND BELTS MLA 628 -120 LSU POWERSHIFT Series 3-E2 MLA 628 -120 LSU POWERSHIFT Series 3-E2 I.C. ENGINE I.C. ENGINE I.C. ENGINE OIL FILTER I.C. -
Page 87: Lubricants And Fuel
LUBRICANTS AND FUEL - For topping up, oils may not be miscible. - For topping up, oils may not be miscible. - For oil changes, MANITOU oils are perfectly appropriate. - For oil changes, MANITOU oils are perfectly appropriate. DIAGNOSTIC ANAL... - Page 88 C C O O M M P P O O N N E E N N T T C C A A P P A A C C I I T T Y Y R R E E C C O O M M M M E E N N D D A A T T I I O O N N 8,5 Liters 8,5 Liters Shell...
-
Page 89: Servicing Schedule
Citgo: : Lithop Lithoplex CM-2 lex CM-2 * Fi * First 2 rst 200 h 00 hrs: rs: Use Use Manito Manitou Sp u Special ecial Immers Immersed B ed Brake rakes 549 s 549 Lubrica Lubricant. nt. (5 ga (5 gal. - Page 90 I.C. engine rates I.C. engine rates ........
-
Page 91: A - Daily Or Every 10 Hours Service
Structure Structure ............... . OPTION Air conditioning OPTION Air conditioning . - Page 92 to cool. to cool. - Open the I.C. engine cover. - Open the I.C. engine cover. - The liquid must be - The liquid must be situated half way up the expansion pan 1 (fig. A2). situated half way up the expansion pan 1 (fig. A2). - If necess - If necessary, ary, add cooling liquid (see...
- Page 93 If the lift truck is used in an abrasive environment (dust, sand, coal…) Use If the lift truck is used in an abrasive environment (dust, sand, coal…) Use IMPORTANT IMPORTANT (MANI (MANITOU ref reference erence : 483536). In this : 483536). In this respect, consult your dealer.
- Page 94 3 - 14 3 - 14 CONTENTS CONTENTS https://www.forkliftpdfmanuals.com/...
-
Page 95: B - Every 50 Hours Service
3 - 15 3 - 15 CONTENTS CONTENTS B - EVERY 50 HOURS SERVICE B - EVERY 50 HOURS SERVICE Carry out the operations described previously as well as the following operations. Carry out the operations described previously as well as the following operations. B1 - D ... - Page 96 - Check visually the outer condition of the air filter and its mounts. Verify the condition of the hoses and their mounts also. - Check visually the outer condition of the air filter and its mounts. Verify the condition of the hoses and their mounts also. Do not clean the dry air filter cartridge by washing it in liquid.
- Page 97 B B 4 4 / / 4 4 B B 4 4 / / 5 5 B B 4 4 / / 6 6 B5 - H B5 - H YDRA RAUL ULIC IC OI OIL L LE LEVE VEL L CHECK ...
- Page 98 B8 - C B8 - C ( ( A A B B VE VENT NTIL ILAT ATIO ION N FI FILT LTER ER OPTI TION ON A A I I R R CON CONDIT DITION IONING ING CLEAN CLEAN - Lift up protective casing 1 (fig. B8). - Lift up protective casing 1 (fig.
- Page 99 2 Lubricators of the universal joint Transmission/Front axle (4 lubricators) (fig. 2 Lubricators of the universal joint Transmission/Front axle (4 lubricators) (fig. B11/2). B11/2). 3 - Lubricators of the universal joint Transmission/Rear axle (3 lubricators) (fig. 3 - Lubricators of the universal joint Transmission/Rear axle (3 lubricators) (fig. B11/3).
- Page 100 B13/3 B13/3 3 - 20 3 - 20 CONTENTS CONTENTS https://www.forkliftpdfmanuals.com/...
-
Page 101: C - Every 250 Hours Service
3 - 21 3 - 21 CONTENTS CONTENTS C - EVERY 250 HOURS SERVICE C - EVERY 250 HOURS SERVICE Carry out the operations described previously as well as the following operations. Carry out the operations described previously as well as the following operations. C1 - A C1 - A / ... - Page 102 C2 - C C2 - C ( ( OMPR PRES ESSO SOR R BE BELT LT TE TENS NSIO ION N OPTIO ION N A A I I R R CON CONDIT DITION IONING ING CHECK - ADJUST CHECK - ADJUST - Open the I.C.
-
Page 103: D - Every 500 Hours Service
C5 - F C5 - F RONT NT A A ND ND R R E E A A R R A A X X L L E E D D I I FF FFE E RE REN N TI TIA A L L OI OIL L LE LEVE VEL ... - Page 104 REPLACEMENT OF THE REPLACEMENT OF THE FILT FILTER - Remove I.C - Remove I.C. engine oil filter 3 (fig. D1/2) . engine oil filter 3 (fig. D1/2) ; discard the filter and ; discard the filter and the filter seal. the filter seal.
- Page 105 D4 - F D4 - F UEL L FI FILT LTER ER CA CART RTRI RIDG DGE E D4/1 D4/1 CHANGE CHANGE Make sure the electrical contact on the lift truck is off, otherwise fuel will Make sure the electrical contact on the lift truck is off, otherwise fuel will Make sure the electrical contact on the lift truck is cut, otherwise fuel will be released if the ...
- Page 106 - The balancing valves - The balancing valves protect the user from any risk due to a protect the user from any risk due to a fall in hydraulic pressure or an exploding fall in hydraulic pressure or an exploding hose during hydraulic oper- hose during hydraulic oper- ations.
- Page 107 D10 - C D10 - C A A B B VE VENT NTIL ILAT ATIO ION N FI FILT LTER ER CLEAN CLEAN - Lift up protective casing 1 (fig. D10). - Lift up protective casing 1 (fig. D10). - Lift out cabin ventilation filters 2 (fig. D10). - Lift out cabin ventilation filters 2 (fig.
- Page 108 3 - 28 3 - 28 CONTENTS CONTENTS https://www.forkliftpdfmanuals.com/...
-
Page 109: E - Every 1000 Hours Service
3 - 29 3 - 29 CONTENTS CONTENTS E - EVERY 1000 HOURS SERVICE E - EVERY 1000 HOURS SERVICE Carry out the operations described previously as well as the following operations. Carry out the operations described previously as well as the following operations. E1 - F ... - Page 110 tered through a strainer tered through a strainer or a clean, or a clean, lint-free cloth and install the filler plug 2 lint-free cloth and install the filler plug 2 (fig. E1/2). (fig. E1/2). - If nece - If necessary ssary, , bleed th bleed the fuel cir e fuel circuit (s...
- Page 111 E4 - H E4 - H E4/1 E4/1 YDRA RAUL ULIC IC OI OIL L DRAIN DRAIN E5 - S E5 - S UCTI TION ON S S TR TRA A I I NE NER R F F O O R R HY HYD D RA RAU U LI LIC C OI OIL L T T A A N N K ...
- Page 112 • Condition of the reel guards. • Condition of the reel guards. • Roller locking mechanism when the strap is given a sharp tug. • Roller locking mechanism when the strap is given a sharp tug. NOTE : After NOTE : After an accident, an accident, replace the seat replace the seat belt.
- Page 113 3 - 33 3 - 33 CONTENTS CONTENTS F - EVERY 2000 HOURS SERVICE F - EVERY 2000 HOURS SERVICE Carry out the operations described previously as well as the following operations. Carry out the operations described previously as well as the following operations. F1 - C ...
- Page 114 FILLING THE LIQUID FILLING THE LIQUID - Tighten the drain valve 2 (fig. F1/2) and drain plug 3 (fig. F1/3) (tightening torque 30 - Tighten the drain valve 2 (fig. F1/2) and drain plug 3 (fig. F1/3) (tightening torque 30 ft/lb).
-
Page 115: G - Occasional Maintenance
3 - 35 3 - 35 CONTENTS CONTENTS G - OCCASIONAL MAINTENANCE G - OCCASIONAL MAINTENANCE G1 - F G1 - F UEL L SY SYST STEM EM G1/1 G1/1 BLEED BLEED These operations are to These operations are to be carried out only in the following case be carried out only in the following cases s : : •... - Page 116 - Loosen high pressure connectors 3 (fig. G1/3) of all the injectors. - Loosen high pressure connectors 3 (fig. G1/3) of all the injectors. - Activate the starter until the diesel fuel flows out free of air at high pressure connectors - Activate the starter until the diesel fuel flows out free of air at high pressure connectors 3 (fig.
- Page 117 - Remove the safety support and lower the lift truck with the jack. - Remove the safety support and lower the lift truck with the jack. - Tighten the wheel nuts with a torque wrench (see : 3 - MAINTENANCE - Tighten the wheel nuts with a torque wrench (see : 3 - MAINTENANCE : A - DAIL : A - DAILY OR EVERY Y OR EVERY...
-
Page 118: Recommended Setting
STOW THE LIFT TRUCK STOW THE LIFT TRUCK - Fix the chocks to the platform at the front and at the back of each tire (fig. G5/1). - Fix the chocks to the platform at the front and at the back of each tire (fig. G5/1). - Fix also the chocks to the platform in the inside of each tire (fig. - Page 119 3 - 39 3 - 39 CONTENTS CONTENTS H - EVERY TWO YEARS (OPTION AIR CONDITIONING) H - EVERY TWO YEARS (OPTION AIR CONDITIONING) DO NOT ATTEMPT REPAIRS. ONLY A QUALIFIED AIR CONDITIONING SERVICEMAN SHOULD MAKE REPAIRS. CONTACT DO NOT ATTEMPT REPAIRS.
- Page 120 surise the installation. The oil level is only checked when changing the oil in the circuit. surise the installation. The oil level is only checked when changing the oil in the circuit. H1 - C H1 - C LEAN ANIN ING G TH THE E CON CONDE...
- Page 121 THE ATTACHMENTS THE ATTACHMENTS 4 - 1 4 - 1 CONTENTS CONTENTS https://www.forkliftpdfmanuals.com/...
- Page 122 4 - 2 4 - 2 CONTENTS CONTENTS TABLE OF CONTENTS TABLE OF CONTENTS I I 4 - 5 4 - 5 N TRODUCTION NTRODUCTION P P 4 - 6 4 - 6 ICKI KING NG U U P P TH THE E AT ATTA TACH...
- Page 123 4 - 3 4 - 3 CONTENTS CONTENTS https://www.forkliftpdfmanuals.com/...
- Page 124 Only attachments approved by MANITOU are to be used on our lift trucks. The manufacturer's liability will be voided in case of modification(s) Only attachments approved by MANITOU are to be used on our lift trucks. The manufacturer's liability will be voided in case of modification(s) ...
- Page 125 WARNING WARNING the attachment having less capacity than the lift truck, never exceed the attachment having less capacity than the lift truck, never exceed this limit. this limit. Depending on their size, certain attachments (when the boom is lowered and/or retracted, or the tilt is activated) may come into contact with Depending on their size, certain attachments (when the boom is lowered and/or retracted, or the tilt is activated) may come into contact with the front tires the front tires and cause damage...
- Page 126 - Proceed in the reverse order of paragraph HAND LOCKING while making sure you install - Proceed in the reverse order of paragraph HAND LOCKING while making sure you install the locking pin and the clip in the bracket (fig. A). the locking pin and the clip in the bracket (fig.
- Page 127 WARNING WARNING accidental unlocking and use the attachment safety. accidental unlocking and use the attachment safety. avoid accidental unlocking! avoid accidental unlocking! HYDRAULIC RELEASING HYDRAULIC RELEASING - Put the valve in position A ( - Put the valve in position A (fig. D), fig.
- Page 128 Make sure that the rapid connectors are clean and protect the holes which are not used, with Make sure that the rapid connectors are clean and protect the holes which are not used, with Make sure that the rapid (quick-release) connectors are clean and protec- Make sure that the rapid (quick-release) connectors are clean and protec- ...
- Page 129 ments. ments. Make sure that the rapid (quick-release) connectors are clean and protec- Make sure that the rapid (quick-release) connectors are clean and protec- Make sure that the rapid connectors are clean and protect the holes which are not used, with Make sure that the rapid connectors are clean and protect the holes which are not used, with ...
- Page 130 4 - 10 4 - 10 https://www.forkliftpdfmanuals.com/...
Need help?
Do you have a question about the MLA 628 -120 LSU 3-E2 Series and is the answer not in the manual?
Questions and answers