
Related Manuals for Shining 3D EinScan Pro 2X


Summary of Contents for Shining 3D EinScan Pro 2X
- Page 1 USER MANUAL EinScan Pro 2X/2X Plus EXScan Pro Software Dec 2018 SHINING 3D - EinScan Pro 2X series - User Manual - Nov 2018...
-
Page 2: Table Of Contents
Alignment 5.3.3. Delete Current Scan HD Mode 6.1. Handheld Scanner Key Function 6.2. Before Scan 6.3. Scan 6.3.1. Preview 6.3.2. Scan Distance 6.3.3. Brightness 6.3.4. Start Scan SHINING 3D - EinScan Pro 2X series - User Manual - Nov 2018... - Page 3 9.4.2. Alignment 9.5. Post Processing 9.5.1. Point-cloud Editing 9.5.2. Create Mesh 9.5.3. Texture Layout Optimization 9.5.4. Brightness & Contrast 9.5.5. Export Data 9.6. Best Practice Industrial Pack SHINING 3D - EinScan Pro 2X series - User Manual - Nov 2018...
- Page 4 Pause menu 11.4.1. Auto-save 11.5. Edit menu Support and Contact 12.1. User Community 12.1.1. Log In 12.1.2. Activate Your Warranty 12.1.3. Submit a Ticket 12.3. Contact Us SHINING 3D - EinScan Pro 2X series - User Manual - Nov 2018...
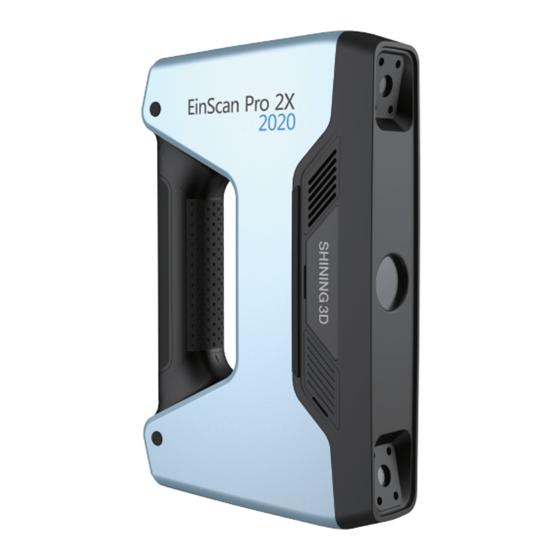
- Page 5 It is based on the feedback from thousands of 3D scanner users and the valuable input of SHINING 3D’s R&D team. The modular design of EinScan handheld 3D scanners provide a professional, yet still easy to use 3D digitizing solution for versatile applications.
-
Page 6: Hardware
Single Scan: <0.5sec 1.1 mil points /sec 1.5 mil points /sec Point Distance 0.2mm~3.0mm 0.25mm~3.0mm 0.24mm Single Scan 208*136mm——312*204mm Range Depth of Field ±100 mm Working 510mm SHINING 3D - EinScan Pro 2X series - User Manual - Nov 2018... -
Page 7: Einscan Pro 2X
1.5 mil points /sec Point Distance 0.2 mm-2 mm 0.2 mm-2 mm 0.16 mm Single Scan 135*100 mm——225*170 mm Range Depth of Field ±100 mm Working 400mm Distance Light source SHINING 3D - EinScan Pro 2X series - User Manual - Nov 2018... -
Page 8: Hardware Introduction
1.4. PC requirements Model Requirements I7 or Higher Display card NVIDIA GTX770 or higher Display memory >4G Memory Storage 16G or more At least one USB 3.0 SHINING 3D - EinScan Pro 2X series - User Manual - Nov 2018... -
Page 9: Set Up
Note: Make sure the cable will stay well plugged in during the operation. You can use the cable clip to fix it in place on the table to avoid loose cable alert. SHINING 3D - EinScan Pro 2X series - User Manual - Nov 2018... - Page 10 If the drivers are not installed properly, or the Alert “device off-line” keeps coming back. Right click on the SHINING-CAM and uninstall the driver. Unplug and replug the USB, Windows will reinstall the drivers by itself. SHINING 3D - EinScan Pro 2X series - User Manual - Nov 2018...
-
Page 11: Software
Note: Administrator rights are required for the installation of the software only. Double click installation package, accept the modification on your computer. Choose the installation language, then click OK. SHINING 3D - EinScan Pro 2X series - User Manual - Nov 2018... - Page 12 Select installation language Follow the instruction on the pop-up window. SHINING 3D - EinScan Pro 2X series - User Manual - Nov 2018...
- Page 13 You must accept the agreement to install EXScan Pro. Click the Checkbox and click Next to approve the Privacy Notice. SHINING 3D - EinScan Pro 2X series - User Manual - Nov 2018...
- Page 14 Choose the default installation path or click the Browse button to select the installation path. Default installation path is recommended. Wait for the installation to be completed. SHINING 3D - EinScan Pro 2X series - User Manual - Nov 2018...
- Page 15 When the installation is completed, there will be a shortcut icon of the software on the desktop. The shortcut in the Start Menu is shown as below: EXScan Pro on the start menu SHINING 3D - EinScan Pro 2X series - User Manual - Nov 2018...
-
Page 16: Uninstall Software
Or go to Control Panel > Programs > Program and Features, choose EXScan Pro and right click to uninstall. Follow the instructions step by step. Click Yes to uninstall the software. SHINING 3D - EinScan Pro 2X series - User Manual - Nov 2018... -
Page 17: Update
Make sure to run the latest version of EXScan Pro. If a new version is available, a pop-up will show when you start the software. Update Reminder Click Yes to update the software version SHINING 3D - EinScan Pro 2X series - User Manual - Nov 2018... -
Page 18: Firmware Upgrade
Click “Upgrade”, software will be closed automatically, and firmware upgrading program pops up. Firmware upgrading program Click “Upgrade”, wait around 1 minute, the firmware starts to upgrade. Make sure there is no electricity off during upgrading. SHINING 3D - EinScan Pro 2X series - User Manual - Nov 2018... -
Page 19: Device Activation
When you use the device for the first time, hardware activation will be required. Activation tool If your computer is connected to the internet, click “online activation”. Click OK to continue SHINING 3D - EinScan Pro 2X series - User Manual - Nov 2018... - Page 20 Connection failed, check your internet connection or do local activation Save the .PLE file on your PC, then on the activation menu. click “ ” to reveal the “Local Activation” button SHINING 3D - EinScan Pro 2X series - User Manual - Nov 2018...
- Page 21 Browse and import the .PLE file. SHINING 3D - EinScan Pro 2X series - User Manual - Nov 2018...
-
Page 22: Interface And Parameters
Navigate between different menus by clicking on the circle. Navigation bar 2.7.2. Settings Click the settings logo from the upper right to open the drop down menu. SHINING 3D - EinScan Pro 2X series - User Manual - Nov 2018... - Page 23 As a reward, the User Experience Enhancement Program will continuously keep you informed with the newest SHINING 3D - EinScan Pro 2X series - User Manual - Nov 2018...
-
Page 24: Einscan Community
2.7.4. Help Mode ● Open Help Mode Click the question mark in the upper right bar, and open the help mode from the drop-down menu. SHINING 3D - EinScan Pro 2X series - User Manual - Nov 2018... - Page 25 Share your ID and password to allow our technicians to remote control of your computer during online technical support Share the Your ID and Password to allow access SHINING 3D - EinScan Pro 2X series - User Manual - Nov 2018...
-
Page 26: Alerts
When the device is offline, meaning the scanner is not connected to PC, please check the connection and restart the software. Device offline or connection loose Offline status in navigation bar SHINING 3D - EinScan Pro 2X series - User Manual - Nov 2018... - Page 27 Add-on is required for this function SHINING 3D - EinScan Pro 2X series - User Manual - Nov 2018...
-
Page 28: Calibration
After installation, when you open the software for the first time the software will enter the calibration mode by default. You can also choose Calibration on the navigation bar to enter calibration process later. Calibration interface SHINING 3D - EinScan Pro 2X series - User Manual - Nov 2018... -
Page 29: Camera Calibration
Keep the cross in the white square area when moving the scanner. ● During calibration, keep the scanner vertical, not parallel to the calibration board. ● Do not move the board during the capture. SHINING 3D - EinScan Pro 2X series - User Manual - Nov 2018... - Page 30 When calibration succeeds, click “Next” to move on to the HD calibration or white balance as the software indicates. Or it will go back to the scan mode selection interface if there is no other calibration required. SHINING 3D - EinScan Pro 2X series - User Manual - Nov 2018...
-
Page 31: Hd Calibration (Only Required For Einscan Pro 2X)
If markers cannot be recognized while scanning, tracking is easily lost or misaligned, we suggest doing the Accuracy Diagnostic. This will feel similar to the calibration process. Scan on the front side of the calibration board (black) to do an accuracy test. SHINING 3D - EinScan Pro 2X series - User Manual - Nov 2018... - Page 32 If the result is more than 0.05mm (accuracy for handheld mode), redo the calibration, and test again. Go back to scan mode selection page by clicking “Next”. SHINING 3D - EinScan Pro 2X series - User Manual - Nov 2018...
-
Page 33: Before Scan
(3) Markers should be stuck on the flat surface area and keep the marker surface flat. (4) Use the markers provided with the device only. Other markers can result bad accuracy or not to be seen. SHINING 3D - EinScan Pro 2X series - User Manual - Nov 2018... - Page 34 Markers surrounding the object Before scanning transparent, highly reflective and black objects, you should spray white powder on the surface (see example above). SHINING 3D - EinScan Pro 2X series - User Manual - Nov 2018...
-
Page 35: Select Scan Mode
EinScan Pro 2X The tables above show the details of each scan mode that can be selected. For limitations of each scan mode refer to the specifications presented previously. SHINING 3D - EinScan Pro 2X series - User Manual - Nov 2018... -
Page 36: Scan Workflow
4.4. Scan Workflow SHINING 3D - EinScan Pro 2X series - User Manual - Nov 2018... -
Page 37: Fixed Mode (Industrial Pack Required)
.ASC, .TCT or .P3. Global Marker File is normally captured by a Photogrammetry System to achieve a high accuracy Markers Frame for large object, in which you can scan the object in detail and match the global accuracy of Markers Frame. SHINING 3D - EinScan Pro 2X series - User Manual - Nov 2018... -
Page 38: Working Distance
Click and drag the button to adjust the brightness. The correct brightness setting will depend on the lighting in the environment and the texture of the object. SHINING 3D - EinScan Pro 2X series - User Manual - Nov 2018... -
Page 39: Scan With Fixed Mode
After the single scan is completed you can edit the data. SHIFT + Left mouse: Select unwanted points, the selected points will turn red, as shown below. Ctrl + Left mouse: Deselect selected data. SHINING 3D - EinScan Pro 2X series - User Manual - Nov 2018... -
Page 40: Edit
Press the space bar on the keyboard to save the data and exit the single-scan editing. The edited data is saved in the project file Delete the current scan data. SHINING 3D - EinScan Pro 2X series - User Manual - Nov 2018... -
Page 41: Alignment
Then change the position of the scanner or the object to scan again. By clicking “Delete” after scanning, the current scan data will be deleted directly. SHINING 3D - EinScan Pro 2X series - User Manual - Nov 2018... - Page 42 By clicking “Delete” after importing a project, it will remove the last single piece of data. SHINING 3D - EinScan Pro 2X series - User Manual - Nov 2018...
-
Page 43: Hd Mode
HD mode uses markers to align the data during the scanning process. Prime (HD Prime Pack add-on) can be used in this mode if your device is EinScan Pro 2X Plus (2X+). It improves a faster scanning speed and enables the feature alignment (Markers-free) for scanning objects with sufficient geometry. - Page 44 If you want to use a previously created Global Marker File (GMF), you may click browse to import one as .ASC, .TCT or .P3. Browse to load a GMF SHINING 3D - EinScan Pro 2X series - User Manual - Nov 2018...
-
Page 45: Scan
Exit Preview mode and start the scan OR press Click Start in software or press the Play button to exit the preview mode and start the scan SHINING 3D - EinScan Pro 2X series - User Manual - Nov 2018... -
Page 46: Scan Distance
Adjust the scanner position until the range finder’s color turns green. Closer limit (mm) Optimal distance (mm) Upper limit (mm) Too Close Good Too Far SHINING 3D - EinScan Pro 2X series - User Manual - Nov 2018... -
Page 47: Brightness
Press the Play button or click Start in the software to start scanning and recording data. 100 lines are projected with 2X Plus, while 7 lines are projected with 2X. SHINING 3D - EinScan Pro 2X series - User Manual - Nov 2018... -
Page 48: Alignment
(displayed in green). The data is captured along the lines, as shown below. To record the data, a minimum of 4 markers (displayed in red) in each frame (every scanning field of view) has to be captured. SHINING 3D - EinScan Pro 2X series - User Manual - Nov 2018... -
Page 49: Pause Menu
Press the Play button or click Start in the software to continue the scan. Click Stop to generate a point cloud: an optimized 3D point cloud will be generated. Or you may select data to use the Edit tools. SHINING 3D - EinScan Pro 2X series - User Manual - Nov 2018... -
Page 50: Edit Menu
Note: Handheld scan mode does not support the deletion of markers. End the editing Click Check to end the editing portion and Confirm to save the edits in the project file. Save the modification or cancel SHINING 3D - EinScan Pro 2X series - User Manual - Nov 2018... -
Page 51: Rapid Mode
Rapid mode can be used on objects from 30mm to 4m. With Rapid mode, you can achieve a large size scan efficiently. In this example, the statue is 1m*1.5m*1.5m. Scan example with Rapid mode 7.1. Handheld Scanner Key Functions SHINING 3D - EinScan Pro 2X series - User Manual - Nov 2018... -
Page 52: Before Scan
Feature Alignment: the data currently captured is “best fit” and aligned to the previously captured data according to the geometric features of the object. “Track Lost” will be displayed if there is not SHINING 3D - EinScan Pro 2X series - User Manual - Nov 2018... -
Page 53: Operation Mode
Refine to select resolution after the scan ends by retopology Scanning Speed: Lightning = Lightning +Refine > Classic Data Resolution: Classic = Lightning + Refine > Lightning SHINING 3D - EinScan Pro 2X series - User Manual - Nov 2018... -
Page 54: Resolution
When importing a project, and continuing to scan, the scanning resolution and alignment mode will be the same as the previous setting of the imported project. 7.3. Scan 7.3.1. Preview Start Preview mode SHINING 3D - EinScan Pro 2X series - User Manual - Nov 2018... -
Page 55: Scan Distance
Green shows it is a good distance away from the object. Adjust the scanner position until the rangefinder color turns green. SHINING 3D - EinScan Pro 2X series - User Manual - Nov 2018... -
Page 56: Brightness
“+” or “-” button on the scanner, or click and drag the cursor under the camera preview to left (-) or right (+). Exposure adjustment menu, Press +/- or drag the cursor SHINING 3D - EinScan Pro 2X series - User Manual - Nov 2018... -
Page 57: Start Scan
During scanning, make sure to keep the scanner perpendicular to the surface, keep the distance in a proper range, and adjust the brightness depending on the ambient light and texture of the object. Scan interface, Rapid Mode Enter Pause menu SHINING 3D - EinScan Pro 2X series - User Manual - Nov 2018... -
Page 58: Alignment
(displayed in green). The green area is the current scan, as shown below. To record data, a minimum of 4 markers (display in red) has to be captured. SHINING 3D - EinScan Pro 2X series - User Manual - Nov 2018... -
Page 59: Pause Menu
Add-markers alert Here the “flat objects” means areas with few geometric features. 7.4. Pause Menu In offline mode, the data can be loaded at this step for editing. SHINING 3D - EinScan Pro 2X series - User Manual - Nov 2018... -
Page 60: Auto Save
⑦Ctrl + Left mouse: deselect selected data Delete selected data Click the button or “DELETE” on the keyboard to delete selected data. Undo You can only undo the most recently deleted data. SHINING 3D - EinScan Pro 2X series - User Manual - Nov 2018... -
Page 61: Generate Point-Cloud
7.5.1. Priority (for Rapid: Feature or Hybrid Alignment Settings) When scanning without markers, choose between Quality and Speed priority for the point-cloud optimization and click Apply. Generate Point-Cloud options SHINING 3D - EinScan Pro 2X series - User Manual - Nov 2018... -
Page 62: Refine (For Rapid Mode: Lightning + Refine Option Mode)
Choose High, Medium or Low or drag the cursor to the exact point distance value setting, and click Apply. Choose resolution The processing time depends on the resolution requested and the amount of points captured. SHINING 3D - EinScan Pro 2X series - User Manual - Nov 2018... -
Page 63: Post Processing
8.1.2. Edit Menu SHIFT + Left mouse:Select redundant area, the selected section will be displayed in red, as shown below. Ctrl + Left mouse: Deselect selected data. SHINING 3D - EinScan Pro 2X series - User Manual - Nov 2018... - Page 64 Click Check to end the editing, confirm to save the editing in the project file and go back to the Pause menu. Save the modification or cancel SHINING 3D - EinScan Pro 2X series - User Manual - Nov 2018...
-
Page 65: Mesh
Select the resolution of the mesh for a watertight model. Choose mesh resolution Note: If some data are not connected. Watertight will keep only the largest data. SHINING 3D - EinScan Pro 2X series - User Manual - Nov 2018... -
Page 66: Mesh Editing
Set the ratio from 1 to 100, the default is 100%. The comparison of detail between before simplification and after simplification is shown below (at 30% simplify proportion). Before simplification After simplification Hole Filling SHINING 3D - EinScan Pro 2X series - User Manual - Nov 2018... - Page 67 The example of before and after smoothing is as below. Before smooth After smooth Sharpen Improve the overall clarity of the data as shown in the figure below, before and after sharpening. SHINING 3D - EinScan Pro 2X series - User Manual - Nov 2018...
-
Page 68: Remesh
Save it prior to the Remesh operation if you want to keep the previous mesh. Mesh the point cloud 8.3. Save 8.3.1. Export Data Save the data Click Save to export the data. SHINING 3D - EinScan Pro 2X series - User Manual - Nov 2018... - Page 69 Reverse Engineering ◆ Compatibility with most mesh editing software ◆ Mesh, scan.obj Artistic applications ◆ (separated) Texture & scan.jpg 3D rendering ◆ Matching scan.mtl Compatibility with most mesh SHINING 3D - EinScan Pro 2X series - User Manual - Nov 2018...
-
Page 70: Scale Data
Upload the data to Sketchfab.com directly, which is a famous online 3D data store. Click Upload after mesh to share data, it will show the dialog as below. SHINING 3D - EinScan Pro 2X series - User Manual - Nov 2018... -
Page 71: Solid Edge Shining 3D Edition
Exscan Pro software to open Solid Edge SHINING 3D Edition. The meshed STL data will also be imported to Solid Edge SHINING 3D Edition in a new part project directly. In the USB drive, there are videos for reverse engineering cases of EinScan scan data processed by Solid Edge SHINING 3D Edition. -
Page 72: Model Preview
STL, OBJ, PLY, ASC, or 3MF can be loaded, files from 3 party software might fail to be loaded. In this case we recommend Meshlab, a free mesh software editor, or upload to sketchfab. SHINING 3D - EinScan Pro 2X series - User Manual - Nov 2018... - Page 73 Note: To load a OBJ textured file make sure to have the MTL and JPG files with the same name and in the same folder than the OBJ SHINING 3D - EinScan Pro 2X series - User Manual - Nov 2018...
-
Page 74: Color Pack
Turn the hook (rotary lever) to the right to lock the camera in position. (3) Power on the scanner and the camera driver will start by itself. SHINING 3D - EinScan Pro 2X series - User Manual - Nov 2018... -
Page 75: Calibration
After HD calibration, White Balance is suggested. If the texture is misaligned to the 3d data during the scan, check whether the camera is properly secured, and redo the calibration. SHINING 3D - EinScan Pro 2X series - User Manual - Nov 2018... -
Page 76: White Balance
Similar to taking a high-quality picture in the photo studio, professional lighting environment setting is key in achieving high-quality texture data. If you are not satisfied with the texture, please optimize the lighting environment and redo the White Balance. SHINING 3D - EinScan Pro 2X series - User Manual - Nov 2018... -
Page 77: Fixed Mode
If so, then try to scan from a different angle. If the texture is misaligned from the data, check that the camera is well placed and locked, then redo the calibration. SHINING 3D - EinScan Pro 2X series - User Manual - Nov 2018... -
Page 78: Rapid Mode
If blue areas appear on the data (usually on the edge of the scan frame), it means the texture information is missing in these areas. Do another scan on the same area from a different path. SHINING 3D - EinScan Pro 2X series - User Manual - Nov 2018... -
Page 79: Post Processing
If the texture is missing, the corresponding mesh data will be in black. Example of a watertight model with texture SHINING 3D - EinScan Pro 2X series - User Manual - Nov 2018... -
Page 80: Texture Layout Optimization
When the mesh model has been generated, use the cursors to change the Brightness and/or Contrast of the texture from -100 to +100. Click Reset to return to the default value is 0 for both. SHINING 3D - EinScan Pro 2X series - User Manual - Nov 2018... -
Page 81: Export Data
How to edit or remove markers on the texture? Use a 3 party software like Photoshop or Gimp, save as OBJ and erase the markers on the matching JPG file. SHINING 3D - EinScan Pro 2X series - User Manual - Nov 2018... -
Page 82: Industrial Pack
Make sure to check the advice for Fixed Mode when using the turntable (see above). Check the Device manager. The turntable will be displayed as below. SHINING 3D - EinScan Pro 2X series - User Manual - Nov 2018... -
Page 83: Scan
8 steps, is recommended. You can change the number of steps according to the features of the objects. Note: Using more turntable steps will help scan more complete data in some angles, but will NOT SHINING 3D - EinScan Pro 2X series - User Manual - Nov 2018... -
Page 84: Alignment Condition
At least 4 common targets need to be recognized between 2 neighboring scans. SHINING 3D - EinScan Pro 2X series - User Manual - Nov 2018... -
Page 85: Feature Alignment
Using feature alignment, make sure that the object is kept still on the turntable, and the first view should contain enough features to allow the initialization. During the “verifying” steps, the software calculates the position of the turntable SHINING 3D - EinScan Pro 2X series - User Manual - Nov 2018... -
Page 86: Markers Alignment And Global Markers Alignment
2 neighboring scans by recognizing at least 4 common markers. Global Markers is accessible if a Global Marker File has been loaded during the project creation. SHINING 3D - EinScan Pro 2X series - User Manual - Nov 2018... -
Page 87: Hd Prime Pack
HD Prime Pack Prime (HD Prime pack add-on) is an add-on for EinScan Pro 2X Plus (2X+) only. It allows Feature alignment under HD mode and improve the speed and allow markers-free scanning experience when the scanned objects have enough geometry. -
Page 88: Calibration
If the calibration keeps failing, check whether the Prime is well locked in position. After calibration, perform the Accuracy test or click Next to go back to the Mode selection menu. SHINING 3D - EinScan Pro 2X series - User Manual - Nov 2018... -
Page 89: Before Scan
Create a new project, to enter the scan settings window When entering the Prime scan mode Prime IR projector will be ON, the side LED will turn orange. SHINING 3D - EinScan Pro 2X series - User Manual - Nov 2018... -
Page 90: Align Mode
The project will be saved with the extension .pri_prj If you choose Markers Align Mode, GMF is available Click Browse to import the GMF as .P3 .TXT or .ASC SHINING 3D - EinScan Pro 2X series - User Manual - Nov 2018... -
Page 91: Resolution
When import project, and continue the scan, the scanning resolution and align mode will be in accordance with the previous setting of imported project. Click Apply to validate and enter the Scanning interface SHINING 3D - EinScan Pro 2X series - User Manual - Nov 2018... -
Page 92: Hd Prime Scan
Preview with or without markers Check the box “Prime camera” to replace the display of the normal camera(s) with Prime camera(s). SHINING 3D - EinScan Pro 2X series - User Manual - Nov 2018... -
Page 93: Brightness
When scanning or in Preview mode double press Play button, adjust the brightness by pressing “+/ -” buttons on the scanner, or drag the cursor under the camera preview to left (-) or the right (+). SHINING 3D - EinScan Pro 2X series - User Manual - Nov 2018... -
Page 94: Scan With Markers
(display in green). The data is captured along the lines, as shown below To record the data, minimum 4 markers (display in red) in one frame (each scanning field of view) have to be captured. SHINING 3D - EinScan Pro 2X series - User Manual - Nov 2018... -
Page 95: Scan Without Markers
When start scanning, the data is captured along the lines, previously captured data shows grey as below. To improve the scan efficiency, the movement should be continuous and uniform. SHINING 3D - EinScan Pro 2X series - User Manual - Nov 2018... -
Page 96: Pause Menu
Enter pause menu OR press Press play button or click Pause in the software to enter the Pause menu. The data will be Auto-saved in the project file. SHINING 3D - EinScan Pro 2X series - User Manual - Nov 2018... -
Page 97: Edit Menu
Note: Handheld scan mode does not support the deletion of markers. End the editing Click Check to End the editing and confirm to save the editing in the project file and go back to pause menu SHINING 3D - EinScan Pro 2X series - User Manual - Nov 2018... -
Page 98: Support And Contact
Find the User Community tab at www.einscan.com, or from the Community menu. 12.1.1. Log In To register a user account, please enter the serial number of the scanner and your contact information including a valid email. SHINING 3D - EinScan Pro 2X series - User Manual - Nov 2018... -
Page 99: Activate Your Warranty
To start the warranty of your device, in My Account, click Add new device. Account page Enter the serial number and date of purchase then upload a copy of the invoice. SHINING 3D - EinScan Pro 2X series - User Manual - Nov 2018... -
Page 100: Submit A Ticket
Log in with your Community account. Click New Ticket on the tab bar. Select the serial number among the registered accounts and describe your problem. Submit a ticket SHINING 3D - EinScan Pro 2X series - User Manual - Nov 2018... - Page 101 Check your submitted tickets under the account page or through Ticket > My tickets. Opened ticket 12.2. SHINING 3D - EinScan Pro 2X series - User Manual - Nov 2018...
-
Page 102: Contact Us
Add: Panorama, Heilbronner straße 86, 70191, Stuttgart, Germany Americas Region SHINING 3D Technology Inc. San Francisco, United States Phone: +1 415 259 4787 Add: 1740 Cesar Chavez St. Unit D. San Francisco, CA 94124 SHINING 3D - EinScan Pro 2X series - User Manual - Nov 2018...
Need help?
Do you have a question about the EinScan Pro 2X and is the answer not in the manual?
Questions and answers