SOMFY RTS Quick Programming Manual
Hide thumbs
Also See for RTS:
- User manual ,
- Operating and installation manual (28 pages) ,
- Instructions manual (20 pages)
Advertisement
Table of Contents
- 1 Programming Mode
- 2 Adjusting the Upper & Lower Stopping Positions in User Mode
- 3 Setting a ‘My’ Position (Intermediate Position)
- 4 Adding or Deleting a Single Channel Control (Handset or Wall Switch)
- 5 Assigning Additional Channels with a Multi Channel Control
- 6 Reset the Wirefree Roller Blind Motor
- 7 Reset the Wirefree Roman Blind Motor
- 8 Reset the Wirefree Tilt-Only Venetian Blind Motor
- Download this manual
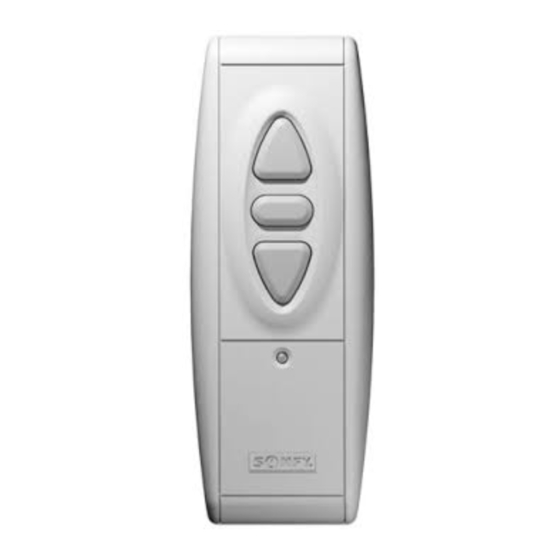
QUICK PROGRAMMING GUIDE
FOR ALL WIREFREE RTS MOTORS
Programming Mode
Before you begin
The following procedure can only be completed when the
motor is in the 'Factory Mode'. To restore the motor into the
Factory Mode, complete a reset procedure as described
later in this guide. Power should ONLY be connected to the
blind being programmed - disconnect the power to all other
blinds within range while programming.
STEP 1: Connect power
With the blind correctly installed, connect the
battery pack or solar pack to the motor.
STEP 2: Initiate programming
Press both
and
blind jogs.
A jog is a brief up and down
You can now operate the blind, but it will only
move when the
STEP 3: Check directions
Press the
button. While pressing
should travel down. If the blind goes up, change
direction by pressing and holding the
until the blind jogs (approx 5 secs). Press the
button to check the direction has reversed.
Adjusting the Upper & Lower stopping positions in User Mode
Adjust the upper stop position
Press
to send the blind to
the current upper stop position.
Adjust the lower stop position
Press
to send the blind to
the current lower stop position.
Setting a 'my' position (intermediate position)
Setting
Use either
or
to operate the blind and press
to stop at the desired 'my' or intermediate
position.
Once the desired Intermediate position is reached,
Press and hold
until the blind jogs (approx 5
secs). The 'my' position has now been set.
simultaneously, until the
motion.
or
buttons are held down.
the blind
button
Press both
until the blind jogs (approx 5 secs).
Then use
blind to the desired upper position.
Press both
until the blind jogs (approx 5 secs).
Then use
blind to the desired lower position.
STEP 4: Setting the UPPER stopping position
Adjust the blind to the upper stop position. Press both
simultaneously, until the blind starts to lower, then release
(if the blind stops when the buttons are released, go back to
the upper stop position and repeat). Stop the motor at the
desired lower stopping position (fine tune with
STEP 5: Setting the LOWER stopping position
Press both
and
blind will move up and stop at the upper stop position
previously set (if the blind stops when the buttons are
released, go back to the lower stop position and repeat).
STEP 6: Confirm the stopping positions
Press and hold
stop positions have been recorded (approx 5 secs).
STEP 7: Set user mode
Press and hold the programming button on the back of
the transmitter until the blind jogs. The blind is now in
User Mode and the transmitter has been recorded to the
motor. Double check the stop positions as a precaution.
The motor is now in User Mode.
and
simultaneously
and/or
to adjust the
and
simultaneously
and/or
to adjust the
Using
Send the blind to the 'my' position by pressing
ANY position (the blind must be stationary prior to
activating the 'my' position function).
Delete the 'my' position
Send the blind to the 'my' position, then press and hold
until the blind jogs (approx 5 secs). The 'my' position
has now been deleted.
simultaneously, then release. The
until the blind jogs to confirm the
Press and hold
secs) until the blind jogs to
confirm the new upper stop
position has been recorded.
Press and hold
secs) until the blind jogs to
confirm the new lower stop
position has been recorded.
and
or
).
(approx 5
(approx 5
from
Advertisement
Table of Contents

Related Manuals for SOMFY RTS


Summary of Contents for SOMFY RTS
- Page 1 QUICK PROGRAMMING GUIDE FOR ALL WIREFREE RTS MOTORS Programming Mode STEP 4: Setting the UPPER stopping position Adjust the blind to the upper stop position. Press both Before you begin simultaneously, until the blind starts to lower, then release The following procedure can only be completed when the (if the blind stops when the buttons are released, go back to motor is in the ‘Factory Mode’.
- Page 2 QUICK PROGRAMMING GUIDE FOR ALL WIREFREE RTS MOTORS Adding or deleting a single channel control (handset or wall switch) Programmed Transmitter Control to Control already Transmitter to add or delete add to/delete programmed Step 1: Take a handset or wall switch that...
Need help?
Do you have a question about the RTS and is the answer not in the manual?
Questions and answers