MSA Ultima X Series Instruction Manual
Gas monitors
Hide thumbs
Also See for Ultima X Series:
- Installation & maintenance instructions manual (142 pages) ,
- Quick start manual (18 pages) ,
- Safety manual (16 pages)
Table of Contents
Advertisement
®
Ultima
X Series Gas
Monitors
instruction manual
" WARNING
THIS MANUAL MUST BE CAREFULLY READ BY ALL INDIVIDUALS WHO
HAVE OR WILL HAVE THE RESPONSIBILITY FOR USING OR SERVICING THE
PRODUCT. Like any piece of complex equipment, the unit will perform as
designed only if it is installed, used and serviced in accordance with the
manufacturer's instructions. OTHERWISE IT COULD FAIL TO PERFORM AS
DESIGNED AND PERSONS WHO RELY ON THIS PRODUCT FOR THEIR
SAFETY COULD SUSTAIN SEVERE PERSONAL INJURY OR DEATH.
The warranties made by Mine Safety Appliances Company with respect to the
product are voided if the product is not used and serviced in accordance with
the instructions in this manual. Please protect yourself and others by following
them. We encourage our customers to write or call regarding this equipment
prior to use or for any additional information relative to use or repairs.
In the U.S., to contact your nearest stocking location, dial toll-free 1-800-MSA-INST.
To contact MSA International, dial 1-412-967-3354.
This manual is available on the internet at www.msanet.com
© MINE SAFETY APPLIANCES COMPANY 2005 - All Rights Reserved
Manufactured by
MSA INSTRUMENT DIVISION
P.O. Box 427, Pittsburgh, Pennsylvania 15230
(L) Rev 3
10036101
Advertisement
Table of Contents

Related Manuals for MSA Ultima X Series


Summary of Contents for MSA Ultima X Series
- Page 1 We encourage our customers to write or call regarding this equipment prior to use or for any additional information relative to use or repairs. In the U.S., to contact your nearest stocking location, dial toll-free 1-800-MSA-INST. To contact MSA International, dial 1-412-967-3354.
- Page 2 MSA Instrument Warranty 1. Warranty- Seller warrants that this product will be free from mechanical defect or faulty workmanship for a period of eighteen (18) months from date of shipment or one (1) year from installation, whichever occurs first, provided it is maintained and used in accordance with Seller’s...
- Page 3 General Warnings and Cautions "! WARNING 1. The Ultima X Series Gas Monitors described in this manual must be installed, operated and maintained in strict accordance with their labels, cautions, warnings, instructions, and within the limitations stated. 2. The Ultima X Series Gas Monitor is designed to detect gases or vapors in air.
- Page 4 2. The Ultima X Series Gas Monitor must not be painted. If painting is done in an area where a Monitor is located, care must be exercised to ensure that paint is not...
-
Page 5: Table Of Contents
Signal Load ........1-7 Typical Ultima X Series Gas Monitor Wiring ..... . . 1-8 Table 1-3.Cable Length and Wire Size (Power Supply 24 VDC) (Toxic... - Page 6 Table 1-7. Low Temperature Wiring Cable ..... 1-13 At the Ultima X Series Remote Sensor Location: ....1-13 Chapter 2 Start-up and Calibration .
- Page 7 Table of Contents Regular Calibration ......... . 2-7 Zeroing .
- Page 8 Internal Relays (4-20 mA Model) ....A-5 Ultima X Series Gas Monitor Internal Relays ..... . A-6 Relay Specifications .
-
Page 9: Chapter 1 Installation
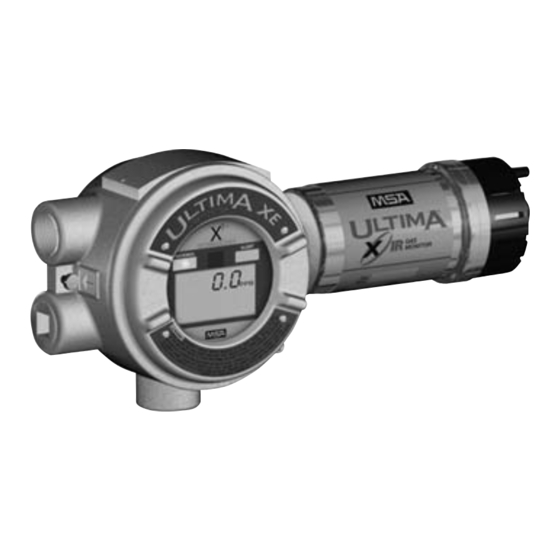
Chapter 1, Installation Chapter 1 Installation General Description The Ultima X Gas Monitor is designed to sample the environment where mounted and alert you to potentially dangerous levels of your target gas, depending on your particular model. The unit is factory-calibrated and shipped ready for installation. - Page 10 Chapter 1, Installation Figure 1-4. General-Purpose XA Remote Sensor Model Figure 1-5. Explosion-Proof XE Remote Sensor Model...
-
Page 11: Installing Your Gas Monitor
(FIGURE 1-3 and 1-6) to help prevent the build-up of particulate or liquid matter on the monitor’s optical surfaces. Do not paint the Ultima X Series Gas Monitors. If painting is done in an area where a sensor is located, exercise CAUTION to ensure paint is not deposited on the sensor inlet fitting. -
Page 12: Installing The Ultima Xa Gas Monitor
Chapter 1, Installation Installing the Ultima XA Gas Monitor Remove lid and drill enclosure for power, signal and optional relay cable entry. Use one of the following methods to mount the general-purpose Ultima XA Gas Monitor/Less Sensor or the Ultima XA Gas Monitor. •... -
Page 13: Installing The Ultima Xir Gas Monitor
Chapter 1, Installation Installing the Ultima XIR Gas Monitor Figure 1-8. Ultima XIR "! WARNING The Ultima XIR Combustible Gas Monitor contains no user- or field-serviceable parts and must be returned to the factory for repair. Any attempt to open the monitor will damage the unit and void the warranty. -
Page 14: Electrical Connections For Ultima X Gas Monitors
Chapter 1, Installation Electrical Connections for Ultima X Gas Monitors "! WARNING Before wiring the Ultima X Series Gas Monitors, disconnect power source supplying the monitor; otherwise, electrical shock could occur. For Ultima XE and XIR installations, the internal grounding terminal must be used for equipment grounding. -
Page 15: For Milliamp Output
" WARNING When using any of the the Ultima X Series accessories (such as relays) with the 4 to 20 mA output Ultima X Series Gas Monitor, a three-wire connection must be used. Failure to use a three-wire connection could damage the electronics within the Ultima X Series Gas Monitor which can result in serious personal injury or death. -
Page 16: Typical Ultima X Series Gas Monitor Wiring
300 OHMS ON 4 - 20 mA SIGNAL • Two-wire 4 to 20 mA Ultima X Series Monitors operate in the current loop mode (FIGURE 1-10 for general-purpose) (FIGURE 1-12 for explosion-proof) • Three-wire Ultima X Series Monitors operate in the current source mode (see FIGURE 1-11 for general-purpose) (FIGURE 1-13 for explosion-proof). - Page 17 Chapter 1, Installation Figure 1-9. Circuit Board • For XE and XIR Gas Monitors locate the identifying label on the side of the plastic shroud for the main pc board: • A-ULTX-PCB-E-B is a two-wire unit • A-ULTX-PCB-E-E is a three-wire unit 2.
- Page 18 Chapter 1, Installation Figure 1-10. General-Purpose Two-Wire Operation Figure 1-11. General-Purpose Three-Wire 4 to 20 mA Operation 1-10...
- Page 19 Chapter 1, Installation Figure 1-12. Explosion-Proof Two-Wire Operation Figure 1-13. Explosion-Proof Three-Wire 4 to 20 mA Operation 1-11...
-
Page 20: Installing The Ultima X Remote Sensor Module
Ultima X Series Gas Monitor/Less Sensor; otherwise, electrical shock could occur. "! CAUTION When installing an Ultima X Series Remote Sensor Module with its mating Ultima X Series Gas Monitor/Less Sensor, follow National Electrical and local procedural Codes; failure to do so can result in an unsafe condition. -
Page 21: At The Ultima X Series Remote Sensor Location
(FIGURE 1-5 or 1-6). 3. Verify the identity of each conductor of the cable and connect the wire to the terminal block. 4. Re-install the cover of the Ultima X Series Remote Sensor 1-13... - Page 22 Chapter 1, Installation NOTES: • Incoming power and signal cable shield should be earth grounded at the power source. Connect power and remote sensor cable shields to shield terminals on main pc board. Provide shield terminations inside the sensor housing as indicated on Installation Outline Drawings for Remote Sensor;...
-
Page 23: Start-Up And Calibration
Ultima X Series Gas Monitors will display one of two modes: • +LOC % LEL - The Ultima X Series Gas Monitor has been exposed to a high concentration of gas (above the LEL) Figure 2-1. -
Page 24: Caution
• OVER % LEL - The Ultima X Series Gas Monitor has been exposed to a high concentration of gas (above the LEL) and the over-range condition definitely still exists. - Page 25 Chapter 2, Start-up and Calibration Table 2-1. Instrument Operation LEDs OPERATION 4 to 20 mA FAULT RELAY GREEN NORMAL NO Gas value Energized ALARMS steady ALARMING Flashing Gas value Energized FAULT 3.0 mA De-energized steady ALERT option disabled: Energized if ALERT 21.0 mA for O option disabled POWER UP/...
-
Page 26: Calibration Basics
Chapter 2, Start-up and Calibration Calibration Basics While the Ultima X Series Gas Monitor is factory-calibrated, it is good practice to calibrate the unit once it is installed in its final environmental destination. As with any type of gas monitor, the only true check of its performance is to apply gas directly to the sensor. -
Page 27: Ultima Calibrator
(P/N 813379) for full functionality. Note on Resetting Latched Alarms with Controller or Calibrator When an Ultima X Series Gas Monitor has an active latched alarm (indicated by a flashing alarm display): • An infrared (IR) remote device (such as the Ultima Calibrator or Controller) may be used to reset this alarm. -
Page 28: Calibration Kit
Calibration Kits are available for the Ultima X Gas Monitors. For the recommended calibration kit, see Ultima Controller/Calibrator manual (P/N 813379). Ultima X Series Gas Monitor Calibration Procedure Read all calibration instructions before attempting an actual calibration. Also, identify and become familiar with all of the calibration components. -
Page 29: Regular Calibration
Turn on the zero gas flow by turning the knob on the flow controller. 3. Point the Calibrator or Controller at the Ultima X Series Monitor display; press the CALIBRATE button. NOTE: The zero or calibration process can be aborted at any time during the 30-second countdown interval;... - Page 30 If CAL FAULT appears on the display, this indicates: • An unsuccessful attempt to zero or calibrate the Ultima X Series Monitor • The Ultima X Series Monitor is operating with the calibration parameters defined before the calibration was attempted.
-
Page 31: Spanning
CAL was performed, the gas monitor will continue to the "span" sequence as described in the following section. Spanning 5. During a regular calibration, the Ultima X Series Monitor automatically begins the span countdown after a successful zeroing of the unit. The span countdown is 30 seconds (FIGURE 2-5). - Page 32 • Ensure that any calibration gases are applied during the 30-second count down period. • If a CAL FAULT indication is on the Ultima X Series Monitor display before the user is able to apply the gas, a steady state gas condition was reached, causing the unit to use a wrong reading as a span indication.
-
Page 33: Xir Calibration
• If a CAL FAULT appears on the display, this indicates: • An unsuccessful attempt to calibrate the Ultima X Series Monitor • The Ultima X Series Monitor is operating with the calibration parameters defined before the calibration was attempted. -
Page 34: Warning
Zeroing and/or Spanning procedure; otherwise, the sensor cannot perform properly. Calibration Documentation The Ultima X Series Monitor records the date of the last successful calibration. This date can then be displayed on the front-panel LCD (with the use of the Controller). -
Page 35: Chapter 3 Specifications
Chapter 3, Specifications Chapter 3 Specifications Table 3-1. Performance Specifications GAS TYPES Combustibles, Oxygen & Toxics OPERATING 0 to 40 RANGE (32 to +104 *EXTENDED -20 to +50 RANGE (-4 to +122 TOXICS & OXYGEN OPERATING 0 to +30 RANGE NH (32 to +86 TEMPERATURE *EXTENDED... - Page 36 Chapter 3, Specifications Table 3-1. Performance Specifications LINEARITY REPEATABILITY CARBON the greater of + 1% FS or 2 ppm + 2% full scale (FS) MONOXIDE + 2% FS + 1% FS OXYGEN HYDROGEN + 10% FS or 2 ppm + 1% FS or 2 ppm SULFIDE + 10% FS or 2 ppm + 5% FS or 1 ppm CHLORINE...
- Page 37 3 years, Typically COMBUSTIBLES OXYGEN SENSOR LIFE 2 years, Typically &TOXICS FULL 1 year; 2 years for IR Combustibles (see REPLACEMENT "MSA Instrument Warranty" in this manual) WARRANTY OXYGEN & 2-wire or 3-wire WIRING TOXICS mA OUTPUT REQUIREMENTS COMBUSTIBLES 3-wire...
- Page 38 Chapter 3, Specifications Table 3-1. Performance Specifications 9.423" H x 5.125" W x 3" D inches SIZE (239.34 mm x 130 mm x 76 mm) XA PHYSICAL WEIGHT 1.5 pounds (0.7 kilograms) 10.280" H x 6.312" W x 3.911" D inches SIZE (261.11 mm x 160.33 mm x 99.34 mm) XE PHYSICAL...
- Page 39 Chapter 3, Specifications For proper installation of an AC power supply used with an Ultima X series transmitter, refer to the following drawings for detailed information. Use this table if the power supply is integral to the Ultima X housing...
- Page 40 Chapter 3, Specifications Table 3-2. Sensor Response to Interferants (continued) CONCEN- INTER- TRATION FERANT filtered filtered (PPM) Acetone 1000 No Data No Data No Data Acetylene 12000 No Data No Data No Data No Data Ammonia No Data Arsine No Data No Data Benzene No Data No Data No Data...
- Page 41 Chapter 3, Specifications Table 3-2. Sensor Response to Interferants (continued) CONCEN INTERFERANT -TRATION (PPM) Acetone 1000 No Data No Data No Data No Data No Data No Data Acetylene 12000 No Data No Data No Data No Data No Data No Data Ammonia No Data No Data No Data No Data No Data Arsine...
- Page 42 Chapter 3, Specifications Table 3-2. Sensor Response to Interferants (continued) CONCEN- INTERFERANT TRATION (PPM) Acetone 1000 No Data No Data No Data Acetylene 12000 No Data No Data No Data Ammonia No Data Arsine No Data No Data No Data Benzene No Data No Data...
-
Page 43: Chapter 4 Maintenance
Chapter 4, Maintenance Chapter 4 Maintenance General The Ultima X Gas Monitor is constantly performing a self-check. When a problem is found, it displays the appropriate error message. (Table 4-3, "Troubleshooting Guidelines"). When a critical error is detected within the unit, the output signal goes to a fault condition. -
Page 44: Caution
Replacing an Ultima XE or Ultima XA Sensor The only routine maintenance item is the sensing element itself, which has a limited lifetime. When the Ultima X Series Gas Monitor’s read-out indicates that the sensor must be changed, there is very little sensor lifetime remaining. It is good practice to obtain a replacement sensing element before the sensing element within your unit becomes inoperative. -
Page 45: Warning
Do not install a leaking sensor in the sensing head assembly. The leaking sensor must be disposed of in accordance with local, state and federal laws. To obtain a replacement sensor, contact MSA at the address given under "Obtaining Replacement Parts."... - Page 46 (e.g., carbon monoxide to oxygen). 3. The Ultima X Series Gas Monitor is shipped with the Sensor Swap Delay enabled. This means that the 4-20 mA output signal and the FAULT relay will hold off a fault indication for 60 seconds after the sensor missing indication is displayed on the instrument.
- Page 47 Chapter 4, Maintenance Table 4-2. Configuration Display Messages MESSAGE INDICATES CAL SIG ON Instrument will output the calibration signal during calibration CAL SIG OFF Instrument will output gas value during calibration LTCH/ Latching relay operations UNLTCH/ Non-latching relay operations INCR/ Increasing Alarm relay operations DECR/ Decreasing Alarm relay operations...
-
Page 48: Obtaining Replacement Parts
Obtaining Replacement Parts See Table 4-4 for replacement sensor kits. To obtain a replacement sensor, address the order or inquiry to: Mine Safety Appliances Company Instrument Division P.O. Box 427, Pittsburgh, PA 15230-0427 or call, toll-free, 1-800-MSA-INST. -
Page 49: Warning
Failure to do so may seriously impair sensor performance. Repair or alteration of the Ultima X Series Gas Monitor, beyond the scope of these maintenance instructions or by anyone other than authorized MSA service personnel, could cause the product to fail to perform as designed and persons who rely on this product for their safety could sustain serious personal injury or death. -
Page 50: Appendix A Internal Relay Option
Unpack, mount and wire the Ultima X Series Gas Monitor according to Chapter 1, "Set-up." All electrical connections to the Ultima X Series Gas Monitor can be made via the clearly marked board-mounted connections. • See FIGURES A-1 and A-2 for Dual module general-purpose and explosion-proof Ultima X Series Gas Monitors, respectively. - Page 51 Appendix A, Internal Relay Option Figure A-1. Dual Module General-Purpose Ultima X Series Wiring...
- Page 52 Appendix A, Internal Relay Option Figure A-2. Dual Module Explosion-Proof Ultima X Series Wiring...
- Page 53 Appendix A, Internal Relay Option Figure A-3. Single Module General-Purpose Ultima X Series Wiring Figure A-4. Single Module Explosion-Proof Ultima X Series Wiring...
-
Page 54: Ith Internal Relays (4-20 Ma Model
Appendix A, Internal Relay Option Power cable wiring lengths for the Ultima X Series Gas Monitor with internal relays differ from models without internal relays (TABLE A-1). NOTE: To avoid electrical noise problems, do not run AC lines from relays in the same conduit or cable tray as the DC Signal lines. -
Page 55: Ultima X Series Gas Monitor Internal Relays
Appendix A, Internal Relay Option Ultima X Series Gas Monitor Internal Relays Relay Specifications Table A-2. Relay Specifications TEMPERATURE RANGE -40 to +60 C (-40 to +140 HUMIDITY 15 to 95% RH, non-condensing 3 ALARMS SPDT (Single pole, double throw) -
Page 56: Alarm Relays
(non-fault) position. • Upon activation, the relay contacts change state and remain changed for as long as: • The alarm condition exists within the Ultima X Series Gas Monitor or • The latching mode is selected (see "Note on Resetting Latched alarms with... -
Page 57: Fault Relay Or Trouble
Appendix A, Internal Relay Option Fault Relay or Trouble • It is a normally-energized, single-pole, double-throw (SPDT) relay. • During normal operation, the relay contacts are normally closed (NC) and normally open (NO) as shown in FIGURE A-5. • When a fault is detected or power is cut or turned OFF, these contacts change as follows: •... -
Page 58: Optional Reset Push-Button
• Ultima X Series Gas Monitor internal fault or • An inoperative relay. • Fault Relay PULSED (once per minute) indicates: • Improper calibration of the Ultima X Series Gas Monitor or • Ultima X Series Gas Monitor CHECK CAL or CAL FAULT displayed. -
Page 59: Optional Push-Button Calibration
These effects may render the unit inoperative. One way to reduce these ® effects is to install a *Quencharc across the load being switched. This device is available from MSA as P/N 630413. A-10... -
Page 60: Warning
Appendix A, Internal Relay Option "! WARNING Before wiring the Ultima X Series Gas Monitors, disconnect power source supplying the monitor; otherwise, electrical shock could occur. • The Ultima X Series Gas Monitor must be disassembled for relay wiring • The following procedure must be performed: 1. - Page 61 7. Pull the cable away from the unit to relieve any excess slack. • It is important not to have excess wire or cable within the module to avoid unwanted AC noise. 8. Re-install the cover of the Ultima X Series Gas Monitor. A-12...
Need help?
Do you have a question about the Ultima X Series and is the answer not in the manual?
Questions and answers