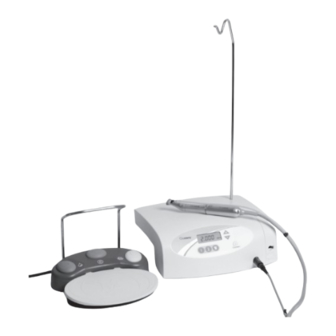
Cochlear Baha Instructions For Use Manual

Cochlear Baha Instructions For Use Manual

Osscora surgical set
Hide thumbs Also See for Baha:

Advertisement

Quick Links

Cochlear
Baha
and Vistafix
®
®
Osscora Surgical Set
INSTRUCTIONS FOR USE
MODEL NO. 91053

Advertisement

Table of Contents
loading

Summary of Contents for Cochlear Baha

  • Page 1 Cochlear Baha ™ ® and Vistafix ® Osscora Surgical Set INSTRUCTIONS FOR USE MODEL NO. 91053...
  • Page 2 Symbols Warning Attention General explanations Risk of injury. Important notes to prevent Without risk to persons damage occurring. or objects. Thermo washer Sterilisable Disinfectable. Up to the stated temperature.
  • Page 3 Symbols Symbols on the control unit Follow instructions for use Do not dispose of with Catalogue number Separate disposal domestic waste of batteries Serial number Consult instructions for use Foot switch Supply voltage of the unit Class II equipment On / Off Alternating current Date of manufacture Data matrix code for product...
  • Page 4 Symbols Symbols on the packaging This way up Temperature limit Fragile, handle with care Humidity limitation Keep away from rain Caution: Federal law restricts this device to sale by or on the order of a medical practitioner. Der Grüne Punkt Identification mark of Duales System Deutschland AG General symbol for recovery/...
  • Page 5 Symbols Symbols on the irrigation tubing Sterilisation with ethylene oxide Consult instructions for use STERILE STERILE EO Not for re-use Manufacturer: ASSAmed GmbH Münchweiser Str.4 D-66450 Bexbach Germany Latex-free Caution: Federal law restricts this device to sale by or on the order of a medical Use by date practitioner.
  • Page 6: Table Of Contents

    Contents Chapter Page Chapter Page 1. Introduction 10. Factory settings 2. Safety notes 11. Control unit operation 3. Unpacking 12. Error messages 4. Equipment supplied 13. Reprocessing guidelines 5. Description of front panel 14. Osscora contra-angle handpiece 6. Description of rear panel 15.
  • Page 7: Introduction

    For your safety and the safety of your patients may use the surgical unit.We have based our development These Instructions for Use explain how to use your Cochlear and design of the Osscora surgial set on the “physician” product. However, we must also warn against possible target group.
  • Page 8: Safety Notes

    Correct any faults or claims. refer to your local Cochlear office. Do not operate the Osscora surgical set if it is damaged. – When changing the fuse, disconnect the unit from the power supply and only use original fuses.
  • Page 9 English 2. Safety notes Risks due to electromagnetic fields Control unit The control unit is classed as “conventional equipment” The functionality of implantable systems, such as cardiac pacemakers and ICD (implantable (closed equipment without protection against the ingress of water). cardioverter defibrillator) can be affected by electric, magnetic and electromagnetic fields.
  • Page 10 EMC and must be installed and put into operation in accordance with the EMC notes included. Cochlear guarantees the compliance of the device with the EMC requirements only when used with original Cochlear accessories and spare parts. The use of...
  • Page 11 Use the supplied irrigation tubing disconnected from the power supply using the power set or accessories supplied by Cochlear. Coolant bottle or switch or power cable. The power switch can also be used coolant bag can be obtained from a pharmacist.
  • Page 12: Unpacking

    English 3. Unpacking x Remove irrigation tubing set. u Lift out insert with stand. v Remove foot control and insert. y Remove carton containing motor, mains cable, handle and contra-angle handpiece. The packaging is environmentally friendly and can be w Lift out insert with control unit. disposed of by industrial recycling companies.
  • Page 13: Equipment Supplied

    English 4. Equipment supplied 91053 Osscora surgical set 115 V Control unit, 115 V Foot control S-N1 Motor with 3,5 m cable incl. motor protective cover, locking pins (2 pcs) and clips (10 pcs) Osscora contra-angle handpiece Irrigation tubing set (6 pcs) Mains cable (1 pcs) (USA, CAN, JAP) Stand...
  • Page 14: Description Of Front Panel

    English 5. Description of front panel Program buttons Pump arm Display Stand holder OPEN Pump arm Motor connection socket...
  • Page 15: Description Of Rear Panel

    English 6. Description of rear panel Stand holder Connecting socket Power switch for foot control ON/OFF Power socket Fuse holder with 2 fuses (250 V–T1.25AH)
  • Page 16: Description Of Motor With Cable

    (see illustration). Test run – Start the motor. – If you observe dysfunctions (e.g. vibrations, unusual noise, overheating, coolant supply failure or leakage) stop the motor immediately and contact your service agent. For details, please contact your local Cochlear office.
  • Page 17: Starting Operation-General

    English 8. Starting operation–General Always place the Osscora on a flat level surface. Ensure that the Osscora can be disconnected easily from the power supply. u Connect the mains cable x Fit the irrigation tubing set. a) Open the pump arm and foot control.
  • Page 18: Starting Operation-Foot Control

    English 9. Starting operation–Foot control ORANGE Change program Program 1 to 3 GREEN YELLOW Pump Change motor direction ON/OFF forward/reverse drive GREY Start motor VARIABLE or FIXED speed (Factory setting = variable)
  • Page 19 English 9. Starting operation – Foot control Changing program Reverse operation The programs 1–3 can be selected in ascending sequence by You can switch between forward and reverse operation by operating the ORANGE button. pressing the YELLOW button. On selecting reverse operation, an audible signal can be heard and the selected program button When changing from program 3 to program 1, a longer flashes.
  • Page 20 English 9. Starting operation–Foot control To change motor speed from VARIABLE speed to w Keep P3 depressed and carry out adjustment. FIXED speed variable speed is only available for program 1 and 2.) Keep program button P3 depressed throughout this procedure! 01 = VARIABLE speed (factory setting) –...
  • Page 21: Factory Settings

    English 10. Factory settings Factory settings P1– P3 Forward Reverse Factory setting rpm 2000 2000 Adjustable range rpm 15–2000 15–2000 – – Motor direction Forward Forward Forward Reverse Pump Factory setting Max. Max. Adjustable range – – 5–50 5–50 Intermediate stage –...
  • Page 22 English 10. Factory settings Reset factory settings Factory setting always starts with program 1 ( P1). u Switch off the control unit. v Keep P1 depressed and simultaneously switch on the control unit. w Keep P1 depressed as long as “DE FAU” appears on the display.
  • Page 23: Control Unit Operation

    English 11. Control unit operation Changing the program (P1–P3) Activate the required program (P1–P3) by pressing the corresponding program button. During selection an audible signal can be heard and the program button is illuminated. On the display the selected program appears with the adjusted range in rpm: Pump operation ON/OFF...
  • Page 24 English 11. Control unit operation Changing the speed (P1–P2) Keeping PLUS / MINUS depressed activates the repeat function and the values are continuously increased / decreased. Press program button (P1– P2). Increase speed Decrease speed The accuracy of the set speed in the range 300 – 40,000 (at the motor) rpm is ± 10%.
  • Page 25 English 11. Control unit operation Changing the torque (P3) Adjustable range from 5 up to 50 Ncm, intermediate stage 32 Ncm. Keeping PLUS /MINUS depressed activates the repeat function and the values are continuously increased /decreased. When changing from 5 to 50 Ncm and 50 to 5 Ncm, a longer confirmation signal is heard.
  • Page 26 English 11. Control unit operation Changing the coolant flow (P1–P3) Factory setting 80% of maximum flowrate (max flowrate: approx. 100 ml/min). Adjustable range 65%, 80% and 100%. Depressing PLUS /MINUS the values are continuously increased /decreased. Keep program button P2 depressed throughout this procedure! Keep P2 depressed for approximately 4 seconds (the adjusted coolant flow rate appears).
  • Page 27: Error Messages

    English 12. Error messages Error No. Description Remedy Electronics overheating–safety shutdown Switch off the equipment, allow to cool for at least 10 minutes, then restart Electronics overloaded Switch off the equipment, allow to cool for at least 10 minutes, then restart Foot control error–initialising Switch off the equipment, restart, do not actuate foot control when switching on...
  • Page 28 For contact details, please contact your local Cochlear office. If a total failure of the equipment occurs caused by external circumstances, the equipment must be switched off and then...
  • Page 29: Reprocessing Guidelines

    English 13. Reprocessing guidelines General notes the warnings provided by the manufacturers of cleaning agents and/ or disinfectants. Follow your local and national laws, directives, – Use only detergents which are intended for standards and guidelines for cleaning, disinfection, cleaning and/or disinfecting medical devices made and sterilisation.
  • Page 30 PG 8582 CD« washer disinfector (Miele & Cie. KG, Gütersloh) and the »Dr. Weigert neodisher® Cochlear recommends automated cleaning and MediClean forte« cleaning agent (Dr. Weigert GmbH disinfection using a washer-disinfector. & Co. KG, Hamburg) according to ISO 15883.
  • Page 31 English 13. Reprocessing guidelines The front panel of the control unit and the foot Pre-disinfection control are sealed and may be wiped clean. – If heavily soiled: Clean first with disinfectant cloths. Only use disinfectants that have no protein-fixing effects. –...
  • Page 32 English 13. Reprocessing guidelines Manual cleaning and disinfection of the contra-angled handpiece  – Remove the rotary instrument. – Remove the contra-angle handpiece from the motor. Pre-disinfection If heavily soiled: Clean first with disinfectant cloths. Only use disinfectants that have no protein-fixing effects. Clean and disinfect the disassembled contra-angle handpiece immediately after every treatment, to flush out any liquid residues (such as blood, etc.) and to prevent settling on...
  • Page 33  Blow through the coolant tube and coolant outlet with the air syringe. In the case of a clogged up spray nozzle or coolant tube contact your service agent. For details, please contact your local Cochlear office. The removable spray clip can be cleaned in an ultrasonic bath. ...
  • Page 34 English 13. Reprocessing guidelines Manual disinfection – Disinfect with surface disinfectants.  Wiping disinfection  is recommended. – Use only surface disinfectants which do not contain chlorine and which are certified by officially recognised institutes. For USA: Use EPA registered surface disinfectants. –...
  • Page 35 13. Reprocessing guidelines Drying Sterilisation – Ensure that the motor with cable and handpiece is Cochlear recommends sterilisation according to EN completely dry internally and externally after cleaning 13060, EN 285 or ANSI/AAMI ST79. and disinfection. Follow your country-specific directives, and guidelines –...
  • Page 36 English 13. Reprocessing guidelines – 132°C (270°F) for at least 4 minutes “Gravity-displacement cycle” (type N)** – 121 °C (250°F) for at least 30 minutes *EN 13060, EN 285, ISO 17665 **ANSI/AAMI ST55, ANSI/AAMI ST79 Recommended sterilisation cycles Steam sterilisation NOTE: All other sterilisation methods are not approved –...
  • Page 37: Osscora Contra-Angle Handpiece

    English 14. Osscora contra-angle handpiece Product description Osscora contra-angle handpiece. For disassembly, see page 43. u press-button   v head w hexagon chucking system  x spray clip  y middle gear    z knee   lower shaft ...
  • Page 38 • If using a Dermatome, please note the Osscora contra-angle handpiece is designed for use with the Baha Dermatome for Osscora only. It must not be used with any other Dermatome model. • This contra-angle handpiece is only intended for use with Osscora surgical set for Baha and Vistafix surgery.
  • Page 39 English 14. Osscora contra-angle handpiece Operation Assembly and removal Do not assemble/remove the contra-angle handpiece during the operation!  Push the contra-angle handpiece onto the motor. – Use a rotational lock between motor and contra-angle  handpiece: see page 16. ...
  • Page 40 English 14. Osscora contra-angle handpiece Operation  Rotary instruments – Use only rotary instruments that are in perfect condition and be careful when the rotary instrument is rotating. – Insert rotary instruments only when the contra- angle handpiece is stationary. –...
  • Page 41 (a) and turn until it engages (b).  Check secure location by applying slight axial tension.  Remove the instrument by pushing the press-button.  Please contact your local Cochlear office for how to get an applicable rotary instrument with hexagon. ...
  • Page 42 – Insert the rotary instrument. – Start the contra-angle handpiece. – If you observe problems (e.g. vibrations, unusual noise, overheating, coolant supply failure or leakage) stop the motor immediately and contact your service agent. For contact details, please contact your local Cochlear office.
  • Page 43 English 14. Osscora contra-angle handpiece Disassemble Osscora contra-angle handpiece  Remove the spray clip.  Hold the contra-angle head firmly with one hand.  Press sheath gently against the contra-angle knee. At the same time turn off the sheath from ...
  • Page 44 English 14. Osscora contra-angle handpiece Reassemble Osscora contra-angle handpiece  Insert the middle gear into the contra-angle head. Check   free running of the chucking system (a).  Insert the knee (4 positions are possible) onto the contra- angle head until it engages. ...
  • Page 45 Oil service only with W&H Service Oil F1, MD-400. For oil service, W&H Service Oil F1, MD-400 is recommended. For details on how to purchase this, contact your local Cochlear office. – Follow the Instructions for Use of the oil spray can. Recommended lubrication cycles –...
  • Page 46 English 14. Osscora contra-angle handpiece Test run following oil service  Place the contra-angle handpiece with the head, downwards.  Start the contra-angle handpiece for 30 seconds to remove excess oil. Start at the minimum speed and increase to the maximum speed within 5 to 10 seconds.
  • Page 47: Osscora Accessories

    English 15. Osscora accessories Use only original Cochlear accessories/spare parts or accessories approved by Cochlear Disposable article 91061 Irrigation tubing set 3,8 m 91891 Spray clip (for Osscora 91054 Osscora motor with 3,5 m (6 pcs). handpiece), (3 pcs). cable.
  • Page 48: Servicing

    We recommend that only authorised personnel undertake this servicing and checking. For details, please contact your local – Visual inspection for outside damage. Cochlear office. – Measurement of device leakage current. – Measurement of patient leakage current. – Visual inspection of internal components and electronic boards on suspicion of safety interference, e.
  • Page 49 The standard ISO 11498 stipulates a durability of at least 250 sterilisation cycles. In the case of the motor with cable from Cochlear we recommend that you carry out a regular servicing after 500 sterilisation cycles, or one year. Repairs...
  • Page 50: Technical Data

    English 17. Technical data 91053 Supply voltage: 100 – 130 V Permitted voltage fluctuation: ± 10 % Nominal current: 0.2 – 1.7 A Frequency: 50 – 60 Hz Mains fuse: 2x 250 V – T1.25AH Max. power consumption: 170 VA Max.
  • Page 51 As manufacturer, Cochlear Bone Anchored Solutions AB is liable Technical data Osscora contra-angle handpiece for material or manufacturing defects within a warranty period of one year from the date of purchase. Only Cochlear products and accessories, or products and accessories approved by Cochlear, should Transmission ratio...
  • Page 53 Copy for the user / customer Certification of training Essential for EU user / customer The user has been trained in all functions of the Osscora surgical set in accordance with current Instructions for Use. Particular attention was shown to Safety notes, Disinfection, cleaning, sterilisation and Servicing.
  • Page 55 Copy for the Medical Device Consultant Certification of training Essential for EU user / customer The user has been trained in all functions of the Osscora surgical set in accordance with current Instructions for Use. Particular attention was shown to Safety notes, Disinfection, cleaning, sterilisation and Servicing.
  • Page 56 Please contact your local Cochlear representative for product information. Cochlear, Hear now. And always, Nucleus, Kanso, Baha, the elliptical logo, and marks bearing an ® or ™ symbol, are either trademarks or registered trademarks of Cochlear Limited or Cochlear Bone Anchored Solutions AB (unless otherwise noted).

This manual is also suitable for:

Vistafix91053

Table of Contents