Regency C34 Classic Owners & Installation Manual
Hide thumbs
Also See for C34 Classic:
- Owners & installation manual (48 pages) ,
- Brochure & specs (8 pages) ,
- Owners & installation manual (44 pages)
Table of Contents
Advertisement
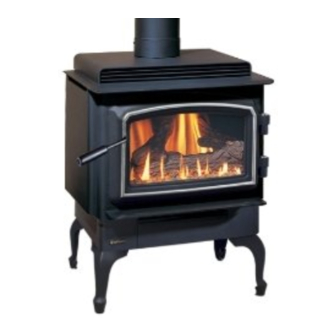
C34 Classic™ Direct Vent
Freestanding Gas Stove
MODELS:
C34-NG11 Natural Gas
WARNING
FIRE OR EXPLOSION HAZARD
Failure to follow safety warnings exactly could result in serious
injury, death, or property damage.
- Do not store or use gasoline or other flammable vapors and liquids in the vicinity of this or any other
appliance.
- WHAT TO DO IF YOU SMELL GAS
•
Do not try to light any appliance.
• Do not touch any electrical switch: do not use any phone in your building.
Leave the building immediately.
• Immediately call your gas supplier from a neighbour's phone. Follow the gas supplier's
instructions.
• If you cannot reach your gas supplier, call the fire department.
- Installation and service must be performed by a qualified installer, service agency or the gas supplier.
Tested by:
Certified to/Certifié pour: CSA 2.17-2017
FPI FIREPLACE PRODUCTS INTERNATIONAL LTD. 6988 Venture St., Delta, BC Canada, V4G 1H4
920-092e
C34-LP11 Propane
Installer: Please complete the details on the back cover
ANSI Z21.88-2017
and leave this manual with the homeowner.
CSA 2.33-2017
Homeowner: Please keep these instructions for future reference.
Owners &
Installation Manual
C34 Video
www.regency-fire.com
03.10.22
Advertisement
Table of Contents

Related Manuals for Regency C34 Classic


Summary of Contents for Regency C34 Classic
- Page 1 C34 Classic™ Direct Vent Owners & Freestanding Gas Stove Installation Manual C34 Video www.regency-fire.com MODELS: C34-NG11 Natural Gas C34-LP11 Propane WARNING FIRE OR EXPLOSION HAZARD Failure to follow safety warnings exactly could result in serious injury, death, or property damage.
- Page 2 REGENCY Classic Direct Vent Freestanding Gas Stove To the New Owner: Congratulations! You are the owner of a state-of-the-art Gas Stove by Fireplace Products International Ltd. The Regency Gas Series ® of hand-crafted appliances has been designed to provide you with all the warmth and charm of a woodstove, at the flick of a switch.
- Page 3 INFORMATION FOR MOBILE/MANUFACTURED HOMES AFTER FIRST SALE This Regency product has been tested and listed by Intertek as a Direct Vent Room Heater to the following standards: CAN/CGA-2.17-2017, ANSI Z21.88- ® 2017 • CSA 2.33-2017. This Direct Vent System Appliance must be installed in accordance with the manufacturer's installation instructions and the Manufactured Home Construction and Safety Standard, Title 24 CFR, Part 3280, or the current Standard of Fire Safety Criteria for Manufactured Home Installations, Sites, and Communities ANSI/NFPA 501A, and with CAN/CSA Z240-MH Mobile Home Standard in Canada.
- Page 4 ALL PICTURES / DIAGRAMS SHOWN THROUGHOUT THIS MANUAL ARE FOR ILLUSTRATION PURPOSES ONLY. ACTUAL PRODUCT MAY VARY DUE TO PRODUCT ENHANCEMENTS. Regency ® CLASSIC™ C34-11 Direct Vent Freestanding Gas Stove...
-
Page 5: Table Of Contents
Converting Class-A Metal Chimney to Direct Vent System ...34 System Data ................35 Main Assembly ..............48 Gas Connection ..............35 Burner Assembly & Log Set ..........49 High Elevation ................35 Base Options .................50 Gas Pipe Pressure Testing ............35 Warranty Warranty ................52 Regency CLASSIC™ C34-11 Direct Vent Freestanding Gas Stove ®... -
Page 6: Copy Of Safety Decal
This is a copy of the label that accompanies NOTE: Regency units are constantly being ® each CLASSIC Direct Vent Freestanding Gas improved. Check the label on the unit and if Stove. We have printed a copy of the contents there is a difference, the label on the unit is here for your review. - Page 7 (e) A copy of all installation instructions for all Product Approved side wall horizontally vented gas fueled equipm ent, all venting instructions, all parts lists for venting instructions, and/or all venting design instructions shall remain with the appliance or equipment at the completion of the installation. Regency CLASSIC™ C34-11 Direct Vent Freestanding Gas Stove ®...
-
Page 8: Gas Installation Checklist
This general checklist does not contain all pertinent installation details or specifics and does not supersede the guidelines in this manual. Your Regency dealer/installer should use it in conjunction with manual instructions. Please follow all local codes and jurisdictions in authority. - Page 9 REGENCY GAS INSTALLATION CHECKLIST Finishing If applicable, is only noncombustible material installed in the noncombustible areas? Do clearances meet installation and manual requirements? Do the mantels and/or projections comply with the installation manual? If applicable, was the solid fuel fireplace warning plate installed?
-
Page 10: For Your Safety
SURFACE TEMPERATURES, ESPE- THE BARRIER SHALL BE REPLACED CIALLY THE FIREPLACE GLASS, AND WITH THE MANUFACTURER'S BARRIER SHOULD STAY AWAY TO AVOID BURNS FOR THIS APPLIANCE. OR CLOTHING IGNITION. 10 | Regency ® CLASSIC™ C34-11 Direct Vent Freestanding Gas Stove... -
Page 11: Important Message
- WARNING - Risk of fire or electric shock. Only qualified service personnel shall be used to install and provide mainte- nance of this appliance. Regency CLASSIC™ C34-11 Direct Vent Freestanding Gas Stove ®... -
Page 12: Installation Checklist
2. Ensure proper grounding using the #8 ground lug provided. See "Optional Fan Installation" section. Side wall 3. Appliance must be anchored to the floor. See "Pedestal Assembly" & "Leg and Bottom" sections. 12 | Regency ® CLASSIC™ C34-11 Direct Vent Freestanding Gas Stove... -
Page 13: Lighting Procedure
2. Press and release the ON/OFF button on the remote handheld transmit- ter (see Diagram 2). An audible beep should be heard from the receiver. ON/OFF Button Diagram 2 Remote shown in Manual Mode on Hi Regency CLASSIC™ C34-11 Direct Vent Freestanding Gas Stove ®... -
Page 14: Proflame I Remote Control Operating Instructions
IFC. Figure 2: Transmitter LCD Display Note: May not be exactly as shown as hand-held may be silver or black. Figure 3: Battery Compartment 14 | Regency ® CLASSIC™ C34-11 Direct Vent Freestanding Gas Stove 06.10.20 919-829... - Page 15 Transmitter LCD display will only show the room temperature (Fig. 6). At the same time the Receiver will turn off the appliance. A single “beep” from the Receiver confirms reception of the command. Figure 9 Figure 10 Regency CLASSIC™ C34-11 Direct Vent Freestanding Gas Stove ®...
- Page 16 Keys (fig.1) to turn on, off or adjust the fan speed (fig. 14). A single “beep” time. will confirm reception of the command. Figure 18 Figure 13 Figure 14 16 | Regency ® CLASSIC™ C34-11 Direct Vent Freestanding Gas Stove 12.17.18 920-019...
- Page 17 5. Use the up or down arrow button to program out the function on the remote. Note: You should never program out the fan (If installed) feature on the remote. It is not possible to remove the thermostat mode on this remote control. 920-019 01.16.19 Regency CLASSIC™ C34-11 Direct Vent Freestanding Gas Stove ®...
-
Page 18: Optional Fan Installation
5. Place the fan assembly partially in door cover plate hole. See Diagram 4. 6. Attach the 2 ground wires (green) to the ground lug as per Diagram 4. Diagram 7 920-109 05.23.19 18 | Regency ® CLASSIC™ C34-11 Direct Vent Freestanding Gas Stove... - Page 19 (Diagram 5). 7. Turn fan 90 degrees. (Diagram 5). (Pedestal units only). 8. Disconnect the green ground wires to the grounding lug. Remove fan from stove. (Diagram 3) 05.23.19 920-109 Regency CLASSIC™ C34-11 Direct Vent Freestanding Gas Stove ®...
-
Page 20: Pedestal Assembly
Tighten the bolts. 3. Push the Regency® logo into the two holes in the front bottom left corner of the pedestal cover plate. 3. Level the stove by adjusting the levelling bolts in the bottom of each leg. -
Page 21: Venting Introduction
Locations" section. 1. Wear gloves and safety glasses for protection. 2. Exercise extreme caution when using ladders or on roof tops. 3. Be aware of electrical wiring locations in walls and ceilings. Regency CLASSIC™ C34-11 Direct Vent Freestanding Gas Stove ®... -
Page 22: Exterior Vent Terminal Locations
* Clearance in accordance with local installation codes and the requirements of the gas supplier 3 feet (91cm) within a height of 15 feet (4.5m) above the meter / regulator assembly 3 feet (91cm) above - if within 10 feet (3m) horizontally 22 | Regency ® CLASSIC™ C34-11 Direct Vent Freestanding Gas Stove... -
Page 23: 4" X 6-5/8" Rigid Pipe Cross Reference Chart
Note: Olympia Ventis DV venting is only approved for certain models. See list of approved models in cross-reference chart. Components from different Manufacturers may not be mixed. Not all rigid pipe components are available directly from Regency. Note: Olympia Ventis DV venting is only approved for certain models. See list of approved models in cross-reference chart. - Page 24 TM-4TR VDV-FS04 * Not available from Regency ***Olympia Ventis DV application for the following units only when using 4" x 6-5/8" vent system: B36XTE, B36XTCE, all City Series 40 models, CV72E/CB72E (power-vented models only), G600C, G600C-1, G600EC, G800C, G800C-1, G800EC, P36, P36E, and RC500E.
-
Page 25: Rigid Pipe Venting Systems
Metal Products Ameri Vent Direct Vent, Security Secure Vent , Selkirk Direct-Temp. AstroCap is a proprietary trademark of FPI Fireplace Products ® International Ltd. Dura-Vent® and Direct Vent are registered and/or proprietary trademarks of Simpson Dura-Vent Co. Inc. Regency CLASSIC™ C34-11 Direct Vent Freestanding Gas Stove ®... -
Page 26: Venting Arrangements
Offset to Vertical Vent. A 15 ft. vertical run with 4 ft. horizontal offset distance falls within the shaded area and is an allowable installation with Vent Restrictor Position "R" (Right). 26 | Regency ® CLASSIC™ C34-11 Direct Vent Freestanding Gas Stove... - Page 27 7' Max. 5' Min. between 90 elbows is 5' Min. 8' Max. 6' Min. required. Lengths do not include elbow indicated. Vent restrictor position C (fully open), refer to "Vent Restrictor Position" section Regency CLASSIC™ C34-11 Direct Vent Freestanding Gas Stove ®...
-
Page 28: Dv Stove Horizontal Vent Kit
Do not locate termination hood where excessive snow or ice buildup may Note: if the centerline cannot be occur. Be sure to check vent termina- met, the adjustable sections will tion area after snow falls, and clear to have to be cut. prevent accidental blockage of venting system. When using snow blowers, make sure snow is not directed towards vent termination area. 28 | Regency ® CLASSIC™ C34-11 Direct Vent Freestanding Gas Stove... - Page 29 4" dia. flex liner. stainless steel). Note: pilot holes will need to be drilled through the wall thimble on all 12. Install the spring spacers onto the pipe 4 corners. sections. Regency CLASSIC™ C34-11 Direct Vent Freestanding Gas Stove ®...
-
Page 30: Dura-Vent Termination Kit
, Selkirk Direct-Temp. AstroCap is a proprietary trademark of FPI Fireplace Products ® International Ltd. Dura-Vent® and Direct Vent are registered and/or proprietary trademarks of Simpson Dura-Vent Co. Inc. 30 | Regency ® CLASSIC™ C34-11 Direct Vent Freestanding Gas Stove... -
Page 31: Dura-Vent Horizontal Installations
Horizontal Termination. NEVER install Diagram 1 the snorkel upside down. Below Grade Installation b) Horizontal runs of vent must be sup- ported every three feet. Wall straps are available for this purpose. Regency CLASSIC™ C34-11 Direct Vent Freestanding Gas Stove ®... -
Page 32: Vertical Termination
Canada). the vent pipe every 3 feet, to avoid exces- sive stress on the elbows, and possible separation. Wall straps are available for this purpose. See Diagram 9. 32 | Regency ® CLASSIC™ C34-11 Direct Vent Freestanding Gas Stove... -
Page 33: Cathedral Ceilings
2. Place the support in the opening. Lower it to the 6. Twist lock the vent cap on to the last section. correct height as determined by the table and Diagram below. Regency CLASSIC™ C34-11 Direct Vent Freestanding Gas Stove ®... -
Page 34: Converting Class-A Metal Chimney To Direct Vent System
If the appliance shuts off during operation, contact a qualified service person to determine if a negative pressure and/or leaky chimney condition exists. Do not operate the appliance until the problem is corrected. Diagram 1 34 | Regency ® CLASSIC™ C34-11 Direct Vent Freestanding Gas Stove... -
Page 35: System Data
(clockwise) with a 1/8" flat screwdriver. system. Screw should be snug, but do not over tighten. Regency CLASSIC™ C34-11 Direct Vent Freestanding Gas Stove ®... - Page 36 DC Sparker Box by opening the battery 8. Main Gas Outlet compartment. 9. Alternative TC Connection Point NOTE: The battery in the DC Sparker Box will need to be replaced annually. Pedestal base shown 36 | Regency ® CLASSIC™ C34-11 Direct Vent Freestanding Gas Stove...
-
Page 37: Door Installation
Note: The bottom of the door may scrape the ash lip. In this case place the spacers provided on the door hinges of the unit before placing the door. 920-076 03.01.19 Regency CLASSIC™ C34-11 Direct Vent Freestanding Gas Stove ®... - Page 38 7. To install the safety screen, hook the tabs on the safety into the slotted brackets on either side of the door (Diagram 7). Diagram 7 8. To remove the safety screen, lift up slightly and pull forward. 38 | Regency ® CLASSIC™ C34-11 Direct Vent Freestanding Gas Stove 03.01.19 920-076...
-
Page 39: Log Installation
Carefully push the ensure proper light off of burner.) made during the log and ember instal- log down onto the pins. See Diagram 3. lation.) 2. The securing bracket keeps the door closed. Regency CLASSIC™ C34-11 Direct Vent Freestanding Gas Stove ®... -
Page 40: Safety Screen Installation / Removal
Connect the wires as per the wiring Diagrams. 1. Install slotted brackets (found in the manual pack) Note that the wires are connected to the "TH" on Use the Regency Remote Control Kit supplied ® to the back of the door with 2 screws on each the gas valve. -
Page 41: Wiring Diagram
Do not cut or remove the grounding prong from this plug. Regency CLASSIC™ C34-11 Direct Vent Freestanding Gas Stove ®... -
Page 42: Pilot Adjustment
Push in for a yellow flame, or pull out for Note: Aeration Adjustment should only be a bluer flame. The burner aeration is factory set Note: If you have an incorrect flame pattern, performed by an authorized Regency but may need adjusting due to either the local ® contact your Regency dealer for further Installer at the time of installation or ®... -
Page 43: First Fire
7. The unit should never be turned off, and on again without a minimum of a 60 second wait. Diagram 1 Regency CLASSIC™ C34-11 Direct Vent Freestanding Gas Stove ®... -
Page 44: Copy Of The Lighting Plate Instructions
Mettre le bouton de contrôle de gaz sur ''OFF'' pour éteindre la veilleuse. Pour économiser le carburant, éteindre la veilleuse quand l’appareil reste longtemps inutilisé. DO NOT REMOVE THIS INSTRUCTION PLATE 919-456 44 | Regency ® CLASSIC™ C34-11 Direct Vent Freestanding Gas Stove... -
Page 45: Normal Operating Sounds Of Gas Appliances
Regency® uses Stove Brite Paint - Metal- Pilot Flame: Continuous condensation can cause corrosion lic Black #6309. -
Page 46: Glass Gasket
In the event that you break your glass by 18. Remove two (2) phillips head M5 screws on impact, purchase your replacement glass from an each side of the valve. authorized Regency dealer only. ® 19. Remove valve and remove gas out 90o brass fitting. -
Page 47: Gas Maintenance
Gas Maintenance GAS MAINTENANCE - RECOMMENDED ANNUAL ROUTINE Recommended Annual Routine Maintenance for Gas Fireplaces, Stoves and Inserts In order for your Regency appliance to continue to provide comfort to your home periodic maintenance must be performed to ensure it is operating at peak efficiency. The items in the list should be checked by a licensed gas service technician during the annual service check. Your unit may require more frequent maintenance checks if you notice any changes in how it operates. Operational changes to look for can include, but are not limited to, extended start up time, increased fan noise, residue/carbon build up, white build up on the glass/firebox, increased operating noise etc. Should any of these or other conditions arise, discontinue use and schedule a service check with your local licensed gas technician. The list below shows items your licensed service technician will need to check and service at least annually. Clean Inspect Check • Glass • Pilot assembly • Voltage on thermocouple/thermopile (mil- • Interior bricks / panels • Burner livolt models) •... -
Page 48: Main Assembly
Air Baffle Plate Capscrew 1/4 x 1-3/4" NC Upper Air Passage Assembly 490-081 Flue Restrictor 490-520 Top Assembly 490-042 Rear Panel 920-092 Manual *Not available as a replacement part. 48 | Regency ® CLASSIC™ C34-11 Direct Vent Freestanding Gas Stove... -
Page 49: Burner Assembly & Log Set
Deflector-Top Rear Log - LP 490-932 Complete Log Set 902-151 Ember 902-153 Rockwool 904-978 Gas Inlet Pipe (18") 946-669 Platinum Embers 946-708 Enbaglow Embers Not available as a replacement part Not shown Regency CLASSIC™ C34-11 Direct Vent Freestanding Gas Stove ®... -
Page 50: Base Options
BASE OPTIONS Part # Description Part # Description 494-921 Complete Floor Shield 494-926 Pedestal Assembly 948-223 Regency ® Logo 948-223 Regency ® Logo 102. 904-257 Magnetic Catch (Large) 102. 904-257 Magnetic Catch (Large) 103. 11" Pedestal Hinge 103. - Page 51 Regency CLASSIC™ C34-11 Direct Vent Freestanding Gas Stove ®...
-
Page 52: Warranty
FPI is not responsible for results or costs of workmanship of unauthorized FPI dealers or agents in the negligence of their service work. Revision Date: February 2019 Regency Gas Products Warranty 52 | Regency ®... - Page 53 Products made or provided by other manufacturers and used in conjunction with the FPI appliance without prior authorization from FPI may void this warranty. Revision Date: February 2019 Regency CLASSIC™ C34-11 Direct Vent Freestanding Gas Stove Regency Gas Products Warranty ®...
- Page 54 Product Registration and Customer Support: Thank you for choosing a Regency Fireplace. Regency strives to be a world leader in the design, manufacture, and marketing of hearth products. To provide the best support for your product, we request that you complete a product registration form at http://www.regency-fire.com/Customer-Care/Warranty-Registration.aspx...
- Page 55 Product Registration and Customer Support: Thank you for choosing a Regency Fireplace. Regency strives to be a world leader in the design, manufacture, and marketing of hearth products. To provide the best support for your product, we request that you complete a product registration form found on our Web Site under Customer Care within ninety (90) days of purchase.
- Page 57 Regency CLASSIC™ C34-11 Direct Vent Freestanding Gas Stove ®...
- Page 58 58 | Regency ® CLASSIC™ C34-11 Direct Vent Freestanding Gas Stove...
- Page 60 Dealer Name & Address: ______________________________________________ ___________________________________________________________________ Installer: ___________________________________________________________ Phone #: ___________________________________________________________ Date Installed: ______________________________________________________ Serial #: ____________________________________________________________ C34 Video Printed in Canada Regency and Classic are trademarks of FPI Fireplace Products International Ltd. © Copyright 2022, FPI Fireplace Products International Ltd. All rights reserved.
Need help?
Do you have a question about the C34 Classic and is the answer not in the manual?
Questions and answers