Table of Contents
Advertisement
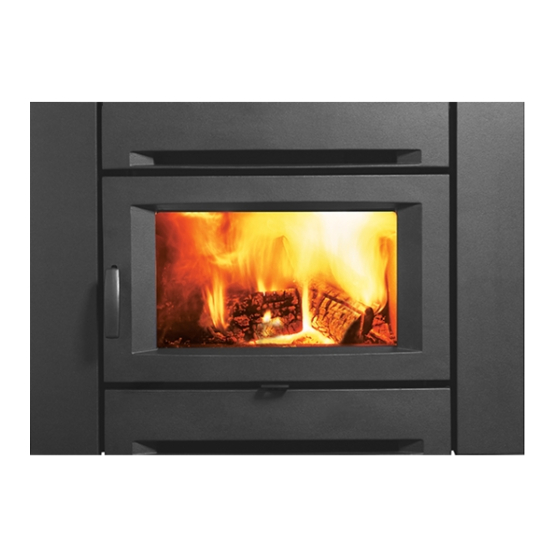
CI1150
Alterra
®
Wood Insert
Owner's & Installation Manual
Tested by:
Installer: Please complete the details on the back cover
and leave this manual with the homeowner.
Homeowner: Please keep these instructions for future reference.
Project No.
0219WN027S
FPI FIREPLACE PRODUCTS INTERNATIONAL LTD. 6988 Venture St., Delta, BC Canada, V4G 1H4
920-160
01.15.20
Advertisement
Table of Contents

Related Manuals for Regency Alterra CI1150


Summary of Contents for Regency Alterra CI1150
- Page 1 CI1150 Alterra ® Wood Insert Owner's & Installation Manual Tested by: Installer: Please complete the details on the back cover and leave this manual with the homeowner. Homeowner: Please keep these instructions for future reference. Project No. 0219WN027S FPI FIREPLACE PRODUCTS INTERNATIONAL LTD. 6988 Venture St., Delta, BC Canada, V4G 1H4 920-160 01.15.20...
- Page 2 Model Regency CI1150 – 1.7g /hr. “This manual describes the installation and operation of the Regency CI1150 wood heater. This heater meets the 2020 U.S. Environmental Pro- tection Agency’s cord wood emission limits for wood heaters. Under specific test conditions this heater has been shown to deliver heat at rates ranging from 12,800 BTU/hr to 39,100 BTU/hr.
-
Page 3: Table Of Contents
Draft Control ............... 20 First Fire ................20 Fan Operation ..............21 Cord reversal ..............21 ALL PICTURES / DIAGRAMS SHOWN THROUGHOUT THIS MANUAL ARE FOR ILLUSTRATION PURPOSES ONLY. ACTUAL PRODUCT MAY VARY DUE TO PRODUCT ENHANCEMENTS. Regency CI1150 Wood Cast Insert... -
Page 4: Copy Of The Safety Decal (Ci1150)
CERTIFIÉ CONFORME AUX NORMES 2020 DU U.S. ENVIRONMENTAL PROTECTION AGENCY EN MATIÈRE D'ÉMISSION DE PARTICULES DE BOIS EN UTILISANT LE BOIS DE CORDE. HOMOLOGUÉ AVEC LA ASTM E3053. MODÈLE REGENCY CI1150 –1.7 G /H. CET APPAREIL DE CHAUFFAGE AU BOIS DOIT ÊTRE INSPECTÉ PÉRIODIQUEMENT ET RÉPARÉ POUR FONCTIONNER CORRECTEMENT. CONSULTER LE MANUEL D’INSTALLATION POUR PLUS D’INFORMATION. -
Page 5: Dimensions
15 1/8" (384 mm) Standard Flue Adapter 6" (152mm) Diameter 6" (152mm) Diameter OFFSET FLUE ADAPTOR (172-946) 6" (152mm) Diameter 6" (152mm) Diameter STANDARD FLUE ADAPTOR (172-942) OFFSET FLUE ADAPTOR (172-946) STANDARD FLUE ADAPTOR (172-942) Regency CI1150 Wood Cast Insert... -
Page 6: Optional Backing Plate Dimensions
Optional Backing Plate Dimensions CI1150 Standard 40” (1016mm) 40” (1016mm) CI1150 Custom - Minimum Dimensions 37” (940mm) 37” (914mm) Regency CI1150 Wood Cast Insert... -
Page 7: Installation
1. Read all instructions before installing and us- ing your fireplace insert. Install and use only 9. Inserts that project in front of the fireplace must Regency Inserts are designed to use either a 5.5" in accordance with manufacturer’s installation be supplied with appropriate supporting means. -
Page 8: Masonry And Factory Built Fireplace Clearances
Your hearth extension must be made from a non-combustible material. Extending 16" for US and 18" for Canada—measured from the fuel loading door. ***Mantel can be installed anywhere in shaded area or higher using the above scale. Regency CI1150 Wood Cast Insert... -
Page 9: Installing Your Insert
3. Install the unit by first setting the rear of the unit into the fireplace. See Diagram 3. En- sure that the unit is centered in the existing fireplace and lined up with the flue adaptor. Diagram 6 Diagram 3 Regency CI1150 Wood Cast Insert... -
Page 10: Installation Into A Masonry Fireplace
846-508 6" Flue Adaptor-45 degree insert installation. If it does not, remove and 948-412/P 6" Flue Offset Adaptor (offsets back 4") store. 846-527 Flue Connector Kit 10 | Regency CI1150 Wood Cast Insert... -
Page 11: Cast Faceplate Installation
(facing the back of the unit) using one screw, as shown below. I1200 CONTEMPORARY 5) Secure the left cast surround with the two bolts removed in Step 3. Page 1 of 1 157-500.SLDASM 10/15/2019 Regency CI1150 Wood Cast Insert 10/21/19 920-162... - Page 12 8) Slide the upper cast surround keyhole brackets over the loosened screws from Step 7. 9) Slide the upper cast surround down over the screws until it is level and in line with the side cast pieces. 12 | Regency CI1150 Wood Cast Insert 920-162 10/21/19...
- Page 13 Then run the cord along the lower part of the lower cast surround and out in between the right cast and the unit. 17) With the cord re-routed, follow steps 13-15 to complete the installa- tion. Regency CI1150 Wood Cast Insert 10/21/19 920-162...
-
Page 14: 3-Piece Backing Plate Installation
If the unit is already installed - remove the top cast faceplate from the unit if access is too difficult - see 'Cast Faceplate Installation' in the owners manual for instructions. Standard backing plate shown on the CI1150 14 | Regency CI1150 Wood Cast Insert... -
Page 15: Door Reversal
4) Flip the door hinge 180° - install on the left side of the unit with 2 bolts. 5) Reattach the door catch assembly on the right side with 2 bolts from step Door 9) Reattach the door to the door hinge. Hinge Door Catch Regency CI1150 Wood Cast Insert... -
Page 16: Brick Installation
4.250 x 8.000 x 30 DEG BRICK 802-147 3.500 x 4.500 BRICK 802-152 2.000 x 9.000 BRICK 902-111 9.000 x 4.500 STANDARD BRICK RD-14289 4.500 x 7.000 BRICK RD-14288 4.250 x 7.000 BRICK ITEM PART NUMBER QTY. DESCRIPTION 16 | Regency CI1150 Wood Cast Insert... -
Page 17: Baffle Installation
Repeat step on other side. 3. Install the center baffle. Centre baffle 4. Install the right and left side baffles (right side baffle shown below). Baffle bracket Regency CI1150 Wood Cast Insert... -
Page 18: Stainless Steel Smoke Deflector Installation
Ensure deflector is seated so bolts are seated at the bottom of the slot before tightening. Smoke deflector installed with 2 bolts. Note: This is a cutaway view from the back of the unit 18 | Regency CI1150 Wood Cast Insert... -
Page 19: Seasoned Wood
Two dry pieces banged together sound hollow; wet pieces sound solid and dull. • Dry wood weighs much less than wet wood. • Split a piece of wood. If the exposed surface feels damp, the wood is too wet to burn. Regency CI1150 Wood Cast Insert... -
Page 20: Operating Instructions
Regency Stove causing a draft down your DO NOT USE A GRATE. CAUTION: DO NOT closed. If doors are left partly open, gas chimney. -
Page 21: Fan Operation
Switching from "Auto" to "Manual" or "High" to "Low" may be done at any time. AUTO MANUAL Neutral Manual/ Green Live Ground Auto 120V AC Switch Switch 60 Hz Fan Thermodisc (normally open) White White Black Ground Fan Wiring Diagram Regency CI1150 Wood Cast Insert... -
Page 22: Ash Disposal
GASOLINE, NAPTHA OR ENGINE 7. Your Regency stove can be very hot. You may be OIL. SOME FUELS COULD GENER- seriously burned if you touch the stove while it is... -
Page 23: Maintenance
3. Only burn seasoned wood! Avoid burning kiln dried, wet or green wood. Seasoned wood has been dried at least one year. Regency CI1150 Wood Cast Insert... -
Page 24: Door Gasket
Glass Cleaning breakage. Your Regency Insert is supplied with 5mm Neoceram ceramic glass that will Only clean your glass window when it is cool. Your local retailer can supply withstand the highest heat that your unit will produce. In the event that you... -
Page 25: Handle Replacement
Remove and replace the nuts, washer and spacer as shown. Spacer washers Cleaning & Maintaining a Wood Stove Video Regency CI1150 Wood Cast Insert... -
Page 26: Fan Removal
4) Lift fan housing up off pins on floor of unit. White 8) Disconnect the ground wire located on the left side of the fan housing. Ground wire 9) To install fan - reverse Steps 8-1. Fan Housing Pins on unit floor 26 | Regency CI1150 Wood Cast Insert... -
Page 27: Secondary Air Tube Removal/Installation
Remove. 4. Remove top left and right metal retainers, followed by the fragile three piece C-Cast Baffles, then remove the remaining 2 tubes. Regency CI1150 Wood Cast Insert... -
Page 28: Vertical Stainless Deflector Repalcement
2. Loosen the two 7/16'' bolts + nuts to remove / replace vertical baffle. 3. Repeat steps to install new vertical deflector. NOTE: ENSURE BAFFLE IS PUSHED UP AS FAR AS POSSIBLE. TIGHT TO TOP OF FIREBOX. 28 | Regency CI1150 Wood Cast Insert... -
Page 29: Annual Maintenance
We highly recommend that the chimney cleaning be done by a professional as they will have the necessary tools such as a proper sized brush and special vacuum cleaner designed to deal with fine particles. Regency CI1150 Wood Cast Insert... -
Page 30: Main Assembly Ci1150
Fan Thermodisc 11) 075-062 Primary Air Cover Plate N/S 911-096 120 Volt Power Cord 12) 075-063F Andiron (each) N/S 948-444 Regency Flame Logo Silver 13) 910-157/P Fan Motor N/S 075-021 Firebox Floor Gasket 30 | Regency CI1150 Wood Cast Insert... -
Page 31: Brick Panels
4.250 x 8.000 x 30 DEG BRICK 802-147 3.500 x 4.500 BRICK 802-152 2.000 x 9.000 BRICK 902-111 9.000 x 4.500 STANDARD BRICK RD-14289 4.500 x 7.000 BRICK RD-14288 4.250 x 7.000 BRICK ITEM PART NUMBER QTY. DESCRIPTION Regency CI1150 Wood Cast Insert... -
Page 32: Cast Faceplate
Cast Faceplate Part # Description 156-951 Metallic Black Faceplate CI1150 Top Surround Left Side Surround Right Side Surround Bottom Surround * Not available as a replacement part. CI1150 Bottom Surround 32 | Regency CI1150 Wood Cast Insert... -
Page 33: Warranty
At all times FPI reserves the right to inspect reported complaints on location in the field claimed to be defective prior to processing or authorizing of any claim. Failure to allow this upon request will void the warranty. Revision Date: July 2019 Regency Wood Products Warranty Regency CI1150 Wood Cast Insert... - Page 34 Freight damages for products or parts are not covered under the terms of the warranty. Products made or provided by other manufacturers and used in conjunction with the FPI appliance without prior authorization from FPI may void this warranty. 34 | Regency CI1150 Wood Cast Insert Revision Date: July 2019 Regency Wood Products Warranty...
- Page 35 Product Registration and Customer Support: Thank you for choosing a Regency Fireplace. Regency strives to be a world leader in the design, manufacture, and marketing of hearth products. To provide the best support for your product, we request that you complete a product registration form at http://www.regency-fire.com/Customer-Care/Warranty-Registration.aspx...
- Page 36 Product Registration and Customer Support: Thank you for choosing a Regency Fireplace. Regency strives to be a world leader in the design, manufacture, and marketing of hearth products. To provide the best support for your product, we request that you complete a product registration form found on our Web Site under Customer Care within ninety (90) days of purchase.
- Page 37 Regency CI1150 Wood Cast Insert...
- Page 38 38 | Regency CI1150 Wood Cast Insert...
- Page 39 Regency CI1150 Wood Cast Insert...
- Page 40 Dealer Name & Address: ______________________________________________ ___________________________________________________________________ Installer: ___________________________________________________________ Phone #: ___________________________________________________________ Date Installed: ______________________________________________________ Serial No.: __________________________________________________________ Regency, Alterra are trademarks of FPI Fireplace Products International Ltd ® Printed in Canada © Copyright 2020, FPI Fireplace Products International Ltd. All rights reserved.
Need help?
Do you have a question about the Alterra CI1150 and is the answer not in the manual?
Questions and answers