
Subscribe to Our Youtube Channel
Related Manuals for Watson-Marlow MasoSine MR Series


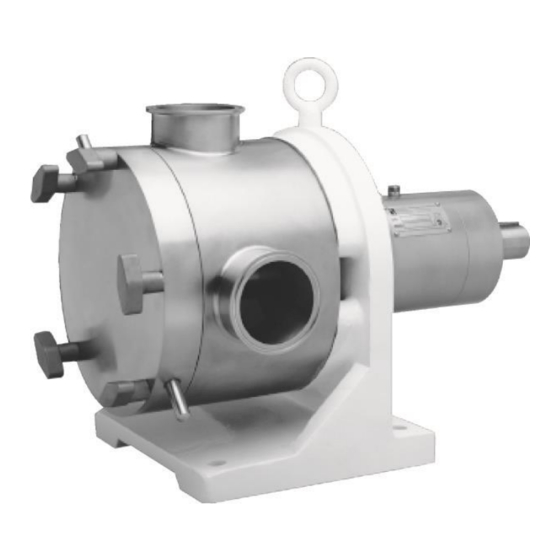
Summary of Contents for Watson-Marlow MasoSine MR Series
- Page 1 Watson-Marlow MasoSine MR-Series Installation & Operation Manual Visit our website at www.masosine.com Revision 1.8 / June 2016...
- Page 2 Icons Used in this Manual The following icons (symbols) are used to indicate specific types of information. Good ideas to use. A reminder to do something. Equipment use alert. Unless you follow these procedures correctly, the equipment may be damaged. Safety alert.
-
Page 3: Table Of Contents
Contents IMPORTANT SAFETY MEASURES ..................4 RECEIVING YOUR MASOSINE PUMP ................5 WARRANTY AND LIABILITY ....................5 INSTALLATION PROCEDURES ..................6 OPERATION GUIDELINES ....................7 WET END DISASSEMBLY ....................8 WET END ASSEMBLY ......................10 POWER END DISASSEMBLY .....................11 POWER END ASSEMBLY ....................12 SEAL SYSTEM - DISASSEMBLY AND ASSEMBLY ............14 SHIMMING FOR PROPER SHAFT LOCATION ..............18 PUMP HOUSING ROTATION INSTRUCTIONS ..............21... -
Page 4: Important Safety Measures
Important Safety Measures Note: It is important that this manual be read completely before attempting operation or disassembly of the MASOSINE PUMP to ensure safety of personnel and to avoid damage to the pump. Be sure to give strict attention to the Installation and Operation sections of this manual. -
Page 5: Receiving Your Masosine Pump
5. Liner/seal housing removal tools have been provided to assist you with maintenance of the MasoSine Pump. These tools (there should be two) can be found in the crating. If there are any questions regarding receiving your pump, please contact Watson-Marlow MasoSine at +49 (0)7062 9560-0 Warranty and Liability Basically our “General sales and delivery conditions”... -
Page 6: Installation Procedures
The Watson-Marlow MasoSine grants no warranty on this documentation as well as no implicit warranties on commercially customary quality and suitability for a certain application. The Watson-Marlow MasoSine undertakes no liability for errors contained in it or consequential damage occurring by chance arising due to the design, performance and the use of this documentation. -
Page 7: Operation Guidelines
Operation Guidelines The following guidelines are important to the proper operation of your MasoSine Pump: 1. Check to be sure that the drive shaft rotation is compatible with the desired rotation of the pump shaft. 2. The suction and discharge nozzles on the pump housing will always remain 90° apart. However, the pump housing can be rotated in 45°... -
Page 8: Wet End Disassembly
Warning: Exceeding the maximum speed rating for your MasoSine Pump could result in severe personal injury or loss of life. Since some pumpages may be adversely affected by operation at high rotor speeds, we recommend that you contact Watson-Marlow MasoSine with pertinent application information before running at or near these speeds. - Page 9 Wet End Disassembly, cont. 1. Remove the front cover, item 400, by removing the five wing nuts, item 441, and sliding the cover off of the front cover studs, item 450. NOTE: Do not use a screwdriver or other prying instrument to separate the cover from the housing.
-
Page 10: Wet End Assembly
Wet End Assembly 1. Place the pump housing, item 300, onto the power frame, item 600, by fitting the opening in the back of the pump housing over the shaft, item 200. NOTE: Be sure that the mating flanges of the power frame and pump housing are free of any debris or nicks, as this may cause misalignment of the rotor. -
Page 11: Power End Disassembly
Wet End Disassembly, cont. 10. The front cover o-ring, item 430, can then be placed into the groove on the front of the pump housing. Applying a food grade lubricant to the o-ring will keep it from slipping out of the groove. 11. -
Page 12: Power End Assembly
Power End Disassembly, cont. 3. Remove the bearing housing mounting cap screws, item 640, which connect the bearing housing, item 700, to the power frame, item 600. The bearing housing may then be removed by pulling the shaft, item 200, and bearing housing away from the power frame. NOTE: Be sure to support the bearing housing such that the shaft will not be damaged when pulling it through the hole in the power frame. - Page 13 Power End Assembly, cont. 5. With the bearing still hot, tighten the bearing locknut, item 750, onto the shaft, only enough to eliminate any float between the shaft and the bearing housing. NOTE: The holes for the set screws must be facing upward or out of the bearing housing when the bearing locknut is installed.
-
Page 14: Seal System - Disassembly And Assembly
Seal System - Disassembly and Assembly Lip Seal Reference the isometric drawing in for parts identification while following the lip seal Figure 4 disassembly and assembly steps. Figure 4 – Lip Seal Disassembly / Assembly Lip Seal Disassembly 1. Using a punch and hammer, remove the single lip seal, item 510, located in the rear of the lip seal housing, item 506. -
Page 15: Figure 5 - O-Ring Seal Disassembly / Assembly
Seal System - Disassembly and Assembly, cont. 2. Place the seal housing in a press with the removal holes at the top of the housing. This side of the seal housing will face into the wet end of the pump. Insert one support ring, item 520, into the seal housing such that the flat surface of the ring rests on the step in the housing. -
Page 16: Figure 6 - Mechanical Disassembly / Assembly
Seal System – Disassembly and Assembly, cont. O-ring Seal Disassembly 1. Remove the dynamic radial o-ring, item 513, from the inner diameter of the o-ring seal housing, item 620. O-ring Seal Assembly 1. Replace the dynamic radial o-ring, item 513, by placing it into the groove on the inner diameter of the o-ring seal housing, item 620. -
Page 17: Table 4 - Mechanical, Press (Into) Plug Diameters
This will mate the stationary ceramic face to the carbon face. 5. For instructions regarding the disassembly and assembly procedures for the double lip seal or the o- ring seal with flush, please contact Watson-Marlow MasoSine at +49 (0)7062 9560-0 Visit our website at www.masosine.com... -
Page 18: Shimming For Proper Shaft Location
Shimming for Proper Shaft Location Proper shaft location will insure that the rotor is positioned in the center of the wet end of the pump. Failure to position the rotor correctly may result in excessive and premature wear to the wet end parts. Here are the steps necessary to shim your MasoSine Pump. -
Page 19: Figure 8 - Scrapergate Installation Instractions
Scrapergate and Scrapergate Guide Installation Instructions The scrapergate has been designed with an angle on each of its ends and a channel on the discharge side for optimum performance and life span. It is used to separate the suction and discharge sides of the pump. -
Page 20: Figure 10 - Scrapergate (Guide) Installation Instructions
Scrapergate and Scrapergate Guide Installation Instructions When inserting the scrapergate into the scrapergate guide, the markings on the ends of both parts must match. This ensures that the wider side of the scrapergate will contact the wider section of the scrapergate guide. -
Page 21: Pump Housing Rotation Instructions
Pump Housing Rotation Instructions The pump housing can be rotated to locate the inlet and outlet nozzles in the three different positions shown in . This allows for six different operating conditions based on the rotation of the pump Figure 11 shaft. -
Page 22: Bearing Oil Lubrication Recommendations
Bearing Oil Lubrication Recommendations There are three plugs located in the bearing housing as shown in below. To determine if the Figure 12 bearings are properly lubricated, remove the level plug. If oil is not visible, remove the fill plug and fill the bearing housing until oil is visible through the level plug hole. -
Page 23: Assembly Instructions For Installation Of Front Cover Hinge
Assembly Instructions for Installation of Front Cover Hinge The front cover hinge is available for the MR-135 and the MR-150 MasoSine Pump. It allows for the front cover to be hinged to the pump housing for easier maintenance. When assembling the front cover hinge, follow the steps below and refer to and the associated parts list. -
Page 24: Figure 13 - Front Cover Hinge
Assembly Instructions for Installation of Front Cover Hinge, cont. Figure 13 – Front Cover Hinge Item Description Part Number Ring Arm (MR-150) 050P460.1304A1 Ring Arm (MR-135) 035P460.1304A1 Pivot Arm 035P461.1304A1 Cap Screw 035P426.1300A1 Washer, Plastic, 3/8 035P463.2636A1 Washer, SS, 3/8 035P463.1304A1 Bolt, 3/8-16 x 1-3/4 035P464.1300A1... -
Page 25: Figure 14 - Removal Tools
How to use the Removal Tools Removal tools are supplied with every new MasoSine Pump. The tools are shaped like skate blades and have a pin extending from one end (see ). These tools are used for removing the rear liner Figure 14 and the seal housing FRONT VIEW... -
Page 26: How To Use The Removel Tools
How to use the Removel Tools To use the tool to remove the rear liner from the pump housing, simply insert the hooked ends of the tools into the slotted ends of the liner and pull forward (See ). Pull on both tools with even Figure 16 pressure when removing the liner to prevent the liner from wedging in the pump housing. -
Page 27: Torque Specifications
Torque Specifications Bearing Bearing Housing Housing Housing Pump Model Rotor Nut Wing Nut Mounting Bolt Mounting Cover Cap Cap Screw Screw ft•lbs N•m ft•lbs N•m ft•lbs N•m ft•lbs N•m ft•lbs N•m MR-120 MR-125 MR-130 MR-135 MR-135RF MR-150 MR-150RF MasoSine Pump Weights Pump Model Pump Only Pump w/Box &... -
Page 28: Troubleshooting The Masosine Pump
Troubleshooting the MasoSine Pump Problem Possible Causes Remedy 1. (A) Check rotation 1. Incorrect shaft rotation (B) Change wiring 2. Change Scrapergate & Guide Inadequate Flow 2. Scrapergate installation 3. (A) Tighten fittings , i.e. Tri Clamp 3. Air leaks – external, internal (B) Replace worn lip seals or (loose fittings, lip seals) o-rings... -
Page 29: Product Line
Product Line MASOSINE PUMP SPECIFICATIONS Max. Max. Displacement Particle Size Capacity Max. (Gallons/Revolution) Inlet/Outlet (Inches) (GPM) Speed Model (CC/Revolution) (Inches) (MM) (MM) (L/H) (RPM) .015 3/16 SPS1 1000 25x25 3,400 MR-120 5,450 50x50 2 1/2x 2 2/2 MR-125 63.5x63.5 12.5 10,900 .124 MR-130... -
Page 30: Software Material Guide
SOFTWARE MATERIAL GUIDE Software Max. Description Color Advantages Disadvantages Material Ratings LINERS Polybutylene Good Performance High Temperature 190° F White Terephthalate Low Cost Abrasives 150 psi High Temperature Good Performance 250° F Polyphenylsulfid Blue Severe Abrasives Chemical Resistance 225 psi SPS-1 / SPS-6 200°... - Page 31 SHAFT SLEEVES Stainless High Temperature 300° F 316 SS Silver Abrasives Steel Low Cost 150 psi Hard Ceramic Oxide Abrasives 300° F Black Higher Cost Coated Coated Stainless High Pressure 150 psi NOTE: The dynamic radial o-ring seal assembly requires the hard coated shaft sleeve. LIP SEALS &...
-
Page 32: Seal Options
Seal Options 1. Lip Seal Assembly 2. O-Ring Seal Assembly This is the standard seal which is used in the The o-ring seal assembly uses a single MasoSine Pump. It consists of three lip seals, elastomeric o- ring to seal the product from two of which are used to seal product into the escaping the pump housing. -
Page 33: Figure 19 - Mechanical Seal Assembly
Seal Options 1. Single Mechanical Seal Assembly The MasoSine Pump mechanical seal arrangement consists of a John Crane Type 9 seal. This uses a stationary ceramic face in contact with a rotating carbon face to achieve the sealing and is rated to product pressures up to 150 psi. -
Page 34: Figure 20 - Double Lip Seal With Flush
Seal Options 3. Double Lip Seal with Flush 4. Double O-Ring Seal with Flush This seal arrangement uses two lip seals and a This seal arrangement uses two o-rings and a flush mediato seal product into the MasoSine flushmedia to seal product into the MasoSine Pump. -
Page 35: Cross Section And Parts
Cross Section and Parts No. Item Description No. Item Description No. Item Description Front Cover Power Frame Cap Screw Seal Housing Front Cover O-Ring Tapered Roller Bearings Lip Seal Support Rings Pump Housing Bearing Lock Nut Shaft Sleeve Bearing Housing Cap Rotor Rotor O-Rings Screw... - Page 36 Wet End Exploded View NOTES; 1. Orientation of the scrapergate, item 125, and the scrapergate guide, item 100 will vary depending on application suction conditions. For details, refer to page 20. 2. Pump housings, item 300, are available with nozzle and jacketing options 3.
- Page 37 Power End Exploded View Note: Shims (Item 800) may vary in both number and thickness. Item No. Description Item No. Description Shaft Oil Seal, Inboard Shaft Key Oil Seal, Outboard Housing Mounting Bolts Baring Lock Nut Housing Mounting Washers Bearing Housing Cover Power Frame Bearing Housing Cover Cap Screws Bearing Housing Mounting Cap...
- Page 38 Dimensions - Inches (Millimeters) Visit our website at www.masosine.com Revision 1.8 / June 2016...
- Page 39 Cross Section and Parts MR150: 13a No. Item Description No. Item Description No. Item Description 400 Front Cover 12 640 Power Frame Cap Screw 340 Housing Mounting Bolt 430 Front Cover O-Ring 13 770 Tapered Roller Bearings 506 Seal Housing 13a 771 300 Pump Housing Tapered Roller Bearing 24...
- Page 40 Wet End Exploded View Notes Orientation of the scrapergate, item 125, and the scrapergate guide, item 100, will vary depending on application suction conditions. For details, refer to page 20. Pump housings, item 300, are available with nozzle and jacketing options. Front covers, item 400, are available with optional jacketing.
- Page 41 Power End Exploded View MR150: 771 Notes: Shims (Item 800) may vary in both number and thickness. Inboard tapered roller bearing, item 770, on the MR-150 is larger than the outboard tapered roller bearing, item 771. Item No. Description Item No. Description Shaft Oil Seal, Inboard...
- Page 42 Dimensions - Inches (Millimeters) Visit our website at www.masosine.com Revision 1.8 / June 2016...
-
Page 43: 200 Shaft
Cross Section and Parts MR150: 13a No. Item Description No. Item Description Item Description 640 Power Frame Cap Screw 340 Housing Mounting Bolt 400 Front Cover 770 Tapered Roller Bearings 430 Front Cover O-Ring 506 Seal Housing MR150 Tapered Roller 300 Pump Housing 520 Lip Seal Support Rings Bearing... - Page 44 Wed End Notes 1. Orientation of the scrapergate, item 125, and the scrapergate guide, item 100, will follow the suction right or "SR" condition. For details, refer to page 20. 2. Pump housings, item 305, are available with nozzle and jacketing options. 3.
-
Page 45: Bearing Housing Mounting Cap
Power End MR150: 771 Notes: 1. Shims (Item 800) may vary in both number and thickness. 2. Inboard tapered roller bearing, item 770, on the MR-150 RF is larger than the outboard tapered roller bearing, item 771. Item No. Description Item No. - Page 46 Dimensions – Inches (Millimeters) Tolerances on dimensions: ± 1/6 (± 1.5mm) Only for reference – without certification do not use for construction Visit our website at www.masosine.com Revision 1.8 / June 2016...
- Page 47 General Notes MR-120 / SPS-20 - MR-150 / SPS-50 Pumps 2. All rotors and certain scrapergates are marked with the symbol **. These are of the MAXRAD design. MAXRAD scrapergates (Item #125) must be used with MAXRAD rotors (Item # 011). Both are marked in the price book with ** for your convenience.
- Page 48 Material Codes and Descriptions MR-120 / SPS-20 - MR-150 / SPS-50 Pumps Code Description 1000 Cast Iron 1100 Carbon Steel 1300 Stainless Steel 1303 303 Stainless Steel 1304 304 Stainless Steel 1316 316 Stainless Steel 1354 17-4PH Stainless Steel 1355 17-4PH Stainless Steel 1360 Nitronic 60 2050...
-
Page 49: Index Of Figures
Index of Figures Figure 1 – Coupling Alignment ....................6 Figure 2 – Nozzle Position ......................7 Figure 3 - Rotation ........................7 Figure 4 – Lip Seal Disassembly / Assembly ................14 Figure 5 – O-Ring Seal Disassembly / Assembly ..............15 Figure 6 –... -
Page 50: Safety Instructions (Atex)
“dust – or gas – explosive areas”! Zone classification The Watson-Marlow MasoSine - Pumps can be used in explosive areas of the zone 1 / 21. This corresponds to the category 2 G / D. It is expressly forbidden to use the pump(s) in the zone 0! Classification of the ex-atmospheres A distinction is made between dust and gas explosive atmospheres. - Page 51 Grounding the pump All supplied pumps are equipped with a grounding option. In particular in ex-areas, the pump must be grounded by fixing a grounding cable to the corresponding position (see diagram). In addition to the grounding of the pump, the motor also needs to be grounded! If the drive is not grounded, the pump aggregate may not be operated.
-
Page 52: Oil Change
Please use the following oil type that is applicable for your application! If the pump is to be used in an area that is combustible where ATEX applies, the oil viewing glass is replaced by a screwed plug. Standard first filling of Watson-Marlow MasoSine Pumps • For –10°C to 60°C Klüberoil 4 UH 1-220 N (lube oil for the food and pharmaceutical industry) - Page 53 If you have questions, give us a call. We will be pleased to help you. Watson-Marlow MasoSine Postfach 100 Steinbeisstraße. 3 D-74358 Ilsfeld (Germany) Telefon : +49 (0)7062 9560-0 Fax : +49 (0)7062 64593 EMail : Info@masosine.com Internet : http://www.masosine.com Visit our website at www.masosine.com...
Need help?
Do you have a question about the MasoSine MR Series and is the answer not in the manual?
Questions and answers