Table of Contents
Advertisement
Quick Links
Advertisement
Table of Contents

Related Manuals for PXM PxArt+ 3


Summary of Contents for PXM PxArt+ 3
- Page 1 PX389 PxArt+ 3 User manual...
-
Page 2: Table Of Contents
8 RDM – available parameters..............13 9 Connection scheme.................15 10 Dimensions.....................16 11 Technical data..................17 Manufacturer reserves the right to make modifications in order to improve device operation. PXM Marek Żupnik sp.k. Podłęże 654 tel. +48 12 385 83 06 32-003 Podłęże mail: info@pxm.pl Rev.1-1 BDO register number 000005972 www.pxm.pl... -
Page 3: Description
Description PxArt + 3 is a professional LED illuminator designed to illuminate museum and exhibition displays. By using the latest semiconductor light sources OSLON Square and ® advanced control electronics, a high-class illuminator has been created that meets very high requirements concerning museum and exposition lighting. Its most important advantages include the total lack of ultraviolet radiation, trace amounts of infrared radiation, very high CRI color rendering index, high brightness and low energy consumption. -
Page 4: Safety Conditions
Safety conditions Caution! Before installing, connecting and using the lamp you have to absolutely read this document. The following symbols are used to underline important information on security on the product and in this manual. Danger! Warning! Warning! Warning! Warning! Risk of loss of life Fire hazard LED light emission,... - Page 5 The PX389 device is powered directly from 230V power grid. Failure to comply with the safety rules may result in electric shock and may endanger the user’s life. Therefore it is necessary to observe the following: 1. Installation should be performed by a person holding the appropriate qualifications, according to the instruction manual.
-
Page 6: Connectors And Control Elements
Connectors and control elements Brightness adjustment PX277 parameter programming connector Indication LED Information on version Below is a description of the PX389 model designations with their explanation: PX389 – XX – YYY – Z XX – beam angle: YYY – CRI and color temperature: Z –... -
Page 7: Dmx Connection
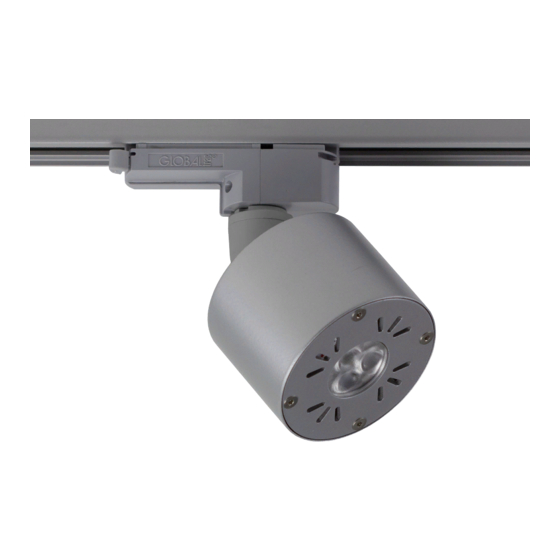
DMX connection PX389 is a device attached to the GLOBAL Trac ® Pulse Control rail by using the GAC 600 adapter included in the kit. 5.1 GLOBAL Trac ® GAC 600 adapter DMX contacts DMX - (on the opposite side DMX +) MAINS POWER SUPPLY protective phase 1 (on the opposite... -
Page 8: Control
Control 6.1 Button The lamp has been equipped with button which allow for changing the brightness level. The button have been placed at the bottom part of the junction box, above the lamp reflector. Depending on a situation, the diode signals the following: •... -
Page 9: Dmx Signal
adjustment direction. The pressing of the adjustment button again will cause the dimming of the lamp (brightness decrease). While the lamp operates, the diode stays switched off (excluding situations mentioned above). 6.2 DMX signal The PX389 lamp can be controlled via one DMX channel. channel 1 –... -
Page 10: Cooperating With The Px277 Configurator
Cooperating with the PX277 configurator Lamp settings can be changed by connecting the PX277 configurator (PxArt+ Settings Controller) to it. It allows in connection with PX389 to define the following parameters: DMX addresses for brightness (in the range of 1 – 512) and device behavior in the absence of DMX signal (programmable scene). - Page 11 Default sett. – factory reset in PX389: Bright. address: 001 • Scene bright: 128 • Smooth: OFF • Smooth time: 0200[ms] • Lighting time – total lighting time (years / days / hours / minutes), Working time – total working time (years / days / hours / minutes), Temp.
-
Page 12: Scheme Of The Px389 Menu In Px277
7.2 Scheme of the PX389 menu in PX277 Model PX389 +MINI NEXT ENTER Bright. address Bright. address 001 * NEXT Scene bright. NEXT 000 * Bright. address 512 * PREV ENTER Scene bright. Scene bright. 128 * NEXT NEXT ENTER Smooth Smooth Scene bright. -
Page 13: Rdm - Available Parameters
RDM – available parameters The PX389 supports the DMX-RDM protocol. DMX protocol allows only of a one-way data transmission, while extension the RDM protocol can transmit information in two directions. This makes possibility of monitoring activities of the compatible devices. Thanks to RDM some available settings of compatible devices may be programmed using this protocol. - Page 14 Parameter name Description FACTORY_DEFAULTS 0x0090 device default settings DMX_PERSONALITY * 0x00E0 DMX operational mode DMX_PERSONALITY_ description of individual 0x00E1 DESCRIPTION operational modes information on the selected SENSOR_DEFINITION 0x0200 temperature sensor SENSOR_VALUE 0x0201 information about sensors DEVICE_HOURS 0x0400 total lamp working time LAMP_HOURS 0x0401 total lamp lighting time SMOOTH_DIS_0/P2P_1/...
-
Page 15: Connection Scheme
Connection scheme 3-phase GLOBAL Trac® Pulse Control bus-bar end feed power supply cable DMX+ DMX- DMX wire (2 wires in screen) GLOBAL Trac® GAC600 adapter... -
Page 16: Dimensions
10 Dimensions... -
Page 17: Technical Data
11 Technical data type PX389 power supply 230V AC number of LEDs power consumption max. increase of the housing temperature +20°C lifetime of diodes 50000h beam angle 10°, 25°, 40° color temperature 2700K, 3000K, 4000K, 5000K, 5700K range of brightness adjustment 0 –... - Page 18 Podłęże, 16.11.2021 DECLARATION OF CONFORMITY PXM Marek Żupnik spółka komandytowa Podłęże 654, 32-003 Podłęże we declare that our product: Product name: PxArt+ 3 Product code: PX389 meets the requirements of the following standards, as well as harmonised standards: PN-EN 60598-1:2021-07...
Need help?
Do you have a question about the PxArt+ 3 and is the answer not in the manual?
Questions and answers