Table of Contents
Advertisement
Quick Links
Advertisement
Table of Contents

Related Manuals for PXM PX178


Summary of Contents for PXM PX178
- Page 1 PX178 Driver LED 6x7,5A/OC Manual...
-
Page 2: Table Of Contents
10. Technical data........................11. Declaration of conformity....................Manufacturer reserves the right to make modifications in order to improve device operation. tel.: +48 12 626 46 92 PXM Marek Żupnik spółka komandytowa fax: +48 12 626 46 94 Podłęże 654 E-mail: info@pxm.pl 32-003 Podłęże... -
Page 3: General Discription
DMX line surge protection device. You can control the PX178 using DMX signals or it can operate independently. In such a case, you can choose from 8 fully programmable scenes and 8 programs, and, in relation to these scenes and programs you can vary playback speed and step transition smoothness. -
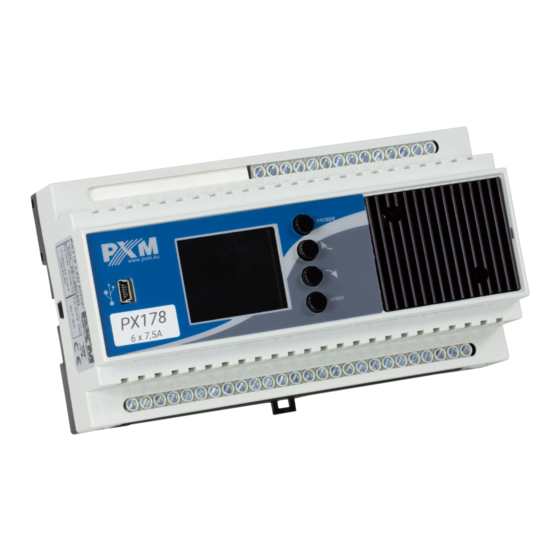
Page 4: Description Of The Connectors And Control Elements
5. All repairs and connections of outputs or DMX signal can only be made with power off. 6. The PX178 should be strictly protected against contact with water and other liquids. 7. All sudden shocks - particularly dropping - should be avoided. -
Page 5: Navigating The Menu
, and then using the „enter” button to change the value. After that you need to save the settings before going level up, this will allow storing value in memory of the PX178. To do this, after moving to the screen button you need to push „enter”... -
Page 6: Use Of The Device
T: 28.8°C housing Menu Other (sample) parameters settings for the No Signal mode for the PX178: a DMX input status message No DMX Signal T: 28.8°C driver operating mode when no DMX signal is available... -
Page 7: Programming The Device
6. DEVICE PROGRAMMING After you confirm your selection of the [Menu] option by pressing the “enter” button, a sub- menu will display, allowing you to select the available options. In order to program any of the options, select an option and confirm your selection by pressing the “enter” button. This will take you to a feature menu screen where you can set all the parameters and features. -
Page 8: Drivers' Working Mode
6.2. Drivers' working mode [Driver Mode] - this option allows you to set the number of DMX channels used and the method they will use to control the output channels: RGBW change mode window, after selecting the RGBWA selected operating mode, confirm with "enter” RGBWAX RGBD RGBWD... -
Page 9: Channel's Balance
CCW Dyn. - a mode for a lamp fitted with 2x cool diodes and 1x warm diode, with a dimming Ÿ feature in the second channel; WWC Dyn. - similarly as above, only for the following colours: 2 x warm white and cool white. Ÿ... -
Page 10: No Dmx Signal
6.4. No DMX Signal In this menu, you can configure the response of the device if no DMX signal is received. The astronomic clock feature is one of the options you can enable. This feature will switch on and off your lighting system according to sunrise and sunset;... - Page 11 RTC Clock - The astronomical clock allowing for switching on and off e.g. a particular program, Ÿ scene, or lamps according to sunrise and sunset times or times set by the user. To proceed to program this menu, you need to select the [RTC Clock] option and confirm your selection by pressing the “enter”...
-
Page 12: Programs Edit
6.5. Programs Edit [Program edit] is a menu in which you can set the parameters of subsequent programs and the scenes (which are subsequent steps of the program) these programs consist of. With this option, you can set the course of a particular program which the driver can subsequently use when operating in the no DMX signal mode. -
Page 13: Scenes Edit
The [Temperature limits] option allows you to set a temperature limit which, if reached, triggers power reduction or causes the device powered by the driver to be turned off. The temperature sensor is installed inside the PX178. The graph below shows how this feature operates:... -
Page 14: Clock And Date
Temperature limitation 50 °C brightness reduction trigger temperature (set within Sensor 1 On the range of 20÷70°C) 90 °C Sensor 1 Off temperature at which brightness is totally reduced 29.1°C (e.g. lamps are turned off) - set within the range of 100% 20÷90°C current temperature and power output level... -
Page 15: Screensaver
Screensaver Time – 6.10. Local settings The local settings are responsible for setting the location of your PX178 device according to geographical coordinates (longitude and latitude), and for setting the time zone in which the device operates. Time zone + –... -
Page 16: Pwm Frequency
6.11. PWM frequency [PWM frequency] - This allows you to change the LED refresh rate from 287 Hz to 1082 Hz. Changing to a higher frequency enables the "flicker free" mode. This feature is very useful for the purpose of controlling lamps in television studios. It allows the user to prevent unpleasant flicker effect that is due to inadequate synchronisation of the LED control signal. - Page 17 4. Packet gap – Interval between packets from the last slot to the Break start (Mark after last channel). The PX178 allows for setting this parameter within the range of 16 - 5000 μs. 5. Channels number – This feature allows you to reduce the number of channels being sent by...
-
Page 18: Input Dmx
6.13. Input DMX The [Input DMX] menu is a graphical view of the DMX512 signal that is being received by the driver. The right-hand side picture shows the screen displayed when no DMX signal is being received by PX 178: Brak syg. -
Page 19: Language
“enter”. 6.16. Firmware info In this submenu, you can check the firmware and bootloader version installed on your PX178 driver. You can also restore the default settings implemented on the device. Firmware version software version information 02.07... -
Page 20: Connection Scheme
7. CONNECTION SCHEME a) Connection between LED strip group and a common power supply LED strip group LED strip group PX178 LED Driver 6x7,5A LED strip group DMX controller e.g PX333 LED strip group D C O K power supply... - Page 21 Connection between a LED strip group and two power supply units D C O K power supply 12-24 V DC LED strip group LED strip group PX178 LED Driver 6x7,5A LED strip group DMX controller e.g PX333 LED strip group...
-
Page 22: Dmx Signal Connection
DMX SIGNAL CONNECTION PX178 have to be connected to the DMX line in series, with no branching on the control cable. This means that the cable should be connected to DMX IN on driver, and then from the DMX OUT to the next DMX receivers. -
Page 23: Declaration Of Conformity
012 626 46 92 http://www.pxm.pl 32-003 Podłęże fax: 012 626 46 94 DECLARATION OF CONFORMITY PXM Marek Żupnik spółka komandytowa Podłęże 654, 32-003 Podłęże we declare that our product: Product name: Driver LED 6x7,5A/OC Product code: PX178 smeets the requirements of the following standards as well as harmonised...
Need help?
Do you have a question about the PX178 and is the answer not in the manual?
Questions and answers