Table of Contents
Advertisement
Quick Links
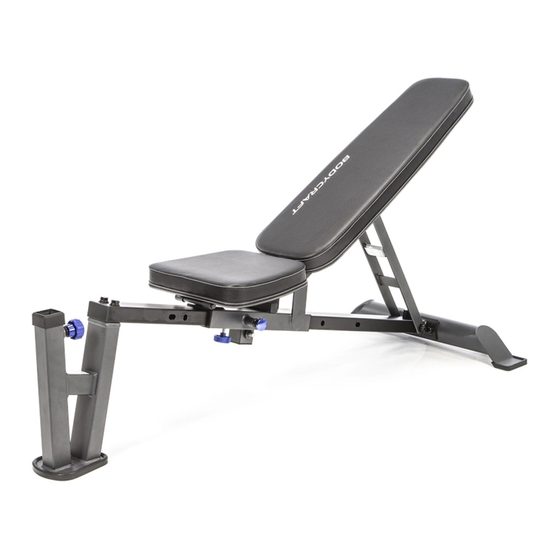
Flat/Incline/Decline System Bench
F704
To see in
Open your Camera
FULL COLOR
App and point it at
the QR Code
& addition information,
scan this QR code
Base Serial Number: _ _ _ _ _ _ _ _ _ _ _ _ _
Purchased Date: ___ / ___ / ______
Dealer's Name:__________________________
Please register your products at:
https://www.bodycraft.com/product-registration/
Serial Number
Owner's Manual
F704 v1.4
1
Advertisement
Table of Contents

Summary of Contents for BodyCraft F704
- Page 1 QR code Base Serial Number: _ _ _ _ _ _ _ _ _ _ _ _ _ Purchased Date: ___ / ___ / ______ Dealer’s Name:__________________________ Please register your products at: https://www.bodycraft.com/product-registration/ Serial Number Owner’s Manual F704 v1.4...
- Page 2 Your BODYCRAFT machine has all the quality and design elements to make your workout extremely efficient and comfortable. Your new unit is a serious cardio machine that will keep you motivated, challenged and within reach of your fitness goals.
-
Page 3: Table Of Contents
Table of Contents Page Page Product Safety Information Product Safety ……………………………………………………………... Important Notes, Recommended Tools & Cleaners …………………….. Product Overview Machine Dimensions & Adjustments ……………...……………………... Assembly Parts List ………………………………………………………… How to Assemble Product Assembly Instructions ..........…………... Maintenance & Repairs Parts Exploded View .………………………………….…………………… Detailed Parts Lists ………….……………………………………….…….. -
Page 4: Product Safety
It is imperative that you retain this Assembly Instructions and be sure all warning labels are legible and intact. Replacement Assembly Instructions and labels are available from BODYCRAFT. If you are unsure about the proper use of the BODYCRAFT strength machine call your local BODYCRAFT dealer or our Customer Service Department. Contact BODYCRAFT at 800-990-5556 or support@bodycraft.com... -
Page 5: Important Notes, Recommended Tools & Cleaners
Important Notes, Recommended Tools & Cleaners Important Notes and Tips: Before assembly, read all instructions thoroughly and preview diagrams to help make the installation easier. 2. Make sure all parts are accounted for and in proper condition before beginning assembly. See the parts list. -
Page 6: Machine Dimensions& Adjustments
Machine Dimensions& Adjustments ¾ View Top View Front View Side View Overall Dimensions 28.5”W x 59.3”D x 18.1”H To adjust bench the angle of choice: 0° Flat Loosen Black KNOB, then Pull the Blue PIN 80° Incline -18° Decline... -
Page 7: Assembly Parts List
F704-010 FLAT WASHER, 1/2" - BLACK F704-011 FLAT WASHER, 3/8" - BLACK F704-012 NYLON NUT, THICK, 1/2" - BLACK F704-013 HEX BOLT, 1/2" x 4-1/2" - BLACK F704-014 HEX BOLT, 1/2" x 4" - BLACK F704-015 HEX BOLT, 1/2" x 2-1/4" - BLACK F704-016 HEX BOLT, 3/8"... -
Page 8: Product Assembly Instructions
Product Assembly Place all parts from the box in a cleared area and position them on the floor in front of you. Remove all packing materials from your area and place them back into the box. Do not dispose of the packing materials until assembly is completed. - Page 9 Product Assembly Please Hand Tighten All Bolts Until end of STEP 2 TEP 2a: Front Upright to Main Frame Attach FRONT UPRIGHT - Assembly (3-ASM) to the MAIN FRAME - Assembly (1-ASM) using: ● Two HEX BOLTS, 1/2" X 2-1/4" (15) ●...
- Page 10 Product Assembly TEP 3a: Back Support Frame Attach Back Support - Assembly (5-ASM) to the Seat Slider- Assembly (2-ASM) using: ● One HEX BOLT, 1/2" X 5" (17) ● One FLAT WASHER, 1/2" (10) ● One NYLON NUT, THICK, 1/2"(12) Continue to attach Back Adjuster (25) to the Main Frame - Assembly (1-ASM) using: ●...
- Page 11 Product Assembly Please Hand Tighten All Bolts Until End of STEP 4 Recommended Tools 9/16 SOCKET & 9/16 WRENCHES 6” EXTENSION TEP 4b: Seat Pad Attach SEAT PAD (8) to the two SEAT HINGES (6) using: ● Two HEX BOLTS, 3/8" X 1" (16) ●...
-
Page 12: Parts Exploded View
Parts Exploded View... -
Page 13: Detailed Parts Lists
F704-018 HEX BOLT, 3/8" x 2-1/4" - BLACK F704-019 SPRING WASHER STEEL, 1/2" - BLK F704-020 BUSHING F704-021 BUMPER F704-022 BOTTOM HEAD BOLT, 5/16" X 1" - BLK F704-023 RECT. END PLUG F704-024 FLAT WASHER, 5/16" - BLACK F704-025 BACK ADJUSTER... -
Page 14: Information Needed Prior To Contacting Customer Support
Heart Rate Monitoring Device & Exercise Tips... -
Page 15: Product Warranty
If the item exhibits such a defect, BODYCRAFT will, at its option, repair or replace it without cost for parts. Shipping and handling charges may apply. (BODYCRAFT may require return of the part(s) or photographic evidence of the damaged part(s) prior to replacement.) Serial number is required. -
Page 16: Product Warranty Registration
The information you provide will never be distributed to any other individuals or agencies for any purpose. If you prefer to mail your warranty card, have the owner of the product complete the information below and return it to BODYCRAFT within 30 days from the date of equipment installation.


Need help?
Do you have a question about the F704 and is the answer not in the manual?
Questions and answers