Edwards nEXT85 Original Instructions Manual
Service tool kit
Hide thumbs
Also See for nEXT85:
- Instruction manual (106 pages) ,
- Instruction manual (112 pages) ,
- Instruction manual (33 pages)

Related Manuals for Edwards nEXT85


Summary of Contents for Edwards nEXT85
- Page 1 SERVICE TOOL KIT Publication Number: B8G2-00-840 Issue: A Original Instructions edwardsvacuum.com...
-
Page 2: Copyright Notice
B8G2-00-840A - Copyright notice Copyright notice © Edwards Limited 2017. All rights reserved. Trademark credits Edwards and the Edwards logo are trademarks of Edwards Limited. Page 2... -
Page 3: Table Of Contents
B8G2-00-840A - Contents Contents Copyright notice..................... 2 Trademark credits....................2 List of Figures......................4 List of Tables......................5 Safety and compliance Definition of Warnings and Cautions................6 Safety symbols........................ 6 General description Overview........................7 Pre-service Unpack and inspect......................8 Additional tools and items required................9 Service kit........................ -
Page 4: List Of Figures
B8G2-00-840A - List of Figures List of Figures Figure 1: Pin spanner adaptor....................8 Figure 2: Bearing module extractor tool................... 8 Figure 3: Bearing preload measurement and setting tool............9 Figure 4: Locating the preload tool (NW40 variant shown)............ 10 Figure 5: Oil cartridge removal.................... -
Page 5: List Of Tables
B8G2-00-840A - List of Tables List of Tables Table 1: Checklist of components for the bearing exchange tool kit B8G200845..... 8 Table 2: Front panel symbols and their functions..............19 Page 5... -
Page 6: Safety And Compliance
Safety symbols The safety symbols on the products denote areas where care and attention is required. The following safety symbols may be used on the nEXT85 or throughout the product documentation. Warning/Caution An appropriate safety instruction should be followed or caution to a potential hazard exists. -
Page 7: General Description
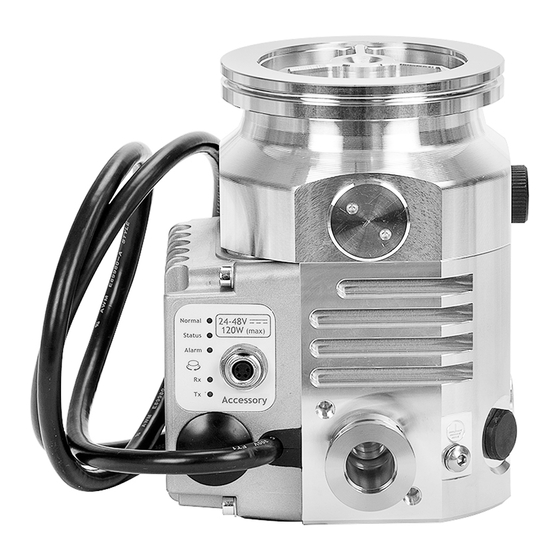
B8G2-00-840A - General description General description Overview This manual provides step by step instructions for the removal and insertion of the bearing module on the nEXT85 pump. Remove the bearing module as specified in this manual. Page 7... -
Page 8: Pre-Service
B8G2-00-840A - Pre-service Pre-service Unpack and inspect Remove all packaging and check that all items listed in Table 1 on page 8 have been received. If any of these items are missing, notify the supplier in writing within three days. Table 1 Checklist of components for the bearing exchange tool kit B8G200845 Quantity Description... -
Page 9: Additional Tools And Items Required
B8G2-00-840A - Pre-service Figure 3 Bearing preload measurement and setting tool Additional tools and items required Additional tools are required to perform a bearing module and oil cartridge replacement. These items are not part of the bearing exchange tool kit B8G200845 and will need to be acquired separately. -
Page 10: Bearing Preload Familiarisation
B8G2-00-840A - Pre-service In order to become familiar with how to recognise bearing preload after a service, it is recommended that the instructions in Bearing preload familiarisation on page 10 are followed. Bearing preload familiarisation CAUTION: Ensure all tools are clean and free of dirt and grease to avoid contamination of the rotor. -
Page 11: Service
B8G2-00-840A - Service Service It is highly recommended that the bearing module service should be performed in a clean environment, free from contamination (metallic debris, dust, human skin and hair). To ensure this: • Clean the immediate working area and wipe clean the base of the pump with a lint- free cloth before starting work. -
Page 12: Oil Feed Nut Removal
B8G2-00-840A - Service Figure 5 Oil cartridge removal 1. 4 x M4 button head screws 2. Oil cartridge base cap Tools (A or B) A. 2.5 mm AF hex key B. T-bar Oil feed nut removal Refer to Figure 6 on page 13. -
Page 13: Bearing Retaining Nut Removal
B8G2-00-840A - Service Figure 6 Oil feed nut removal 1. Oil feed nut Tools A. T10 Torx drive bit B. Torque driver C. T15 Torx screwdriver Bearing retaining nut removal Refer to Figure 7 on page 13. 1. Using the combination of tools, engage the pins of the pin spanner adaptor into the pump bearing retaining nut. -
Page 14: Bearing Module Removal
B8G2-00-840A - Service Tools A. Torque driver B. ¼” square drive Bearing module removal Refer to Figure 8 on page 14. 1. Screw the bearing extractor sleeve onto the bearing module. Note: The bearing anti-rotating tube may be used to prevent the bearing from rotating while the extractor sleeve is fitted. -
Page 15: Bearing Retaining Nut Assembly
B8G2-00-840A - Service Note: The bearing anti-rotating tube may be used to prevent the bearing from rotating while the extractor sleeve is removed. Figure 9 Bearing module insertion Bearing retaining nut assembly Refer to Figure 10 on page 15. 1. Using the combination of tools, engage the bearing retaining nut onto the pins of the pin spanner adaptor. -
Page 16: Oil Feed Nut Assembly
B8G2-00-840A - Service Tools A. Torque driver B. ¼” square drive Oil feed nut assembly Refer to Figure 11 on page 16. 1. Screw the oil feed nut onto the end of the shaft. This can be performed by hand. 2. -
Page 17: Bearing Preload Check
B8G2-00-840A - Service Note: If replacing the oil cartridge only, go straight to Service counter reset on page 18 after following this instruction. Figure 12 Oil cartridge assembly 1. 4 x M4 button head screws Tools A. Torque driver B. 4 mm hex bit Bearing preload check The bearing preload tool checks that the bearing preload force is correctly set. -
Page 18: Service Counter Reset
B8G2-00-840A - Service falls within the pass limit. When confident that the preload force has been correctly set, proceed to Service counter reset on page 18. 4. If no preload is detected, slowly turn the preload tool body clockwise until preload is established in accordance with Preload check on page 9. -
Page 19: Reset The Service Interval Using A Turbo Instrument Controller (Tic)
B8G2-00-840A - Service WARNING: Following a service counter reset the pump may enter a short setup / test routine. During this period some movement of the rotor may occur. To ensure safety of the user, in line with the product instruction manual, install the pump in the vacuum system before connecting the motor controller to the power supply. -
Page 20: Reset The Service Interval Using A Pc Serial Command
USB service port. It can be used to control, monitor, configure and data log the nEXT85 pump and also to view service status, reset service intervals and upgrade the software embedded in the motor controller. -
Page 21: Reset The Service Interval Using The Turbo Drive Standby Speed Control Buttons
Reset the service interval using the turbo drive standby speed control buttons The service interval may be reset using the nEXT85 drive standby speed control buttons. 1. To proceed, ensure the drive is powered. Using a suitable implement such as the end of a ballpoint pen, press both the increase and decrease standby speed buttons simultaneously for more than 5 seconds. -
Page 22: Pump Checks
Vacuum leak check For a helium leak detector, leak checking the pump on the system against the specified system leak rate is highly recommended. Operational checks Refer to the Operation section of the nEXT85 pump instructional manual B8G0-00-880. Page 22... - Page 24 © Edwards Limited . All rights reserved edwardsvacuum.com Edwards and the Edwards logo are trademarks of Edwards Limited...
- Page 25 This page has been intentionally left blank.
- Page 26 This page has been intentionally left blank.
- Page 27 Download the latest documents from www.edwardsvacuum.com/HSForms/, follow the procedure in HS1, fill in the electronic HS2 form, print it, sign it, and return the signed copy to Edwards. Note: If we do not receive a completed HS2 form, we will not accept the return of the...
- Page 28 edwardsvacuum.com...
Need help?
Do you have a question about the nEXT85 and is the answer not in the manual?
Questions and answers