Table of Contents
Advertisement
Quick Links
Advertisement
Table of Contents

Related Manuals for KaVo K-ERGOgrip 4944


Summary of Contents for KaVo K-ERGOgrip 4944
- Page 1 Instructions for use K-ERGOgrip 4944 Always be on the safe side.
- Page 2 Distributed by: Manufacturer: KaVo Dental GmbH Kaltenbach & Voigt GmbH Bismarckring 39 Bismarckring 39 D-88400 Biberach D-88400 Biberach Phone +49 (0) 7351 56-0 www.kavo.com Fax +49 (0) 7351 56-1488...
-
Page 3: Table Of Contents
Instructions for use K-ERGOgrip 4944 Contents Contents 1 User instructions............................... 4 1.1 User guide..............................4 1.1.1 Abbreviations..........................4 1.1.2 Symbols............................4 1.1.3 Target group..........................4 1.2 Service..............................4 1.3 Warranty terms and conditions......................... 5 1.4 Transportation and storage........................5 1.4.1 Currently valid packaging regulations.................. -
Page 4: User Instructions
Instructions for use K-ERGOgrip 4944 1 User instructions | 1.1 User guide 1 User instructions 1.1 User guide Requirement Read these instructions prior to first use to avoid misuse and prevent damage. 1.1.1 Abbreviations Abbre‐ Explanation viation Instructions for use... -
Page 5: Warranty Terms And Conditions
12 months from the date of purchase as confirmed by the salesperson. In case of justified complaints, KaVo will honour its warranty with a free replacement or repair. -
Page 6: Information On The Packaging: Storage And Transportation
(in accordance with the General German Freight Forwarders´ Terms and Conditions, Art. 28) Outside Germany Note KaVo shall not be held liable for damage arising from transportation. The shipment must be checked on arrival. If the packaging is visibly damaged on delivery, please proceed as follows: 1. - Page 7 Instructions for use K-ERGOgrip 4944 1 User instructions | 1.4 Transportation and storage Transport upright with the arrows pointing upwards! Fragile - protect against impact! Protect from moisture! Permissible stacking load Temperature range Humidity Air pressure 7 / 30...
-
Page 8: Safety
Instructions for use K-ERGOgrip 4944 2 Safety | 2.1 Description of safety instructions 2 Safety 2.1 Description of safety instructions 2.1.1 Warning symbol Warning symbol 2.1.2 Structure DANGER The introduction describes the type and source of the hazard. This section describes potential consequences of non-compliance. -
Page 9: Product-Specific
Any waste which is generated must be recycled or disposed of in strict compliance with all applicable national regulations in a manner which is safe both for people and the environment. If you have any questions regarding proper disposal of the KaVo product, please contact the KaVo branch. CAUTION Improper maintenance or repair of the unit. - Page 10 Instructions for use K-ERGOgrip 4944 2 Safety | 2.2 Safety instructions CAUTION Risk due to incorrectly stored handpiece. Injury caused by chucked drill or grinder. Damage to clamping system caused by handpiece falling down. ▶ Store the handpiece properly in a tray or tool carrier.
-
Page 11: Product Description
This product has only been approved for use indoors. The overarching guidelines and/or national laws, national regulations and the rules of technology applicable to the startup and use of the KaVo product for the intended pur‐ pose are to be applied and complied with. -
Page 12: Scope Of Delivery
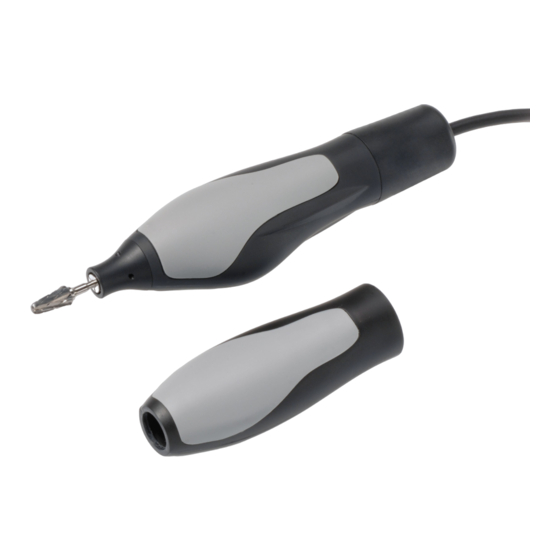
Instructions for use K-ERGOgrip 4944 3 Product description | 3.3 Scope of delivery 3.3 Scope of delivery Figure Description Material number K-ERGOgrip 4944 hand‐ Mat. no. 1.003.7555 piece Grip sleeve Mat. no. 1.003.8708 Clamp Mat. no. 1.004.1148 Cleaning brush Mat. no. 0.229.3205 Instructions for use 3.4 Technical Data... - Page 13 Instructions for use K-ERGOgrip 4944 3 Product description | 3.4 Technical Data Ambient conditions Permissible ambient temperature range C to +40 Permissible up to a maximal relative hu‐ 80 % midity of Intermittent mode Operating time 2 minutes / ON...
-
Page 14: First Use
Instructions for use K-ERGOgrip 4944 4 First use | 3.4 Technical Data 4 First use Requirement The handpiece must only be operated and stored with the tool or test probe chucked. Note Do not switch the handpiece on while the chuck is open! Note When it is new, you can hear a soft, irregular "clicking"... -
Page 15: Operation
Instructions for use K-ERGOgrip 4944 5 Operation | 5.1 Replacing the grip sleeve 5 Operation Note Note the safety instructions before each use. 5.1 Replacing the grip sleeve The handpiece is supplied fitted with an ERGOgrip grip sleeve. ▶ Take hold of the handpiece by the grip sleeve ② insert the clip into the tip ① and unscrew the tip ①... -
Page 16: Using/Changing The Tool
Note Once you have inserted the tool (insert the tool as far as it will go, tool shaft length: minimum 16 mm) you need to check the functionality of the chuck. KaVo recom‐ mends a grip test at 50 N. - Page 17 Instructions for use K-ERGOgrip 4944 5 Operation | 5.3 Operation ▶ Operate the handpiece as specified in the instructions for use of the upstream control unit. 17 / 30...
-
Page 18: Maintenance
Instructions for use K-ERGOgrip 4944 6 Maintenance | 6.1 Servicing 6 Maintenance CAUTION Ingress of dust or liquids into the handpiece. Damage to ball bearings and O-rings. ▶ Never use compressed air or cleaning agents (such as spray cleaners, degreas‐... - Page 19 Instructions for use K-ERGOgrip 4944 6 Maintenance | 6.1 Servicing ▶ Remove the felt ring ① from the rotor ②. ▶ Using an open-ended spanner (16 mm), unscrew the bearing housing ② from the sleeve ④ in the direction indicated by the arrow and remove the bearing housing ②.
- Page 20 Instructions for use K-ERGOgrip 4944 6 Maintenance | 6.1 Servicing Fitting the ball bearing DANGER Risks due to strong permanent-magnet field The functions of implanted systems (such as pacemakers) can be influenced. Metal objects can be attracted and in the event of impact may damage the permanent magnet, for example.
-
Page 21: Replacing The Cable
Run through the speed range of the handpiece and check for unusual noise. Note To increase the service life of the ball bearings, KaVo recommends the following: After changing the ball bearing, let the handpiece idle for about 60 minute at 10,000 to 15,000 rpm. -
Page 22: Cleaning
Instructions for use K-ERGOgrip 4944 6 Maintenance | 6.2 Cleaning ▶ Plug the connection cable ② firmly into the handpiece ① and screw the knob ③ back onto the handpiece ①. Note Check the functionality of the handpiece. 6.2 Cleaning 6.2.1 Weekly cleaning of chuck and handpiece section... - Page 23 Instructions for use K-ERGOgrip 4944 6 Maintenance | 6.2 Cleaning ▶ Turn the grip sleeve ① and knob ② in opposite directions as indicated by the ar‐ rows until the chuck closes again completely. Do not use a tool to do this! ▶...
-
Page 24: Cleaning The Grip Sleeve
Note Once you have inserted the tool (insert the tool as far as it will go, tool shaft length: minimum 16 mm) you need to check the functionality of the chuck. KaVo recom‐ mends a grip test at 50 N. -
Page 25: Troubleshooting
Instructions for use K-ERGOgrip 4944 7 Troubleshooting | 6.2 Cleaning 7 Troubleshooting Malfunction Cause Remedy ▶ Close the chuck correctly The handpiece cannot ro‐ Handpiece is blocked, with the tool in-situ. tate or temporarily shuts clamping system may be off. -
Page 26: Accessories
Instructions for use K-ERGOgrip 4944 8 Accessories | 6.2 Cleaning 8 Accessories Presentation Material summary Material number Handpiece tray 1.005.3460 Chuck 3.00 mm 1.003.8262 Socket wrench 1.004.0255 Docking guide 1.005.3461 26 / 30... -
Page 27: Spares
Instructions for use K-ERGOgrip 4944 9 Spares | 6.2 Cleaning 9 Spares 05 / 2007 27 / 30... -
Page 28: Declaration Of Conformity
Instructions for use K-ERGOgrip 4944 10 Declaration of conformity | 6.2 Cleaning 10 Declaration of conformity 28 / 30...
Need help?
Do you have a question about the K-ERGOgrip 4944 and is the answer not in the manual?
Questions and answers