
Subscribe to Our Youtube Channel
Related Manuals for ProLights DIGIDRIVER


Summary of Contents for ProLights DIGIDRIVER
- Page 1 DIGIDRIVER DIGITILE144 DIGIBAR160 DIGISTRIP40 DIGITUBE MANUALE UTENTE USER MANUAL IT - EN...
- Page 2 Music & Lights S.r.l. si riserva ogni diritto di elaborazione in qualsiasi forma delle presenti istruzioni per l’uso. La riproduzione - anche parziale - per propri scopi commerciali è vietata. Al fine di migliorare la qualità dei prodotti, la Music&Lights S.r.l. si riserva la facoltà di modificare, in qualunque momento e senza preavviso, le specifiche menzionate nel presente manuale di istruzioni.
-
Page 3: Table Of Contents
2. 1 Montaggio DIGIDRIVER 2. 2 Distanza massima di cablaggio 3 Funzioni e impostazioni 3. 1 Funzionamento 3. 2 Impostazione base 3. 3 Struttura menu DIGIDRIVER 4 Manutenzione 4. 1 Manutenzione e pulizia del sistema 4. 2 Sostituzione fusibile Certificato di garanzia Contenuto dell'imballo: • DIGIDRIVER/DIGITILE144/... -
Page 4: Avvertenze Generali
DIGI series ATTENZIONE! Prima di effettuare qualsiasi operazione con l’unità, leggere con attenzione questo manuale e conservarlo accuratamente per riferimenti futuri. Contiene informazioni importanti riguardo l’installazione, l’uso e la manutenzione dell’unità. SICUREZZA Avvertenze generali • I prodotti a cui questo manuale si riferisce sono conformi alle Direttive della Comunità Europea e per- tanto recano la sigla . -
Page 5: Informazioni Generali
DIGI series INFORMAZIONI GENERALI Spedizioni e reclami Le merci sono vendute “franco nostra sede” e viaggiano sempre a rischio e pericolo del distributore/clien- te. Eventuali avarie e danni dovranno essere contestati al vettore. Ogni reclamo per imballi manomessi dovrà essere inoltrato entro 8 giorni dal ricevimento della merce. Garanzie e resi Il prodotto è... -
Page 6: Descrizione E Specifiche Tecniche
(DIGITUBE, DIGIBAR, DIGISTRIP e DIGITILE). Può gestire fino a 24 DIGISTRIP, 16 DIGITUBE, 6 DIGIBAR e 6 DIGITILE; dispone di 6 universi DMX e 350W di potenza in uscita, tutto in un’unità rack. DIGIDRIVER è compatibile con protocolli Art-Net e Kling-Net; convoglia segnale e alimentazione in un unico cavo a 4 poli, offrendo una maggiore stabilità... -
Page 7: Digitile144
L’unità di controllo DIGIDRIVER esterna è compatibile con protocolli ArtNet e KlingNet; convoglia segnale e alimentazione in un unico cavo a 4 poli, offrendo una maggiore stabilità... -
Page 8: Digibar160
L’unità di controllo DIGIDRIVER esterna è compatibile con protocolli Art-Net e Kling-Net; convoglia segnale e alimentazione in un unico cavo a 4 poli, offrendo una maggiore stabilità... -
Page 9: Digistrip40
L’unità di controllo DIGIDRIVER esterna è compatibile con protocolli Art-Net e Kling-Net; convoglia segnale e alimentazione in un unico cavo a 4 poli, offrendo una maggiore stabilità... -
Page 10: Digitube
360°, DIGITUBE aggiunge la terza dimensione nella creazione di visual show. Ogni tubo, lungo 1 metro, è dotato di 2 righe da 40 LED RGB/FC e di controllo pixel2pixel. L’unità di controllo DIGIDRIVER esterna è compatibile con protocolli Art-Net e Kling-Net; convoglia segnale e alimentazione in un unico cavo a 4 poli, offrendo una maggiore stabilità... -
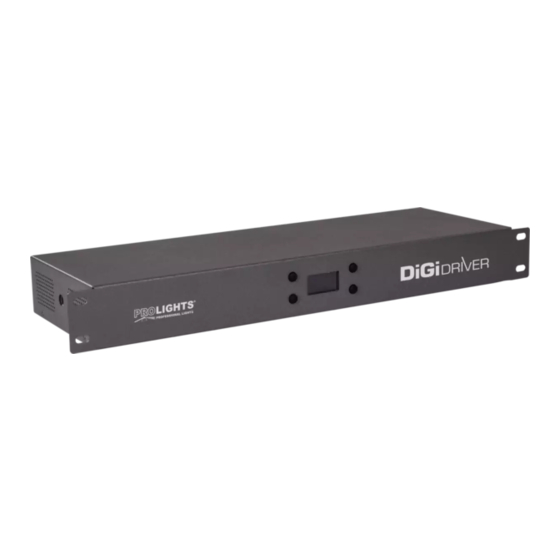
Page 11: Elementi Di Comando E Collegamenti
DIGI series 1.6 ELEMENTI DI COMANDO E COLLEGAMENTI DIGIDRIVER DiGi DRIVER Fig.6 1. FORI DI FISSAGGIO per il montaggio rack 5. GND POINT usato per la messa a terra del 2. PANNELLO DI CONTROLLO con display e 4 dispositivo pulsanti per accesso e gestione delle diverse 6. -
Page 12: Installazione
- 2 - INSTALLAZIONE 2.1 MONTAGGIO DIGIDRIVER L‘ unità di gestione e alimentazione DIGIDRIVER deve essere collocata in modo stabile su una superficie piana non infiammabile, oppure può essere montata in un rack da 19” per mezzo delle viti che devono essere inserite negli appositi fori presenti sul corpo del dispositivo, come mostrato in figura 7. -
Page 13: Funzioni E Impostazioni
- 3 - FUNZIONI E IMPOSTAZIONI 3.1 FUNZIONAMENTO Eseguire il collegamento delle unità secondo lo schema esemplificativo indicato in figura 8. Per accendere il DIGIDRIVER inserire la spina del cavo di alimentazione in una presa di rete (100-240V~/50-60Hz). Input segnale: Ethernet (RJ45) -
Page 14: Impostazione Base
DIGI series 3.2 IMPOSTAZIONE BASE Il DIGIDRIVER dispone di un display OLED e 4 pulsanti per accesso alle funzioni del pannello di controllo (fig.9). MENU DOWN ENTER MENU DOWN ENTER Per scorrere il menu Per scorrere attraverso le Per scorrere attraverso le... -
Page 15: Struttura Menu Digidriver
DIGI series 3.3 STRUTTURA MENU DIGIDRIVER Main Level Programming Levels Default Description ð Protocol Kling-Net Art-Net Art-Net ð Auto Address No - Yes Auto LED Address ð Subnet 0 - 15 Sets the subnet address ð Universe#1 0 - 15 Sets the universe #1 address ð... -
Page 16: Manutenzione
DIGI series - 4 - MANUTENZIONE 4.1 MANUTENZIONE E PULIZIA DEL SISTEMA • Durante gli interventi, assicurarsi che l’area sotto il luogo di installazione sia libera da personale non qualificato. • Tutte le viti utilizzate per l’installazione dell’unità e le sue parti devono essere assicurate saldamente e non devono essere corrose. - Page 18 All rights reserved by Music & Lights S.r.l. No part of this instruction manual may be reproduced in any form or by any means for any commercial use. In order to improve the quality of products, Music&Lights S.r.l. reserves the right to modify the characteristics stated in this instruction manual at any time and without prior notice.
- Page 19 2. 1 Mounting DIGIDRIVER 2. 2 Maximum cable distance 3 Functions and settings 3. 1 Operation 3. 2 Basic setup 3. 3 DIGIDRIVER menu structure 4 Maintenance 4. 1 Maintenance and cleaning the unit 4. 2 Fuse replacement Warranty Packing content • DIGIDRIVER/DIGITILE144/...
-
Page 20: General Instructions
DIGI series WARNING! Before carrying out any operations with the unit, carefully read this instruction manual and keep it with cure for future reference. It contains important information about the installation, usage and maintenance of the unit. SAFETY General instruction • The products referred to in this manual conform to the European Community Directives and are there- fore marked with . -
Page 21: General Information
DIGI series GENERAL INFORMATION Shipments and claims The goods are sold “ex works” and always travel at the risk and danger of the distributor. Eventual dam- age will have to be claimed to the freight forwarder. Any claim for broken packs will have to be forwarded within 8 days from the reception of the goods. -
Page 22: Description And Technical Specifications
It controls up to 24 DIGISTRIP, 16 DIGITUBE, 6 DIGIBAR, 6 DIGITILE, offering 6 DMX uni- verses and 350W of power in out, in a one rack unit. DIGIDRIVER is compatible with both Art-Net and Kling-Net protocol and runs signal and power over a 4 pole XLR cable that allow wiring of units in a chain. -
Page 23: Digitile144
DIGITILE have been studied to grant a great mounting flexibility through a sliding hardwares on the back for truss application and on the side for multiple vertical linking. The external control unit DIGIDRIVER is compatible with ArtNet and KlingNet protocol, and runs both signal and power over a 4 poles cable that provides greater stability and connection in daisy chain (up to 6 DIGITILE). -
Page 24: Digibar160
The external con- trol unit DIGIDRIVER is compatible with Art-Net and Kling-Net protocol, and runs both signal and power over a 4 poles cable that provides greater stability and connection in daisy chain (up to 6 DIGIBAR). -
Page 25: Digistrip40
The external control unit DIGIDRIVER is compatible with Art-Net and Kling-Net protocol, and runs both signal and power over a 4 poles cable that provides greater stability and connection in daisy chain (up to 24 DIGISTRIP). -
Page 26: Digitube
360°. Each tube is equipped with 2 lines of 40 RGB/FC LEDs with individual pixel control, 1 meter long. The external control unit DIGIDRIVER is compat- ible with Art-Net and Kling-Net protocol, and runs both signal and power over a 4 poles cable that pro- vides greater stability and connection in daisy chain (up to 16 tubes). -
Page 27: Operating Elements And Connections
DIGI series 1.6 OPERATING ELEMENTS AND CONNECTIONS DIGIDRIVER DiGi DRIVER Fig.6 1. MOUNTING HOLES for fixing the rack 5. GND POINT used for the grounding of the 2. CONTROL PANEL with display and 4 buttons device used to access the control panel functions 6. -
Page 28: Installation
- 2 - INSTALLATION 2.1 MOUNTING DIGIDRIVER The management and power unit DIGIDRIVER should be placed on a non-flammable flat surface in any orientation or fixed by four screws in a 19” rack. There are four mounting holes on the housing as shown in figure 7. -
Page 29: Functions And Settings
- 3 - FUNCTIONS AND SETTINGS 3.1 OPERATION Connect the unit according to the connection example shown in Figure 8. Plug the power cord into a wall socket (100-240V~/50-60Hz) to turn on the DIGIDRIVER. Signal input: Ethernet (RJ45) DIGIDRIVER (1) -
Page 30: Basic Setup
DIGI series 3.2 BASIC SETUP The DIGIDRIVER has an OLED display and 4 buttons for access to the functions of the control panel (fig.9). MENU DOWN ENTER MENU DOWN ENTER Used to scroll down the Scrolls up the list of options or... -
Page 31: Digidriver Menu Structure
DIGI series 3.3 DIGIDRIVER MENU STRUCTURE Main Level Programming Levels Default Description ð Protocol Kling-Net Art-Net Art-Net ð Auto Address No - Yes Auto LED Address ð Subnet 0 - 15 Sets the subnet address ð Universe#1 0 - 15 Sets the universe #1 address ð... -
Page 32: Maintenance
DIGI series - 4 - MAINTENANCE 4.1 MAINTENANCE AND CLEANING THE UNIT • Make sure the area below the installation place is free from unwanted persons during setup. • All screws used for installing the device and any of its parts should be tightly fastened and should not be corroded. - Page 33 Place Stamp Here Affrancare Spett.le Music&Lights S.r.l. Via Appia Km 136.200 04020 Itri (LT) Italy "...
- Page 36 MUSIC & LIGHTS S.r.l. Via Appia, km 136,200 - 04020 Itri (LT) - ITALY Phone +39 0771 72190 - Fax +39 0771 721955 www.musiclights.it - email: info@musiclights.it ISO 9001:2008 Certified Company...
Need help?
Do you have a question about the DIGIDRIVER and is the answer not in the manual?
Questions and answers