Table of Contents
Advertisement
Available languages
Available languages
Quick Links
Advertisement
Chapters
Table of Contents

Related Manuals for ProLights PINSPOT


Summary of Contents for ProLights PINSPOT
- Page 1 PINSPOT PINSPOTTR DIFFUSED LIGHT PROJECTOR MANUALE UTENTE USER MANUAL IT - EN...
- Page 2 Music & Lights S.r.l. si riserva ogni diritto di elaborazione in qualsiasi forma delle presenti istruzioni per l’uso. La riproduzione - anche parziale - per propri scopi commerciali è vietata. Al fine di migliorare la qualità dei prodotti, la Music&Lights S.r.l. si riserva la facoltà di modificare, in qualunque momento e senza preavviso, le specifiche menzionate nel presente manuale di istruzioni.
-
Page 3: Table Of Contents
PINSPOT - PINSPOTTR INDICE Sicurezza Avvertenze generali Attenzioni e precauzioni per l’installazione 1 Introduzione 1. 1 Descrizione 1. 2 Specifiche tecniche 1. 3 Elementi di comando e di collegamento 2 Installazione 2. 1 Montaggio 3 Funzioni e impostazioni 3. 1 Funzionamento 4 Manutenzione 4. -
Page 4: Sicurezza
PINSPOT - PINSPOTTR ATTENZIONE! Prima di effettuare qualsiasi operazione con l’unità, leggere con attenzione questo manuale e conservarlo accuratamente per riferimenti futuri. Contiene informazioni importanti riguardo l’installazione, l’uso e la manutenzione dell’unità. SICUREZZA Avvertenze generali • I prodotti a cui questo manuale si riferisce sono conformi alle Direttive della Comunità Europea e per- tanto recano la sigla . -
Page 5: Introduzione
- 1 - INTRODUZIONE 1.1 DESCRIZIONE La serie PINSPOT/PINSPOTTR è formata da proiettori a testa mobile basati su una sorgente LED ad alta efficienza. Nonostante le dimensioni compatte, sono tra i proiettori LED più efficienti nella sua categoria. Un corpo molto compatto, l’agilità nei movimenti e la totale silenziosità rendono questi proiettori la mi- gliore soluzione per l’illuminazione di stage, live e clubs di piccole dimensioni. -
Page 6: Elementi Di Comando E Di Collegamento
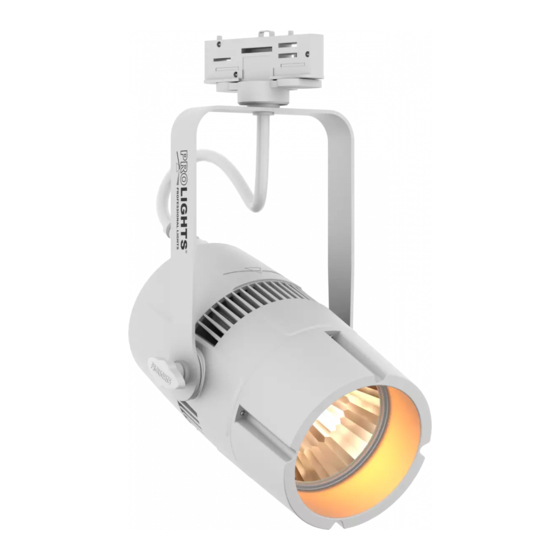
PINSPOT - PINSPOTTR 1.3 ELEMENTI DI COMANDO E DI COLLEGAMENTO Pannello posteriore Fig.2 1. MANOPOLA DIMMER per la regolazione della luminosità 2. VITE DI FISSAGGIO per la staffa di montaggio 3. PORTAFUSIBILE: sostituire un fusibile difettoso solo con uno dello stesso tipo 4. -
Page 7: Installazione
20 cm. Quindi orientare il proiettore. NOTA - Per l’installazione del proiettore PINSPOT/PINSPOTTR inserire il track adapter (incluso in PINSPOT- in un idoneo binario a quattro linee quindi ruotare la manopola di 90° per collegare l’adattatore al circuito. -
Page 8: Funzioni E Impostazioni
- 3 - FUNZIONI E IMPOSTAZIONI 3.1 FUNZIONAMENTO Per accendere il PINSPOT/PINSPOTTR inserire la spina del cavo di alimentazione in una presa di rete (100-240V~/50-60Hz). Poco dopo l’unità è pronta. Effettuare le regolazioni del dimmer mediante le re- lative manopole Per spegnere il PINSPOT/PINSPOTTR, staccare la spina dalla presa di rete. Per maggiore comodità... -
Page 9: Risoluzione Dei Problemi
PINSPOT - PINSPOTTR Fig.8 4.3 RISOLUZIONE DEI PROBLEMI Anomalie Possibili cause Controlli e rimedi Mancanza di alimentazione di rete Verificare la presenza della tensione alimentazione • • Dimmer impostato a 0 Incrementare i valori del canale dimmer • • Tutti i colori impostati a 0... - Page 10 All rights reserved by Music & Lights S.r.l. No part of this instruction manual may be reproduced in any form or by any means for any commercial use. In order to improve the quality of products, Music&Lights S.r.l. reserves the right to modify the characteristics stated in this instruction manual at any time and without prior notice.
-
Page 11: Pinspot - Pinspottr
PINSPOT - PINSPOTTR TABLE OF CONTENTS Safety General instructions Warnings and installation precautions 1 Introduction 1. 1 Description 1. 2 Technical specifications 1. 3 Operating elements and connections 2 Installation 2. 1 Mounting 3 Functions and settings 3. 1 Operation 3. -
Page 12: General Instructions
PINSPOT - PINSPOTTR WARNING! Before carrying out any operations with the unit, carefully read this instruction manual and keep it with cure for future reference. It contains important information about the installation, usage and maintenance of the unit. SAFETY General instruction •... -
Page 13: Introduction
- 1 - INTRODUCTION 1.1 DESCRIPTION PINSPOT/PINSPOTTR projectors are moving head based on a special LED optical system with a white LED source. Despite the very compact sizes, are the most efficient luminaires in its range. The compact-size structure, the rapid movements and silent operations grant this projectors to be a valu- able solution for lighting projects in limited-space environments like live stages and clubs 1.2 TECHNICAL SPECIFICATIONS... -
Page 14: Operating Elements And Connections
PINSPOT - PINSPOTTR 1.3 OPERATING ELEMENTS AND CONNECTIONS Rear panel Fig.2 1. DIMMER KNOB for brightness adjustment 2. SCREW for the mounting bracket 3. MAIN FUSE HOLDER: replace a burnt-out fuse by one of the same type only 4. MOUNTING BRACKET 5. -
Page 15: Installation
• Adjust the projector and use the knobs. NOTE - For the installation of the PINSPOT/PINSPOTTR make sure that the ridge of the adaptor is in with the groove of the track (included in PINSPOTTR). Turn knobs 90° to connect the adaptor to the circuit. -
Page 16: Functions And Settings
Connect the supplied main cable to a socket (100-240V~/50-60Hz). The unit will run built-in program to reset all motors to their home position. Shortly after that the PINSPOT/PINSPOTTR is ready for operation. To switch off, disconnect the mains plug from the socket. For a more convenient operation it is recom- mended to connect the unit to a socket which can be switched on and off via light switch. -
Page 17: Maintenance
PINSPOT - PINSPOTTR - 4 - MAINTENANCE 4.1 MAINTENANCE AND CLEANING THE UNIT • Make sure the area below the installation place is free from unwanted persons during setup. • Switch off the unit, unplug the main cable and wait until the unit has cooled down. -
Page 18: Troubleshooting
PINSPOT - PINSPOTTR 4.3 TROUBLESHOOTING Problems Possible causes Checks and remedies No mains supply Check the power supply voltage • • Dimmer fader set to 0 Increase the value of the dimmer channels • • All color faders set to 0 Increase the value of the color channels •... - Page 19 Note...
- Page 20 MUSIC & LIGHTS S.r.l. Via Appia, km 136,200 - 04020 Itri (LT) - ITALY Phone +39 0771 72190 - Fax +39 0771 721955 www.musiclights.it - email: info@musiclights.it ISO 9001:2008 Certified Company...
Need help?
Do you have a question about the PINSPOT and is the answer not in the manual?
Questions and answers