
Related Manuals for AIC RSC-2AT


Summary of Contents for AIC RSC-2AT
- Page 1 All manuals and user guides at all-guides.com RSC-2AT Storage Server Barebone User's Manual UM_RSC-2AT_v.1_020316...
-
Page 2: Table Of Contents
All manuals and user guides at all-guides.com CONTENTS PREFACE ������������������������������������������������������������������������������������������� i SAFETY INSTRUCTIONS �������������������������������������������������������������������� ii Chapter 1� Prodcut Introduction ������������������������������������������������ 1 1�1 Box Content ����������������������������������������������������������������������������������������1 1.2 Specifications �������������������������������������������������������������������������������������2 1�3 General Information ���������������������������������������������������������������������������3 1�4 Four option SKUs ���������������������������������������������������������������������������������6 Chapter 2� Hardware Installation ��������������������������������������������� 10 2�1 Removing and Installing Top Cover �����������������������������������������������10 2�2 Installing/ Removing a Hard Disk Drive ������������������������������������������11 2�3 Removing and Installing a Fan Module �����������������������������������������13... - Page 3 All manuals and user guides at all-guides.com Copyright © 2016 AIC, Inc� All Rights Reserved� This document contains proprietary information about AIC products and is not to be disclosed or used except in accordance with applicable agreements.
-
Page 4: Preface
AIC shall not be liable for technical or editorial errors or omissions contained herein. The information provided is provided "as is" without warranty of any kind. To the extent permitted by law, neither AIC or its affiliates, subcontractors or suppliers will be liable for incidental, special or consequential damages including downtime cost;... -
Page 5: Safety Instructions
All manuals and user guides at all-guides.com SAFETY INSTRUCTIONS • Before getting started, please read the following important cautions: • All cautions and warnings on the equipment or in the manuals should be noted. • Most electronic components are sensitive to electrical static discharge. Therefore, be sure to ground yourself at all times when installing the internal components. - Page 6 All manuals and user guides at all-guides.com • product, voltage and current marked on the product’s electrical ratings label. The voltage and current rating of the cord should be greater than the voltage and current rating marked on the product. •...
-
Page 7: Chapter 1� Prodcut Introduction
• Enclosure( Power supply, fan, 26 x 2.5'' HDD tray included) • 2.5’’ HDD Tray • Power cord • Screws kit x 1set • (Include console serial cable) • Slide rail x 1set ♦ PACKAGE CONTENT MAY VARY PER REGION. RSC-2AT User's Manual... -
Page 8: Specifications
All manuals and user guides at all-guides.com Chapter 1 Product Introduction 1.2 Specifications RSC-2AT User's Manual... -
Page 9: 1�3 General Information
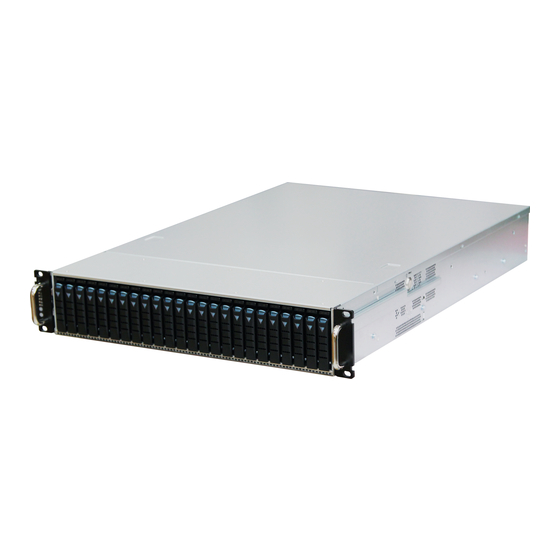
Chapter 1 Product Introduction 1�3 General Information RSC-2AT is a 2U rackmount chassis with 24 x 2.5”HDD hot swap Bays at front and 2 x 2.5'' External hot swap drive bays and single 12G expander on HDD Backplane which is a high performance server storage product. - Page 10 All manuals and user guides at all-guides.com Chapter 1 Product Introduction • Rear Panel 2 x 2.5'' External hot swap drive bays 1U redundant 7 x PCIe 3.0 slots(low-profile) high-efficiency power supply 80+ RSC-2AT User's Manual...
- Page 11 24 x 2.5” hot swap drive bays 3 x 80x38mm easy swap fans 3 x 80x38mm easy swap fans 1+1 redundant 1+1 redundant high-efficiency power supply 80+ high-efficiency power supply 80+ • (Power supply is included. Motherboard is not included.) RSC-2AT User's Manual...
-
Page 12: 1�4 Four Option Skus
1.4.1 12G Expander Backplane + rear hot swap O/S tray • 12G Expander on board HDD BP w/ 3 x 8643. • 1U redundant power supply. • 2.5" x 2 External hot swap drive bays. • (Power supply is included. Motherboard is not included.) RSC-2AT User's Manual... - Page 13 1.4.2 12G Expander Backplane + internal O/S tray • 12G Expander on board HDD BP w/ 3 x 8643. • 2U 1+1 redundant high-efficiency power supply 80+. • 2.5" x 2 internal Drive Bracket. • (Power supply is included. Motherboard is not included.) RSC-2AT User's Manual...
- Page 14 1.4.3 12G Passive Backplane + rear hot swap O/S tray • 12G None Expander on board HDD BP w/ 6 x 8643. • 1U redundant power supply • 2.5" x 2 External hot swap drive bays • (Power supply is included. Motherboard is not included.) RSC-2AT User's Manual...
- Page 15 1.4.4 12G Passive Backplane + internal O/S tray • 12G None Expander on board HDD BP w/ 6 x 8643. • 2U 1+1 redundant high-efficiency power supply 80+. • 2.5" x 2 internal Drive Bracket. • (Power supply is included. Motherboard is not included.) RSC-2AT User's Manual...
-
Page 16: Chapter 2� Hardware Installation
All manuals and user guides at all-guides.com Chapter 2 Hardware Installation Chapter 2� Hardware Installation 2�1 Removing and Installing Top Cover Pushing release button on both side and slide forward the top cover to open cover. RSC-2AT User's Manual... -
Page 17: 2�2 Installing/ Removing A Hard Disk Drive
Directly place HDD into tool-less HDD tray untli it snaps. Please check if the screw holes on HDD match the dimples on HDD tray. HDD can also be screwed on HDD tray by fastening two screws as picture showed. RSC-2AT User's Manual... - Page 18 2.2.2 Insert the drive tray into chassis HDD cage. Make sure the drive tray is correctly secured in place when its front edge aligns with the bay edge. Push the tray lever until it reaches the end and clicks. RSC-2AT User's Manual...
-
Page 19: 2�3 Removing And Installing A Fan Module
Chapter 2 Hardware Installation 2�3 Removing and Installing a Fan Module 2.3.1 Removing a fan module Grabbing and removing the fan module from the fan slot. AIRFLOW AIRFLOW AIRFLOW AIRFLOW • (Power supply is included. Motherboard is not included.) RSC-2AT User's Manual... - Page 20 Pull the fan module up gently and taking out the fan module by removing rubbers out from the fan bar. 2.3.2 Installing a Fan Module Make sure the 4 rubbers and connector insert firmly while fan module is inserted. RSC-2AT User's Manual...
-
Page 21: 2�4 Removing And Installing The Hdd Backplane Module
Chapter 2 Hardware Installation 2�4 Removing and Installing the HDD backplane Module 2.4.1 Removing a HDD backplane • Unplugging all connectors & HDDs from HDD backplane. • Release the lock pin. • (Power supply is included. Motherboard is not included.) RSC-2AT User's Manual... - Page 22 2.4.3 Installing a HDD backplane module(follow the reverse order) • Align the backplane with the hooks, and insert it into the enclosure firmly. • Lock the backplane. Follow the reverse order. • (Power supply is included. Motherboard is not included.) RSC-2AT User's Manual...
-
Page 23: 2�5 Removing And Installing A Psu Module
2. Pushing the latch and hold the tray handle. 3. Pull the PSU module tray handle out gently to slides out the PSU module. 2.5.2 Installing a PSU Module • To install PSU module, follow the reverse order. RSC-2AT User's Manual... -
Page 24: 2�6 Tool-Less Blade Slide Installation Instruction
All manuals and user guides at all-guides.com Chapter 2 Hardware Installation 2�6 Tool-less Blade Slide Installation Instruction 2.6.1 Release and detach the inner rail from the slide. PUSH RSC-2AT User's Manual... - Page 25 All manuals and user guides at all-guides.com Chapter 2 Hardware Installation 2.6.2 Attach inner rail to the system. Click! RSC-2AT User's Manual...
- Page 26 All manuals and user guides at all-guides.com Chapter 2 Hardware Installation 2.6.3 Attach outer rail to the rack. Click! Click! PUSH RSC-2AT User's Manual...
- Page 27 All manuals and user guides at all-guides.com Chapter 2 Hardware Installation CAUTION:Verify ball bearing retainer is locked forward. 2.6.4 Pull out the intermediate member until locked out. RSC-2AT User's Manual...
- Page 28 All manuals and user guides at all-guides.com Chapter 2 Hardware Installation 2.6.5 Slide release tab and push system into rack. RSC-2AT User's Manual...
-
Page 29: Chapter 3� Hardware Introduction
All manuals and user guides at all-guides.com Chapter 3 Hardware Introduction Chapter 3� Hardware Introduction This chapter provides detailed instruction guide on hardware instruction 3�1 HARDWARE DESIGN SPECIFICATION_BP-HD2E03-TY 3.1.1 Placement PCBA Placement RSC-2AT User's Manual... - Page 30 All manuals and user guides at all-guides.com Chapter 3 Hardware Introduction 3.1.2 Connector Location Connector Location JFAN4 JFAN2 JFAN1 JPWR1 JFAN3 JPWR2 JPMBUS JEXP2 JEXP_UART JFRONT Sensor Sensor Sensor Sensor JMCU_UART JMCU_UART JI2C0 SASHD1 JI2C3 JMCU_DBG SASHD3 JI2C4 SASHD2 HDD1 HDD24 RSC-2AT User's Manual...
- Page 31 All manuals and user guides at all-guides.com Chapter 3 Hardware Introduction 3.1.3 Connectors Power Connector – JPWR1 Description Description +12V +12V VCC3 MUTE_L +5VSTBY PSU_N1 PS_ON_L Power Connector –JPWR2 Description Description +12V +12V +12V +12V PMBUS Connector –JPMBUS Description PMBUS_CLOCK PMBUS_DATA RSC-2AT User's Manual...
- Page 32 Chapter 3 Hardware Introduction Connectors FAN Connector –JFAN 1~ JFAN4 Description +12V TACH Cascade – JEXP2 Description Description E2E_SCL E2E_SCL E2E_SDA E2E_SDA PEER_MATE_N LB_AB0 LB_BA0 LB_AB1 LB_BA1 Control for Expander –JEXP_UART Description Description DBG_SIRXD SM_SIRXD DBG_SITXD SM_SITXD RSC-2AT User's Manual...
- Page 33 All manuals and user guides at all-guides.com Chapter 3 Hardware Introduction Connectors Console for MCU –JMCU_DBG Description UART_RX UART_TX Remote Power Control –JMCU_UART Description Description DOWN_RXD UP_RXD DOWN_TXD UP_TXD I2C Connectort – JI2C0,JI2C3,JI2C4 Description I2C_CLOCK I2C_DATA RSC-2AT User's Manual...
- Page 34 FAN Fail LED Description Remark For External LED(+) LED Anode For External LED(-) LED Cathode Power Fault LED Description Remark For External LED(+) LED Anode For External LED(-) LED Cathode Mute SW Description Remark MUTE Input(-) Active Low RSC-2AT User's Manual...
- Page 35 All manuals and user guides at all-guides.com Chapter 3 Hardware Introduction Connectors Power/ID LED Description Remark For External LED(+) LED Anode For External LED(-) LED Cathode Power SW Description Remark Power SW Input(-) Active Low PMBUS Support Description Remark PMBUS_Disable_N Active Low RSC-2AT User's Manual...
- Page 36 HDD no connect or Power Off Normal HDD Fault/Status LEDs Red (Blinking) Re-build status Red (On) HDD Fault or Locate HDD Yellow (On) MCU alive MCU Status (LED3) Yellow (Off) Boot loader mode LED3 Act LED Fail LED LED1 LED1 RSC-2AT User's Manual...
- Page 37 All manuals and user guides at all-guides.com Chapter 3 Hardware Introduction 3.1.5 Jumpers Open Normal, default JMCU_RST Close Reset MCU Open Normal, default JMD_SEL Close Boot loader mode JMD_SEL JMCU_RST RSC-2AT User's Manual...
- Page 38 0 1 2 3 4 5 6 7 8 9 10 11 12 13 14 15 16 17 18 19 20 21 22 23 MegaRaid card 1 2 3 4 5 6 7 8 9 10 11 12 13 14 15 16 17 18 19 20 21 22 23 24 RSC-2AT User's Manual...
-
Page 39: 3�2 Hardware Design Specification_Bp-Hd2H05
R308 R300 R301 R275 R309 R305 R306 R285 R255 R293 R294 R298 C135 R302 R303 R307 R280 C134 R266 R267 R264 R297 C132 R290 R304 C125 R287 R282 R283 R284 C131 R224 R291 R289 R292 C133 R288 RSC-2AT User's Manual... - Page 40 C2261 C2271 C2267 C2262 C2273 C2276 C2281 C2282 C2298 C2277 C2288 C2284 C2287 C2280 C2289 C2295 C2301 R2323 C2283 C2299 C2278 C2279 C2297 C2302 C2290 C2304 R2330 Q2055 RN2001 C2303 HDD 1 HDD 2 ∼ 23 HDD 24 RSC-2AT User's Manual...
- Page 41 Chapter 3 Hardware Introduction 3.2.3 Connectors Power Connector – CON1 Description Description +12V +12V +3V3 MUTE_L +5VSTBY PSU_N1 Power_ON_L Power Connector – CON2 CON1 Description Description +12V +12V +12V +12V PMBUS Connector – JPMBUS_CON Description PMBUS_CLOCK PMBUS_DATA RSC-2AT User's Manual...
- Page 42 All manuals and user guides at all-guides.com Chapter 3 Hardware Introduction Connectors FAN Connector – JFAN1~JFAN4 Description +12V TACH Function I/O – JMCU_BP Description Description RST_BP_I2C ASSERT_C0_N BP_SCL ASSERT_C1_N BP_SDA PMBUS_SUPPT_N +5VSTBY +5VSTBY RSC-2AT User's Manual...
- Page 43 FAN Fail LED Description Remark For External LED(+) LED Anode For External LED(-) LED Cathode Power Fault LED Description Remark For External LED(+) LED Anode For External LED(-) LED Cathode Mute SW Description Remark MUTE Input(-) Active Low RSC-2AT User's Manual...
- Page 44 All manuals and user guides at all-guides.com Chapter 3 Hardware Introduction Connectors Power/ID LED Description Remark For External LED(+) LED Anode For External LED(-) LED Cathode Power SW Description Remark Power SW Input(-) Active Low PMBUS Support Description Remark PMBUS_Disable_N Active Low RSC-2AT User's Manual...
- Page 45 C117 R299 R295 R258 R266 R267 R279 R304 C125 R282 R283 R284 C131 R305 R306 R224 R285 R255 R288 R293 R294 R298 C135 R302 R303 R307 R280 C134 R264 R297 C132 R290 R287 R291 R289 R292 C133 RSC-2AT User's Manual...
- Page 46 Enable External Access LED input Open Access LED from HDD Pin P11 Close Access LED from SGPIO Open Support SSD520 DAS Behavior Close Support SSD320 DAS Behavior Open Disable SGPIO Close Enable SGPIO and CPLD Core Power(+1V8) RSC-2AT User's Manual...
- Page 47 0 1 2 3 4 5 6 7 8 9 10 11 12 13 14 15 16 17 18 19 20 21 22 23 MegaRaid card 1 2 3 4 5 6 7 8 9 10 11 12 13 14 15 16 17 18 19 20 21 22 23 24 RSC-2AT User's Manual...
-
Page 48: Chapter 4� Hdd Blackplane Instruction
Chapter 4� HDD Blackplane Instruction 4.1 Expender firmware update through smart console port 4.1.1 Update Expander firmware revision Step 1: Set up RSC-2AT console serial cable. Insert console serial cable into console port shown below also the other side inert serial port into motherboard. - Page 49 All manuals and user guides at all-guides.com Chapter 4 HDD Blackplane Introduction Step 2: Set up RSC-2AT RS232 connection Set up RS232 connection application into your RSC-2AT as shown in the example process below. For example: OS: Microsoft Windows RS232 connection application: Hyperterminal Step 2: Install HyperTrm.exe...
- Page 50 Step 3: Enter a new name for the icon in the field below and click OK. Step 4: Connecting by using selecting an option in the drop down menu circled in red below (we selected COM2 in this example) and click OK. RSC-2AT User's Manual...
- Page 51 None. Click OK when you have finished your selections. Properties Port Setting Bits per second: Data bits: Parity: None Stop bits: Flow control: None Restore Defaults Cancel Apply Step 6 : Set up is complete. The diagram below depicts what screen should displayed. cmd>_ RSC-2AT User's Manual...
- Page 52 All manuals and user guides at all-guides.com Chapter 4 HDD Blackplane Introduction Step 7:To get firmware image & MFG Configuration Image version information from ''AIC SAS Related Firmware Downloadne'' website. http://ppms.aicipc.com.tw:8888/download/expander/mcu/ RSC-2AT User's Manual...
- Page 53 All manuals and user guides at all-guides.com Chapter 4 HDD Blackplane Introduction Step 8: Comand line for show current firmware revision. cmd>rev RSC-2AT User's Manual...
- Page 54 All manuals and user guides at all-guides.com Chapter 4 HDD Blackplane Introduction Step 9: Start to update expander firmware cmd>fdl 0 0_ Step 10: Select the tool bar ''Transfer'' -> ''Send File''. RSC-2AT User's Manual...
- Page 55 All manuals and user guides at all-guides.com Chapter 4 HDD Blackplane Introduction Step 11: • Choose new firmware path file ''fw 3A1_v1.12.2.1''. • Protocol have to choose ''Xmodem''. Step 12: Firmware download complete RSC-2AT User's Manual...
- Page 56 All manuals and user guides at all-guides.com Chapter 4 HDD Blackplane Introduction Step 13: Reset computer for success update firmware. cmd>reset reset RSC-2AT User's Manual...
- Page 57 All manuals and user guides at all-guides.com Chapter 4 HDD Blackplane Introduction 4.1.2 Update expander configuration MFG Step 1: Comand line for show current configuration MFG cmd> showmfg RSC-2AT User's Manual...
- Page 58 All manuals and user guides at all-guides.com Chapter 4 HDD Blackplane Introduction Step 2: Start to update expander configuration MFG cmd>fdl 83 0_ Step 3: Select the tool bar ''Transfer'' -> ''Send File''. 83 0 RSC-2AT User's Manual...
- Page 59 All manuals and user guides at all-guides.com Chapter 4 HDD Blackplane Introduction Step 4: • Choose new MFG path file ''mfg 3A1.0_eob_1.2.0.1.bin''. • Protocol have to choose ''Xmodem''. Step 5: MFG download complete. RSC-2AT User's Manual...
- Page 60 All manuals and user guides at all-guides.com Chapter 4 HDD Blackplane Introduction Step 6: Reset computer for success update MFG. cmd>reset reset RSC-2AT User's Manual...
-
Page 61: Update The Expander Firmware Through In-Band
Step 1: Download and install SG3_utils.exe which compatible with Linux OS. From website http://sg.danny.cz/sg/sg3_utils.html website Reference version sg3_utils-1.40.tgz Step 2: To get firmware image & MFG Configuration Image version information from ''AIC SAS Related Firmware Downloadne'' website. http://ppms.aicipc.com.tw:8888/download/expander/mcu/ RSC-2AT User's Manual... - Page 62 Execute terminal under the same new firmware folder. example: Setting a new firmware folder on ''Home'' page. Open Terminal by click to the right button of mouse in the same window ''Home''. Step 4: Typing ''sudo -s'' to into administrator mode. RSC-2AT User's Manual...
- Page 63 All manuals and user guides at all-guides.com Chapter 4 HDD Blackplane Introduction Step 5: Find expander location. $ sg_map -i Step 6: Update Expander firmware $ sg_write_buffer --id=0x0 --in=fw3A1_v1.12.2.1 --mode=0x2 --offset=0 / dev/sg0 RSC-2AT User's Manual...
- Page 64 All manuals and user guides at all-guides.com Chapter 4 HDD Blackplane Introduction Step 7: Update Expander MFG $ sg_write_buffer --id=0x83 --in=mfg3A1.0_eob_1.2.0.1.bin --mode=0x2 --offset=0 /dev/sg0 Step 8: Reboot computer for success update firmware & MFG. root@ubuntu:~# reboot RSC-2AT User's Manual...
-
Page 65: 4�3 12G Expander Edfb Setting
All manuals and user guides at all-guides.com Chapter 4 HDD Blackplane Introduction 4�3 12G expander EDFB setting Step 1: For Install HyperTerminal.exe refer to section 4.1 Step 2 : Get EDFB status cmd> edfb RSC-2AT User's Manual... - Page 66 Chapter 4 HDD Blackplane Introduction Step 3: Change EDFB setting Enable EDFB function cmd>edfb on Disable EDFB function cmd>edfb off cmd >edfb EDFB is OFF cmd >edfb on Succeeded to set EDFB cmd >edfb off EDFB is OFF RSC-2AT User's Manual...
-
Page 67: 4�4 Slot Hdd Power Setting
For Install sg3.exe tool and get new firmware from website refer to section 4.2 Step 2: Execute terminal under the same new firmware folder. example: Setting a new firmware folder on ''Home'' page. Open Terminal by click to the right button of mouse in the same window ''Home''. RSC-2AT User's Manual... - Page 68 All manuals and user guides at all-guides.com Chapter 4 HDD Blackplane Introduction Step 3: Typing ''sudo -s'' to into administrator mode. Step 4: Find expander location. $ sg_map -i RSC-2AT User's Manual...
- Page 69 Chapter 4 HDD Blackplane Introduction Step 5: For example: If would like to turn the Disk004 power off under the HBA card. Need to check Disk004 power status. $ sg_ses --page=7 /dev/sg0 Under HBA card the Element 3 = Disk004. RSC-2AT User's Manual...
- Page 70 All manuals and user guides at all-guides.com Chapter 4 HDD Blackplane Introduction Step 6: To check Disk004 (element 3) power status is ok $ sg_ses --page=2 /dev/sg0 Status shows below: The status of Element 3 is OK. RSC-2AT User's Manual...
- Page 71 All manuals and user guides at all-guides.com Chapter 4 HDD Blackplane Introduction Step 7: Turn off a HDD power $ sg_ses --descriptor=Disk004 --set=3:4:1 /dev/sg0 Step 8: Turn on a HDD power $ sg_ses --descriptor=Disk004 --clear=3:4:1 /dev/sg0 RSC-2AT User's Manual...
-
Page 72: 4�5 Hdd Bp Thermal Sensor Temperature Setting
Chapter 4 HDD Blackplane Introduction 4�5 HDD BP thermal sensor temperature setting (Only for system cooling Fan controled by expander.) Step 1: For Install HyperTerminal.exe refer to section 4.1 Step 2: Get the current temperature settings cmd> temperature RSC-2AT User's Manual... - Page 73 Set new temperature T1=20 C 4 18 C T2=50 C 4 52 C Warning threshold=50 C 448 C Alarm threshold=55 C 454 C The new setting will take effect after reset. cmd> temperature 18 52 48 54 cmd> reset RSC-2AT User's Manual...
- Page 74 : 82% Expander Temperature : 76 Celsius degree Sytem Temperature-0 : 33 Celsius degree : 20 Celsius degree : 50 Celsius degree : 55 Celsius degree Voltage Sensor 0.9V : 0.93V Voltage Sensor 1.8V : 1.80V cmd >_ RSC-2AT User's Manual...
-
Page 75: Chapter 5� Technical Support
All manuals and user guides at all-guides.com Chapter 1 Product Introduction Chapter 1 Product Introduction Chapter 5� Technical Support www�aicipc�com • TAIWAN Tel: +886 3 433 9188 Fax: +886 3 287 1818 Email : sales@aicipc�com�tw • CHINA Tel: +86�21�54961421, +86�21�54961422 Fax: Extension: 608 Email Technical Support: support@aicipc�com •...
Need help?
Do you have a question about the RSC-2AT and is the answer not in the manual?
Questions and answers