Table of Contents
Advertisement
Available languages
Available languages
Quick Links
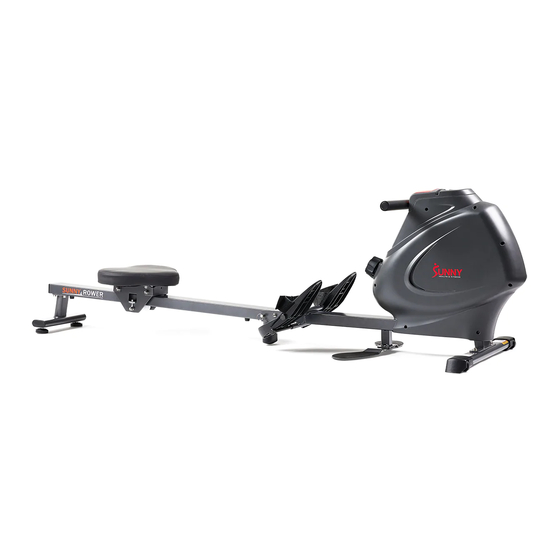
MULTIFUNCTION SPM MAGNETIC
IMPORTANT! Please retain owner's manual for maintenance and adjustment instructions. Your satisfaction is
English, Page 14 ~ 21
very
support@sunnyhealthfitness.com or 1-877-90SUNNY (877-907-8669).
¡ IMPORTANTE! Conserve el manual del propietario para las instrucciones de mantenimiento y ajuste.
Español, Page 22 ~ 29
Susatisfacción es muy importante para nosotros, NO DEVUELVA HASTA HABERNOS CONTACTADO:
support@sunnyhealthfitness.com ó 1-877-90SUNNY (877-907-8669).
IMPORTANT! Veuillez conserver le manuel du propriétaire pour les instructions de réglage etd'entretien.Votre
Français, Page 30 ~ 37
satisfaction est très importante pour nous, VEUILLEZ NE PAS EFFECTUER DE RETOURAVANT DE NOUS
AVOIR CONTACTÉ: support@sunnyhealthfitness.com ou 1-877–90SUNNY (877-907-8669).
Deutsch, Seite 38 ~ 45
WICHTIG! Bitte bewahren Sie das Benutzerhandbuch fü r Wartungs- und Einstellanweisungen auf. Ihre
Zufriedenheit ist besonders wichtig für uns, BITTE SCHICKEN SIE DAS PRODUKT NICHT ZURÜCK, BEVOR
SIE SICH MIT UNS IN VERBINDUNG GESETZT HABEN: support@sunnyhealthfitness.com oder
1-877-90SUNNY (877-907-8669).
ROWING MACHINE
SF-RW5941
USER MANUAL
important
to
us,
PLEASE
DO
NOT
RETURN
UNTIL
YOU
HAVE
CONTACTED
US:
Advertisement
Table of Contents

Related Manuals for Sunny Health & Fitness SF-RW5941


Summary of Contents for Sunny Health & Fitness SF-RW5941
- Page 1 MULTIFUNCTION SPM MAGNETIC ROWING MACHINE SF-RW5941 USER MANUAL IMPORTANT! Please retain owner’s manual for maintenance and adjustment instructions. Your satisfaction is English, Page 14 ~ 21 very important PLEASE RETURN UNTIL HAVE CONTACTED support@sunnyhealthfitness.com or 1-877-90SUNNY (877-907-8669). ¡ IMPORTANTE! Conserve el manual del propietario para las instrucciones de mantenimiento y ajuste.
-
Page 2: Important Safety Information
IMPORTANT SAFETY INFORMATION We thank you for choosing our product. To ensure your safety and health, please use this equipment correctly. It is important to read this entire manual before assembling and using the equipment. Safe and effective use can only be achieved if the equipment is assembled, maintained, and used properly. -
Page 3: Informations De Sécurité Importantes
INFORMATIONS DE SÉCURITÉ IMPORTANTES Nous vous remercions d’avoir choisi notre produit. Pour votre santé et votre sécurité, veuillez utiliser correctement cet appareil. Il est important de lire entièrement le présent manuel avant d’assembler l’appareil et de l’utiliser. L’utilisation sûre et efficace n’est possible que si l’appareil est correctement assemblé, entretenu et utilisé. -
Page 4: Exploded Diagram
EXPLODED DIAGRAM 1... - Page 5 EXPLODED DIAGRAM 2...
-
Page 6: Parts List
PARTS LIST Description Spec. Qty. Description Spec. Qty. Main Frame 33L/R Pedal L/R Sliding Rail Pedal Strap Front Stabilizer Screw M8*15 Rear Stabilizer Left End Cap Handlebar Right End Cap Seat Screw ST4.2*20 φ8*φ16*1.5 Washer End Cap φ8 Spring Washer Round End Cap φ27*φ33*214 Bolt... - Page 7 Description Spec. Description Spec. Clip Spanner S10, 13, 14, 15 Left Foot Pad Spanner S10, 13, 17, 19 Right Foot Pad Allen Wrench Screw ST4.2*25 Bolt M6*15 Cover Fixed Column Left Anti-slip Mat Computer Right Anti-slip Mat Bottom Fixed Plate Bolt M5*15...
-
Page 8: Lista De Piezas
LISTA DE PIEZAS n.° Descripción Espec Cant n.° Descripción Espec Cant Estructura Principal 33L/R Pedal Izq/Der Riel Deslizante Correa de Pedal Estabilizador Delantero Tornillo M8*15 Tapa del Extremo Estabilizador Trasero Izquierdo Tapa del Extremo Manubrio Derecho Asiento Tornillo ST4.2*20 φ8*φ16*1.5 Arandela Tapa de Extremo Tapa de Extremo... - Page 9 n.° Descripción Espec Cant n.° Descripción Espec Cant Clip Llave Inglesa S10, 13, 14, 15 Almohadilla Para el Pie Llave Inglesa S10, 13, 17, 19 Izquierdo Almohadilla Para el Pie Llave Allen Derecho Tornillo ST4.2*25 Perno M6*15 Alfombrilla Cubrir Columna Fija Antideslizante Izquierda Alfombrilla...
-
Page 10: Liste Des Éléments
LISTE DES ÉLÉMENTS Description Spéc Qté Description Spéc Qté Cadre Principal 33L/R Pédale D/G Rail de Glissière Sangle de Pédale Stabilisateur Avant M8*15 Embout d’Extrémité Stabilisateur Arrière Gauche Embout d’Extrémité Guidon Droite Siège ST4.2*20 φ8*φ16*1.5 Rondelle Embout d’Extrémité Embout d’Extrémité φ8 Rondelle Élastique Arrondi... - Page 11 Description Spéc Qté Description Spéc Qté Pince Clé Tricoise S10, 13, 14, 15 Coussin de Pied Clé Tricoise S10, 13, 17, 19 Gauche Coussin de Pied Droite Clé Allen ST4.2*25 Boulon M6*15 Tapis Antidérapant Couvrir la Colonne Fixe Gauche Tapis Antidérapant Ordinateur Droite Plaque Fixe...
- Page 12 TEILELISTE Bezeichnung Spezif. Menge Bezeichnung Spezif. Menge Hauptrahmen 33L/R Pedal L/R Gleitschiene Pedalriemen Vorne Stabilisator Schraube M8*15 Stabilisator Hinten Linke Endkappe Lenkstange Rechte Endkappe Sitz Schraube ST4.2*20 φ8*φ16*1.5 Beilagscheibe Endkappe φ8 Federscheibe Runde Endkappe φ27*φ33*214 Bolzen M8*20 Schaumstoffgriff Rechte Sitzstützbrett Schraubenmutter M10*1.0*9 Linke Sitzstützbrett...
- Page 13 Bezeichnung Spezif. Menge Bezeichnung Spezif. Menge Clip Schraubenschlüssel S10, 13, 14, 15 Linke Fußpolster Schraubenschlüssel S10, 13, 17, 19 Rechte Fußpolster Inbusschlüssel Schraube ST4.2*25 Bolzen M6*15 Linke Feste Spalte Abdecken Anti-Rutsch-Matte Rechte Computer Anti-Rutsch-Matte Untere Feste Platte Bolzen M5*15...
-
Page 14: Hardware Package
HARDWARE PACKAGE Ordering Replacement Parts (U.S. and Canadian Customers only) Please provide the following information in order for us to accurately identify the part(s) needed: ✓ The model number (found on cover of manual) ✓ The product name (found on cover of manual) ✓... - Page 15 ASSEMBLY INSTRUCTIONS We value your experience using Sunny Health and Fitness products. For assistance with parts or troubleshooting, please contact us at support@sunnyhealthfitness.com or 1-877-90SUNNY (877-907-8669). STEP 1: Attach the Front Stabilizer (No. 3) to the Main Frame (No. 1) using 2 Screws (No.
- Page 16 We value your experience using Sunny Health and Fitness products. For assistance with parts or troubleshooting, please contact us at support@sunnyhealthfitness.com or 1-877-90SUNNY (877-907-8669). STEP 3: Slide the Seat (No. 6) into the Sliding Rail (No. 2). Attach 1 Limit Mat (No. 29) onto the Sliding Rail (No.
-
Page 17: Pedal Strap Adjustment
ADJUSTMENTS & USAGE GUIDE CAUTION! Moving parts, such as the seat, can cut and crush. Keep hands clear of the sliding rail during use! PEDAL STRAP ADJUSTMENT The pedal strap is adjustable and can be personalized to fit the user’s foot size. MOVING THE ROWER To move the rower, lift the Rear Stabilizer (No. -
Page 18: Battery Installation And Replacement
BATTERY INSTALLATION & REPLACEMENT BATTERY INSTALLATION: 1. Press the buckle on the bottom of Computer (No. 70), then remove Computer (No. 70) from Main Frame (No. 1). Then open the velcro above the battery case on the back of the Computer (No. - Page 19 FOLDING GUIDE Figure A CAUTION! CAUTION! The Seat (No. 6) Use caution when you vertically will glide down fold the Sliding Rail (No. 2) as when folding the your head may touch the Rear Sliding Rail (No. Stabilizer (No. 4). When not in use, you can save Figure B space by folding the Sliding Rail...
- Page 20 UNFOLDING GUIDE To unfold the Sliding Rail (No. 2), first remove Knob Figure A (No. 31) and Pull Pin (No. 27) (as Figure A showed). Slightly lay down the Sliding Rail (No. 2), then screw Knob (No. 31) to tighten the Sliding Rail (No.
-
Page 21: Using The Machine
USING THE MACHINE The Multifunction SPM Magnetic Rowing Machine lets you work out in multiple ways. You can use it as a traditional rowing machine or use it to do upper body strength exercises. When using it as a rowing machine, make sure to put your feet in the Pedals (No. 33L/R) and use the straps. -
Page 22: Exercise Computer
EXERCISE COMPUTER FUNCTION KEYS: MODE: To select your specification mode and/or turn on computer. SET: To set a value of TIME, COUNT, or CALORIES (when not in SCAN mode). RESET: Press to reset TIME, COUNT, or CALORIES. Press and hold for about 3 seconds to reset all values, except TOTAL COUNT. -
Page 23: Instrucciones De Armado
INSTRUCCIONES DE ARMADO Valoramos su experiencia con los productos de Sunny Health and Fitness. Para obtener ayuda con las piezas o la solución de problemas, contáctenos en support@sunnyhealthfitness.com o al 1-877-90SUNNY (877-907-8669). PASO 1: Fije el Estabilizador Delantero (n.° 3) a Estructura Principal (n.°... - Page 24 Valoramos su experiencia con los productos de Sunny Health and Fitness. Para obtener ayuda con las piezas o la solución de problemas, contáctenos en support@sunnyhealthfitness.com o al 1-877-90SUNNY (877-907-8669). PASO 3: Fije el Asiento (n.° 6) en el Riel Deslizante (n.° 2). Fije el Tope de Lí...
-
Page 25: Guí A De Ajustes
GUÍ A DE AJUSTES ¡ PRECAUCIÓN! Las partes móviles, como el asiento, pueden cortar y aplastar. Mantenga las manos alejadas del riel deslizante durante el uso. AJUSTE DE LA CORREA DEL PEDAL La Correa del Pedales ajustable y se puede personalizar para adaptarse al tamaño del pie del usuario. -
Page 26: Cambio De Pilas
INSTALACIÓN Y REEMPLAZO DE PILAS INSTALACIÓN DE LA PILAS: 1. Presione la hebilla en la parte inferior de la Computadora (n.° 70), luego retire la Computadora (n.° 70) de la Estructura Principal (n.° 1). Luego abra el velcro sobre la caja de las pilas en la parte posterior de la Computadora (n.°... - Page 27 GUÍ A DE ALMACENAMIENTO Figura A ¡ PRECAUCIÓN! Mué vase con cuidado cuando pliegue verticalmente el Riel ¡ PRECAUCIÓN! Deslizante (n.° 2), ya que su ¡ El Asiento (n.° cabeza puede tocar 6) se deslizará Estabilizador Trasero (n.° 4). hacia abajo plegar Riel...
- Page 28 GUÍ A DE DESPLIEGUE Para desplegar Riel Deslizante (n.° 2), primero retire la Perilla (n.° 31) y el Pasador (n.° 27) (como se muestra en la Figura A). Figura A Coloque ligeramente el Riel Deslizante (n.° 2), luego atornille la Perilla (n.° 31) para apretar el Riel Deslizante (n.°...
- Page 29 CÓMO USAR LA MÁQUINA La má quina de remo magnética multifunción SPM le permite entrenar de múltiples maneras. Puede usarla como una máquina de remo tradicional o usarla para hacer ejercicios de fuerza de la parte superior del cuerpo. Cuando la use como una máquina de remo, asegúrese de poner los pies en los Pedales Izq/Der (n.°...
- Page 30 MEDIDOR DE EJERCICIO TECLAS DE FUNCION: MODO: Para seleccionar la opción de modo que desea o encender la consola de visualización. CONFIGURACIÓN: Para establecer un valor de TIEMPO, CONTEO o CALORÍ AS (cuando no está en modo ESCANEO). REINICIO: Presione para restablecer el TIEMPO, CONTEO o las CALORÍ AS. Mantenga presionado durante aproximadamente 3 segundos para restablecer todos los valores, excepto el CONTEO TOTAL.
-
Page 31: Instructions D'assemblage
INSTRUCTIONS D’ASSEMBLAGE Nous apprécions votre expérience d'utilisation des produits Sunny Health and Fitness. Pour obtenir l'aide concernant pièces dépannage, veuillez nous contacter à support@sunnyhealthfitness.com ou au 1-877-90SUNNY (877-907-8669). ÉTAPE 1: Fixer le Stabilisateur Avant (N 3) au Cadre Principal (N 1) à... - Page 32 Nous apprécions votre expérience d'utilisation des produits Sunny Health and Fitness. Pour obtenir l'aide concernant pièces dépannage, veuillez nous contacter à support@sunnyhealthfitness.com ou au 1-877-90SUNNY (877-907-8669). ÉTAPE 3: Fixez le Siège (N 6) au Rail de Glissière Fixez le Tapis Limite (N 29) sur Rail de 2) à...
-
Page 33: Déplacement De L'appareil
GUIDE DE RÉGLAGE Les pièces mobiles, telles que le siège, peuvent s’écraser et causer des coupures. ATTENTION! Ne mettez pas les mains sur le rail coulissant pendant l’utilisation. RÉGLAGE DE LA COURROIE DE PÉDALE La sangle de pé dale est réglable et peut s’adapter à... -
Page 34: Installation Et Remplacement Des Piles
INSTALLATION ET REMPLACEMENT DES PILES INSTALLATION DES PILES: 1. Poussez la boucle au bas de Ordinateur (N° 70), puis retirez Ordinateur (N° 70) du Cadre Principal (N° 1). Puis ouvrez le velcro au-dessus du boî tier de la batterie à l'arrière de Ordinateur (N°... - Page 35 GUIDE D’ENTREPOSAGE Figure A ATTENTION! Procédez prudemment lors du ATTENTION! pliage vertical du Rail de Le Siège (N Glissière (N 2), car votre tête glissera pourrait heurter vers le bas lors du pliage Stabilisateur Arrière (N Rail (Nº Glissière Lorsqu’il n’est pas utilisé, vous pouvez gagner de l’espace en Figure B pliant le Rail de Glissière (N°...
- Page 36 GUIDE DÉ DÉPLOAGE Pour déplier Rail Glissière ( 2), retirez d'abord N° Figure A le Bouton ( 31) et la N° Goupille ( 27) (comme le N° montre la Figure A). Posez légèrement le Rail de Glissière ( 2), puis vissez le N°...
-
Page 37: Utilisation De L'appareil
UTILISATION DE L’APPAREIL Le rameur magnétique multifonction SPM vous permet de vous entraî ner de plusieurs manières. Vous pouvez l’utiliser comme un rameur traditionnel ou vous pouvez l’utiliser pour muscler le haut de votre corps. Lorsque vous l’utilisez comme un rameur, assurez-vous de bien placer vos pieds dans les Pédales D/G (N°... -
Page 38: Spécifications
ORDINATEUR D EXERCICE ’ LES TOUCHES DE FONCTION: MODE: Pour choisir votre mode ou pour allumer la console d’affichage. RÉGLER: Pour définir une valeur de DURÉE, NOMBRE ou de CALORIES (en dehors du mode BALAYAGE). RÉINITIALISER: Appuyez pour réinitialiser la DURÉE, NOMBRE ou les CALORIES. - Page 39 MONTAGEANLEITUNG Wir schätzen Ihre Erfahrung im Umgang mit den Produkten von Sunny Health and Fitness. Für Fragen zu Teilen oder Hilfe bei der Fehlerbehebung kontaktieren Sie uns bitte unter support@sunnyhealthfitness.com oder 1-877-90SUNNY (877-907-8669). SCHRITT 1: Befestigen Sie den Vorne Stabilisator (Nr.
- Page 40 Wir schätzen Ihre Erfahrung im Umgang mit den Produkten von Sunny Health and Fitness. Für Fragen zu Teilen oder Hilfe bei der Fehlerbehebung kontaktieren Sie uns bitte unter support@sunnyhealthfitness.com oder 1-877-90SUNNY (877-907-8669). SCHRITT 3: Setzen Sie den Sitz (Nr. 6) auf die Gleitschiene (Nr.
- Page 41 EINSTELLUNGEN UND GEBRAUCHSANWEISUNG VORSICHT! Bewegliche Teile, wie z.B. der Sitz, können zu Schnittverletzungen und Quetschungen führen. Halten Sie während der Benutzung die Hände von der Gleitschiene fern! PEDALRIEMEN-EINSTELLUNG Der Pedalriemen ist verstellbar und kann an die Fußgröße des Benutzers angepasst werden. TRANSPORTIEREN DES RUDERGERÄTES Um das Rudergerät zu transportieren, heben Sie die Stabilisator Hinten (Nr.
-
Page 42: Einlegen Der Batterien
INSTALLATION UND AUSTAUSCH DER BATTERIE Batterie Klettverschlus EINLEGEN DER BATTERIEN: 1. Drücken Sie die Verschlussklappe an der Unterseite des Computer (Nr. 70) und entfernen Sie dann den Computer (Nr. 70) vom Hauptrahmen (Nr. 1). Öffnen Sie dann den Klettverschluss oberhalb des Batteriefachs auf der Rückseite des Computer (Nr. 70). 2. - Page 43 FALTFÜHRUNG Abbildung A VORSICHT! Der Sitz (Nr. 6) VORSICHT! rutscht beim Seien Sie vorsichtig, wenn Zusammenklap Sie die Gleitschiene (Nr. 2) vertical zusammenklappen, Gleitschiene da Ihr Kopf die Stabilisator (Nr. nach Hinten (Nr. 4) berü hren Bei Nichtgebrauch können Sie kann.
- Page 44 ENTFALTUNGSFÜHRUNG Um die Gleitschiene (Nr. 2) zu Abbildung A entfalten, entfernen Sie zuerst den Knopf (Nr. 31) und den Zugbolzen (Nr. 27) (wie in Abbildung A gezeigt). Legen Sie die Gleitschiene (Nr. 2) leicht hin, schrauben Sie dann den Knopf (Nr.
- Page 45 VERWENDEN DER MASCHINE Mit dem Multifunktions-Magnetrudergerä t SPM können Sie auf verschiedene Arten trainieren. kann sie als herkö mmliche Rudermaschine verwenden oder mit ihr Übungen zur Stärkung des Oberkörpers durchführen. Wird sie als Rudermaschine verwendet, ist es wichtig, die Füße in die Pedalen L/R (Nr. 33L/R) zu setzen und die Riemen zu benutzen.
-
Page 46: Funktionen Und Betrieb
TRAININGSCOMPUTER FUNKTIONSTASTEN: MODE: Zum Auswählen des Spezifikationsmodus und/oder Einschalten des Computer. SET: Um einen Wert fü r ZEIT, ANZAHL oder KALORIEN einzustellen (wenn Sie sich nicht im SCAN-Modus befinden). RESET: Drü cken Sie diese Taste, um ZEIT, ANZAHL oder KALORIEN zurückzusetzen.
Need help?
Do you have a question about the SF-RW5941 and is the answer not in the manual?
Questions and answers