Advertisement
Advertisement
Table of Contents

Related Manuals for Sunny Health & Fitness SF-RW5515


Summary of Contents for Sunny Health & Fitness SF-RW5515
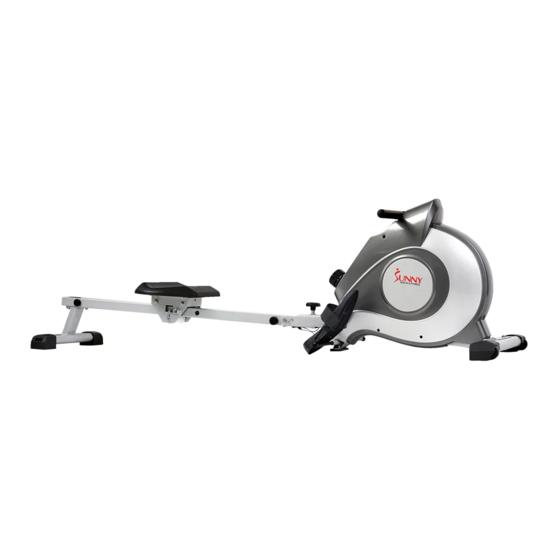
- Page 1 MAGNETIC ROWING MACHINE SF-RW5515 USER MANUAL IMPORTANT! Please retain owner’s manual for maintenance and adjustment instructions. Your satisfaction is very important to us, PLEASE DO NOT RETURN UNTIL YOU HAVE CONTACTED support@sunnyhealthfitness.com or 1- 877 - 90SUNNY (877-907-8669).
-
Page 2: Important Safety Information
IMPORTANT SAFETY INFORMATION We thank you for choosing our product. To ensure your safety and health, please use this equipment correctly. It is important to read this entire manual before assembling and using the equipment. Safe and effective use can only be achieved if the equipment is assembled, maintained, and used properly. It is your responsibility to ensure that all users of the equipment are informed of all warnings and precautions. -
Page 3: Exploded Diagram
EXPLODED DIAGRAM... -
Page 4: Parts List
PARTS LIST Description Spec. Description Spec. Front Stabilizer Adjusting U Seat 30*10*1.5 Washer d8*Φ16*1.5 M6*H6*S10 Screw M8*55*20*S6 Main Frame End Cap Trunk Wire 1 4L/R M8*H7.5*S13 Washer d12*Φ24*2 Screw ST4.2*25*Φ10.5 Knob Handlebar Bolt M12*Φ12.5*160*S19 Foam Grip Φ26*3*215 Pedal L/R 49L/R End Cap Φ28*15 Pedal Strap... -
Page 5: Hardware Package
HARDWARE PACKAGE #63 M6*16*Φ12 1PC #2 d8*Φ16*1.5 6PCS PC11PC #64 d6*Φ12*1 1PC #3 M8*55*20*S6 2PCS #46 d12*Φ24*2 1PC #65 Φ33*Φ8*13 1PC #66 Φ12*80*M6 1PC #47 M12 1PC #72 M8*20*S6 4PCS #48 M12*Φ12.5*160*S19 4PCS #52 d8 4PCS #58 Φ10*95*M6*25 1PC #59 M6*16*S5 1PC #60 Φ8*100*105 1PC Ordering Replacement Parts (U.S. -
Page 6: Assembly Instructions
ASSEMBLY INSTRUCTIONS We value your experience using Sunny Health and Fitness products. For assistance with parts or troubleshooting, please contact us at support@sunnyhealthfitness.com or 1-877-90SUNNY (877-907- 8669). STEP 1: Attach Front Stabilizer (No. 1) to Main Frame (No. 44) using 2 Screws (No. 3) and 2 Washers (No. - Page 7 We value your experience using Sunny Health and Fitness products. For assistance with parts or troubleshooting, please contact us at support@sunnyhealthfitness.com or 1-877-90SUNNY (877-907- 8669). STEP 3: Insert the Seat (No. 71) onto Sliding Rail (No. 62). Insert the Limit Axle (No. 66) into the hole on the back of the Sliding Rail (No.
- Page 8 ADJUSTMENTS & USAGE GUIDE CAUTION! Moving parts, such as the seat, can cut and crush. Keep hands clear of the sliding rail during use! PEDAL STRAP ADJUSTMENT The pedal strap is adjustable and can be personalized to fit the user’s foot size. MOVING THE ROWER To move the rower, lift up the Rear Support (No.
-
Page 9: Storage Guide
STORAGE GUIDE Figure A When not in use, you can save space by folding the Sliding Rail (No. 62). CAUTION! 1. Disassemble Knob (No. 47) and Washer (No. Use caution when you 46) and pull out the Pull vertically fold Pin (No. -
Page 10: Exercise Computer
EXERCISE COMPUTER FUNCTION KEYS: MODE: To select your specification mode and/or turn on display console. SET: To set a value of Time or Calories (when not in Scan mode). RESET: Press to reset Time or Calories. FUNCTIONS AUTO ON/OFF & AUTO START/STOP: The power will turn off automatically once there’s no signal for 4 minutes.
Need help?
Do you have a question about the SF-RW5515 and is the answer not in the manual?
Questions and answers
My mesh belt lost tension yesterday while rowing. I looked up manual and I am assuming I need a replacement volute spring?
Yes, the Sunny Health & Fitness SF-RW5515 includes a volute spring (part 21) as part of its components, which suggests it may be related to mesh belt tension. If there is a tension issue, replacing the volute spring could be necessary.
This answer is automatically generated
I have an SR-RW5515 rowing machine that is long out of warranty. I love it, but recently the computer stalls on the stopwatch function and doesn't add seconds until I slap the machine and it starts the time rolling again. Could I fix this by replacing the computer, or is the computer not sensing motion and so stops counting up? If replacing the computer would help, how do I order one?
Yes, replacing the computer may fix the stopwatch function issue on the Sunny Health & Fitness SF-RW5515 rowing machine, especially if the display is incorrect or difficult to read. The manual suggests replacing the computer or batteries if the display malfunctions.
This answer is automatically generated
My knob has gone missing, how do I get a replacement part?
To obtain a replacement knob for the Sunny Health & Fitness SF-RW5515, provide the following information:
1. The model number (found on the cover of the manual).
2. The product name (found on the cover of the manual).
3. The part number from the “EXPLODED DIAGRAM” and “PARTS LIST” in the manual.
Then, contact Sunny Health & Fitness customer support at support@sunnyhealthfitness.com or call 1-877-90SUNNY (877-907-8669).
This answer is automatically generated
Can you make the computer stay on TIME and not Scan
To set the Sunny Health & Fitness SF-RW5515 computer to display TIME instead of SCAN, follow these steps:
1. Press the MODO button to select a function. Ensure that you are not in SCAN mode.
2. Once TIME is selected, press ESTABLECER to adjust the value if needed.
3. When the display stops flashing, start rowing, and the countdown will begin.
This will set the display to show TIME instead of SCAN.
This answer is automatically generated
How do I replace the two AAA batteries?
To replace the two AAA batteries in the Sunny Health & Fitness SF-RW5515:
1. Take out two AAA batteries from the plastic bag with the manual.
2. Press the buckle on the bottom of Computer (No. 13) upward, then remove Computer (No. 13) from the Main Frame (No. 44).
3. Disconnect Sensor A/B (No. 45A & 45B) and the Computer Wire A/B (No. 13A & 13B).
4. Install the two AAA batteries into the back of Computer (No. 13).
5. Reconnect Sensor A/B (No. 45A & 45B) with the Computer Wire A/B (No. 13A & 13B).
6. Press the buckle on the bottom of Computer (No. 13) and put it back onto the Main Frame (No. 44).
7. Push the Computer (No. 13) downwards to fit it in position.
Always change both batteries at the same time, do not mix battery types, and dispose of old batteries according to local guidelines.
This answer is automatically generated