Advertisement
Quick Links
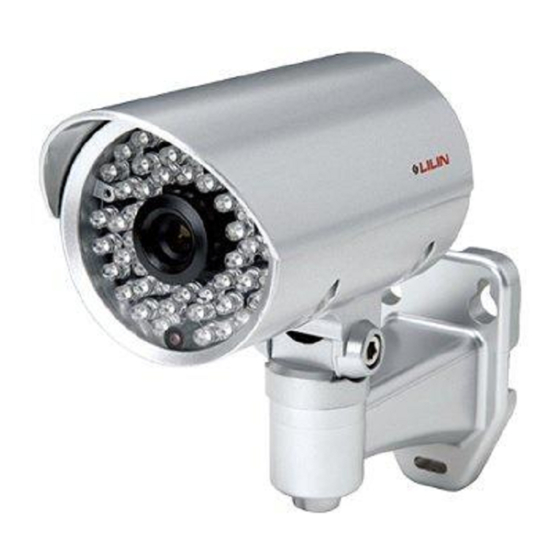
AHD IR CAMERA
Part Description & Dimension
72.5
82
Installation Guide
154
67
101
35
R 2.25
67
12.5mm
Unit: mm
66-AHD702AOOE-3
TOP COVER
BOTTOM CHASSIS
BRACKET
PAN ADJUSTMENT SCREW
Installation
1.
Remove the camera from the inner box first. Plug the video cable and power
cable to the video output jack and DC power input jack of the camera (FIG.1).
Then secure the bracket to the wall(FIG.2).
DC power input
Video output
2. Loosen the pan and tilt adjustment screw on the bracket to turn the camera
body to the desired angle and then tighten the screws(FIG.3).
TILT ADJUSTMENT SCREW
WINDOW
VIDEO OUTPUT JACK
DC POWER INPUT JACK (DC12V ±10%)
FIG. 1
FIG. 3
FIG. 2
Advertisement

Related Manuals for Lilin AHD705A3.6


Summary of Contents for Lilin AHD705A3.6
- Page 1 AHD IR CAMERA Installation Guide 66-AHD702AOOE-3 Part Description & Dimension TOP COVER TILT ADJUSTMENT SCREW BOTTOM CHASSIS WINDOW BRACKET VIDEO OUTPUT JACK PAN ADJUSTMENT SCREW DC POWER INPUT JACK (DC12V ±10%) Installation 72.5 Remove the camera from the inner box first. Plug the video cable and power cable to the video output jack and DC power input jack of the camera (FIG.1).
- Page 2 3. For models with vari-focal lens, a screw driver is required to open the top 6. Connect to an Up-the-Coax (UTC) digital recorder that supports AHD-Coaxial cover of the camera (FIG. 4). protocol. Then use the 8-directional buttons (FIG. 8) to adjust settings for the best images.