
Related Manuals for Blaupunkt BLUEBOT XTREME


Summary of Contents for Blaupunkt BLUEBOT XTREME
-
Page 1: Table Of Contents
USER MANUAL BLUEBOT XTREME Product introduction 02 - 16 Installation robot 17 - 21 App installation 22 - 40 Instructions 41 - 51 Maintenance 52 - 63 Others 64 - 74... -
Page 2: Product Introduction
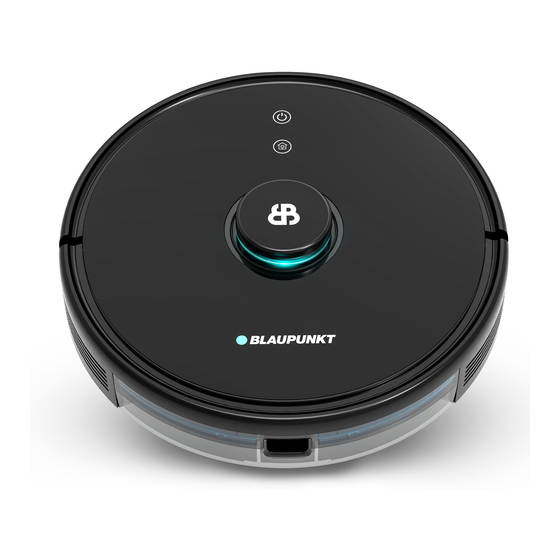
PRODUCT INTRODUCTION Robot, sensors & assembly Parts & accessories... - Page 3 PRODUCT INTRODUCTION Top view Robot Bottom view Robot...
- Page 4 PRODUCT INTRODUCTION Filter cover Wall sensor LDS laser ranging sensor Anti-collision sensor for radar Infrared recharging sensor Dustbin button Anti-collision sensor...
- Page 5 Dustbin PRODUCT INTRODUCTION Maintenance dustbin Maintenance filter 1. Press the button and pull the dustbin out backwards. 3. Remove the filter gauze, sponge, and HEPA. 4. Clean the removed filter gauze, sponge, and HEPA with water if needed. Filter cover Wall sensor 5.
- Page 6 PRODUCT INTRODUCTION Sensors Filter cover Wall sensor Maintenance Clean the sensors with a dry, soft cloth, including: 1. The sensors along the sides of the robot. LDS laser ranging sensor 2. Three anti-dropping sensors at the bottom of the robot. 3.
- Page 7 PRODUCT INTRODUCTION Anti-drop sensor Charging contact points Battery cover Side brush Universal wheel Driving wheel Rolling brush cover Rolling brush...
- Page 8 PRODUCT INTRODUCTION Anti-drop sensor Anti-drop sensor Anti-drop sensor Maintenance Clean the sensors with a dry, soft cloth, include: 1. The sensors along the side of the robot. Charging contact points 2. Three anti-dropping sensors at the bottom of the robot. 3.
- Page 9 PRODUCT INTRODUCTION Side brush Installation Maintenance Make the left side-brush (L) and the right-side brush (R) correspond 1. Turn the machine over and pull the side brush out and upwards. Anti-drop sensor to L and R on the bottom casing, keep pressing L and R and the side 2.
- Page 10 PRODUCT INTRODUCTION Rolling brush Anti-drop sensor Clip Maintenance 1. Turn the machine over and press simultaneously on both clips of the cover of the brush to open the cover and take Charging contact points out the rolling brush. Main brush 2.
- Page 11 PRODUCT INTRODUCTION Charging base Adapter HEPA filter + sponge Duster cloth Left side brush filter Right side brush 2 in 1 electrically- Remote control Cleaning brush with Cleaning brush controlled water tank knife...
- Page 12 PRODUCT INTRODUCTION Charging base Power indicator light Signal emission area Charging base Adapter HEPA filter + sponge Duster cloth Left side brush filter Right side brush Charging base pin Wire slot Power adapter port Cover plate Storage groove 2 in 1 electrically- Remote control Cleaning brush with Cleaning brush...
- Page 13 PRODUCT INTRODUCTION Adapter 1. Connect the adapter and wrap the excess 2. Place the charging base against the wall 3. Please do not move the charging base wire around the wrapping post in the and connect the power without reason and keep it out of direct storage groove sunlightsunlight Charging base...
- Page 14 HEPA filter + sponge filter PRODUCT INTRODUCTION 1. Remove the filter gauze, sponge and HEPA. Clean filter regularly 2. Clean the removed filter gauze, sponge, and HEPA with water if needed. 3. Shake off the water drops and dry the pieces naturally, only use them after they are completely dried.
- Page 15 PRODUCT INTRODUCTION Left/right side brush 1. Turn the machine over and pull the side brush out and upwards. 2. Remove hair and dirt and reassemble the side brush. 3. Make the left-side brush (L) and the right-side brush (R) correspond to L and R on the bottom casing, press L and R to reinstall them. Charging base Adapter HEPA filter + sponge...
- Page 16 PRODUCT INTRODUCTION 2 in 1 electrically-controlled water tank 1. Remove the mop, pour the water out of the water tank. 2. Clean the mop by hand, dry the water tank and mop. Charging base Adapter HEPA filter + sponge Duster cloth Left side brush filter Right side brush...
- Page 17 INSTALLATION Robot Mopping module...
- Page 18 INSTALLATION Installation of mopping cloth | 2 in 1 electric-controlled water tank Paste the mopping cloth flat onto the bottom Fill the water tank: uncap the cover and fill Press and hold the button in the middle of the of the water tank. with water.
- Page 19 INSTALLATION Robot installation Connect the adapter and feed the excess wire into the slot. Place the charging base against the wall and connect the power. >1 m >1 m >1.5m • Ensure a space of more than 1 m on both sides of the charging base and a space of more than 1.5m in the front. Robot Mopping module •...
-
Page 20: Installation Robot
INSTALLATION Robot installation Please do not move the charging base without reason and Make the left side-brush (L) and the right-side brush (R) correspond keep it out of direct sunlight. to L and R on the bottom casing, keep pressing L and R and the side brushes. - Page 21 INSTALLATION Robot installation Starting up and charging Start cleaning Please charge the robot on the charging base and the machine After the robot is powered on, short press key on the robot will start automatically. The machine can only work normally or use the mobile APP to start cleaning (press any button to when the battery level is ≥20%.
-
Page 22: App Installation
APP INSTALLATION App connection | Start Start Step 1 App installation Create an account Make sure the robot is on, by holding in the ‘On button’ for a few seconds on top of the robot. Wait until the robot has fully started. Connect your Bluebot... - Page 23 APP INSTALLATION App connection | Start Start Step 2 App installation Create an account Place the robot charging basecharging baseon the charging base to charge and make sure it’s completely charged before Connect your Bluebot use, the lights on the robot will stop blinking when ready.
- Page 24 APP INSTALLATION App connection | Start Start Step 3 App installation Create an account Remove the robot from the charging basecharging base. Connect your Bluebot...
- Page 25 APP INSTALLATION App connection | App installation Start App installation Create an account Download the Bluebot app. The Bluebot app can be found via the App Connect your Bluebot Store and Google Play.
- Page 26 APP INSTALLATION App connection | Create an account Start Step 1 App installation Register a new account if you are not an Create an account existing user. Press “Register” to register a new account. Connect your Bluebot...
- Page 27 APP INSTALLATION App connection | Create an account Start Step 2 App installation When the Privacy Policy pops up, please Create an account read it and press “Agree” if you agree with the policy. Connect your Bluebot...
- Page 28 APP INSTALLATION App connection | Create an account Start Step 3 App installation Here you can choose to register by Create an account mobile phone number or email. If you choose email, you will receive your verification code by email and if you Connect your Bluebot register with a mobile phone number, you will receive your verification code...
- Page 29 APP INSTALLATION App connection | Create an account Start Step 4 App installation Enter the verification code that was Create an account sent to you. Connect your Bluebot...
- Page 30 APP INSTALLATION App connection | Create an account Start Step 5 App installation Choose a safe password for your Create an account account. Connect your Bluebot...
- Page 31 APP INSTALLATION App connection | Create an account Start Step 6 App installation Allow the “BlueBot” to use your location Create an account by pressing “Allow While Using App”. Connect your Bluebot...
- Page 32 APP INSTALLATION App connection | Create an account Start Step 7 App installation After your registration, make sure that the Create an account robot is removed from its charging base. Turn your robot on by pressing the ‘On button’ . After that is done, simultaneously Connect your Bluebot press both the ‘Home button’...
- Page 33 APP INSTALLATION App connection | Connect your Bluebot Start Step 1 App installation Open the Bluebot app and press the ‘ A dd Create an account Device’ button to add your Bluebot robot. Connect your Bluebot...
- Page 34 APP INSTALLATION App connection | Connect your Bluebot Start Step 2 App installation Select the device you want to add. Create an account Connect your Bluebot...
- Page 35 APP INSTALLATION App connection | Connect your Bluebot Start Step 3 App installation Enter your WIFI password and press confirm. Create an account Connect your Bluebot Only 2.4 GHz WIFI networks are supported. Please see your router manual for help.
- Page 36 APP INSTALLATION App connection | Connect your Bluebot Start Step 4 App installation Select ‘AP mode’ in the upper right if not yet Create an account selected and click ‘Next Step’ . Connect your Bluebot Previous Step Next Step...
- Page 37 APP INSTALLATION App connection | Connect your Bluebot Start Step 5 App installation Press on the ‘Go to connect’ button in the Create an account bottom of your screen. Connect your Bluebot...
- Page 38 APP INSTALLATION App connection | Connect your Bluebot Start Step 6 App installation Select the ‘SmartLife xxx’ network from the list and Create an account return to the Bluebot app. Connect your Bluebot...
- Page 39 APP INSTALLATION App connection | Connect your Bluebot Start Step 7 App installation Your robot will now connect to the app. Create an account Connect your Bluebot...
- Page 40 APP INSTALLATION App connection | Connect your Bluebot Start Step 8 App installation Your are now connected with the App. Create an account For more info about the app, choose “App instructions” from the main menu below. Connect your Bluebot...
- Page 41 APP INSTRUCTIONS Choose a starting point for your cleaning process Draw your own area in the map to clean Set Wall Adjustment of Start / Pause suction power The robot will drive back to More options it’s charging base...
- Page 42 APP INSTRUCTIONS Cleaning start/pause Use this function for the first time using the Robot. The Robot will scan the room it is in and create a map. This map can then be used in the future. It will speed up the Robots process as it knows exactly where it is. Choose a starting point for your cleaning process Draw your own area...
- Page 43 APP INSTRUCTIONS Choose a starting point for your cleaning process When choosing this feature, you can place a pointer marker in your map and use that marker as a starting point for the Robots next cleaning process. Choose a starting point for your cleaning process Draw your own area in the map to clean...
- Page 44 APP INSTRUCTIONS Draw your own area within the map to clean When choosing this option, you can draw your own area to clean within the map. You can create these areas by choosing “set wall” on the left site of your map. Choose a starting point for your cleaning process Draw your own area...
- Page 45 APP INSTRUCTIONS More options Timer Auto Boost Do not disturb mode Set a timer to program the robot to clean at Auto Boost will increase suction power Here you can schedule an do not disturb a certain time or day. when the robot gets more friction.
- Page 46 APP INSTRUCTIONS Set wall Use this function to create no-go zones within the area that you are cleaning. You can draw virtual walls that blocks the robot from crossing. Choose a starting point for your cleaning process Draw your own area in the map to clean Set Wall Adjustment of...
-
Page 47: Instructions
INSTRUCTIONS Autocleaning start/pause Recharging start/pause Go forward Turn left Turn right Find robot Adjustment of Adjustment of water flow suction power Spot cleaning start/pause Light on/off... - Page 48 INSTRUCTIONS Autocleaning start/pause Recharging start/pause Go forward Adjustment of water flow Turn left Turn right Find robot You can adjust the water flow to a low level, standard level, and high level by mobile level. Adjustment of Adjustment of water flow suction power Spot cleaning start/pause Light on/off...
- Page 49 INSTRUCTIONS Autocleaning start/pause Recharging start/pause Go forward Recharging start/pause Turn left Turn right Find robot Automatic mode: The robot will return to the charging base automatically after work. Adjustment of Manual mode: In a suspended state, short press this key to start recharging or when the recharging robot is charged under Adjustment of water flow suction power the control of the Bluebot app.
- Page 50 INSTRUCTIONS Autocleaning start/pause Recharging start/pause Spot cleaning start/pause 1.8 m Go forward When the robot cannot be controlled by the Bluebot app, please Turn left Turn right move the robot to the place you want to clean. Long press the button for 3 seconds, and the robot will clean twice within the scope Find robot of 1.8mx1.8m centring on itself.
- Page 51 INSTRUCTIONS Autocleaning start/pause Recharging start/pause Go forward Adjustment of suction power Turn left Turn right Find robot You can adjust the suction power to silent level, standard level, and high level. Adjustment of Adjustment of water flow suction power Spot cleaning start/pause Light on/off This can also be done with the Bluebot app.
-
Page 52: Maintenance
DAILY MAINTENANCE Rolling Brush Side brush Dust bin Filter cover cleaning Mopping module Filter cleaning 2 in 1 electrically-controlled water tank Sensors Sensors Regular cleaning Monthly cleaning Battery Firmware upgrade System reset... - Page 53 DAILY MAINTENANCE Rolling brush Rolling Brush Side brush 1. Turn over the machine and press the buckle on the rolling brush Clip cover to take out the rolling brush. Dust bin Filter cover cleaning 2. Remove dust outside and inside the rolling brush using a tiny brush and clean the rolling brush.
- Page 54 DAILY MAINTENANCE Side brush Rolling Brush Side brush 1. Turn over the machine and pull the side brush out and upwards. (right side brush) (left side brush) Dust bin Filter cover cleaning 2. Remove hair and dirt and reassemble the side brush. 3.
- Page 55 DAILY MAINTENANCE Dust bin Rolling Brush Side brush 2. Open, empty and clean the dustbin. 1. Press the button and pull the dustbin out backwards. Dust bin Filter cover cleaning Mopping module Filter cleaning 2 in 1 electrically-controlled water tank Sensors Sensors Regular cleaning...
- Page 56 DAILY MAINTENANCE Filter screen cleaning Rolling Brush Side brush 1. Remove the filter gauze, sponge and HEPA 2. Clean the removed filter gauze, sponge, and Dust bin Filter cover cleaning Filter gauze HEPA with water if needed. 3. Shake off the water drops and dry the pieces Mopping module Filter cleaning naturally, then use them after they have...
- Page 57 DAILY MAINTENANCE Filter cleaning Rolling Brush Side brush Dust bin Dust bin Filter cover cleaning Mopping module Filter cleaning HEPA 2 in 1 electrically-controlled water tank Sponge Sensors Sensors Regular cleaning Monthly cleaning Filter gauze Battery Firmware upgrade Water tank System reset Clean it regularly...
- Page 58 DAILY MAINTENANCE Mopping module | 2 in 1 electrically-controlled water tank Rolling Brush Side brush 1. Remove the mop, pour the water out of the water tank. 2. Lean the mop (by hand), dry the water tank and mop. Dust bin Filter cover cleaning Mopping module Filter cleaning...
- Page 59 DAILY MAINTENANCE Sensor | Regulary cleaning Rolling Brush Side brush Clean the sensors with a soft, dry mop, including: Anti-drop sensor 1. Three anti-dropping sensors at the bottom of the robot. Dust bin Filter cover cleaning 2. Electric shock protector and the pins to connect with the Charging contact charging base at the bottom of the robot (please cut the power Mopping module...
- Page 60 DAILY MAINTENANCE Sensor | Monthly cleaning Rolling Brush Side brush LDS laser ranging sensor Clean the sensors with a soft, dry mop, including: 1. The anti-collision sensors along the side of the robot. Anti-collision sensor for radar Dust bin Filter cover cleaning 2.
- Page 61 DAILY MAINTENANCE Rolling Brush Side brush Dust bin Filter cover cleaning Battery Mopping module Filter cleaning 2 in 1 electrically-controlled water tank • The robot is furnished with high-performance lithium-ion batteries. • To maintain battery performance, please keep the robot charged in daily use Sensors Sensors •...
- Page 62 DAILY MAINTENANCE Rolling Brush Side brush Dust bin Filter cover cleaning Firmware upgrade Mopping module Filter cleaning 2 in 1 electrically-controlled water tank • Upgrade firmware using the Bluebot app. If new firmware is detected, upgrade it according to the report. •...
- Page 63 DAILY MAINTENANCE Rolling Brush Side brush Dust bin Filter cover cleaning System reset Mopping module Filter cleaning 2 in 1 electrically-controlled water tank • Take the dust bin down and press ‘Reset key’. Make sure that you place the robot back on its charging base. •...
-
Page 64: Others
OTHERS Safety information General Safety information Basic Parameters Limitations Safety information Troubleshooting Laser Safety information Warning Safety information Battery and Charging Warranty Policy Period... - Page 65 OTHERS Problem Solution Safety information General Text missing Safety information Basic Parameters Limitations Safety information Troubleshooting Laser Safety information Warning Safety information Battery and Charging Warranty Policy Period...
- Page 66 Basic Parameters OTHERS Machine Safety information Items Parameters General Model Bluebot XTreme Safety information Basic Parameters Overall dimension 350x350x100mm Limitations Product weight 3.2kg Safety information Troubleshooting Laser Li-battery 5000mAh Rated voltage 14.4V Safety information Warning Rated power Safety information Battery and Charging...
- Page 67 Troubleshooting OTHERS Prompt Tone Solution Safety information General Error 1: Oh dear! I cannot find the dust collector Cleaning is triggered when the dust bin is removed Safety information The top radar is covered or placed in an open area Error 2: Please check if the radar on top has been covered or blocked Basic Parameters (there are no obstacles within an area of 6×6m2)
- Page 68 Troubleshooting OTHERS Prompt Tone Solution Safety information General Error 11: I’m stuck, please help me The robot is stuck Safety information Error 12: Please place me correctly! Basic Parameters The robot is tilted Limitations Error 13: Please check if my wheels have become blocked somewhere The driving wheel is stuck or twisted Safety information Troubleshooting...
- Page 69 Safety Information | General OTHERS Before using this product, please read the following safety instructions and follow all routine safety precautions. Please read the instructions carefully, please keep the instructions. Any operation inconsistent with this instruction manual may cause damage to this product. Safety information Note: General...
- Page 70 OTHERS Safety Information | Usage Limitations • The product is only used for floor cleaning in a home environment and cannot be used outdoors (such as an open terrace), non-ground Safety information (such as a sofa) and commercial or industrial environments. General •...
- Page 71 OTHERS Safety information General Safety information Basic Parameters Limitations Safety information Troubleshooting Safety Information | Laser Laser Laser distance sensor of the product complies with the standard for class1 laser products of IEC60825 and does not produce dangerous laser Safety information Warning radiation.
- Page 72 OTHERS Safety Information | Usage Limitations • Use only the original rechargeable battery and charging seat specially equipped by the manufacturer. Non - rechargeable batteries are Safety information strictly prohibited. General • It is forbidden to use products in environments with open flames or fragile objects. Safety information •...
- Page 73 OTHERS Safety information General Safety Information | Battery and Charging Safety information Basic Parameters Limitations • Please do not use a battery, charging base, or charger provided by any third parties. • Please do not dismantle, report or refit battery or charging base arbitrarily. Safety information Troubleshooting •...
- Page 74 OTHERS Safety information General Safety information Basic Parameters Limitations Safety information Warranty Policy | Period Troubleshooting Laser • Please contact the Customer Service team for warranty cases. Safety information Warning Safety information Battery and Charging Warranty Policy Period...
Need help?
Do you have a question about the BLUEBOT XTREME and is the answer not in the manual?
Questions and answers