
Related Manuals for Blaupunkt Bluebot


Summary of Contents for Blaupunkt Bluebot
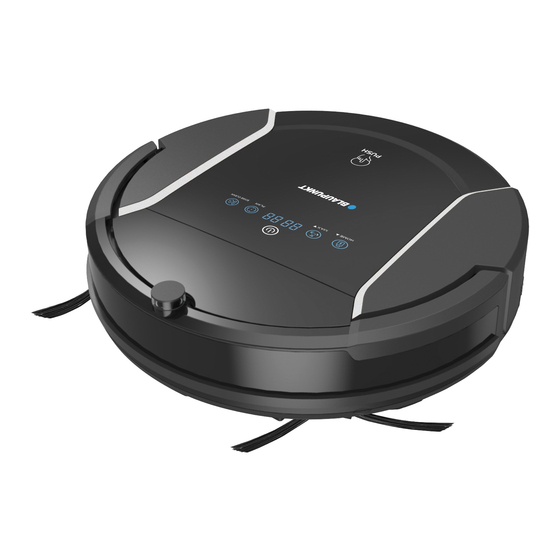
- Page 1 Robotic Vacuum Cleaner & Mop Blaupunkt Bluebot User Manual Please keep this user manual in your sight, read it thoroughly and carefully before using this product.
-
Page 2: Table Of Contents
Contents Safety Instructions ..................1 Product Features ...................2 Product Components ..................4 Main Body and Accessories ................4 Main Body Diagram/Dust bin ................5 Roller Brush Kit ....................6 Charging Station / Remote Control ..............7 Display Panel ....................8 Product Operation ..................9 Battery Charging .....................9 Starting Up / Standby / Sleep/Power Off ............10 Scheduling .....................10 Cleaning Modes ....................12 Water Tank and Mopping Cloth Usage ............14... -
Page 3: Safety Instructions
Safety Instructions Before using this product, please read the safety instructions and follow all regular safety precautions. Only authorized technicians can disassemble the product. Users are not allowed to disassemble or repair the product. Only use the original battery and power adapter (Model: GQ15-240060-AG) of the product for charging. -
Page 4: Product Features
Product Features Powerful Suction Suction power of this product is strong enough to ensure that even tiny dust on the floor will be cleaned thoroughly! Replaceable Roller Brush kit / Vacuum Suction kit Main Brush Kit/ Vacuum Suction Kit of this product is replaceable to meet the needs of different users per various cleaning environments. - Page 5 Product Features 2. Spot cleaning mode When using suction kit, the robot will clean intensively in a spiral way while it detects a very dirty area. 3. Edge cleaning mode In this mode, the robot will clean along the wall or obstacles. 4.
-
Page 6: Product Components
Product Components Main Body and Accessories Description Quantity Main Body Charging Station Adapter Remote Control (battery not included) Water Tank and Mopping Cloth each one piece HEPA Filter Cleaning Brush Side Brushes *2 and Spare Brushes *2 User Manual... -
Page 7: Main Body Diagram/Dust Bin
Product Components Bumper Main Body Diagram LED display Touch key Suction component Cover Roller brush component Bumper strip Power Switch Left wheel Left side brush Battery cover Bottom cover Universal wheel Right wheel Charging socket Auto charging pole Right side brush Dust Bin Dust bin... -
Page 8: Roller Brush Kit
Product Components Dust Bin Kit Primary filter Handle Dust bin HEPA filter HEPA filter shelf Roller Brush Kit Roller brush coverplate Roller brush bushing Ball bearing Roller brush Bearing glusheath Roller brush holder... -
Page 9: Charging Station / Remote Control
Product Components Charging Station Power indicator Top cover Charging socket Charging poles Remote Control Note: A. Install two AAA type batteries into the remote control before use, B. The big round button in the middle of the 4 direction buttons, is a blank button without any function. C. -
Page 10: Display Panel
Product Components Display Panel LED Panel LED panel, it shows the time setting, charging status, and error codes by using numbers, letters or graphs. : fully charged, : low power, : charging. : suction passage blocked, : no dust bin. Clean Button A: Press this button to change from sleep mode to standby mode. -
Page 11: Product Operation
Product Operation 1. Battery Charging Charging station placement Place charging station against the wall and remove obstacles from within 1 meter at two sides and about 2 meters in front of the station, as shown in the right figure. If the robot has been shut down, power on the robot by pressing the power switch at the right side of the robot for more than 3 seconds. -
Page 12: Starting Up / Standby / Sleep/Power Off
Product Operation If the robot is not to be used for a long time, fully charge the battery before use, turn the power off, remove and store it in a cool, dry place. If the robot is not to be used for more than 3 months, charge the robot for 12 hours, turn the power off, remove and store it in a cool, dry place. - Page 13 Product Operation How to schedule the robot A. Setting robot clock a. In standby or charging status, press to start clock-setting. the LED panel will show the current system time. Then the left two numbers on LED panel will flash. Press to increase hour or to decrease it.
-
Page 14: Cleaning Modes
Product Operation Cleaning Modes 1. Auto cleaning In this mode, the robot will clean a room automatically and adjust its cleaning mode according to environment. Note: Press on robot or ON/OFF on remote control to start auto cleaning. 2. Spot cleaning Under the following situations, the robot will activate spot cleaning: 1). - Page 15 Product Operation Suction component and Roller brush component can be exchangeable Either suction component or roller brush component is replaceable. Just install either of them in appropriate place at the bottom of the robot (as shown in the figure below), the robot will bring up brilliant cleaning performance.
-
Page 16: Water Tank And Mopping Cloth Usage
Product Operation Water Tank and Mopping Cloth Usage 1. Sticking mopping cloth To stick mopping cloth on the bottom of water tank as shown in fig 1, make sure the sticking side and mopping cloth are facing the appropriate sides, and then to stick the mopping cloth on its sticking side. -
Page 17: Product Maintenance
Product Maintenance 1. Cleaning Side Brushes Clean the side brush when it gets dirty and replace it if it’s damaged. Max life span for side brush is 12 months. Note: before replacing side brushes, check and make L/R mark on side brush match with the L/R mark on the bottom base of the robot. -
Page 18: Cleaning Sensors And Wheels
Product Maintenance 3. Cleaning Sensors and Wheels Slightly wipe all the sensors and wheels, as marked in figure below, with soft cleaning cloth or tool. 4. Cleaning Charging Poles Clean the charging poles, as marked in figure below, with soft cleaning cloth or tool. 5. -
Page 19: Cleaning Roller Brush Kit
Product Maintenance Kit 6. Cleaning Roller Brush Take out and disassemble the roller brush kit as shown in figure below, and clean it with soft cleaning cloth or tool. (The roller brush axle can be washed by water) Note: Please re-install the roller brush axle after it is fully dry. -
Page 20: Troubleshooting For Error Code For Sensors
Troubleshooting Error Code for Sensors Cause Solution Error code AUBF Suction passage blocked Clean suction passage AUBN Dust bin not well located or robot without dust bin Put back dust bin and place it in position E1xx Left collision switch fault E2xx Right collision switch fault Check sensitivity of the front bumper... - Page 21 Troubleshooting Error Code for Sensors Cause Solution code Error Left anti-drop sensor detect cliff, front bumper right Exx9 infrared sensors detect obstacle Front anti-drop sensor detect cliff, front bumper right ExxA infrared sensors detect obstacle Left and front anti-drop sensor detect cliff, front ExxB bumper right infrared sensors detect obstacle Clean front sensor lens and bottom...
-
Page 22: Troubleshooting For Motors
Troubleshooting Troubleshooting for Motors Cause Solution Error code Check if fan is pressed, and clean dust bin L01x Fan overloaded L0x1 Left wheel overloaded L0x2 Right wheel overloaded L0x3 Left and right wheel overloaded L0x4 Left side brush overloaded L0x5 Left wheel and left side brush overloaded L0x6 Right wheel and left side brush overloaded... -
Page 23: Product Specifications
Product specifications Classification Item Detail Mechanical Diameter 340mm Specifications Height 88mm Weight 3.5Kg Power Rating 14.6V Electrical Specifications Battery specifications Li - ion battery 2150mAh Dust bin Capacity 0.5L Cleaning Charging Type Auto Charging/ Manual Charging Specifications Cleaning Mode Auto, Spot, Edge, zig-zag, Schedule Charging Time 240~300 mins Cleaning Time...
Need help?
Do you have a question about the Bluebot and is the answer not in the manual?
Questions and answers