Table of Contents
Advertisement
Available languages
Available languages
All manuals and user guides at all-guides.com
PCE Americas Inc.
PCE Instruments UK Ltd.
711 Commerce Way
Units 12/13
Suite 8
Southpoint Business Park
Jupiter
Ensign way
FL-33458
Hampshire / Southampton
USA
United Kingdom, SO31 4RF
From outside US: +1
From outside UK: +44
Tel: (561) 320-9162
Tel: (0) 2380 98703 0
Fax: (561) 320-9176
Fax: (0) 2380 98703 9
info@pce-americas.com
info@pce-instruments.com
www.pce-instruments.com/english
www.pce-instruments.com
Advertisement
Table of Contents

Related Manuals for optris MS


Summary of Contents for optris MS
- Page 1 All manuals and user guides at all-guides.com PCE Americas Inc. PCE Instruments UK Ltd. 711 Commerce Way Units 12/13 Suite 8 Southpoint Business Park Jupiter Ensign way FL-33458 Hampshire / Southampton United Kingdom, SO31 4RF From outside US: +1 From outside UK: +44 Tel: (561) 320-9162 Tel: (0) 2380 98703 0 Fax: (561) 320-9176...
- Page 2 All manuals and user guides at all-guides.com...
-
Page 3: Table Of Contents
Display Optics Insertion of Batteries Usage of the Pouch [MSPlus/ MSPro] Protection Boot [MSPlus/ MSPro] Basic Operation Unit Settings Reset Function Data Logger [MSPro] OptrisConnect Report software Technical Data Emissivity Table Metals Emissivity Table Non-Metals Warranty optris MS – DE2011-04-A... -
Page 4: Funktionsweise
Geräteschutzhülle Adapter für Fotostativ USB-Schnittstellenkabel OptrisConnect Report Software Das Modell MSPro enthält zusätzlich: Thermoelement-Einstechfühler Typ K Optional: Werksprüfschein Software-Kit für MS, bestehend aus: OptrisConnect Report Software USB-Schnittstellenkabel Adapter für Fotostativ optris MS – DE2011-04-A... -
Page 5: Einsatzgebiete
statische Elektrizität abrupte Änderungen der Umgebungstemperatur Infrarotthermometer messen nur die Oberfläche von Objekten. Das MS kann nicht durch durchsichtige Materialien wie Glas und Plastik hindurch messen. Halten Sie die Linse frei von Verschmutzungen (Reinigung mit einem weichen, feuchten Tuch oder einem wasserbasierten Glasreiniger). -
Page 6: Bedienelemente
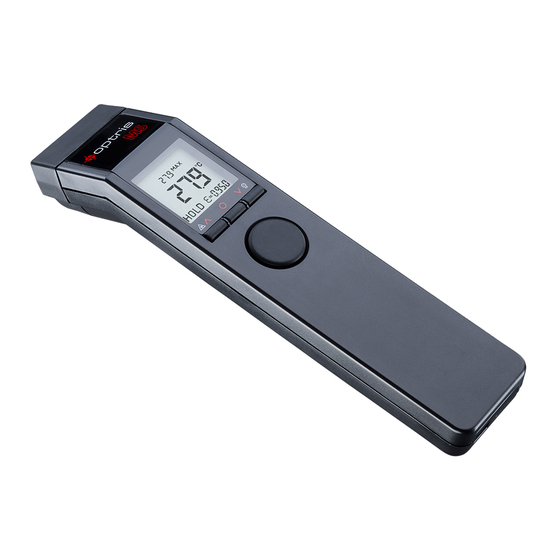
3 Ab-Taste/ Beleuchtung 4 Mode-Taste 5 Messtaste 6 Thermoelement-Eingang [MSPro] 7 USB-Schnittstelle 8 Batteriefach 9 Auf-Taste/ Laser Anzeige [MS] A Displaybeleuchtung B Batteriesymbol C Lasersymbol D MAX- bzw. MIN-Wert E aktueller Temperaturwert F HOLD-Funktion G Emissionsgrad optris MS – DE2011-04-A... -
Page 7: Optik
140 mm (260 mm beim Modell Pro). Achten Sie darauf, dass das Messobjekt mindestens gleich groß wie der Messfleck ist. Das Diagramm zeigt das Verhältnis Entfernung (D) zu Messfleckgröße (S). D:S = 20:1 [MS/ MSPlus]/ 40:1 [MSPro] optris MS – DE2011-04-A... -
Page 8: Einsetzen Der Batterie
Verwenden der Tasche [MSPlus/ MSPro] Bitte schieben Sie das Gerät wie abgebildet in die Tasche, um eine unbeabsichtigte Aktivierung zu vermeiden. Schutzhülle [MSPlus/ MSPro] Die Gummi-Schutzhülle schützt Ihr MS wirkungsvoll gegen Verschmutzung beim Einsatz in rauer industrieller Umgebung. optris MS – DE2011-04-A... -
Page 9: Grundlegende Bedienung
All manuals and user guides at all-guides.com Schieben Sie das MS wie abgebildet in die Schutzhülle und ziehen Sie anschließend das Vorderteil vorsichtig über die Optik. Alle Bedienelemente und Anschlüsse sind bei Verwendung der Schutzhülle weiterhin zugänglich. Grundlegende Bedienung EMPERATURMESSUNG Zielen Sie mit dem Gerät auf das Messobjekt... -
Page 10: Geräteeinstellungen
Objektoberfläche entweder mit mattschwarzer Farbe beschichtet werden oder ein geeigneter Kunststoffaufkleber aufgebracht werden. °C/ °F-U MSCHALTUNG Zum Einstellen der Temperatureinheit auf °F betätigen Sie im ausgeschalteten Zustand zunächst die A (gedrückt halten) und ASTE dann die M ESSTASTE optris MS – DE2011-04-A... - Page 11 Wird innerhalb von 7 Sekunden keine Taste betätigt, erfolgt keine Speicherung und das Gerät schaltet sich ab. MISSIONSGRAD Definition ► siehe Geräteeinstellungen MS Insbesondere die Messung metallischer Oberflächen erfordert eine sorgfältige Emissionsgradeinstellung. Eine Materialtabelle finden Sie im Abschnitt Emissionsgrad- tabellen.
- Page 12 Wertes erfolgt eine akustische Alarmierung und die Displaybeleuchtung wechselt zu BLAU. °C/ °F-U MSCHALTUNG Einstellen der Temperatureinheit. FFSET Mit dieser Funktion kann ein linearer Offset (+/-) zur Temperaturanzeige eingestellt werden. Dadurch lassen sich z.B. mehrere Geräte aufeinander exakt abstimmen. optris MS – DE2011-04-A...
-
Page 13: Resetfunktion
ÖSCHEN DES PEICHERS Betätigen Sie die A , während sich das ASTE Gerät im HOLD-Modus befindet. Wählen Sie Speicherplatz 0 und betätigen Sie dann die erneut. Ein dreimaliges ASTE akustisches Signal bestätigt das Löschen des kompletten Datenspeichers. optris MS – DE2011-04-A... -
Page 14: Optrisconnect Report Software
All manuals and user guides at all-guides.com OptrisConnect Report Software Die Software ist im MSPlus- und MSPro-Paket bereits enthalten. Für das Basismodell MS ist ein Upgrade-Kit verfügbar. Minimale Systemanforderungen Windows XP USB-Schnittstelle Festplatte mit mind. 30 MB freiem Speicher ... - Page 15 Emissionsgrad, Alarm, Temperatureinheit, Displaybeleuchtung, Laser, Signalton. ESSUNG STARTEN Durch Betätigen der S -Schaltfläche in der TART Werkzeugleiste wird die Messung gestartet [Menü: Messung\ Start]. ESSUNG BEENDEN PEICHERN Die S -Schaltfläche [Menü: Messung\ Stop] beendet die laufende Messung. optris MS – DE2011-04-A...
- Page 16 Öffnen Sie das Bild innerhalb der OptrisConnect Software mit Hilfe der Report-Funktion [Menü: Datei\ Report]. Verbinden Sie Ihr MS mit dem PC Visieren Sie das gewünschte Objekt an Bringen Sie nun den Cursor im Bild auf die...
- Page 17 [Menü: Messung\ CHALTFLÄCHE Loggerdaten herunterladen]. In einem Extrafenster werden alle im Gerät gespeicherten Daten tabellarisch dargestellt. Datum und Uhrzeit entsprechen dem Zeitpunkt des Herunterladens. Eine ausführliche Softwarebeschreibung finden Sie nach Start des Programms unter: [Menü: ?\ Hilfe]. optris MS – DE2011-04-A...
-
Page 18: Technische Daten
9mm Offset PC-Schnittstelle Software OptrisConnect Report Software Gewicht/ Abmessungen 150g, 190x38x45 mm Batterie 9V Alkaline-Batterie Batterielebensdauer 20h (Laser und Displaybel. 50% an)/ 40h (Laser und Displaybel. aus) Relative Luftfeuchte 10-95% RH, nicht kondensierend, bei Umgebungstemperatur < 30°C optris MS – DE2011-04-A... -
Page 19: Fehlermeldungen
Objekt innerhalb des oberhalb Messbereiches Bereichsgrenze wählen Objekttemperatur Objekt innerhalb des unterhalb Messbereiches Bereichsgrenze wählen Batteriesymbol Batterie verbraucht Batterie wechseln keine Anzeige Batterie verbraucht Batterie wechseln kein Laser Batterie verbraucht Batterie wechseln Laser ist Laser aktivieren ausgeschaltet optris MS – DE2011-04-A... -
Page 20: Emissionsgradtabelle Metalle
0,05-0,15 oxidiert 0,2-0,5 Platin schwarz Quecksilber 0,05-0,15 Silber 0,02 Stahl poliertes Blech rostfrei 0,1-0,8 Grobblech 0,4-0,6 kaltgewalzt 0,7-0,9 oxidiert 0,7-0,9 Titan poliert 0,05-0,2 oxidiert 0,5-0,6 Wolfram poliert 0,03-0,1 Zink poliert 0,02 oxidiert Zinn nicht oxidiert 0,05 optris MS – DE2011-04-A... -
Page 21: Emissionsgradtabelle Nichtmetalle
0,8-0,95 Glas 0,85 Gummi 0,95 Holz natürlich 0,9-0,95 Kalkstein 0,98 Karborund Keramik 0,95 Kies 0,95 Kohlenstoff nicht oxidiert 0,8-0,9 Graphit 0,7-0,8 Kunststoff >50 μm lichtundurchlässig 0,95 Papier jede Farbe 0,95 Sand Schnee Textilien 0,95 Wasser 0,93 optris MS – DE2011-04-A... -
Page 22: Gewährleistung
Beginn der Reparatur auf Wunsch ein Kostenvoranschlag erstellt. Das Gerät entspricht den folgenden Standards: EMV: EN 61326-1:2006 (Grundlegende Prüfanforderungen) EN 61326-2-3:2006 Gerätesicherheit: EN 61010-1:2001 Lasersicherheit: EN 60825-1:2007 Das Produkt erfüllt die Anforderungen der EMV- Richtlinie 2004/108/EG und der Niederspannungsrichtlinie 2006/95/EG. optris MS – DE2011-04-A... - Page 23 Produkt nicht als normaler Haushaltsabfall zu behandeln ist, sondern an einer Annahmestelle für das Recycling von elektrischen und elektronischen Geräten abgegeben werden muss. Für weitere Informationen kontaktieren Sie bitte Ihren Händler. optris MS – DE2011-04-A...
-
Page 24: Introduction
All manuals and user guides at all-guides.com Introduction Thank you for choosing the optris MS! Infrared thermometers measure contactless. They determine the temperature on the basis of the emitted infrared radiation from an object. These thermometers enable the user to detect the temperature of inaccessible or moving objects without difficulties. -
Page 25: Applications
Detection of energy losses on heat insulations Inspection of critical components on vehicles Important Notes The MS contains a laser class 2 for marking the measurement spot. Do not point the laser directly at the eye or indirectly off reflective... -
Page 26: Functional Elements
6 Thermocouple input [Pro] 7 USB interface 8 Battery chamber 9 Up button/ Laser Display [MS] A Display backlight B Battery symbol C Laser symbol D MAX or MIN value E Current temperature value F HOLD function G Emissivity optris MS – DE2011-04-A... -
Page 27: Optics
13 mm at any distance within the first 140 mm (260 mm at model MSPro). The object must be at least as large as the spot size. The diagram shows the distance (D) to spot (S) ratio. D:S = 20:1 [MS/ MSPlus]/ 40:1 [MSPro] optris MS – DE2011-04-A... -
Page 28: Insertion Of Batteries
Usage of the Pouch [MSPlus/ MSPro] Make sure to insert the unit into the pouch as shown to avoid unintended operation. Protection Boot [MSPlus/ MSPro] The rubber protection boot protects your MS efficiently against dirt and contamination in harsh industrial environment. optris MS – DE2011-04-A... -
Page 29: Basic Operation
All manuals and user guides at all-guides.com Slide the MS into the boot as shown in the picture. Then pull the front part of the boot carefully over the optics of the MS. All operating elements and connections are still accessible if the protection boot is used. -
Page 30: Unit Settings
To setup the temperature unit to °F please press the D button (keep pressed) and then the T RIGGER To setup the temperature unit to °C please press the U button (keep pressed) and then the T RIGGER optris MS – DE2011-04-A... - Page 31 If you have not activated any button for 7 seconds, the instrument will not save the current modification and shut down. MISSIVITY Definition ► see Unit Setting MS The measurement of metallic surfaces, in particular, requires a careful emissivity adjustment. You will find a material table in chapter Emissivity Tables.
-
Page 32: Reset Function
Reset Function The unit can be reset to the factory default values by pressing the M and U button simultaneously (during HOLD mode). The Data logger [MSPro] will not be deleted by this procedure. optris MS – DE2011-04-A... -
Page 33: Data Logger [Mspro]
IR temperature value and t/c probe value please press the M button. ESET OF THE OGGER Please press the D button during the HOLD mode. Select logger position 0 and press M again. A threefold acoustic signal confirms the successful reset. optris MS – DE2011-04-A... -
Page 34: Optrisconnect Report Software
All manuals and user guides at all-guides.com OptrisConnect Report software The software is included in the MSPlus and MSPro package. For the basic model MS an upgrade kit is available. Minimum system requirements Windows XP USB interface Hard disc with at least 30 MByte free space ... - Page 35 Display backlight, Laser, Buzzer. TARTING A EASUREMENT You can start a measurement by pressing the button in the tool bar: TART [Menu: Measurement\ Start]. EASUREMENT The S button will finish the current measurement [Menu: Measurement\ Stop]. optris MS – DE2011-04-A...
- Page 36 Open the picture inside the OptrisConnect software using the Report function [Menu: File\ Report]. Connect the MS unit to the PC Point to the desired object Align the cursor on the picture to the same location the laser of the MS is showing ...
- Page 37 Date and time correspond to the time of the download. You will find a detailed software description after start of the program under [Menu: ?\ Help]. optris MS – DE2011-04-A...
-
Page 38: Technical Data
OptrisConnect Report software Weight/ Dimensions 150g, 190x38x45 mm Battery 9V alkaline battery Battery life time 20h (laser and backlight on 50%)/ 40h (laser and backlight off) Relative humidity 10-95% RH, non condensing at ambient temperature < 30°C optris MS – DE2011-04-A... - Page 39 MS – DE2011-04-A...
-
Page 40: Emissivity Table Metals
Nickel electrolytic 0,05-0,15 oxidized 0,2-0,5 Platinum black Silver 0,02 Steel polished plate rustless 0,1-0,8 heavy plate 0,4-0,6 cold-rolled 0,7-0,9 oxidized 0,7-0,9 non oxidized 0,05 Titanium polished 0,05-0,2 oxidized 0,5-0,6 Wolfram polished 0,03-0,1 Zinc polished 0,02 oxidized optris MS – DE2011-04-A... -
Page 41: Emissivity Table Non-Metals
Glass 0,85 Grit 0,95 Gypsum 0,8-0,95 0,98 Limestone 0,98 Paint non alkaline 0,9-0,95 Paper any color 0,95 Plastic >50 μm non transparent 0,95 Rubber 0,95 Sand Snow Soil 0,9-0,98 Textiles 0,95 Water 0,93 Wood natural 0,9-0,95 optris MS – DE2011-04-A... -
Page 42: Warranty
This symbol on the unit indicates that this product shall not be treated as household waste. Instead it should be handed over to the applicable collection point for the recycling of electrical and electronic equipment. For more information please contact your distributor. optris MS – DE2011-04-A...
Need help?
Do you have a question about the MS and is the answer not in the manual?
Questions and answers