
Subscribe to Our Youtube Channel
Related Manuals for Everbilt PCP10001-VSP


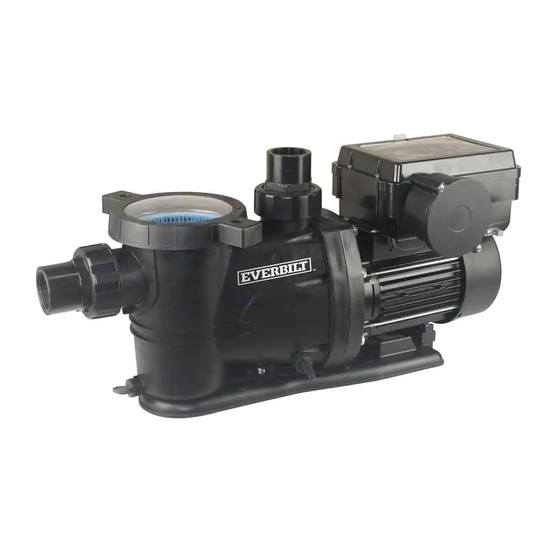
Summary of Contents for Everbilt PCP10001-VSP
- Page 1 Questions, problems, missing parts? Before returning to the store call Everbilt Customer Service 8 a.m. - 6 p.m., EST, Monday-Friday 1-844-241-5521 HOMEDEPOT.COM...
- Page 2 GPM of Water @ Total Feet of Lift Max. Lift 0 ft. 10 ft. 20 ft. 30 ft. 40 ft. 50 ft. 3500 72.0 65.0 56.0 44.0 25.0 48 ft. 1006 460 127 2000 39.0 20.0 16 ft. 1200 22.0 7 ft.
- Page 3 CAUTION: Follow all local electrical and safety codes, along DANGER: Do not pump flammable or explosive liquids such with the National Electrical Code (NEC). In addition, all as oil, gasoline, kerosene, ethanol, etc. Do not use in the Occupational Safety and Health Administration (OSHA) presence of flammable or explosive vapors.
-
Page 4: Tools Required
IMPORTANT: This pump is made of high-strength, IMPORTANT: Provide sufficient ventilation to maintain air corrosion-resistant materials. It will provide trouble-free temperature below the maximum ambient temperature rating service for a long time when properly installed, maintained, shown on the motor nameplate. Any enclosure or pump and used. - Page 5 MATERIALS REQUIRED (NOT INCLUDED) SPECIFICATIONS 230V, 60 Hz., 15 Amp Circuit Power supply Liquid temp. range 32 to 100° F (0- 38° C) 1-1/2 in. NPT thread with adaptor Discharge size Only qualified, licensed personnel should install pump and wiring. The pump mount must be located away from corrosive or flammable chemicals.
- Page 6 FITTINGS Fittings restrict flow; for best efficiency use the fewest number of possible fittings. Avoid fittings which could cause an air trap. Pool fittings must conform to International Association of Plumbing and Mechanical Officials (IAPMO) standards. Use only non-entrapping suction fitting or double suction.
- Page 7 TO WIRE A VARIABLE SPEED MOTOR Be sure power is off. Remove the terminal box lid. (FIG.1) Use multifunction crimping pliers to press O-type grounding terminal which connects 14 AWG. (FIG.2) Install 1/2” connector to terminal box. Install ground wire to ground rod using multifunction crimping pliers to connect two wires with two ...
- Page 8 TABLE I- RECOMMENDED FUSING DATA Service to Motor – Distance in Ft. (m) Branch Fuse Motor HP Max Load Amps Voltage/Hz/Phase 0-300’ (0-90m) Rating Amps* AWG Wire Size (mm 230/60/1 14 (2 mm 1-1/2 230/60/1 14 (2 mm * Time delay fuses are recommended instead of standard fuses in any motor circuit. MECHANICAL TROUBLES AND NOISE If suction and discharge piping are not adequately supported, pump assembly will be strained.
-
Page 9: Priming Pump
PRIMING PUMP Release all pressure from filter, pump, and piping system; see the filter owner’s manual. In a flooded suction system (water source higher than pump), pump will prime automatically during suction and discharge valves are opened. If the pump is located above the normal pool water level, remove ring and trap assembly, ... -
Page 10: Operation Of Control Panel
Read these instructions completely before operating or programming the Control Panel. OPERATION OF CONTROL PANEL The Variable Speed pool pump features a Control Panel that displays the Current Time, Operating Status, Motor Speed, and Time Period with Start and End Times. The Control Panel can be set to MANUAL, which allows manual control of pump speed, or to AUTOMATIC which allows you to set a Custom ... -
Page 11: Manual Mode
MANUAL MODE The first time the pump is connected to power, the pump will default to MANUAL mode. Pressing the AUTO button starts the pump, then you can manually control the speed of the pump by pressing one of the speed buttons: ... - Page 12 Program the Operation Schedule Set the Current Time Press the MENU button and hold it. > HOURS will start to flash. Stop pressing MENU. Press the UP or DOWN arrows to Adjust Hours. Press the ENTER button once. ...
- Page 13 STEP 1 - START time: STEP 3 - Operating Speed: Press ENTER button once. Press the UP or DOWN arrows to Adjust Hours. Press either LOW, MEDIUM or HIGH. Press the ENTER button once. Adjust the Operating Speed in 25 RPM increments by ...
- Page 14 Fault Code Description If the Control panel displays any of these Fault Codes, please call Customer Service at 1-844-241-5521. E3 Locked-rotor protection E8 Drive is overheating E14 Communication failure Er06 Motor open phase Er14 Supply voltage error The supply voltage must be 230V. Pump should only be serviced by qualified personnel.
- Page 15 Pump Reassembly/Installing New Seal Ceramic seat must be clean and free of dirt, grease, dust, etc. Wet outer edge with small amount of liquid detergent; press ceramic seat into seal plate cavity firmly and squarely with finger pressure. If ceramic seat will not locate properly, remove it, place face up on bench and reclean cavity. Ceramic seat should now locate. ...
- Page 16 Read and understand safety and operating instructions in this manual before doing any work on pump! Only qualified personnel should electrically test the pump motor! TO AVOID FAILURE TO PUMP; YOU MAY REDUCE CAPACITY OR DISCHARGE PRESSURE. Problem Possible Cause Corrective Action Pump must be primed.
- Page 18 1-844-241-5521 HOMEDEPOT.COM...
- Page 19 ¿ 1-844-241-5521 HOMEDEPOT.COM ¡...
- Page 20 LPM de Agua @ Pies de Altura Má x. Levante 0 pi. 10 pi. 20 pi. 30 pi. 40 pi. 50 pi. 3500 48 pi. 1006 460 127 2000 16 pi. 1200 7 pi. 3500 65 pi. 1006 460 133 1-1/2 2000 22 pi.
- Page 21 PRECAUCIÓ N: Follow all local electrical and safety codes, PELIGRO: No bombee líquidos inflamables o explosivos, along with the National Electrical Code (NEC). In addition, all como aceite, gasolina, queroseno, etanol, etc. No utilizar en Occupational Safety and Health Administration (OSHA) presencia de vapores inflamables o explosivos.
-
Page 22: Herramientas Necesarias
IMPORTANTE: Proporcione suficiente ventilació n para IMPORTANTE: Asegú rese de que la fuente de alimentació n mantener la temperatura del aire por debajo de la elé ctrica sea adecuada para los requisitos de la bomba. temperatura ambiente nominal má xima que se muestra en la placa de identificació... -
Page 23: Especificaciones
MATERIALES NECESARIOS (NO INCLUIDOS) Cinta de PTFE Segú n sea necesario Tubo rígido Segú n sea necesario Vá lvula de bola Segú n sea necesario Unió n Segú n sea necesario Codo Segú n sea necesario Adaptador Colector en T Segú... - Page 24 Instrucciones para la cinta selladora de roscas Utilice ú nicamente accesorios de tubos de PVC nuevos o limpios. Envuelva las roscas macho de los tubos con una o dos capas de cinta PTFE. Cubra toda la porció n roscada del tubo. ...
- Page 25 Electricidad Conecte el motor a tierra antes de conectar la fuente de alimentació n elé ctrica. La falta de conexió n a tierra del motor puede causar peligros de electrocució n graves o fatales. No conecte a una línea de abastecimiento de gas. Para evitar electrocuciones peligrosas o fatales, apague la alimentació...
- Page 26 Conecte un cable de unió n de cobre só lido nú mero 8 AWG al conector del cable de presió n provisto en la carcasa del motor y a todas las partes metá licas de la piscina, hidromasaje o jacuzzi y a todos los equipos elé ctricos, tuberías o conductos metá licos dentro de los 5 pies de la parte interior de las paredes de la piscina, hidromasaje o jacuzzi.
- Page 27 DETENGA LA BOMBA antes de continuar. CIERRE LAS VÁ LVULAS DE COMPUERTA en las tuberías de aspiració n y descarga. LIBERE TODA LA PRESIÓ N de la bomba y del sistema de tuberías. Si está probando la presió n de la bomba, asegú rese de que se haya liberado toda la presió n antes de retirar la tapa del purgador. ...
- Page 28 Drenaje de la bomba ADVERTENCIA: Para evitar el riesgo de un choque elé ctrico peligroso o fatal, desconecte el suministro de energía (OFF) al motor antes de drenar la bomba. Bombee el agua hasta que llegue a un nivel por debajo de todas las tomas de admisió n a la piscina. ...
-
Page 29: Pantalla Lcd
Read these instructions completely before operating or programming the Control Panel. OPERATION OF CONTROL PANEL The Variable Speed pool pump features a Control Panel that displays the Current Time, Operating Status, Motor Speed, and Time Period with Start and End Times. The Control Panel can be set to MANUAL, which allows manual control of pump speed or to AUTOMATIC which allows you to set a Custom ... -
Page 30: Modo Manual
MODO MANUAL La primera vez que se conecte la bomba a la alimentació n, el modo predeterminado será MANUAL. Al presionar el botó n AUTO se enciende la bomba, entonces puede controlar de forma manual la velocidad de la bomba al presionar uno de ... - Page 31 Configuració n del programa de funcionamiento Configurar la hora actual Mantenga presionado el botó n MENÚ . >las HORAS comenzará n a parpadear. Suelte el botó n MENÚ . Presione las flechas ARRIBA o ABAJO para ajustar las horas. ...
- Page 32 PASO 1—Hora de INICIO: PASO 3—Velocidad de funcionamiento: presione el botó n ACEPTAR una vez. Presione las fechas ARRIBA o ABAJO para ajustar las horas. Presione BAJA, MEDIA o ALTA. Presione el botó n ACEPTAR una vez. Ajuste la velocidad de operació n por 25 RPM cada vez con ...
- Page 33 Descripció n de có digos de fallas Si el panel de control muestra alguno de estos có digos de falla, llame al Servicio de Atenció n al Cliente al 1-844-241-5521. E3 Protecció n del rotor bloqueado E8 Sobrecalentamiento de energía E14 La comunicació...
- Page 34 Montaje de la bomba/instalació n de un sello nuevo El asiento de cerá mica debe estar limpio y libre de suciedad, grasa, polvo, etc. Moje el borde exterior con una pequeñ a cantidad de detergente líquido; presione el asiento de cerá mica en la cavidad de la placa de sellado firmemente y en á ngulo recto con la presió n del dedo.
- Page 35 Lea y comprenda las instrucciones de seguridad y de operació n en el manual antes de realizar trabajos en la bomba! Las pruebas elé ctricas del motor de la bomba deben ser realizadas solamente por personal calificado! NO BOMBEA, CAPAVIDAD O PRESION DE DASCARGA REDUCIDAS.
Need help?
Do you have a question about the PCP10001-VSP and is the answer not in the manual?
Questions and answers