Table of Contents
Advertisement
Quick Links
Instruction Manual
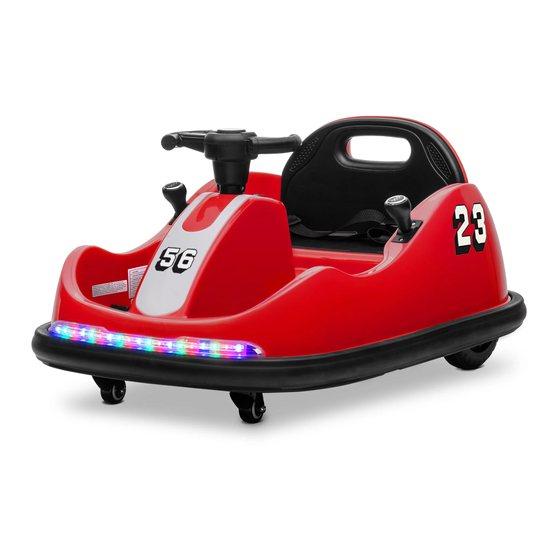
Ride On Bumper Car (2 Driving Modes) (12V)
item number: 060-ROT-07
*Product appearance and colors may vary from the photo.
This vehicle is packed with the battery disconnected. Connect
the battery before use.
This manual contains important safety, performance and
maintenance information. Read the manual thoroughly before
allowing your child to ride your new electric ride-on toy.
Failure to read the user manual can result in property damage
or bodily injuries.
Keep this user manual for future reference.
Advertisement
Table of Contents

Related Manuals for Kidzone 060-ROT-07


Summary of Contents for Kidzone 060-ROT-07
- Page 1 Instruction Manual Ride On Bumper Car (2 Driving Modes) (12V) item number: 060-ROT-07 *Product appearance and colors may vary from the photo. This vehicle is packed with the battery disconnected. Connect the battery before use. This manual contains important safety, performance and maintenance information.
-
Page 2: Safety Instruction
Safety Instruction When using electrical product, basic safety precaution should always be followed including the following: Read all Instruction before operating this product WARNING • To protect against electrical shock, do not immerse cord, charger, transformer, battery, or the product in any liquids. - Page 3 WARNING • Avoid continuously hitting into obstacle to prevent overheating or damaging the motor. Drive away or remove obstacle as soon as possible. WARNING • Manufacturer and seller expressly disclaim any and all liability for personal injury, property damage or losses, whether direct, indirect, or incidental, resulting from the incorrect attachment, improper use, WARNING: Stop operating this product whenever it stuck under any circumstances.
- Page 4 WARNING Safe Riding Warnings • Not to be used by children under 18 months or children over 72 months. • Do not exceed the maximum weight capacity of 66 lbs(30 kg). • Do not allow more than one (1) rider. ADULTS AND SUPERVISORS, PLEASE NOTE: 1.
- Page 5 WARNING Battery and Charging Warnings The following safety hazards may result in serious injury or death to the user of the ride-on: Do not mix old and new batteries. • Do not mix alkaline, standard (carbon-zinc), or rechargeable (nickel-cadmium batteries.) •...
- Page 6 CAUTION Re-Charge Interval and Time Important! • Damage to the battery may occur if it is allowed to drain completely. Do not allow the battery to drain completely. • Check the battery and charger (supply cord, connector) for wear and damage before charging.
- Page 7 Parts and Feature Vehicle Body Steering Wheel Steerable Front Wheel Backrest Seat Charger Remote Control M5 x 39 Screw M4 x 10 Tapping Screw M5 Nut...
-
Page 8: Assembly Instruction
Assembly Instruction • Lift up the ① Vehicle Body and insert the ③ Steerable Front Wheel through the opening. • Unscrew the ⑧ M5*39 Screw and ⑩ M5 Nut from ② Steering Wheel. ① ① ① • Align and insert the ② Steering Wheel to the front wheel column. Using ⑧ M5*38 Screw and ⑩... - Page 9 Assembly Instruction • Unscrew the attached 4 pcs ⑨ M4 x 10 Tapping Screws. • Insert the ④ Backrest to the ① Vehicle Body and secure by using two ⑨ M4 x 10 Tapping Screws . • Put on the Seat and secure by using two M4 x 10 Tapping Screws .
-
Page 10: User Instruction
Only operate in indoor mode. Bluetooth connection To connect your mobile device to the vehicle, turn on the Bluetooth and select "KIDZONE BUMPER CAR”, there is voice message after pairing successfully. Music can be played from the vehicle speaker according... -
Page 11: Indoor Mode
User Instruction Indoor Mode: When using the vehicle indoor, switch the setting to indoor mode. • Lift up the vehicle body. • Press the plastic buckle and fold up the steerable front wheel into the body. • Press the switch to indoor mode. •... - Page 12 Operating this vehicle by using control stick: To move the vehicle forward, push both control sticks forward at the same time. To move the vehicle backward, pull both control sticks backward at the same time. To left turn the vehicle forward, push the right control stick forward. To right turn the vehicle forward, push the left control stick forward.
-
Page 13: Outdoor Mode
User Instruction Outdoor Mode: When using the vehicle outdoor, switch the setting to outdoor mode. • Lift up the vehicle body. • Press the plastic buckle and fold down the steerable front wheel. • Press the switch to outdoor mode. •... - Page 14 User Instruction (Remote Control) Stop Forward Right Reverse Speed Left Selection Speed Indicator Remote Control Buttons 1. Forward Button Press to move the vehicle forward. 2. Reverse Button Press to move the vehicle backward. 3. Speed Selection Button Press to switch between low, medium, or high speed.
- Page 15 User Instruction (Remote Control) Using the remote control The remote control should only be used by adult. ATTENTION: The remote control will override all control input from the vehicle control sticks. The remote control should only be used when the vehicle is in indoor mode. Insert / Changing Battery 1.
- Page 16 User Instruction (Charging) WARNING! The battery should only be charged by an adult.The battery is not replaceable. Charging the battery 1. Insert the charging cable to the charging port located in front of the indoor / outdoor switch. 2. Insert the charger plug into a wall outlet, and the battery will start charging. 3.
-
Page 17: Care And Maintenance
Care and Maintenance • Check the product regularly and make sure there is no missing or loose parts. Re-tighten any loose parts if necessary. • Make sure there is no cracked or broken plastic parts. • Keep away the product from heat and humid area, cover it with trap when not in use. •... - Page 18 Troubleshooting Problem Possible Reason Solution Check if the battery connectors Poor wire connection Contact Customer service if Vehicle needs a push to go necessary forward “Dead spot” on motor Contact customer service Loud grinding sound or clicking Damaged motor or gear box Contact customer service sound from the motor or gear box Disconnected / Badly connected...
- Page 19 Model: JR1602FCC FCC ID: 2AWOBJR1602 This device complies with part 15 of the FCC Rules. Operation is subject to the following two conditions: (1) this device may not cause harmful interference, and (2) this device must accept any interference received, including interference that may cause undesired operation.
-
Page 20: Warranty Terms
It is the retailer’s responsibility consumer, or other parties not authorized by to contact KIDZONE with a claim. We will not KIDZONE will void this warranty. handle claims from consumers directly; all 3.
Need help?
Do you have a question about the 060-ROT-07 and is the answer not in the manual?
Questions and answers