Advertisement
Quick Links
This product requires assembly by an adult because of small parts. Care should be
taken in unpacking and assembling this item to keep small parts away from children.
WARNING
Young children can be seriously injured or killed if furniture tips over. Don't
use this item for a TV stand or place heavy objects on top of item. Always
use angle-braces or anchors to secure furniture to the wall.
ASSEMBLY INSTRUCTIONS
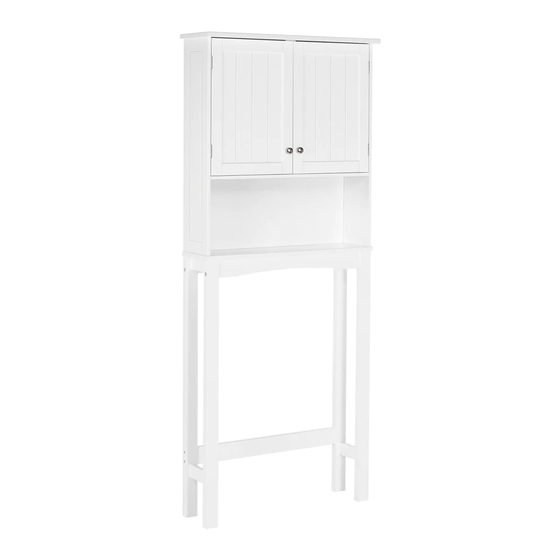
RiverRidge
Ashland Spacesaver
®
ITEM #:06-090 WHITE
ITEM #:06-091
ADULT ASSEMBLY REQUIRED
SEE FULL WARNING ON PAGE 2
GRAY
Advertisement

Related Manuals for RiverRidge 06-090


Summary of Contents for RiverRidge 06-090
- Page 1 ASSEMBLY INSTRUCTIONS RiverRidge Ashland Spacesaver ® ITEM #:06-090 WHITE ITEM #:06-091 GRAY ADULT ASSEMBLY REQUIRED This product requires assembly by an adult because of small parts. Care should be taken in unpacking and assembling this item to keep small parts away from children.
- Page 2 Send requests for missing or damaged parts replacements by email to: customer.service@ssi-rr.com or call toll free 1-(844)-223-5201 or order parts on line at www.riverridgehome.com THIS SHELF UNIT WILL HOLD UP TO 20 POUNDS PER SHELF OR A TOTAL OF 60 POUNDS. DO NOT LOAD EACH SHELF WITH MORE THAN 20 POUNDS.
-
Page 3: Parts List
PARTS LIST DESCRIPTION TOP BOARD TOP LEFT SIDE PANEL TOP RIGHT SIDE PANEL BOTTOM LEFT SIDE PANEL BOTTOM RIGHT SIDE PANEL REAR TOP CROSS BAR ADJUSTABLE SHELF FIXED SHELF MIDDLE CONNECTION BOARD FRONT MIDDLE CROSS BAR REAR MIDDLE CROSS BAR REAR BOTTOM CROSS BAR BACK BOARD BACK BOARD... - Page 4 PART DESCRIPTION 22PCS WOOD DOWEL 4PCS CAM BOLT 4PCS CAM LOCK 6PCS WOOD SCREW (4 X 40MM) 6PCS WOOD SCREW (4 X 50MM) 4PCS MACHINE SCREW (6X 65MM) METAL NUT 4PCS 2PCS SCREW (3 X 14MM) ALLEN WRENCH MAGNET 2PCS MAGNET PLATE 18PCS SCREW (3 X 10MM)
- Page 5 STEP 1 STEP 1 1. Screw 1 cam bolt (B) into pre-threaded hole on top left side panel (2). 2. Insert 4 wood dowels (A) into dowel holes on end of top left side panel (2). 3. Repeat above steps for top right side panel (3). STEP 2 STEP 2 1.Insert 2 wood dowels (A) into dowel holes on bottom left side panel (4) and bottom right...
- Page 6 STEP 3 STEP 3 1. Screw 2 cam bolts (B) into pre-threaded holes on top board (1). 2. Attach magnet (J) to top board (1) by inserting 2 screws (H) through holes on magnet (J) and tighten to top board (1). 3.
- Page 7 STEP 5 STEP 5 1. Attach magnet plate (K) to left door (16) by inserting 1 screw (L) through hole on magnet plate (K) and tighten to left door (16). 2. Attach 2 metal hinges (M) to left door (16) by inserting 4 screw (L) through hole on metal hinges (M) and tighten to left door (16).
- Page 8 STEP 7 STEP 7 1. Slide back board (15) into grooves on top left side panel (2), top right side panel (3) and fixed shelf (8). 2. Attach middle connection board (9) to top left side panel (2), top right side panel (3) and back board (15) by inserting back board (15) into groove on middle connection board (9) and wood dowels into wood dowel holes on middle connection board (9).
- Page 9 STEP 9 STEP 9 1. Attach front middle cross bar (10) and rear middle cross bar (11) to bottom left side panel (4) and bottom right side panel (5) by inserting wood dowels (A) into wood dowel holes on bottom left side panel (4) and bottom right side panel (5).
- Page 10 STEP 11 STEP 11 1. Attach rear bottom cross bar (12) to bottom left side panel (4) and bottom right side panel (5) by inserting 4 wood screws (E) through holes on bottom left side panel (4) and bottom right side panel (5) and tighten to rear bottom cross bar (12).
Need help?
Do you have a question about the 06-090 and is the answer not in the manual?
Questions and answers