Advertisement
Quick Links
COSEC ATOM
ATOM RD300
Quick Installation Guide
ATOM RD200
ATOM RD100
1
2
3
4
5
6
7
8
9
*
0
#
Safety Instructions
These instructions are intended to ensure that the user can
use the product correctly to avoid danger or property loss.
Cautions
Do not install the device:
Ÿ
On unstable surface.
Ÿ
Where ferromagnetic field or noise is induced.
Ÿ
Where static is created, such as desks made of plastics, carpets.
Ÿ
Near volatile inflammable materials or inflammable goods such as
drapes.
Ÿ
Where volatile gas and/or inflammable gas is created.
Warning
Ÿ
Installing and servicing should be done only by qualified
technician.
Ÿ
There are no user-serviceable parts inside.
Ÿ
Opening or removing the device cover may result in electric
shock or exposure to other hazards.
Ÿ
Use the device only for the purpose for which it was designed.
Advertisement

Related Manuals for Matrix COSEC ATOM RD300


Summary of Contents for Matrix COSEC ATOM RD300
- Page 1 COSEC ATOM Safety Instructions These instructions are intended to ensure that the user can ATOM RD300 ATOM RD200 use the product correctly to avoid danger or property loss. Cautions Do not install the device: Ÿ On unstable surface. Ÿ Where ferromagnetic field or noise is induced. Ÿ...
-
Page 2: Table Of Contents
Please read this guide first for correct installation and retain it for future reference. The information 1. Display Screen in this guide is prevailing at the time of publication. However, Matrix Comsec reserves the right to make changes in product design and specifications without prior notice. -
Page 3: What Your Package Contains
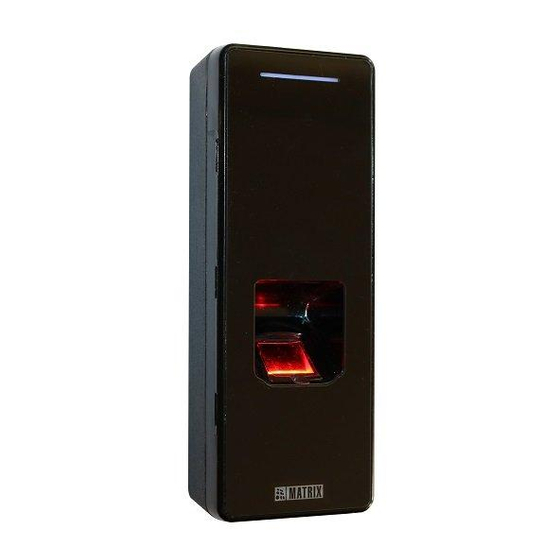
What your Package Contains Type 2: COSEC ATOM RD200 Type 2: COSEC ATOM RD200 Ÿ COSEC ATOM Unit 1. LED Indicator Ÿ Cable Assembly 2. Finger Sensor Ÿ Wall Mounting Accessories 3. Mounting Screw Hole Ÿ Flush Mounting Accessories (with Type 1 and Type 2 only) 4. -
Page 4: Installation
Installation Step 2: Connecting the Cables Ÿ You can mount COSEC ATOM RD200/300 in two ways : 1) Installing the COSEC ATOM RD200/300: Wall Mounting Concealed Wiring or Non-concealed Wiring as explained below. Step 1: Removing the Mounting Plate A. Concealed Wiring Ÿ... - Page 5 2. Affix the mounting plate with the help of the screws and screw 3. Lead the cables from the wall through the drilled area D of the grips through the holes A, B and C. Mounting Plate as illustrated in Figure 12. Connect the necessary cables with COSEC ATOM.
- Page 6 B. Non-Concealed Wiring 3.Pull out the Cables from the Back Plate hole and lead the cables outside from the bottom opening of COSEC ATOM, as illustrated 1. Follow the Step 1 and Step 2 as explained for the Concealed in Figure 14. Wiring and fix the mounting plate on the wall.
- Page 7 2. Slide the reader downwards to fix it into the groove of the Mounting Plate and insert the Mounting screw back in place at the bottom of the device. 3. Tighten the screw with 2 kgf-cm torque as shown in Figure 17. Figure 15 Step 3: Inserting Mounting Screw 1.
- Page 8 2) Installing the COSEC ATOM RD200/300: Flush Mounting Step 1: Take the Surface Mount Plate provided with the package and trace screw holes A, B, C and D on the surface where COSEC ATOM is to be installed, see Figure 18. After tracing drill along the markings as shown in Figure 19.
- Page 9 Step 3: To connect the cables refer below image for Concealed and Non-concealed Wiring positions. Cut-out for Concealed Wiring Surface Device Mount Plate Cut-out for Non-concealed Wiring Figure 20...
- Page 10 Step 4: Affix the Surface Mount Plate with the Device on the Step 5: Place the Surface Mount Top Facia Plate on the installed surface with the help of the screws and screw grips through the Device, see Figure 22. holes A, B, C and D, see Figure 21.
- Page 11 3) Installing the COSEC ATOM RD100 Step 2: Connecting the Cables Step 1: Removing the Mounting Plate Ÿ You can mount COSEC ATOM in two ways : Concealed Wiring or Non-concealed Wiring as explained below. Ÿ From the top of the COSEC ATOM, unscrew the Mounting screw with the help of screw driver as illustrated in Figure 24.
- Page 12 2. Affix the Mounting Plate with the help of the screws and screw 3. Lead the cables from the wall through the drilled area C of the grips through the holes A and B. Mounting Plate as illustrated in Figure 24. Connect the necessary cables with COSEC ATOM, see Figure 28.
- Page 13 B. Non- Concealed Wiring 2. Unscrew the Back Plate screw with the help of screwdriver and remove the Back Plate. 1. Follow Step 1 and Step 2 as explained for the Concealed Wiring and fix the Mounting Plate on the wall. 3.Pull out the Cables from the Back Plate hole and lead the cables (For non-concealed wiring, you do not need to drill the area C.) outside from the bottom opening of COSEC ATOM, as illustrated...
- Page 14 Figure 32 2. Slide the reader downwards to fix it with the groove of the Mounting Plate and insert the mounting screw back in place on top of the device. Figure 31 3. Tighten the screw with 2 kgf-cm Step 3: Inserting Mounting Screw torque as shown in Figure 33.
-
Page 15: Technical Specifications
Technical Specifications Specification ATOM RD300 ATOM RD200 ATOM RD100 Parameters Specification ATOM RD300 ATOM RD200 ATOM RD100 Parameters Tamper Detection Credential Support PIN, RFID Card, RFID Card, Card, Mobile Operating -20°C to +55°C 0°C to +55°C Mobile Credential Mobile Credential Credential Temperature over BLE and... -
Page 16: Led And Buzzer Indications
LED and Buzzer Indications State Single LED Buzzer (tri color) ATOM RD100/200: Connected through RS-232/ RS-485 Alarm Clear State Single LED Buzzer (tri color) Access Allowed Green (ON: 1200ms) ON: 1200ms Power On Blue (ON) Access Denied Red (ON: 200ms ON: 200ms Idle Online Blue (ON: 200ms... - Page 17 ATOM RD100/200/300: Connected through Wiegand Interface State Buzzer State Single LED Buzzer Processing No Change (tri color) Idle Blue (ON: 200ms No Change Wait ON: 200ms OFF: 2200ms OFF: 1000ms Alarm Minor ON: 200ms Card Detection/ Green (ON: 100ms) ON: 100ms OFF: 1000ms PIN Transmission/ BLE Punch...
-
Page 18: Connecting The Reader
Connecting the Reader 1. RS-232 connectivity for COSEC Doors, COSEC VEGA, COSEC PATH and COSEC ARGO. 2. RS-485 connectivity for COSEC ARC. RS-485 A Blue RS-485 B Brown 3. Wiegand connectivity for 3rd party Access Control Panel. Black +12V_RDR White RS-485 Black TO COSEC ARC Controllers... - Page 19 Matrix Return Material Authorization (RMA) department. This equipment generates, uses and can radiate radio frequency energy and, if not installed and used in accordance with the instruction manual, may cause harmful interference to radio communications.
Need help?
Do you have a question about the COSEC ATOM RD300 and is the answer not in the manual?
Questions and answers