Table of Contents
Advertisement
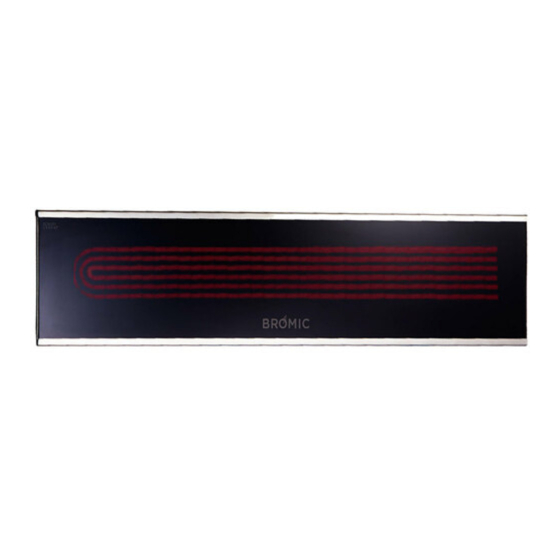
PLATINUM SMART-HEAT™
ELECTRIC HEATER SERIES II
BY BROMIC
INSTALLATION, INSTRUCTION
AND SERVICE MANUAL
FOR MODEL 2300W / 3400W
IMPORTANT
READ THIS MANUAL CAREFULLY.
Original Instructions
SEE INSIDE COVER FOR IMPORTANT
INFORMATION ABOUT THIS MANUAL. KEEP
INSTRUCTION WITH APPLIANCE FOR FUTURE
REFERENCE.
Version 4 US
Advertisement
Table of Contents

Related Manuals for Bromic Heating latinum Smart-Heat Electric II


Summary of Contents for Bromic Heating latinum Smart-Heat Electric II
- Page 1 PLATINUM SMART-HEAT™ ELECTRIC HEATER SERIES II BY BROMIC INSTALLATION, INSTRUCTION AND SERVICE MANUAL FOR MODEL 2300W / 3400W IMPORTANT READ THIS MANUAL CAREFULLY. Original Instructions SEE INSIDE COVER FOR IMPORTANT INFORMATION ABOUT THIS MANUAL. KEEP INSTRUCTION WITH APPLIANCE FOR FUTURE REFERENCE.
- Page 2 IMPORTANT This manual contains important information about the installation, operation, and maintenance of Platinum Smart-Heat™ Electric Heaters. Please pay close attention to the important safety information shown throughout this instruction manual. Any safety information will be accompanied by the following safety alert symbols: DANGER, WARNING, IMPORTANT...
-
Page 3: Table Of Contents
CONTENTS IMPORTANT NOTES & WARNINGS PRODUCT OVERVIEW PRODUCT DESCRIPTION SPECIFICATIONS PRODUCT FEATURES HEATER INSTALLATION INSTRUCTIONS CEILING & WALL MOUNTING CEILING RECESS (SOLD SEPARATELY) TUBE SUSPENSION ELECTRICAL INSTALLATION SERVICING TROUBLESHOOTING bromic.com/heat... -
Page 4: Important Notes & Warnings
IMPORTANT NOTES AND WARNINGS WARNING • Clothing or other fl ammable materials should not be hung from the heater or placed on or near the heater. • IMPORTANT - Installation MUST be carried out by a licensed • Be sure the heater is not facing the ceiling or fl ammable or and authorised person. -
Page 5: Product Overview
IMPORTANT NOTES AND WARNINGS CONTINUED • This heater is not equipped with a device to control the room • Avoid physical shock & impact to the heater when handling and temperature. Do not use this heater in small rooms when they after installation. -
Page 6: Heater Installation Instructions
HEATING INSTALLATION INSTRUCTIONS CEILING & WALL MOUNTING The stated clearance to combustible materials represents surface temperature of 149°F above room temperature. Building material with Application for land and coastal installations ONLY • a low heating tolerance (such a plastic, vinyl siding, canvas, tri-ply ect.) •... - Page 7 HEATING INSTALLATION INSTRUCTIONS • Heaters must be installed according to the minimum installation clearances shown in these diagrams. • Minimum distance between heaters measured from the edge of the heater must be at least 20”. OPTION 1 To exit the cable through the side of the wall mounting bracket, start from step 1.
- Page 8 HEATING INSTALLATION INSTRUCTIONS 8. To fi x heater at desired angle, fully insert M3x10mm positioning screws (included with wall bracket) on both sides of mounting bracket whilst holding heater in the desired position (h). The heater can positioned straight, or be angled 30deg either way. 9.
-
Page 9: Ceiling Recess (Sold Separately)
HEATING INSTALLATION INSTRUCTIONS CEILING RECESS KIT INSTALLATION (SOLD SEPARATELY) FOR INFORMATION ONLY • REFER TO TABLE FOR CEILING RECESS KIT CONFIGURATIONS Ceiling Recess Kit Application Standard Marine Part Number BH3130017 BH3130027 BH3130034 BH3130035 Model 2300W 3400W 2300W 3400W Material Brushed Stainless Steel 304 Brushed Stainless Steel 316 WARNING WARNING... - Page 10 HEATING INSTALLATION INSTRUCTIONS IMPORTANT ENSURE THE CORRECT CEILING RECESS KIT IS BEING USED. REFER TO THE TABLE ON PAGE 9 FOR MORE INFO. 1. Prepare ceiling cut-out with dimensions from images on P.11 to fi t ceiling recess frame (a). Heater must be installed with heater surface at least 2400mm (94”) above the fl...
-
Page 11: Tube Suspension
HEATING INSTALLATION INSTRUCTIONS CEILING RECESS KIT INSTALLATION (SOLD SEPARATELY) 11. Attach the bracket end-cap to the wall bracket using the 4 M5 screws and nuts provided (k). 12. Carefully remove the 4 M5 screws fastening the heater mounting bracket to the back of the heater. Be careful not to move or put any force on the bracket. -
Page 12: Electrical Installation
ELECTRICAL INSTALLATION FOR 220-240V WIRING DIAGRAM PLATINUM SMART-HEAT™ ELECTRIC SERIES II SPLIT 240V SUPPLY STANDARD INSTALLATION 2300W & 3400W MODELS* For Part Numbers : BH0320003 BH0320007 2300W @ 9.6A** BH0320015 BH0320017 BH0320005 BH0320008 3400W @ 14.2A** BH0320016 BH0320018 WARNING AC Single Phase Heater must be permanently installed and hard wired by an authorised/licensed person. -
Page 13: Servicing
ELECTRICAL INSTALLATION WARNING ELECTRICAL INSTALLATION This heater MUST be permanently installed by Check product label for correct voltage and an authorised/licenced person. Do not perform wattage to ensure sure power source conforms to maintenance, or carry out installation or assembly the heaters requirements.
Need help?
Do you have a question about the latinum Smart-Heat Electric II and is the answer not in the manual?
Questions and answers