Bromic Heating BH0320003 Installation, Instruction And Service Manual
Platinum smart-heat ii series
Hide thumbs
Also See for BH0320003:
- Installation, instruction and service manual (13 pages) ,
- Installation, instruction and service manual (12 pages) ,
- Installation instructions manual (15 pages)
Table of Contents
Advertisement
PLATINUM SMART-HEAT™
ELECTRIC HEATER SERIES II
BY BROMIC
INSTALLATION, INSTRUCTION
AND SERVICE MANUAL
AVAILABLE IN 2300W VERSION
!
IMPORTANT
READ THIS MANUAL CAREFULLY.
SEE INSIDE COVER FOR IMPORTANT
Original Instructions
INFORMATION ABOUT THIS MANUAL. KEEP
INSTRUCTION WITH APPLIANCE FOR FUTURE
REFERENCE.
Version 1.0 US
Advertisement
Table of Contents

Related Manuals for Bromic Heating BH0320003


Summary of Contents for Bromic Heating BH0320003
- Page 1 PLATINUM SMART-HEAT™ ELECTRIC HEATER SERIES II BY BROMIC INSTALLATION, INSTRUCTION AND SERVICE MANUAL AVAILABLE IN 2300W VERSION IMPORTANT READ THIS MANUAL CAREFULLY. SEE INSIDE COVER FOR IMPORTANT Original Instructions INFORMATION ABOUT THIS MANUAL. KEEP INSTRUCTION WITH APPLIANCE FOR FUTURE REFERENCE. Version 1.0 US...
- Page 2 IMPORTANT This manual contains important information about the installation, operation, and maintenance of Platinum Smart-Heat™ Electric Heaters. Please pay close attention to the important safety information shown throughout this instruction manual. Any safety information will be accompanied by the following safety alert symbols: DANGER, WARNING, IMPORTANT...
-
Page 3: Table Of Contents
CONTENTS IMPORTANT NOTES & WARNINGS PRODUCT OVERVIEW PRODUCT DESCRIPTION SPECIFICATIONS PRODUCT FEATURES HEATER INSTALLATION INSTRUCTIONS CEILING & WALL MOUNTING CEILING RECESS TUBE SUSPENSION ELECTRICAL INSTALLATION SERVICING TROUBLESHOOTING www.bromicheating.com... -
Page 4: Important Notes & Warnings
IMPORTANT NOTES AND WARNINGS WARNING • Installation and repair must be carried out by a qualified IMPORTANT - Installation MUST be carried out by a licensed & licenced service person only. The heater should be and authorised person. inspected before use and at least annually serviced & inspected by a qualified &... -
Page 5: Product Overview
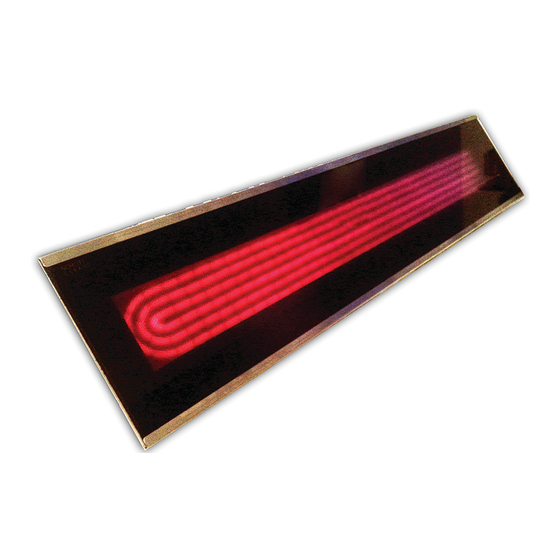
The heaters are built with corrosion resistant materials, have electrical approval in North America and are rated to IPX4 water Ingress Protection. Making the Platinum Smart-Heat™ Electric the perfect solution for a SPECIFICATIONS Model 2300W Part no. BH0320003 Heat Output (Watts) 2300W Power connection required (Volts/Amps) 220-240V - A.C. - 50/60Hz Dimensions (WxHxD) 838 x 177 x 54 mm (33.0 x 7.0 x 2.1”) -
Page 6: Heater Installation Instructions
HEATING INSTALLATION INSTRUCTIONS CEILING & WALL MOUNTING • Heaters must be installed according to the • Minimum distance from edge of heaters to minimum installation clearances shown in these any adjacent walls must be at least 250mm. diagrams Heaters must be away from the fourth wall. •... - Page 7 HEATING INSTALLATION INSTRUCTIONS CONTINUED... OPTION 1 To exit the cable through the side of the wall mounting bracket, start from step 1. 1. Unscrew and remove plug-in wall bracket (a). 2. Attach extra supplied cable gland into the same hole from the outside of the bracket. Fasten in place with the metal cable gland nut from inside the bracket...
- Page 8 9. Fit the smaller cover over the heater bracket so that the slots pass over the shafts of the M6x14mm mounting screws (i). Fit the larger cover over the HEATING INSTALLATION INSTRUCTIONS CONTINUED... smaller cover in the same way from the opposite side of the bracket (j). 8.
-
Page 9: Ceiling Recess
HEATING INSTALLATION INSTRUCTIONS CONTINUED... CEILING RECESS (SOLD SEPARATELY) WARNING Minimum vertical ceiling space clearance between the WARNING heater frame and ceiling surface must be 10”. Instructions below are suitable for ceiling surfaces Minimum horizontal ceiling space clearance measured 0.4-1.2” thick. For ceiling surfaces thicker than 1.2” , from each edge of ceiling cut out must be 20”. -
Page 10: Tube Suspension
the 4 M5 screws and nuts provided (k). HEATING INSTALLATION INSTRUCTIONS 12. Remove the 4 M5 screws fastening the heater CONTINUED... mounting bracket to the back of the heater. Re-insert the screws with both halves of the ceiling support bracket in place and tighten firmly. -
Page 11: Electrical Installation
ELECTRICAL INSTALLATION WARNING ELECTRICAL INSTALLATION This heater MUST be permanently installed by Check product label for correct voltage and an authorised/licenced person. Do not perform wattage to ensure sure power source conforms to maintenance, or carry out installation or assembly the heaters requirements.
Need help?
Do you have a question about the BH0320003 and is the answer not in the manual?
Questions and answers