Table of Contents
Advertisement
Quick Links
Advertisement
Table of Contents

Subscribe to Our Youtube Channel
Related Manuals for Kiloview S2


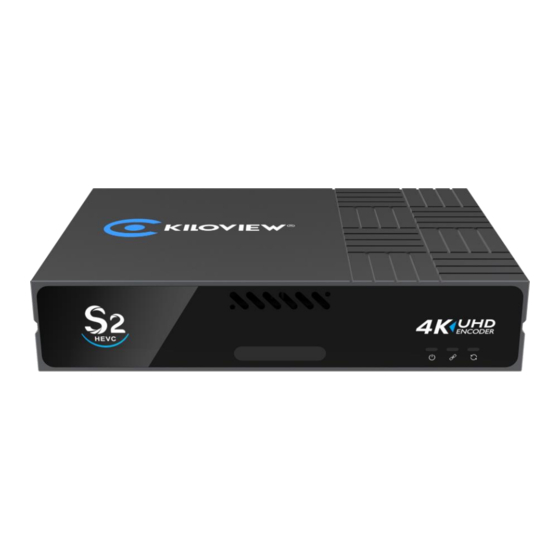
Summary of Contents for Kiloview S2
- Page 1 , S2 4K Video Encoder USER MANUAL Changsha KILOVIEW Electronics CO., LTD...
- Page 2 Kiloview. The name and logo are the trademarks or registered trademarks of the company. Other products or company names mentioned in this document may be the trademarks or registered trademarks of their respective owners.
-
Page 3: Table Of Contents
Contents 1. Product Introduction ......................5 1.1 Advantages ........................5 1.2 Parameters ........................6 2. Operation guidance ........................ 7 3. Device interface description ....................7 4. Installation and connection ....................9 4.1 Video signal connection ....................9 4.2 Network connection ....................10 4.3 Power connection ...................... - Page 4 6.3 Text and OSD overlay ....................18 6.3.1 Text overlay ......................18 6.3.2 OSD overlay ....................... 20 7. Streaming service ........................22 7.1 NDI|HX..........................22 7.2 NDI discovery server ....................24 7.3 RTSP ..........................25 7.4 SRT ........................... 27 7.5 RTMP pushing(live streaming) ................. 29 7.6 TS-UDP Pushing (unicast and multicast) ..............
-
Page 5: Product Introduction
Product Introduction S2 is an UHD 4K HDMI video encoder, which supports up to 4Kp60 input and H.265 (HEVC)/H.264 high-performance encoding with Gigabit wired network transmission. Also, supports most protocols including NDI|HX/SRT/RTMP/RTMPS/HLS/UDP/RTSP, etc. 1.1 Advantages UHD and low latency ... -
Page 6: Parameters
1.2 Parameters Model HDMI input HDMI2.0 Analog audio interface 1*3.5mm Line in USB interface USB2.0 Video interface 1 channel HDMI input,1 channel HDMI loop Network 1000M Ethernet Support Streaming protocols RTSP/RTMP/HLS/TS-UDP/SRT/NDI|HX Video resolution input Up to 4KP60 Video encoding H.264/H.265 Encoding resolution 4KP30 Audio encoding... -
Page 7: Operation Guidance
2. Operation Guidance Installation and connection ⚫ Connect the power, Ethernet cables and video input source correctly, power on the device. Network connection and configuration ⚫ The simplest way is to access the unit via Ethernet through default IP address (192.168.1.168) to login the WEB page for setting (default username and password: admin/admin). - Page 8 2. Status 1. Tally 3. Power Switch 4. Power Port Indicator 5. 3.5mm Line In/Line 6. HDMI Loop 7. HDMI Input 8. USB Expansion Port 1 GbE port with PoE 10. Reset...
-
Page 9: Installation And Connection
Name Color Status Description Always on Power connected POWER White Flashing Power off or failure No power supplied or power failure Quick flashing Network connected LINK Network connection abnormal or restore factory White Slow flashing setting indication (Run light will be flashing as well) Network disconnected or abnormal Flashing Working normally... -
Page 10: Network Connection
4.2 Network connection Connect the network cable to Ethernet of the device, and connect the other end to the network switch or directly to the network port of the computer. 4.3 Power connection Using the power adapter (DC 12v) to connect to the power connector of the device. Turn on power switch, the power light will be on and the device starts working, which will take 30~40s. -
Page 11: Login And Network Configuration
Note: If your switch supports POE power supply, there is no need to connect to the power supply. 5. Login and Network Configuration 5.1 Device login 5.1.1 The default management IP address for the device The default management IP address of the encoder is 192.168.1.16, which could be used as device management all the time and no effects on the device business IP address. -
Page 12: Network Configuration
5.1.3 WEB management page login Open the WEB browser, directly input the encoder's IP address (default is 192.168.1.168) or the URL http://192.168.1.168 and press “Enter” to open the login interface. Fill in the username and password, the default username is admin, the default password is admin, and then click "Login". -
Page 13: Advanced Setting
There are two ways to get the address, one is DHCP, and the other is manually. To use DHCP, please ensure that the router or switch has enabled the DHCP service. This method is simple and convenient, but the IP obtained by DHCP changes continuously, and you cannot directly know what IP address the encoder gets. -
Page 14: Function Parameter Configuration
Routing strategy The object of operation of routing strategy is the data packet, which is for routing release and reception. According to the needs, the data packet transmission path can be changed according to a certain strategy. When the device is connected to multiple network links, the different data link can be sent according to the appointed network link through designated strategy, which improves the utilization efficiency of the link. - Page 15 preview window is displayed in black, it means the video source has not been detected by the device, and you need to check whether the input cable is plugged in correctly. The icon in the lower left corner of the preview window can realize the functions of safety frame and centerline for the preview video.
-
Page 16: Audio & Video Encoding Setting
6.2 Audio & video encoding setting Click setting button on the dashboard, enter the video encoding setting Webpage. 6.2.1 Audio and video signal source setting There is only one HDMI input for the device, video source is HDMI by default. For audio source, you can select HDMI embedded audio or analog Line In. - Page 17 H264 or H265. “Scaling” has 7 options for choice. Default setting is “Default size”, ⚫ that is, the video size after encoding is the same as the input video size. You can also set to encode low resolution input into high resolution output, and similarity, high resolution input can be encoded into low resolution output.
-
Page 18: Audio Encoding Parameter
higher than your own upstream bandwidth. “Framerate” is adjustable from 24FPS to 60FPS and customized framerate ⚫ supported. For customized customized framerate, you can assign framerate manually after encoding, in theory, it shouldn’t be higher than the original framerate. “GOP size” has seven options and supports user-defined adjustment. It is ⚫... - Page 19 2)Fill in “image name”in the pop up window, choose the image to upload, and then save. You can check the image and information listed under the Image list. 3)Click image management back to image overlay page, click add image. 4)Go to the overlay setting pages, overlay type select image, and then click the image and the position you need overlay, click ok.
-
Page 20: Osd Overlay
image overlaid, and finally check image overlay to make it effect. Note: The number of uploaded images can not be over 10 due to the limites of ⚫ storage space, and the maximum size of a single image is 5M. The resolution of uploaded image can not be over the video. - Page 21 Go to the configuration page, to choose overlay item to set overlay functions for “Image”, “Time and Date” and “Text” respectively. Overlay type: “Text, Date, Time, Date/Time, and Image” for options. ➢ Overlay position: There are seven preset display and self-defined positions for ➢...
-
Page 22: Streaming Service
8 different live platforms. There are two code streams (the main stream and sub stream) for S2, so S2 can stream up to 16 different live platforms at the same time. - Page 23 Name: English letters and numbers Group:To configure the devices to a group, the name of the group can be the combination of letters and figures. Multiple groups configuration is allowed and the group names should be separated by comma (,). The default group name is “public”.
-
Page 24: Ndi Discovery Server
Bin\Utilities\x64\NDI Discovery Service.exe Configure the receiving IP address in the discovery server for your S2, and it will be registered to the server. It is recommended that the receiver IP address configured as a static IP address to prevent the disconnection due to IP reassignment. -
Page 25: Rtsp
NDI streams. 7.3 RTSP Add an RTSP stream in the S2 encoder, if it is not decoded and there will be no additional load on the device. As shown in the below, if the IP address of the device... - Page 26 192.168.2.33, then stream address RTSP service rtsp://192.168.2.33:554/ch01. That is, you can directly pull as many RTSP streams as IP addresses the encoder has. Under the same LAN, you can pull RTSP streams by VLC on the computer to test whether the encoding is normal and view parameter information, etc. After installing and opening VLC, click "Media"-"Open Network Streaming"...
-
Page 27: Srt
7.4 SRT 1) Click to add a SRT stream service.. 2} Fill in the pushing address and port, click “Save”. Then SRT pushing is working. Setting parameters means the following (It can be set according to the network situation, and select the default configuration generally): Handshake mode: Caller, Listener and Rendezvous. - Page 28 Encryption mode: AES-128, AES-192, AES-256. ➢ AES key: Encryption key can be 10-32 letters or numbers combination. ➢ Bandwidth overhead: It is set as the percentage value based on network link ➢ quality. Using this value to multiply the total bitrate of the audio and video encoded by the encoder, this will get the occupied maximum bandwidth allowed by Bandwidth Overhead.
-
Page 29: Rtmp Pushing(Live Streaming)
≤7 ≤10 Note: The data in the form is the reference delay value under different packet loss. When RTT>20ms, it requires to increase the delay appropriately. Save the settings, then a SRT-TS pushing address will be added. The encoder starts to initiate a handshake connection to the receiver. - Page 30 Streaming point should be like Server URL+ Stream ID/key, For example: rtmp://a.rtmp.youtube.com/live2/9ja6-9u28-uz4j-8x6r 2) After getting the RTMP URL address, login to the webpage of the encoder, and click “Add a stream service” to add a stream under the “H.264 main stream”. Select RTMP in the pop-up window and fill in the URL address into the push address (The format is: rtmp address/live code), and then click “OK”.
-
Page 31: Ts-Udp Pushing (Unicast And Multicast)
7.6 TS-UDP Pushing (unicast and multicast) Click “+” to add a stream service and selects “TS-UDP pushing”. The TS-UDP pushing including unicast and multicast. If use unicast, the "Push Target Address" is the IP address of the device that receives the TS stream, and the "Target Port"... -
Page 32: Hls Service
After finishing setting, it will come up an URL address from TS-UDP pushing, which could be decoded through VLC or other decoding player. If the multicast is decoded and played on the computer, please remember to close firewall and configure the network with a gateway. Note: When configure the multicast and get the URL is udp://225.6.6.6:1234. -
Page 33: User Management
8. User Management To add and delete users, change the password, etc. 9. Area and Time Click “Location & Time” to change the time. If there no special requirements, please select “Synchronize From This PC” and click “SET”. -
Page 34: System Setup
10. System Settings 10.1 Language Click the language window to switch the system language, currently it supports simplified Chinese, traditional Chinese and English. 10.2 Restore If users change parameters that lead device cannot work (The typical situation is changed network address, so it cannot login to the device), users could restore... -
Page 35: Reboot
factory setting to default value. There are two ways to restore the factory settings ① Webpage "Settings"> "Basic Settings"> "Restore Factory Settings"; ② RESET button: press and hold the reset button on the bottom of the device for more than 5 seconds, the device will restore the factory settings, which will lead to a hard restart of the device, it lasts about 3 minutes. - Page 36 be abnormal. Please contact our support team for help if needed. After the upgrade is completed, please check the current firmware version in the upper right corner is consistent with the latest version to ensure that the device upgrades successfully. Note: It is recommended to use the WINDOWS system when upgrading, and use Google or Firefox to login to the device webpage.
- Page 37 Thank you for reading. KILOVIEW Electronics CO., LTD. Service Hotline:86-731-88315979 Website :www.kiloview.com Technical support Email:support@kiloview.com WhatsApp: +86-18573195156/18573195256 Address: B4-106/109, Jiahua Intelligence Valley Industrial Park, 877 Huijin Road, Yuhua District, Changsha City, Hunan Province, China...
Need help?
Do you have a question about the S2 and is the answer not in the manual?
Questions and answers