Table of Contents
Advertisement
Available languages
Available languages
Quick Links
Advertisement
Chapters
Table of Contents

Related Manuals for Ferroli ECOTRONIC Plus


Summary of Contents for Ferroli ECOTRONIC Plus
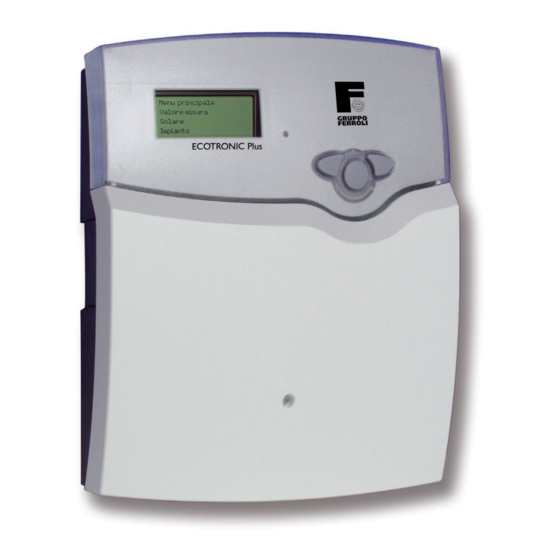
- Page 1 Ferroli ECOTRONIC Plus Installazione Messa in funzione Ricerca di guasti Grazie per aver acquistato questo apparecchio. Leggere attentamente il presente manuale, per poter sfruttare Manuale al meglio le prestazioni di questo apparecchio.
-
Page 2: Table Of Contents
Avvertenze per la sicurezza Dichiarazione di conformità Seguire scrupolosamente le presenti istruzioni relative alla La sottoscritta ditta Ferroli S.p.A., dichiara sotto la propria sicurezza per evitare pericoli e danni alle persone e alle responsabilità che il prodotto ECOTRONIC Plus soddisfa cose. -
Page 3: Dati Tecnici E Panoramica Funzioni
Il ECOTRONIC Plus è dotato di serie di un'interfaccia per La centralina dispone di una gestione a menù multilingue. la comunicazione con il software Service Center. Questo Con 9 uscite relè... -
Page 4: Installazione
ECOTRONIC Plus 1. Installazione AVVERTENZA! Prima di aprire l'involucro, accer- tarsi della separazione onnipolare 1.1 Montaggio dalla tensione di rete! Il montaggio può essere eseguito esclusivamente in lo- cali interni asciutti su una base di appoggio piana. Tenere presente che, per un corretto funzionamento sul luogo prescelto, l'apparecchio non deve essere esposto a campi elettromagnetici forti. -
Page 5: Collegamento Elettrico
ECOTRONIC Plus Collegamento elettrico 1.2.1 Descrizione dei collegamenti elettrici Menu Principale Valori Misurati Segnalazioni Menu Principale Solare Valori Misurati Segnalazioni Solare ® DeltaSol M ® DeltaSol M Fusibile T6,3A (totale di tutti i relè) DeltaSol M ® Prima di aprire la calotta coprimorsetti,... -
Page 6: Attuatori
ECOTRONIC Plus Utilizzare la morsettiera del conduttore di protezione Utilizzare la morsettiera del conduttore neutro Use the PE Collectiv e T erminal Block Use the Neutral Conductor Collecti ve T erminal Block 1.2.3 Attuatori T6,3A Avvertenza: i relè da R1 a R4 sono relè a se- floating relay relè... -
Page 7: Bus
ECOTRONIC Plus 1.2.4 Bus Prima di aprire la calotta coprimorsetti, Utilizzare la morsettiera del conduttore di protezione staccare l'apparecchio dalla tensione La centralina dispone di due interfacce bus per la comuni- Utilizzare la morsettiera del conduttore neutro Isolate mains befor e re moving clamp-co ve r... -
Page 8: Uso E Funzionamento
ECOTRONIC Plus Uso e funzionamento La centralina è comandata esclusivamente con i 3 pulsanti disposti sotto il display. Il tasto "Avanti" (1) serve per sfoglia- 2.1 Tasti di regolazione re in avanti o per aumentare i valori di regolazione. Il tasto "Indietro"... -
Page 9: Struttura Menù
ECOTRONIC Plus 2.3 Struttura menù La centralina viene impostata e controllata tramite il menù. Menù principale Alla prima messa in funzione è visualizzato il menù princi- Valori misurati pale. Nella prima riga di ogni sottomenù si trova la scritta Segnalazioni “indietro”, che permette di tornare al livello di menù... -
Page 10: Ramificazione Menù
ECOTRONIC Plus 2.5 Ramificazione menù Menù princi- pale Valori misurati Segnalazioni Spazzacamino Solare (v. 4.1) Solare Valori impostati Impianto Valori bilancio Contacalorie Opzioni Funzionamento Esperto manuale(v. 4.5) Codice operato- re (v. 2.4) Esperto Impianto (v. 4.2) Valori impostati Valori impostati Circ. -
Page 11: Messa In Funzione
ECOTRONIC Plus 3. Messa in funzione 3.1. Messa in funzione della centralina La centralina è in parte liberamente programmabile. Per applicazioni speciali i relè e i relativi sensori vengono asse- gnati passo passo. Nella centralina sono preprogrammati 7 sistemi solari di base, ognuno dei quali è... - Page 12 ECOTRONIC Plus A partire dal Sistema 2 sono possibili diverse varianti idrau- liche (comando pompe e valvole): Sistema 1 Sistema 2 Variante 1 Sistema 2 Variante 2 Sistema 3 Variante 1 Sistema 3 Variante 2 Sistema 3 Variante 3 Sistema 4 Variante 1...
-
Page 13: Blocchi Di Funzioni
ECOTRONIC Plus 3.3 Blocchi di funzioni In seguito alla scelta della combinazione di sistema e variante Ogni blocco di funzioni mette a disposizione 4 funzioni: idraulica e alle opzioni eventualmente attivate o a causa del 1 Funzione differenza di temperatura modulo circuito di riscaldamento, alcuni relè... - Page 14 ECOTRONIC Plus Per il collegamento di un'ulteriore fonte di calore, come per es. una caldaia a legna, possono essere attivate, oltre alla funzione differenza, una o entrambe le funzioni termostato, per assegnare alla caldaia una temperatura minima o per limitare la temperatura massima del bollitore.
-
Page 15: Fasi D'impostazione Della Centralina
ECOTRONIC Plus 3.4 Fasi d'impostazione della centralina Prima dell'impostazione vera e propria della centralina è possibile scegliere la lingua (Esperto/Lingua...). I punti da 1 a 3 sono impostazioni obbligatorie, i punti da 4 a 18 possono essere impostati opzionalmente, i punti 19 e 20 devono essere eseguiti prima della consegna dell'impianto. -
Page 16: Panoramica Assegnazioni Relè E Sensori
ECOTRONIC Plus 3.5 Descrizione dell'assegnazione di relè e sensori In ogni sistema sono disponibili gli ingressi per sensori Imp1 e Imp2 per il conteggio della quantità di calore e pertanto non vengono ulteriormente elencati. Imp1 Imp2 Sistema 1 Variante 1... - Page 17 ECOTRONIC Plus Sistema 2 Variante 2 R1 R2 Assegnazione sensori Sen.1 Sen.2 Sen.3 Sen.4 Sen.5 Sen.6 Sen.7 Sen.8 Sen.9 Sen.10 Sen.11 Sen.12 Th 1 Th 7 Th 8 Th 9 Th 10 Tbol-i T1-DT5 Th 4 Th 6 T1-DT8 T2-DT8...
- Page 18 ECOTRONIC Plus Sistema 3 Variante 2 Assegnazione sensori Sen.1 Sen.2 Sen.3 Sen.4 Sen.5 Sen.6 Sen.7 Sen.8 Sen.9 Sen.10 Sen.11 Sen.12 Th 9 Th 1 Th 7 Th 8 Th 10 T1-DT9 Tbol-i T1-DT5 Tbol2-i Th 6 T1-DT8 T2-DT8 T2-DT9 Th 3...
- Page 19 ECOTRONIC Plus Sistema 4 Variante 1 S1 S6 Assegnazione sensori Sen.1 Sen.2 Sen.3 Sen.4 Sen.5 Sen.6 Sen.7 Sen.8 Sen.9 Sen.10 Sen.11 Sen.12 Th 9 Th 1 Th 7 Th 8 Th 10 T1-DT9 Tbol-i T1-DT5 Tbol2-i Tcol2 Th 6 T1-DT8...
- Page 20 ECOTRONIC Plus Sistema 4 Variante 3 S1 S6 Assegnazione sensori Sen.1 Sen.2 Sen.3 Sen.4 Sen.5 Sen.6 Sen.7 Sen.8 Sen.9 Sen.10 Sen.11 Sen.12 Th 1 Th 7 Th 8 Th 9 Th 10 Tbol-i T1-DT5 Tbol2-i Tcol2 Th 6 T1-DT8 T2-DT8...
- Page 21 ECOTRONIC Plus Sistema 5 Variante 1 Assegnazione sensori Sen.1 Sen.2 Sen.3 Sen.4 Sen.5 Sen.6 Sen.7 Sen.8 Sen.9 Sen.10 Sen.11 Sen.12 Th 1 Th 7 Th 8 Th 9 Th 10 Tbol-i T1-DT5 Tbol2-i Tbol3-i Th 6 T1-DT8 T2-DT8 T1-DT9 T2-DT9...
- Page 22 ECOTRONIC Plus Sistema 6 Variante 1 Assegnazione sensori Sen.1 Sen.2 Sen.3 Sen.4 Sen.5 Sen.6 Sen.7 Sen.8 Sen.9 Sen.10 Sen.11 Sen.12 Th 1 Th 7 Th 8 Th 9 Th 10 Tbol-i T1-DT5 Tbol2-i Th 6 T1-DT8 T2-DT8 T1-DT9 T2-DT9 Th 5 Tcol Funz.
- Page 23 ECOTRONIC Plus Sistema 6 Variante 3 Assegnazione sensori Sen.1 Sen.2 Sen.3 Sen.4 Sen.5 Sen.6 Sen.7 Sen.8 Sen.9 Sen.10 Sen.11 Sen.12 Th 9 Th 1 Th 7 Th 8 Th 10 T1-DT9 Tbol-i T1-DT5 Tbol2-i Th 6 T1-DT8 T2-DT8 T2-DT9 Th 5...
- Page 24 ECOTRONIC Plus Sistema 7 Variante 2 Assegnazione sensori Sen.1 Sen.2 Sen.3 Sen.4 Sen.5 Sen.6 Sen.7 Sen.8 Sen.9 Sen.10 Sen.11 Sen.12 Th 1 Th 7 Th 8 Th 9 Th 10 Tbol-i T1-DT5 Tbol2-i Th 6 T1-DT8 T2-DT8 T1-DT9 T2-DT9 Th 5 Tcol Funz.
-
Page 25: Funzioni E Opzioni
ECOTRONIC Plus 4. Funzioni e opzioni 4.1 Menù: Solare Scelta del sistema solare di base adeguato (v. 3.2). Sistema: Solare/Opzioni/Sistema Nota: Range di regolazione: 1 ... 7 È necessario intraprendere come primo passo la scelta del Impostazione di fabbrica: 1... - Page 26 ECOTRONIC Plus Il sensore di riferimento si trova a monte della valvola o della Bypass sensore: pompa e può essere assegnato a piacimento. Solare/Esperto/Sen. Bypass Range di regolazione: 1 ... 14 Impostazione di fabbrica: 3 Scambiatore di calore esterno: Questa funzione serve ad accoppiare i circuiti di caricamen-...
- Page 27 ECOTRONIC Plus Quando è in atto una carica del bollitore da un collettore, Circuiti collettori comuni (1 pompa) con questa funzione viene messo in funzione anche l'altro collettore dopo l'intervallo di inattività impostato. Il numero di giri della pompa viene regolato sul minimo e viene ignorato l'eventuale numero di giri impostato tramite la regolazione.
- Page 28 ECOTRONIC Plus Tramite questa funzione le temperature del sistema, e Raffreddamento inverso: quindi la sollecitazione termica, vengono tenute più basse Solare/Opzioni/Funz.ra.inv. possibili. Selezione: "Sì", "No" Se la temperatura massima di tutti i bollitori presenti nel Impostazione di fabbrica: "No" sistema viene superata, entra di nuovo in funzione il cir- cuito di caricamento per il primo bollitore della serie (se la temperatura del collettore è...
- Page 29 ECOTRONIC Plus Viene attuata una regolazione del numero dei giri dipendente Temperatura obiettivo: dalla temperatura del collettore (mantenimento di una tem- Solare/Opzioni/T obiettivo. peratura costante del collettore). Con ciò viene disattivata la dipendenza dalla differenza di temperatura. Con il valore Selezione: "Sì", "No"...
- Page 30 ECOTRONIC Plus Un collettore viene considerato bloccato quando un sen- Collettore bloccato sore è guasto o quando è stata raggiunta la temperatura di disattivazione di sicurezza. Limitazione minima collettore: Un collettore viene considerato bloccato per il funzio- namento solare se esso non ha superato la temperatura Solare/Esperto/Tcolmin minima impostata o se la condizione “collettore bloccato”...
- Page 31 ECOTRONIC Plus La logica prioritaria viene utilizzata solo in sistemi a più Logica della precedenza e caricamento pendolare: bollitori. Solare/Valori impostati/Preceden bol1 (...bol4) Impostando Precenden. bol1, bol2, bol3, bol4 su 1, i bollitori Range di regolazione: 1 ... 4 che hanno una temperatura differente da quella del colletto- Impostazione di fabbrica: 1;...
-
Page 32: Menù: Impianto
ECOTRONIC Plus 4.2 Menù: Impianto Funz. suppl. (Protezione antilegionella): La funzione antilegionella (DVGW) verifica se la temperatura su un determinato sensore (Sen. funz. supl.) supera i 60 °C. Impianto/Opzioni/Funz. suppl Se i 60 °C non sono stati raggiunti entro il tempo di at- Selezione: "Sì", "No"... - Page 33 ECOTRONIC Plus Blocchi di funzioni: A seconda del sistema di base selezionato e delle opzioni attivate sono disponibili fino a 5 blocchi di funzioni, com- Impianto/Opzioni/Th 1 (...10) posti dalle funzioni termostato, temporizzatore e funzione differenza. Grazie ad esse è possibile realizzare ulteriori Selezione: "Sì", "No"...
-
Page 34: Circuiti Di Riscaldamento
ECOTRONIC Plus Impostare il sensore di riferimento nel menù Esperto. Impianto/Esperto/Sen.1-funzDT5(...9) Range di regolazione: 1 ... 14 Impostazione di fabbrica: 3 (...11) Impianto/Esperto/Sen.2-funzDT5(...9) Range di regolazione: 1 ... 14 Impostazione di fabbrica: 4 (...12) Funzione temporizzata (blocco di funzioni 1 ... 5): Ogni funzione temporizzatore mette a disposizione fino a 3 intervalli di tempo. - Page 35 ECOTRONIC Plus Canale di regolazione per la riduzione notturna del circuito Riduzione notturna: di riscaldamento. Per la riduzione notturna è possibile im- Impianto/Circ.Risc./Circ.Risc./Rid.notte postare degli intervalli di tempo (v. sotto), in cui la tempe- Range di regolazione: -20 ...+30 K...
- Page 36 Impostazione di fabbrica: "Dis" mite la regolazione del caricamento del boiler (v. 4.2) della centralina ECOTRONIC Plus. Temporizzatore settimanale: Il temporizzatore determina se utilizzare la correzione diurna o la riduzione notturna per la modifica della tempe- Impianto/Circ.Risc./Circ.Risc./Temporiz./Modo...
- Page 37 ECOTRONIC Plus Post-riscaldamento Il post-riscaldamento del circuito di riscaldamento viene re- alizzato tramite un raffronto (regolazione differenziale) tra la Impianto/Circ.Risc./Circ.Risc./Esperto/Risc.int. temperatura di mandata nominale calcolata e la temperatura Selezione: "Ness.", "Termo.", "Boll." registrata da uno o due sensori di riferimento del bollitore Regolazione di fabbrica: "Ness."...
- Page 38 ECOTRONIC Plus Il regolatore a distanza consente uno spostamento parallelo Correzione manuale (regolatore a distanza) della curva (±15 K). Inoltre, tramite il regolatore a distanza, è Impianto/Circ.Risc./Circ.Risc./Esperto/Corr.man. possibile disattivare il circuito di riscaldamento o innescare Selezione: "Sì", "No" il riscaldamento rapido (il regolatore a distanza è opzionale Impostazione di fabbrica: "No"...
-
Page 39: Menù: Funzioni Bilancio Termico
ECOTRONIC Plus 4.3 Menù: Funzioni bilancio termico La centralina è dotata di un calorimetro integrato che per- Contacalorie/Opzioni/Contacalorie 1 (2, Mod.CC) mette l'applicazione di 2 principi di bilanciamento termico Selezione: "Sì", "No" (con o senza misuratore di volume V40). Inoltre possono Impostazione di fabbrica: "No"... -
Page 40: Menù: Esperto
ECOTRONIC Plus 4.4 Menù: Esperto La segnalazione viene attivata se un processo di caricamento Avviso di sistema "DT troppo alto" solare avviene per un periodo di 20 minuti con una differen- Esperto/DT troppo alto za maggiore di 50 K. Selezione: "Sì", "No"... -
Page 41: Menù: Funzionamento Manuale
Selezione: "dis.", "auto", "ins." Impostazione di fabbrica: "auto" 5. Accessori 5.1 Sensori temperatura Per la centralina ECOTRONIC Plus vengono utilizzati sen- sori di temperatura di precisione del tipo Pt1000 (FKP e FRP). Per l'adattamento ad impianti di tipo diverso, tra gli accessori... - Page 42 ECOTRONIC Plus integrato. Dopo il passaggio di un de- terminato volume il V40 manda un impulso al calorimetro. Da tali impulsi e dalla differenza di temperatura misurata il calorimetro calcola, sulla base di parametri definiti (tipo di glicole, densità, capacità...
-
Page 43: Consigli Per La Ricerca Guasti
ECOTRONIC Plus 6. Consigli per la ricerca guasti Nell'eventualità in cui la centralina ECOTRONIC Plus non dovesse funzionare correttamente, verifi- care i seguenti punti: AVVERTENZA! 1. Alimentazione di corrente Prima di aprire l'involucro, accer- Nel caso in cui la spia di funzionamento sia spenta, control- tarsi della separazione onnipolare lare l'alimentazione elettrica della centralina. - Page 44 ECOTRONIC Plus Segnalazioni In caso di guasti e anomalie, il display della centralina visua- lizza un messaggio: Segnalazione "!Interruzione" / "!Cortocircuito" Segnalazione "?Circol. notturna" La spia di controllo lampeggia Indica una linea interrotta o in cortocir- Se nell'intervallo di tempo tra le 23:00 cuito del sensore indicato.
- Page 45 ECOTRONIC Plus Varie La pompa è calda, ma non c'è trasporto di calore dal col- La pompa si attiva brevemente, si disattiva, si attiva di lettore al bollitore, mandata e ritorno alla stessa tempera- nuovo, ecc. tura, eventualmente anche gorgogli nella conduttura.
- Page 46 ECOTRONIC Plus Raffreddare il bollitore durante la notte Controllare il dispositivo Controllare anche le altre antiriflusso nella circolazio- pompe collegate al bolli- ne dell'acqua calda - OK.. tore solare La pompa del circuito collettori è attiva di Sì notte? Verificare il funzionamen- Pulire o sostituire La circolazione a gravità...
- Page 47 ECOTRONIC Plus Appunti...
-
Page 48: Sigla Editoriale
Per l'utilizzo in deroga al diritto pletezza di tutti i disegni e testi pubblicati nelle presenti istruzioni, d'autore è necessaria l'approvazione della Ditta Ferroli S.p.A.. che hanno esclusivamente un carattere esemplificativo. Qualora Ciò vale in particolar modo per la riproduzione / copia, traduzione, si utilizzino o si applichino i contenuti qui riportati, il rischio va riproduzione su microfilm e salvataggio su supporti elettronici. - Page 49 Ferroli ECOTRONIC Plus Mounting Connection Commissioning Troubleshooting Manual Thank you for buying this Ferroli product. Please read this manual carefully to get the best performance from this unit.
-
Page 50: Safety Advice
Imprint ................48 Safety advice Declaration of conformity Please pay attention to the following safety advice in order We, Ferroli S.p.A.. declare under our sole responsibility to avoid danger and damage to people and property. that our product ECOTRONIC Plus... -
Page 51: Technical Data And Overview Of Functions
Service Center Soft- ware The controller ECOTRONIC Plus is preprogrammed for weather-compensated heating circuit. ECOTRONIC Plus 7 larger basic systems and allows the control of more is equipped with an interface for communication with the complex solar systems. -
Page 52: Installation
ECOTRONIC Plus 1. Installation WARNING! Always disconnect the controller from power supply before open ing 1.1 Mounting the housing! The unit must only be located in dry interior locations. It is not suitable for installation in hazardous locations and should not be placed close to any electromagnetic fields. -
Page 53: Electrical Connection
ECOTRONIC Plus Electrical connection 1.2.1 Overview of electrical connections Main menu Meas. values Reports Main menu Solar Meas. values Reports Solar ® De ltaS ol M ® De ltaS ol M fuse T6,3A (supply to all relays) DeltaSol M ®... -
Page 54: Actuators
ECOTRONIC Plus Schutzleiter -Sammelklemmenblock benutzen Nullleiter -Sammelklemmenblock benutzen Use the PE Collectiv e T erminal Block Use the Neutral Conductor Collecti ve T erminal Block 1.2.3 Actuators T6,3A Please note: Relays R1 to R4 are semiconduc- floating re la y... -
Page 55: Bus
ECOTRONIC Plus 1.2.4 Bus V or Öffnen der Klemmenabdeckung Schutzleiter -Sammelklemmenblock benutzen Gerät spannungslos schalten The controller is equipped with two bus interfaces for data Nullleiter -Sammelklemmenblock benutzen Isolate mains befor e re moving clamp-co ve r communication: Use the PE Collectiv e T erminal Block Use the Neutral Conductor Collecti ve T erminal Block 6,3 (1) A 220 ... -
Page 56: Operation And Function
ECOTRONIC Plus Operation and function The controller is operated via the 3 push buttons next to the display. The forward-button (1) is used for scrolling forward 2.1 Buttons for adjustment through the menu or to increase the adjustment values. The... -
Page 57: Menu Structure
ECOTRONIC Plus 2.3 Menu structure Adjustment and control of the controller are carried out via the menu. When the controller is commissioned, the display level is in the main menu. In the first line of each submenu main menu you will find the option “back”, by means of which it is possi- Meas. -
Page 58: Menu Overview
ECOTRONIC Plus 2.5 Menu overview Main menu Meas. values Reports Chimney Sweeper Solar Solar (see 4.1) Arrangement Adj. values Balance values Manual operati- Options on (see 4.5) Expert User code (see 2.4) Expert Arrangement (see 4.2) Adj. values Adj. values Heat. -
Page 59: Commissioning
ECOTRONIC Plus 3. Commissioning 3.1 Commissioning the controller The controller is partially freely programmable. For special applications, the relays and the corresponding sensors are assigned in steps. 7 basic systems with different hydraulic variants each are pre-programmed. 1. Adjust the basic system; sensors and relays will be allo- cated automatically (see 3.2 and 4.1). - Page 60 ECOTRONIC Plus Beginning with system 2, different hydraulic variants are possible (pump or valve control): system 1 system 2 variant 1 system 2 variant 2 system 3 variant 1 system 3 variant 2 system 3 variant 3 system 4 variant 1...
-
Page 61: Function Blocks
ECOTRONIC Plus 3.3 Function blocks Depending on the selected combination system/variant Each function block provides 4 functions: other options e.g. internal heating circuit module, certain 1 temperature differential function relays are already assigned. Relays which are not assigned 2 thermostat function... - Page 62 ECOTRONIC Plus For the use of a further heat source (e.g. solid fuel boiler), one or two thermostat functions can be activated additional- ly to the differential function, in order to allocate a minimum temperature to the boiler or to limit the maximum store temperature.
-
Page 63: Adjusting The Controller Step-By-Step
ECOTRONIC Plus 3.4 Adjusting the controller step-by-step Before adjusting the controller, select the language (Expert/language/...). Points 1. – 3. have to be adjusted for all systems, points 4. – 18. aree adjusted optional to suit the system requirements, points 19. and 20. should be adjusted before the system is handed over to the operator. -
Page 64: Overview Of Sensor And Relay Allocation
ECOTRONIC Plus 3.5 Overview of sensor and relay allocations All systems reserve sensor inputs Imp1 and Imp2 for heat quantity measurement and these are therefore not listed in the tables on the following pages. Imp1 Imp2 WMZ1 WMZ2 System 1 variant 1... - Page 65 ECOTRONIC Plus System 2 variant 2 R1 R2 Sensor allocation sen.1 sen.2 sen.3 sen.4 sen.5 sen.6 sen.7 sen.8 sen.9 sen.10 sen.11 sen.12 Th 1 Th 8 Th 9 Th 10 Th 7 Th 4 Th 6 Tstb Th 2 Th 3...
- Page 66 ECOTRONIC Plus System 3 variant 2 Sensor allocation sen.1 sen.2 sen.3 sen.4 sen.5 sen.6 sen.7 sen.8 sen.9 sen.10 sen.11 sen.12 Th 1 Th 8 Th 9 Th 10 Th 7 Tst2b Th 6 Tstb Th 3 Th 4 Th 5...
- Page 67 ECOTRONIC Plus System 4 variant 1 S1 S6 Sensor allocation sen.1 sen.2 sen.3 sen.4 sen.5 sen.6 sen.7 sen.8 sen.9 sen.10 sen.11 sen.12 Th 1 Th 7 Th 8 Th 9 Th 10 T1-DT5 Tst2b Tcol2 Th 6 Tstb Th 3...
- Page 68 ECOTRONIC Plus System 4 variant 3 S1 S6 Sensor allocation sen.1 sen.2 sen.3 sen.4 sen.5 sen.6 sen.7 sen.8 sen.9 sen.10 sen.11 sen.12 Th 1 Th 7 Th 8 Th 9 Th 10 T1-DT5 Tst2b Tcol2 Th 6 Tstb Th 3...
- Page 69 ECOTRONIC Plus System 5 variant 1 Sensor allocation sen.1 sen.2 sen.3 sen.4 sen.5 sen.6 sen.7 sen.8 sen.9 sen.10 sen.11 sen.12 Th 1 Th 7 Th 8 Th 9 Th 10 T1-DT5 Tst2b Tst3b Th 6 Tstb Th 4 Th 5...
- Page 70 ECOTRONIC Plus System 6 variant 1 Sensor allocation sen.1 sen.2 sen.3 sen.4 sen.5 sen.6 sen.7 sen.8 sen.9 sen.10 sen.11 sen.12 Th 1 Th 7 Th 8 Th 9 Th 10 T1-DT5 Tst2b Th 6 Tstb Th 5 T1-DT8 T2-DT8 T1-DT9...
- Page 71 ECOTRONIC Plus System 6 variant 3 Sensor allocation sen.1 sen.2 sen.3 sen.4 sen.5 sen.6 sen.7 sen.8 sen.9 sen.10 sen.11 sen.12 Th 1 Th 7 Th 8 Th 9 Th 10 T1-DT5 Tst2b Th 6 Tstb Th 5 T1-DT8 T2-DT8 T1-DT9...
- Page 72 ECOTRONIC Plus System 7 variant 2 Sensor allocation sen.1 sen.2 sen.3 sen.4 sen.5 sen.6 sen.7 sen.8 sen.9 sen.10 sen.11 sen.12 Th 1 Th 7 Th 8 Th 9 Th 10 T1-DT5 Tst2b Th 6 Tstb Th 5 T1-DT8 T2-DT8 T1-DT9...
-
Page 73: Functions And Options
ECOTRONIC Plus 4. Functions and options 4.1 Menu: Solar System: Select the appropriate basic system (see 3.2). Solar/Options/System Note: adjustment range: 1 ... 7 Select the basic system first, because the subsequent selec- factory setting: 1 tion of a new system will reset all other adjustments to the... - Page 74 ECOTRONIC Plus The reference sensor is located in front of the valve or the Bypass Sensor: pump respectively. The default is sensor 3, but this can be Solar/Expert/Sen. Bypass changed using this menu item. adjustment range: 1 ... 14 factory setting: 3...
- Page 75 ECOTRONIC Plus The cooling function can be used in 1-store systems (basic Cooling function (1-store systems) systems 1 and 2). If the store temperature exceeds its maxi- Solar/Options/cool func. mum limitation (Tstmax), the surplus energy in the collector selection: “Yes“, “No“...
- Page 76 ECOTRONIC Plus This function is used for keeping the system temperatures Recooling: and consequently the thermal load as low as possible. Solar/Options/Recooling If the temperatures of all stores of the system have excee- selection: “Yes“, “No“ ded the maximum temperature, the Tstmax for the first factory setting: “No“...
- Page 77 ECOTRONIC Plus Target temperature: Pump speed is controlled according to collector tempera- ture rather than (usual) temperature difference. The aim is Solar/Options/Target tem. to maintain constant collector temperature, adjustable with selection: “Yes“, “No“ parameter “Tcolset“. factory setting: “No“ if you select “Yes“: Solar/adj.
- Page 78 ECOTRONIC Plus Collector minimum limitation: This is the minimum temperature which must be exceeded for the solar pump to switch on. If the adjusted minimum Solar/Expert/Tcolmin temperature is not exceeded or the condition “collector adjustment range: -25 ... 90 °C blocked“...
- Page 79 ECOTRONIC Plus Priority logic is used in multi-store systems only. Priority logic and store sequence control: If St1, St2, St 3, St4 are set to 1, the stores with a tempera- Solar/adj. values/priority St1 (...St4) ture difference to the collector are loaded in parallel as long adjustment range: 1 ...
-
Page 80: Menu: Arrangement
ECOTRONIC Plus 4.2 Menu: Arrangement HSE (protection against legionella): The HSE-function checks whether the temperature at the given sensor (Sen-HSE) exceeds 60 °C at certain times for Arrangement/Options/HSE legionella control. selection “Yes“, “No“ If 60 °C has not been achieved by the HSE start time, the factory setting: “No“... - Page 81 ECOTRONIC Plus Function blocks: Depending on the selected system and activated options, there are up to 5 function blocks including thermostat Arrangement/Options/Thermo. 1 (...10) functions, timer and differential functions. With these, fur- Selection: “Yes“, “No“ ther components or functions e.g. solid fuel boiler, heating factory setting: “No“...
-
Page 82: Heating Circuits
ECOTRONIC Plus Adjust the reference sensor in the expert menu. Arrangement/Expert/Sen 1-DT5 (...9) adjustment range: 1 ... 14 factory setting: 3 (...11) Arrangement/Expert/Sen 2-DT5 (...9) adjustment range: 1 ... 14 factory setting: 4 (...12) Timer function (function block 1 ... 5): Each timer function provides up to 3 time frames. - Page 83 ECOTRONIC Plus Adjustment channel for night correction (night set back) Night correction: of the heating circuit. For the night correction function, arrangement/heat.circuits/heating circuit/ time frames (see below) can be adjusted. Within these time night corr. frames, the set flow temperature of the curve will be de- creased (set back) by the adjusted temperature value.
- Page 84 For this purpose, the option domestic hot water priority store prio. and afterheating via store loading (see 4.2) of the controller selection: “Off“, “On“ ECOTRONIC Plus have to be active as well. factory setting: “Off“ Timer: The timer determines whether day correction or night correction (set back) is used for changing the set flow tem- arrangement/heat.circuits/heating circuit/...
- Page 85 ECOTRONIC Plus Afterheating The set flow temperature is compared with the tempera- ture at one or two store (buffer) reference sensors (diffe- arrangement/heat.circuits/heating circuit/ rential control). If this temperature differential is to small expert/aft.-heat. (DTHon), afterheating will be activated. It will be switched off, if the differential (DTHoff) between store and set flow selection: “None“, “Therm.“, “Store“...
- Page 86 ECOTRONIC Plus The remote control (RTA11-M) allows manual adjustment Manual correction (remote control) of the heating curve (±15 K).The remote control is optional arrangement/heat.circuits/heating circuit/ and it is not included in the full kit. expert/man. corr. The heating circuit can be switched off manually, if the re- selection: “Yes“, “No“...
-
Page 87: Menu: Heat Quantity Measurement
ECOTRONIC Plus 4.3 Menu: Heat quantity measurement WMZ/Options/WMZ 1 (2, Module) The controller has two separate integrated calorimeters which can be configured with or without flowmeter V40. selection: “Yes“, “No“ Furthermore, the values of a separate WMZ module can factory setting: “No“... -
Page 88: Menu: Expert
ECOTRONIC Plus 4.4 Menu: Expert System warning “DT too high“ This message is shown, if solar loading has been carried out for a period of 20 minutes with a differential higher than Expert/DT too high 50 K. selection: “Yes“, “No“... -
Page 89: Menu: Manual Operation
“Auto“ 5. Accessory 5.1 Sensors Precision-platin sensors PT1000 (FKP and FRP) are used for the controller ECOTRONIC Plus. Depending on the individual solar system, the product range contains 3 different sensor types: sensors with immersion sensor in immersion sleeves sleeves, flatscrew sensors and cylindrical clip-on sensors. - Page 90 The outdoor temperature sensor FAP12 is suitable for mounting outdoors. It measures the outside temperature for the weather compensated heating circuit control of the ECOTRONIC Plus. The sensor element is placed in a weather-resistant protective housing with cable entry gland at the base.
-
Page 91: Troubleshooting
ECOTRONIC Plus 6. Troubleshooting If the controller ECOTRONIC Plus does not work correctly, please check the following items: WARNING! Switch-off power supply and 1. Power supply: disconnect from mains before Check power supply if the control lamp is extinguised. The opening the housing! controller is protected with 1 can fuse. - Page 92 ECOTRONIC Plus 3. Messages: If a malfunction occurs, a message is displayed in the display of the controller: Message“! Sensor broken“ / “! Sensor short“ Message“? Non-ret. valve“ Control lamp flashes Indication of a broken cable or a short- If the collector temperature is higher circuit with indication of the respective than 40 °C between 11 p.m.
- Page 93 ECOTRONIC Plus 4. Various: Pump is overheated, but no heat transfer from the colle- Pump starts for a short moment, switches-off, switches-on ctor to the store, flow and return have the same tempe- again, etc. rature; perhaps also bubble in the lines.
- Page 94 ECOTRONIC Plus Stores cool down at night Control the non-return Further pumps which are valve in warm water cir- connected to the solar culation - o.k. store must also be che- cked. Collector circuit pump runs in the night ? Check controller Clean or replace it.
- Page 95 ECOTRONIC Plus Notes...
-
Page 96: Imprint
Another use outside the copyright requires manual and to the best of our knowledge and consent. As the approval of Ferroli S.p.A.. This especially applies for co- faults can never be excluded, please note: Your own calcu- pies, translations, micro films and the storage into electro- lations and plans, under consideration of the current stan- nic systems.
Need help?
Do you have a question about the ECOTRONIC Plus and is the answer not in the manual?
Questions and answers