Subscribe to Our Youtube Channel
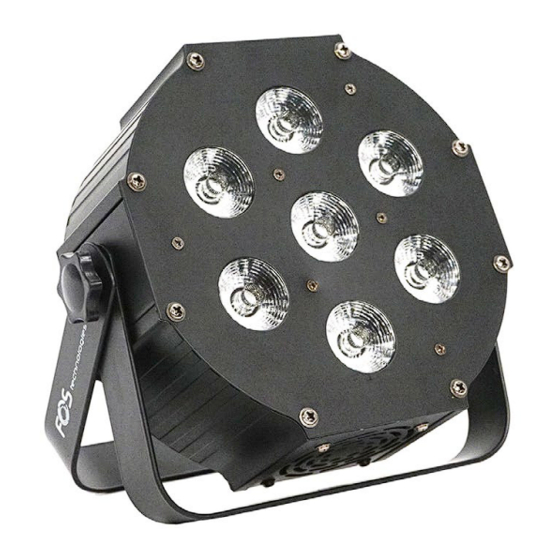
Summary of Contents for FOS Technologies FOS PAR 7x10W ALU
- Page 1 FOS PAR 7x10W ALU User Manual This manual contains important information. Please read before operating fixture.
- Page 2 1. SECURITY TIPS WARNING!!! To reduce the risk of fire, electric shock, or injury to persons, follow these important safety instructions: non-professionals, not to disassemble the light arbitrarily and lighting accessories inside. rated voltage range: AC110V-120V/60Hz or AC200V-240V / 50HZ (to be selected).
- Page 3 2 TECHNOLOGY REFERENCE Power supply: AC90~240V / 50~60Hz Power consumption:70W Led:7pcs×10W RGBW LED 4in1 Beam angle:15° 25° 40° optional DMX channels:4 CHS / 8 CHS Control mode: DMX, Auto, Sound, Master-slave, strobe, dimmer Housing Material: Iron + Aluminium Protection: IP20 Working Environment: -20~40℃...
- Page 4 A001 001- 512 DMX mode,8 Channels d001 001- 512 DMX mode,4 Channels r255 000 - 255 Dimming red from dark to brightness G255 000 - 255 Dimming green from dark to brightness b255 000 - 255 Dimming blue from dark to brightness u255 000 - 255 Dimming white from dark to brightness...
- Page 5 0-255 Master dimming Master dimming 0-255 Dimming Red 0-255 Dimming green Dimming static color 0-255 Dimming blue 0-255 Dimming white 0-255 Strobe mode Strobe from slow to fast 0-50 No function No function 51-100 Static color Static color selected by CH8 101-150 Jump mode 151-200...
- Page 6 Please fasten the fixture clamp before hanging. The clamp can be fasten by the little hole in the middle of the bracket, then tie with a safety belt. The loading capacity of the safety belt should be 10 times than the weight of the fixture itself. 6 CONNECTION OF DMX-512 AND CONNETION WITH THE LIGHT EQUIPMENT Please connect XLR-XLR control wire with every light from the output...
- Page 7 not work of the machine. 2. Replace the same fuse. 2. If the fuse was broken. LED dimmed If your power us same as the input Make sure the voltage of the machine input. No DMX input 1. If the polarity is opposited in the 1.
- Page 8 Sale Store End User Link man: Company Name: Tel: Stamp Add: Description: These must be truthfully fill, seal by the end-user and point-of-sale, or else the warranty will not work (warranty period and terms, see the following) warranty period:one year since purchase warranty terms:1、If fail when using the product in normal state, you can made under the provisions of the warranty, show the warranty card and purchase bills(copy), and enjoy free maintenance service in a specific service center or the manufacturer.


Need help?
Do you have a question about the FOS PAR 7x10W ALU and is the answer not in the manual?
Questions and answers