Advertisement
Quick Links
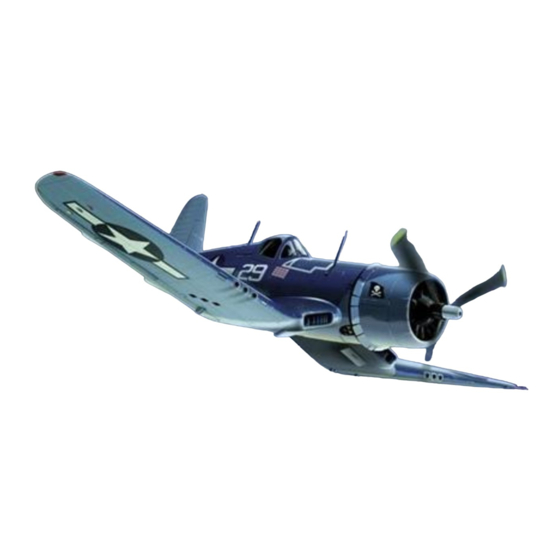
Wing Span:94in/2397mm;
Wing Area:95sq.dm;
Length:57.1in/1450mm;
CAUTION : this plane is not a toy!
Before use , please carefully read this manual.
●First-time builders should seek advice from people having building
experience in order to assemble the model correctly and to produce its
performance to full extent .
●Assemble this kit only in places out of children's reach!
●Take enough safety percautions prior to operating this model.
You are responsible for this model's assembly and safe operation!
●Always keep this instruction manual ready at hand for quick
Sheet1
Flying Weight:3400g;
Radio:6Channels10Servos;
Engine:2C-60 or 4C-91;
Page 1
Advertisement

Related Manuals for Flight Model F-4U Corsair 100CC


Summary of Contents for Flight Model F-4U Corsair 100CC
- Page 1 Sheet1 Flying Weight:3400g; Wing Span:94in/2397mm; Wing Area:95sq.dm; Radio:6Channels10Servos; Length:57.1in/1450mm; Engine:2C-60 or 4C-91; CAUTION : this plane is not a toy! Before use , please carefully read this manual. ●First-time builders should seek advice from people having building experience in order to assemble the model correctly and to produce its performance to full extent .
- Page 2 Sheet1 reference,even after completing the assembly. Install The Elevator & Rudder Drill four hole at the LE.and TE. of Sta. and Elve. As shown Use 4mm plastic screw to install the elevator Drill a 1mm a hole as shown, install the servo arm Page 2...
- Page 3 Sheet1 install elevator servo as photo shown a finished photo as shown. Find the Rudder control parts as shown Drill a 2.5mm hole at the LE. Of Rudder 25mm from Rudder bottom then install the Rudder control wire and glue the together as show. Page 3...
- Page 4 Sheet1 Drill a 3mm hole at the bottom of fin base for the Rudder control wire install as show. Install the Rudder to the Fin and glue all hinges with Epoxy as show. Notice: some version of this model we will use flat hinges.
- Page 5 Sheet1 Main Wing Placing the center wing on the fuse,Bottom then follow mount bolt area to drill four 5mm hole from bottom of center wing and mounting block inside the fuselage, Install M5 blind nut inside each wing mount block from inside then glue them with Epoxy.
- Page 6 Sheet1 First drill a 8mm hole as each in broad flap than install 5X8mm carbon tube inside each flap planel, Install a 5mm control spring in to flap panel, Noties:if the spring are too tiger with the carbon tube can not slip you need to make the carbon tube a bit bigger till the spring was free to slio at least in on side carbon tube, Page 6...
- Page 7 Sheet1 Install a 5MM control spring to both flappanel. Notice:double check and made sure both flap panel can be moving together by spring but will not jam before you glue the flap hinges, Drill 4.5mm hole for flap hinges as show. M3 steel line install the tube.
- Page 8 Sheet1 Fixed M6 plastic screw install the center wing Open a around 8-10mm hole ar the bottom of tail area of the drop tank then use a 2mm long drill bit to drill Install the Aileron are as following. Install the Main Wheel Page 8...
- Page 9 Sheet1 Mount the main gear in to the gear bay and fix it by eight mount bolt as show. The wheel for this model are 4in or 100mm. Your also need to glue two hinges in each side landing gear door. Install tail landing gear as shown.
-
Page 10: Install The Engine
Sheet1 Install the Engine If you choice a 100cc engine that will be install like the pic,this is DLE 111 engine, With AB glue sticky firewall. Cut a 3mm hole then install the Screw as photo shown, Page 10... - Page 11 Sheet1 Cowl and Canopy Install the Cowl as the photo shown. Fixed six 3mm screw install the cowl. Install the spinner as the photo shown. Page 11...
- Page 12 Sheet1 Fix the bottom window with four 1.5mm TP, screw as shown, Fix the canopy with 1.5mm TP.screw for better looking we suggest you print them in black color with a black marker after you fix canopy. Install and glue wing panel parts in wing panel as shown.
- Page 13 Sheet1 Flight Model CO.,LTD ADD:No.10,Fu Ning Street,Xian Xi Industrial,Chang An Town,Dong Guan City,Guang Dong Province,China Tel: +86-769-85070618 / +86-769-85079668 Fax: +86-769-85091868 E-mail:info@flight-model.com / flight_model@126.com Web: http://www.flight-model.com/product/eindex.asp http://flight-model.preview.alibaba.com/ Page 13...
- Page 14 Sheet1 Page 14...
- Page 15 Sheet1 Page 15...
- Page 16 Sheet1 Page 16...
- Page 17 Sheet1 Page 17...
- Page 18 Sheet1 Page 18...
- Page 19 Sheet1 Page 19...
- Page 20 Sheet1 Page 20...
- Page 21 Sheet1 Page 21...
- Page 22 Sheet1 Page 22...
- Page 23 Sheet1 Page 23...
- Page 24 Sheet1 Page 24...
- Page 25 Sheet1 Page 25...
- Page 26 Sheet1 Page 26...
Need help?
Do you have a question about the F-4U Corsair 100CC and is the answer not in the manual?
Questions and answers