Table of Contents
Advertisement
Quick Links
Advertisement
Table of Contents

Related Manuals for Mountain Models Smooth E


Summary of Contents for Mountain Models Smooth E
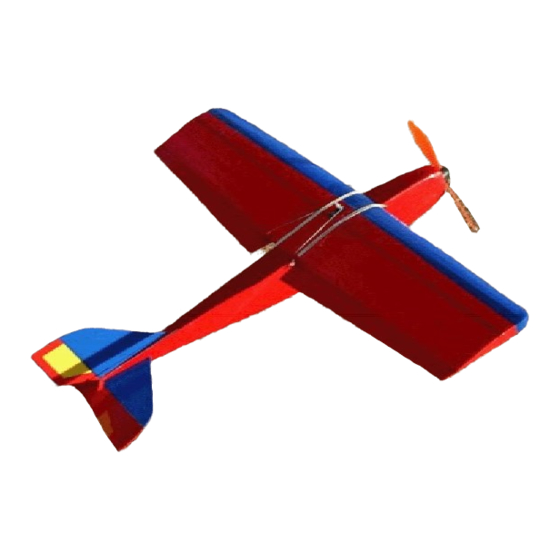
- Page 1 SmoothE Specifications Length: 31 in. (79 cm.) Wingspan (SP): 40in. (102 cm.) Wingspan (SF): 46in. (117 cm.) Wing Area (SP): 312in (2013 cm Wing Area (SF): 293in (1890 cm ) 355in (2290 cm Weight (without battery): 10-12oz. (284-340 g.)
-
Page 2: Revision History
This manual covers both the SmoothE SP (Sport Flyer) and the SmoothE SF (Slow Flyer). Sincerely, Doug Binder doug@mountainmodels.com Mountain Models 465 D Street P.O. Box 762 Penrose, CO 81240 www.mountainmodels.com Phone: 719.372.6727 Created by Ross Design Group for exclusive use by Mountain Models. Mountain Models SmoothE... -
Page 3: Before You Begin
1/32” x 18” thin music wire for the pushrods and tail wheel Foam Front wing sections Rear wing sections Bagged Parts 1/8” round x 9” hardwood dowel 1 3/4” wheels Internal star wheel retainers 1/2” tail wheel 6” heat shrink tubing Mountain Models SmoothE... -
Page 4: General Building Tips
If you want to remove the charred edges caused by the laser cutting process, dampen a cloth with bleach and gently rub the affected areas. Removing the char will not increase the strength but will make it look better. Mountain Models SmoothE... - Page 5 Although these pieces are shaped differently depending on whether you are working on the Sport (SP) or Slow Flyer (SF) wing, they all go together in the same way. Mountain Models SmoothE...
- Page 6 Once the glue is dry, carefully remove the spar from the wax paper. Attaching the Wing Pieces to the Spar To attach the wing pieces to the spar, you need to understand a bit of terminology…once you have this, these steps will become much clearer. Mountain Models SmoothE...
- Page 7 Once the other side with the CA hits the water, the CA will set up quickly. In addition, if you choose to use a slower drying glue, you can use painter's tape (it's the blue tape with low stickiness) to hold your wing pieces together as they dry. Mountain Models SmoothE...
- Page 8 It is advisable but not essential to lightly mist the entire wing with 3M 77 spray adhesive. Allow the adhesive to dry for 30 minutes before continuing. You can also use a very light coating of water based contact cement. Mountain Models SmoothE...
- Page 9 Applying the Covering Tape For the SmoothE, we recommend using wing tape (a colored tape) which can be purchased from Mountain Models or clear packing tape which can be purchased at many office supply stores. Spray the bottom of the wing with 3M 77 and let it set for about 5 - 15 minutes, until it is tacky.
- Page 10 Once the bottom is done, shrink the top in the same fashion. Step 3: Assembling the Ailerons The ailerons will be assembled and then attached to the wing. You will need: • Aileron pieces (Sport wing) • Aileron pieces (Slow flyer wing) Mountain Models SmoothE...
-
Page 11: Step 4: Installing The Aileron Servo
Cut the hole all the way through the wing so that the wires will exit the bottom of the wing, and then press the servo into the hole. Mountain Models SmoothE... -
Page 12: Step 5: Assembling The Fuselage
Step 5: Assembling the Fuselage You will assemble the fuselage by first assembling the fuselage crutch and then adding the fuselage bottom, sides, and top. Follow along carefully as there are a few critical steps along the way. Mountain Models SmoothE... - Page 13 (Figure 1). Press the blind nut into place and then flow a drop of thin CA around the nut so it is secure. Glue the landing gear spacer to the F5 bulkhead using the engraved lines as a guide (Figure 2). Figure 1 Figure 2 Mountain Models SmoothE...
- Page 14 Make sure that the orientation of the F3 and F7 bulkhead is as shown in the picture. Adding the Fuselage Crutch Doublers You will need: • Fuselage crutch doublers for left and right side • F1 and F2 bulkhead Mountain Models SmoothE...
- Page 15 F1 bulkhead, attached to the fuselage crutch doublers. Glue the three fuselage crutch braces to the inside top of the fuselage crutch. Use the following picture for positioning. Mountain Models SmoothE...
- Page 16 3 crutch braces Assembling the Fuselage Extensions, Fuselage Bottom, and Remaining Bulkheads You will need: • Fuselage bottom, plus the extension piece • Battery door and reinforcing strips • Fuselage left and right sides, plus the extension pieces Mountain Models SmoothE...
- Page 17 Top (inside) view of fuselage bottom Outside View and battery door Glue one set of the side fuselage extension pieces together, making sure they are firmly pushed together. This piece is now one of the fuselage sides. Mountain Models SmoothE...
- Page 18 Fuselage, shown here upside down so you can see the bottom more clearly Glue the F8 and F9 bulkheads to the fuselage bottom. Completing the Fuselage Buildup You will need: • Fuselage rear top • 1/4" block 1/4" block Mountain Models SmoothE...
- Page 19 Once straight, glue the F8 and F9 bulkheads to the fuselage sides. Glue the fuselage rear top to the fuselage sides. Fuselage rear top Glue the 1/4” block into the fuselage doubler, as shown in the next photo. Mountain Models SmoothE...
- Page 20 CA. If there is any slop in the motor mount, angle the front of the stick right and down from the pilots point of view. Mountain Models SmoothE...
- Page 21 The dowels should extend 1/4” from the F1 bulkhead. To make sure the dowels extend the proper length, use one of the 1/4” balsa cowl pieces for reference. Mountain Models SmoothE...
- Page 22 These are the wing hold downs. Center them to the fuselage and glue in place with thin CA. Note: if you are going to cover your fuselage instead of paint it, wait till the fuselage is covered before installing the dowels. Mountain Models SmoothE...
- Page 23 On a flat surface with waxed paper over it, assemble the vertical stabilizer, rudder, and elevator and flow thin CA into the joints. Vertical stabilizer Horizontal stabilizer Elevator Rudder ◦ Sand a 45 bevel into the leading edge of the rudder and elevator. Mountain Models SmoothE...
- Page 24 Bend the 1/32” x 18” wire following these steps and referring to the plans: Needle nose pliers work pretty well to shape the wire. ◦ Put a 90 bend into the wire 3/8” in from the end (Figure 8). The tailwheel will fit on this bend. Mountain Models SmoothE...
- Page 25 Attach the elevator to the horizontal stabilizer with a 1” wide strip of packing tape. Step 7: Installing the Elevator and Rudder Servos You will need: • 1/32" x 18" thin music wire (Wire) Mountain Models SmoothE...
-
Page 26: Installing The Servos
F7 bulkhead, through the small guide hole in the F8 bulkhead, and then through the slot located at the top of the fuselage. Look through the battery compartment area to see the small holes in the F8 bulkhead. Mountain Models SmoothE... -
Page 27: Step 8: Assembling The Landing Gear
CA. If you need to readjust the position later, you can break the CA bond by twisting the L bend wire. 11. Install the other pushrod using the same method. Step 8: Assembling the Landing Gear You will need: • 2 plywood landing gear reinforcements Mountain Models SmoothE... - Page 28 Insert the landing gear wire into the landing gear mount. Position the other plywood landing gear reinforcement over the top of the balsa and plywood landing gear assembly you have created, making sure all of the edges line up, and then glue them together. Mountain Models SmoothE...
- Page 29 Attaching the Receiver • The receiver is attached within the fuselage, on top of the crutch using a short section of adhesive Velcro. Connect the servos and ESC to the receiver, following the guides on the receiver itself. Mountain Models SmoothE...
- Page 30 Typically, losing your battery in mid-flight is a bad thing…a very bad thing… Setting the Throws You need to adjust your radio trim so that the elevator, rudder, and ailerons are all level. The throws are as follows: Mountain Models SmoothE...
- Page 31 Using the EPS350 motor, you will have more than enough power. If you are new to ailerons, be ready to back the throttle down to around half throttle to slow things down. Trees and light poles REALLY like to munch on remote control planes. We say this from experience…trust us. Mountain Models SmoothE...
Need help?
Do you have a question about the Smooth E and is the answer not in the manual?
Questions and answers