Advertisement
Quick Links
CONTENTS
1.
Warnings and operation notes..........................................3
2.
Product Overview ............................................................4
3.
Unpacking....................................................................5
4.
Installation.....................................................................6
5.
6.
Advanced Camera Setup..................................................15
7.
Specifications.................................................................28
Before attempting to connect or operate this product, read these instructions carefully.
Save this manual for future use.
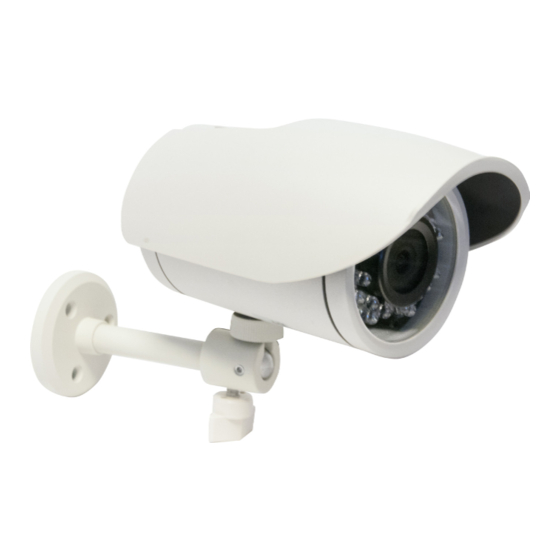
Ax51B IR Bullet Camera
User Guide
Advertisement

Subscribe to Our Youtube Channel
Related Manuals for i3 International Ax51B


Summary of Contents for i3 International Ax51B
-
Page 1: Table Of Contents
Ax51B IR Bullet Camera User Guide CONTENTS Warnings and operation notes..........3 Product Overview ............4 Unpacking..............5 Installation..............6 Connecting your IP Camera to the SRX-Pro Server..7 Advanced Camera Setup..........15 Specifications..............28 Before attempting to connect or operate this product, read these instructions carefully. - Page 2 Neither i3 International Inc. nor its dealers or distributors shall be liable to any person or entity with respect to any liability, loss, or damage, caused or alleged to have been caused directly or indirectly by this information.
-
Page 3: Warnings And Operation Notes
Please read this guide carefully before you install the camera. Keep this guide for future reference. Ax51B comes with a fixed lens and a built-in heater. 24 high quality IR illuminators built around the lens facilitate crystal clear pictures with no outside illumination as far as 25 meters (82 ft). -
Page 4: Product Overview
2. Product Overview • High Definition Images Clear and detailed HD quality images in all conditions. Unlike other megapixel cameras, Ax51B-series offer higher resolutions and better frame rates. Blurry images are reduced and individuals and objects of interest come with perfect clarity. -
Page 5: Unpacking
• Triple Streaming The Ax51B-series Network Camera is designed to show extreme image detail. H.264/MPEG4/MJPEG triple streaming allows you to choose the appropriate code for your bandwidth. • Cost-saving H.264 Support The AX51B-series support the H.264 compression standard. H.264 greatly reduces the size of video without compromising image quality. -
Page 6: Installation
Note: If PoE (Power over Ethernet) connector is used, an electrical cable is not required C. BNC: video output i3-TRNG-CAMS-Ax51B.indd Rev. 130411... -
Page 7: Connecting Your Ip Camera To The Srx-Pro Server
Screws to rotate the bracket. 5. Connecting your IP Camera to the SRX-Pro Server 5.1 Camera Connection Options Connection Type 1: Crossover direct connection i3 SRX-Pro Server Connection Type 2: Via Gigabit Switch i3 SRX-Pro Server i3-TRNG-CAMS-Ax51B.indd Rev. 130411... - Page 8 5.2 Hardware/Software Requirements The following requirements must be met to achieve a successful network connection with the Ax51B IR Bullet IP camera. SRX-Pro Server: • i3 SRX-Pro Version 3.0 or higher • Latest GiPi adapter is installed. GiPi adapters can be downloaded from i3 FTP website.
- Page 9 The application window will appear displaying a list of active network cameras 9. Next, select desired camera in the Annexxus Finder software by double-clicking it in the list and click Edit. 10. Enter the new IP address and Subnet Mask of the camera in the Change IP i3-TRNG-CAMS-Ax51B.indd Rev. 130411...
- Page 10 Annexxus camera’s IP address to 192.138.10.XXX. Remember: Annexxus Cameras cannot share an IP address, each camera requires its own unique IP address. 11. Enter the default camera password: 1234 in the Input Password field and click i3-TRNG-CAMS-Ax51B.indd Rev. 130411...
- Page 11 16. Enter the default camera User Name: admin and default Password: 1234 17. Annexxus camera interface will be displayed in the Internet Explorer window. You should be able to see the camera image on the screen. i3-TRNG-CAMS-Ax51B.indd Rev. 130411...
- Page 12 If you do not see the camera image on the screen, call i3 International tech support for troubleshooting tips: 1.877.877.7241 5.4 Adding your IP Camera to your SRX-Pro Server 1. Make sure that the latest version of GiPi updater is installed on your SRX-Pro Server.
- Page 13 6. In the Select IP Camera window, enter the default camera User Name: admin and default Password: 1234, then click Add. i3-TRNG-CAMS-Ax51B.indd Rev. 130411...
- Page 14 8. Your Annexxus camera is now connected to SRX-Pro Server and is ready to record. You may change resolution and frame rate for the Annexxus camera in the IP Camera tab menu or you may choose to configure the camera’s advanced settings (see the following section). i3-TRNG-CAMS-Ax51B.indd Rev. 130411...
-
Page 15: Advanced Camera Setup
IP cameras and click the Advanced Setup button. The password window should be displayed. Enter the default camera User Name: admin and default Password: 1234. Camera’s user interface will be displayed in a separate Internet Explorer window. i3-TRNG-CAMS-Ax51B.indd Rev. 130411... - Page 16 After making any setting adjustments, remember to click the Save button to save any changes made. You may switch to the advanced setup at any time by clicking the button in the bottom left-hand corner. To switch back to the Basic Setup, click the same button again. i3-TRNG-CAMS-Ax51B.indd Rev. 130411...
- Page 17 Switch to the Advanced Setup by clicking the Advance Setup button on the bottom left-hand corner of the screen as shown on the previous page. The Setup screen will change to reveal multiple setup tabs. Video Setup tab is displayed by default. i3-TRNG-CAMS-Ax51B.indd Rev. 130411...
- Page 18 » CBR (Constant Bit Rate): Produces the smoothest streaming for variable scenes, but is not ideal if highest image quality is desired. i3-TRNG-CAMS-Ax51B.indd Rev. 130411...
- Page 19 Configure Stream 3 - Third Streaming (Live View): • Video Codec: OFF or MJPEG. OFF setting will result in no video on Live View. • Resolution: Resolution for Third Streaming is pre-set to VGA and cannot be changed. i3-TRNG-CAMS-Ax51B.indd Rev. 130411...
- Page 20 • IP Address: Manually enter the camera’s IP address here. This option should NOT be used if DHCP is enabled. • Subnet Mask: Manually enter the camera’s Subnet Mask here. This option should NOT be used if DHCP is enabled. i3-TRNG-CAMS-Ax51B.indd Rev. 130411...
- Page 21 • NTP Server: assign an IP address or domain name for a time server. Default NTP Server: us.pool.ntp.org • Time Zone: select the correct time zone. After making any setting adjustments, remember to click the Save button to save any changes made. 6.4 System Setup i3-TRNG-CAMS-Ax51B.indd Rev. 130411...
- Page 22 All Annexxus-series cameras are sold with the most recent version of the firmware already installed. If in the future firmware updates are released, you can update your camera’s firmware by first downloading the firmware file from i3 International’s website or FTP site. After downloading firmware file, click the Browse... button in the camera’s System setup tab and locate the new firmware file.
- Page 23 To change the password on the default “admin” account, follow instructions below: 1. Type admin in the Username field of the Add/Modify User area. 2. Enter new password in the Password field of the Add/Modify User area. i3-TRNG-CAMS-Ax51B.indd Rev. 130411...
- Page 24 1. Select a user in the User List 2. Click the Delete User button 3. Click OK in a confirmation window. The user will be deleted from User List. 6.6 Logs Logs setup tab displays all login and Alarms log records. i3-TRNG-CAMS-Ax51B.indd Rev. 130411...
- Page 25 4. If you are not satisfied with the size or positioning of the privacy zone, repeat steps 1-3 to re-draw it. 5. Set the Privacy Zone to ON to activate this setting. After making any setting adjustments, remember to click the Save button to save any changes made. i3-TRNG-CAMS-Ax51B.indd Rev. 130411...
- Page 26 • Min Exposure: Set the minimum exposure time. Values range from 1/30 to Unlimited. • Sensitivity: Set the exposure sensitivity. Exposure will increase as the sensitivity value increases relative to the time interval. Values range from 1 to 10 with 10 being the most sensitive. i3-TRNG-CAMS-Ax51B.indd Rev. 130411...
- Page 27 BLC Configuration preview screen. Enabled areas will be shaded purple. Digital WDR • Set the Wide Dynamic Range Level if desired. The WDR can be turned OFF, set to Auto or to Levels 1-5. i3-TRNG-CAMS-Ax51B.indd Rev. 130411...
-
Page 28: Specifications
7. Specifications Ax51B Features/Model Image System Image sensor 1/2.7” 2 MP image sensor optimized for low-light performance Image compression method Triple Streaming : H.264 / MPEG4 / Motion JPEG Maximum Framerate vs Up to 15fps (NTSC)/12.5fps (PAL) at 1920x1080 (2M) - Page 29 Ax51B Features/Model (cont.) Environment Operating Temperature -40ºC ~ 50ºC (-40ºF ~ 122 ºF) Operating Humidity 10~90% RH Storage Temperature -20°C ~ 60°C (-4°F ~140°F) Protection Class IP67 Regulatory CE, FCC, RoHS Accessory Mount Type Wall mount/Ceiling mount with free pack-in bracket i3-TRNG-CAMS-Ax51B.indd...
- Page 30 INTERNATIONAL INC. 1.866.840.0004 U.S.A. 1967 Wehrle Drive, Canada 780 Birchmount Road, www.i3international.com Suite 1, PMB# 034 Buffalo Unit 16, Scarborough, NY, 14221 ON, M1K 5H4...
Need help?
Do you have a question about the Ax51B and is the answer not in the manual?
Questions and answers