Table of Contents
Advertisement
Quick Links
Advertisement
Table of Contents

Related Manuals for SEPTENTRIO AsteRx SB Sx


Summary of Contents for SEPTENTRIO AsteRx SB Sx
- Page 1 AsteRx SB Sx User Manual...
- Page 2 February 25, 2021 Thank you for choosing the AsteRx SB Sx ! This user manual provides detailed instructions on how to use AsteRx SB Sx and we recommend that you read it carefully before you start using the device. Please note that this manual provides descriptions of all functionalities of the AsteRx SB Sx product family however, the particular AsteRx SB Sx you purchased may not support functions specific to certain variants.
-
Page 3: Table Of Contents
Connecting the AsteRx SB Sx over WiFi ........ - Page 4 Managing Configurations ............58 8.1.3 How to set the AsteRx SB Sx to its default configuration ....59 SB S .
- Page 5 1 Introduction 1.1 User Notices 1.1.1 CE Notice AsteRx SB Sx receivers carry the CE mark and are as such compliant with the 2004/108/EC - EMC Directive and amendments, 2006/95/EC - Low Voltage Directive, both amended by the CE-marking directive 93/68/EC.
- Page 6 Further information can be found on our website or by contacting Septentrio’s Technical Support department. In case the AsteRx SB Sx does not behave as expected and you need to contact Septentrio’s Technical Support department, you should attach a short SBF log file containing the support blocks and a Diagnostic Report of the receiver (see Section 7.2).
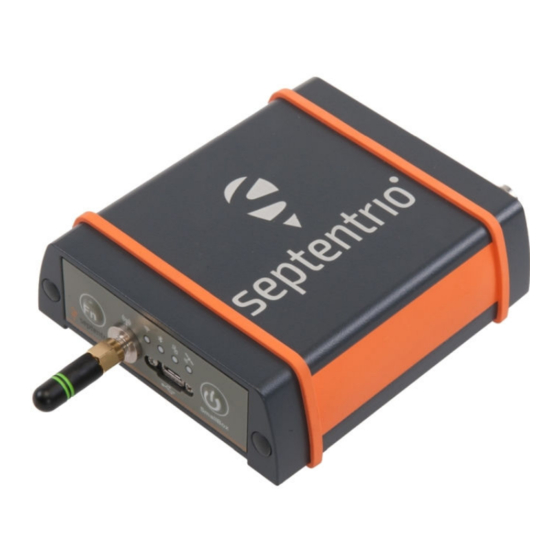
- Page 7 CHAPTER 2. ASTERX SB SX OVERVIEW 2 AsteRx SB Sx Overview The AsteRx SB Sx is an IP68 compliant, multi-constellation, multi-frequency GNSS receiver ideal for rapid integration into machine control or sensor fusion applications. It offers an extensive range of cable and wireless connections for maximum flexibility.
- Page 8 CHAPTER 2. ASTERX SB SX OVERVIEW Time to first fix Cold Start <45s Warm Start <20s Re-acquisition avg. 1s No information available (no almanac, no approximate position) Ephemeris and approximate position known 2.1.2 Physical and Environmental Size: 102 x 36 x 111 mm (4.0 x 1.4 x 4.4 in) Weight: 460 g (1.01 lb)
-
Page 9: Front Panel
2.2 AsteRx SB Sx design 2.2.1 Front Panel The AsteRx SB Sx has an intuitive front panel with status LEDs and a central power button. Figure 2-1: The front panel of the AsteRx SB Sx Tables 2.2-1 below provides an overview of the LED indicators. - Page 10 Blue: Power-over-Ethernet (PoE), powered Power Green: VIN, USB or OTG powered Button Off: There is currently no functionality linked to toggling the function button Function Button Blinking White: All RGB LEDs are blinking white Failsafe Mode Table 2.2-1: AsteRx SB Sx LED Behaviour...
-
Page 11: Rear Panel
CHAPTER 2. ASTERX SB SX OVERVIEW 2.2.2 Rear Panel Figure 2-2 shows the layout of the rear-panel connectors on the AsteRx SB Sx . A description of the connector PIN layout and cable-colour assignments can be found in Appendix A. -
Page 12: Sb S X
This section details how to power-up, connect to and communicate with the AsteRx SB Sx . The AsteRx SB Sx has an on-board web interface which you can connect to in three ways: Ethernet, USB or WiFi. The AsteRx SB Sx is fully configurable using the web interface. Please note that older versions of certain browsers may not properly display the web interface. -
Page 13: Sb S X Via The Web Interface
3.3.1 Using the micro-USB cable Connect the micro-USB cable to the front panel of the AsteRx SB Sx and to your PC as in Figure 3-3. Figure 3-3: Connecting to the front-panel USB socket The first time that the USB cable is connected to your PC, you may be prompted to allow... - Page 14 AsteRx SB Sx the IP address 192.168.3.1. To connect to the AsteRx SB Sx , you can then simply open a web browser using the IP address 192.168.3.1 as shown in Figure 3-5.
-
Page 15: Over Wifi
Figure 3-6: The green WiFi LED indicates that the WiFi modem is turned on On your PC or tablet, search for visible WiFi networks: the AsteRx SB Sx identifies itself as a wireless access point named ’AsteRx_SB-serial number’. The serial number of the AsteRx SB Sx can be found on an identification sticker on the receiver housing. -
Page 16: Using The Ethernet Cable
IP address 192.168.20.1 on any web browser 3.3.3 Using the Ethernet cable Connect the Ethernet cable to the socket labeled ETH on the rear panel of the AsteRx SB Sx as shown in Figure 3-9. Figure 3-9: Connecting to the rear-panel Ethernet socket For the most straightforward setup, the RJ45 socket of the Ethernet cable should be connected to a network running a DHCP server. - Page 17 CHAPTER 3. GETTING STARTED WITH THE ASTERX SB SX Figure 3-10 shows a screenshot of an Ethernet connection to an AsteRx SB receiver with serial number 3024596 using http://asterxsb-3024596. Figure 3-10: Connecting to the Web Interface over Ethernet...
- Page 18 CHAPTER 3. GETTING STARTED WITH THE ASTERX SB SX 3.4 Basic operational monitoring The ‘Overview’ page of the web interface in Figure 3-11 shows at a glance a summary of the AsteRx SB Sx ’s operational status. Figure 3-11: Overview page of the web interface...
- Page 19 CHAPTER 3. GETTING STARTED WITH THE ASTERX SB SX The GNSS field details how many satellites for each constellation are being tracked and used in the position solution (PVT). A green line indicates that at least one satellite in the constellation is being used in the PVT, a...
-
Page 20: Sb S X To The Internet
Client you can reconfigure it over USB. To do this, connect the AsteRx SB Sx to your PC using the (micro) USB cable. You can now open an internet browser and connect to Web Interface using the IP address 192.168.3.1 as shown in Figure 3-12 Figure 3-12: Connecting over USB to the Web Interface using the URL 192.168.3.1... - Page 21 CHAPTER 3. GETTING STARTED WITH THE ASTERX SB SX Figure 3-13: Select ‘ A ccessPoint’ in the WiFi Mode field Configuring the AsteRx SB Sx in a WiFi Client mode In case the receiver is configured in WiFi client mode you will need to access the Web Interface using the USB connection.
-
Page 22: Connecting The Asterx Sb Sx Over A Network With Internet Access
An internet connection can also be achieved by using the Ethernet connector or the USB connector (OTG socket or rear-panel USB connector) of the AsteRx SB Sx . When using Ethernet, make sure your network has internet access. Contact your system administrator to confirm that your network is a properly configured. - Page 23 CHAPTER 4. PPP-RTK OUT OF THE BOX 4 PPP-RTK out of the box The AsteRx SB Sx is delivered already configured to receive PPP-RTK augmentation stream thorough NTRIP port 2. The user only needs to ensure the appropriate network connectivity.
- Page 24 Base station, check that Rover and RTK are selected in the Position Mode field in the GNSS menu as shown in Figure 5-1. This is the default operating mode of the AsteRx SB Sx . Figure 5-1: Setting the AsteRx SB Sx Rover and RTK positioning mode...
- Page 25 Rover. In the Corrections Input window of the Corrections menu, you can configure the AsteRx SB Sx to only accept differential corrections of a particular format. The default ‘auto’ setting will accept correction data format RTCMv2, RTCMv3 or CMR+.
- Page 26 CHAPTER 5. CONFIGURING THE ASTERX SB SX AS A ROVER Step 3a: Configure the NTRIP Client settings 1. On the Corrections/NTRIP window, click on New NTRIP client as shown in Figure 5-3 Figure 5-3: NTRIP tab of the Web Interface 3.
- Page 27 If the NTRIP Mode Field is set to Client and the configuration saved to boot, the AsteRx SB Sx will auto-connect to the NTRIP Caster each time it is powered. If the Mode Field is set to Off, no corrections will be received and the AsteRx SB Sx will not auto-connect to the Caster when switched on.
- Page 28 CHAPTER 5. CONFIGURING THE ASTERX SB SX AS A ROVER Figure 5-6: In the IP Ports window, click on New IP Receive Connection to configure the connection with the Base station Verifying the configuration If the Base station and Rover receivers have been configured correctly then graphics in the Communication Ethernet windows of the Rover and the Base station should appear similar to those shown in Figures 5-7 and 5-8.
- Page 29 CHAPTER 5. CONFIGURING THE ASTERX SB SX AS A ROVER Step 4: Configure data output Section 6.2 details the settings needed to configure data output. Step 5: Configure any additional settings Chapter 6 details some additional settings that you may need.
- Page 30 Figure 6-1: GNSS Tab: setting Antenna Offset By selecting the correct antenna type, the AsteRx SB Sx will automatically compensate for the Antenna Phase Centre offset using the approved calibration of the product in order to provide the most accurate position out of the box.
-
Page 31: And Nmea Output
SBF and NMEA can also be logged on the internal 16 GB disk of the AsteRx SB Sx . Section 6.3.1 and 6.4 detail how to log data on the receiver and how to download data logged on the receiver. - Page 32 CHAPTER 6. OTHER RECEIVER OPERATIONS Step 2: Configure data output NMEA In the NMEA/SBF Out tab, clicking on New NMEA Stream will guide you through the steps needed to configure NMEA output as shown in Figures 6-3 and 6-4. Figure 6-3: Selecting to output NMEA data on COM3 Figure 6-4: Selecting to output the GGA and ZDA NMEA message every second...
- Page 33 CHAPTER 6. OTHER RECEIVER OPERATIONS By clicking New SBF stream in the NMEA/SBF Out window, a second output stream can be configured. In the example shown in Figures 6-5 and 6-6 the PVTCartesian SBF data block will be output over COM1 once per second. Figure 6-5: Selecting to output SBF data on COM1 Figure 6-6: Selecting to output the PVTCartesian SBF block every second...
- Page 34 CHAPTER 6. OTHER RECEIVER OPERATIONS Step 3: Verifying the configuration Having configured data output and clicked on Ok the NMEA/SBF Out page will now display a summary of all data output as shown in Figure 6-7. Figure 6-7: Summary of all configured data output streams Figure 6-8 shows the actual data output.
-
Page 35: Output Over Ethernet
CHAPTER 6. OTHER RECEIVER OPERATIONS 6.2.2 Output over Ethernet SBF and NMEA data can be sent over an Ethernet connection from the AsteRx SB Sx . Ethernet settings are explained in Section 8.4. Step 1: Configure an IP connection on the AsteRx SB Sx The Ethernet port settings can be configured by selecting IP Ports from the Communication... - Page 36 CHAPTER 6. OTHER RECEIVER OPERATIONS Step 2: Configure output of NMEA messages In the NMEA/SBF Out window, click on New NMEA stream and follow the sequence of windows to configure the data you want to output. In the example shown in Figure 6-10, the NMEA GGA message will be output every second.
- Page 37 CHAPTER 6. OTHER RECEIVER OPERATIONS Step 3: Configure Data Link to listen for NMEA output The screenshots in Figure 6-11 show how the Septentrio GUI tool Data Link can be configured to listen for the AsteRx SB Sx GGA output.
- Page 38 CHAPTER 6. OTHER RECEIVER OPERATIONS Figure 6-12: The Show data window of Data Link showing GGA from the AsteRx SB...
-
Page 39: Output Over Bluetooth
Bluetooth device. 3. On your Bluetooth device, open the Bluetooth application and find the Bluetooth device name of your AsteRx SB Sx and pair. By default, the Bluetooth device name is AsteRx_SB-serial-number . The device name and pairing code may be changed for user preference. Also, the Bluetooth module may be powered on/off... -
Page 40: How To Log Data
RINEX onboard logging, FTP Push and USB Host external disk function. RINEX is an optional feature. If you don’t have this permission on your AsteRx SB Sx , you can purchase this option from the Septentrio Sales department:... - Page 41 CHAPTER 6. OTHER RECEIVER OPERATIONS To define a new logging session, click on a Create button as shown in Figure 7-7. Figure 6-15: Click on a ‘Create’ button to start defining a new logging session You can then follow the sequence of steps shown in Figure 6-16 selecting the various configuration settings for the logging session.
- Page 42 CHAPTER 6. OTHER RECEIVER OPERATIONS Step 3: Verifying the configuration When you have finished configuring the logging session, the Log Sessions window will show a summary of the defined logging sessions as in Figure 6-17. An estimate of the daily size of data generated with the current logging configuration is also given.
-
Page 43: Logging To An External Usb Memory Device
Figure 6-19: Select External from the drop-down list to log data to an external memory device If you don’t have permissions to log data to an external memory device on your AsteRx SB Sx , you can purchase this option from the Septentrio Sales department: sales@septentrio.com... - Page 44 Data files logged by the AsteRx SB Sx , both on its internal memory and to an external USB device, can be downloaded using the web interface on the Disk Contents window of the Logging menu. Each logging session is logged to a separate folder. Individual files can be downloaded by clicking on the green download arrow next to the file name as shown in...
-
Page 45: How To Ftp Push Logged Data To A Remote Location
files cannot be deleted then the receiver will also report this and the test file will remain in the remote folder. FTP push is an optional feature. If you don’t have this permission on your AsteRx SB Sx , you can purchase this option from the Septentrio Sales department:... - Page 46 CHAPTER 6. OTHER RECEIVER OPERATIONS Figure 6-22: Testing the remote FTP server credential are correct...
-
Page 47: Receiver Monitoring
7.1 AIM+: Using the spectrum analyser to detect and mitigate interference The AsteRx SB Sx is equipped with a sophisticated RF interference monitoring and mitigation system (AIM+). To mitigate the effects of narrow-band interference, 3 notch filters can be configured either in auto or manual mode. These notch filters effectively remove a narrow part of the RF spectrum around the interfering signal. -
Page 48: Narrowband Interference Mitigation
CHAPTER 7. RECEIVER MONITORING 7.1.1 Narrowband interference mitigation Configuring the notch filters In the default auto mode of the notch filters, the receiver performs automatic interference mitigation of the region of the spectrum affected by interference. In manual mode as shown configured for Notch1 in Figure 7-2, the region of the affected spectrum is specified by a center frequency and a bandwidth which is effectively blanked by the notch filter. -
Page 49: Wideband Interference Mitigation
There are also intentional sources of interference from devices such as chirp jammers. The wideband interference mitigation system (WBI) of the AsteRx SB Sx can reduce the effect of both types of interference on GNSS signals. Configuring WBI mitigation The wideband interference mitigation system (WBI) can be enabled by selecting ‘on’... - Page 50 CHAPTER 7. RECEIVER MONITORING When WBI mitigation is enabled, the effect of the interference is dramatically reduced to the extent that, the small signal bump at the GPS L1 central frequency of 1575 MHz is clearly visible as Figure 7-6 shows. In this particular test, the interference signal caused the receiver to fall back to the less precise DGNSS or standalone positioning modes.
-
Page 51: Ow To Log Data For Problem Diagnosis
7.2 How to log data for problem diagnosis If the AsteRx SB Sx does not behave as expected and you need to contact Septentrio Support Department, it is often useful to send a short SBF data file that captures the anomalous behaviour, as well as a Diagnostic Report from the receiver. - Page 52 CHAPTER 7. RECEIVER MONITORING Figure 7-8: Configure a logging session selecting Support in the Edit SBF Stream field Figure 7-9: Selecting BBSamples in the Edit SBF Stream field for logging interference Please note that logging the Support data blocks requires a large throughput of data that may not be compatible with other CPU-intensive tasks such as data output at higher rates.
- Page 53 Figure 7-10: The Logging window showing an active logging session Step 3: Downloading the logged SBF file To download a data file logged on the AsteRx SB Sx , click the download icon next to the filename on the Disk Contents page as shown in Figure 7-11 Figure 7-11: Click the icon next to the file you want to download...
-
Page 54: Diagnostic Report
CHAPTER 7. RECEIVER MONITORING 7.2.2 Diagnostic Report A Diagnostic Report can be generated under the Admin/About tab on the Web interface as shown in Figure 7-12 and saved to your PC. Figure 7-12: Generate a Diagnostic Report... -
Page 55: Activity Logging
CHAPTER 7. RECEIVER MONITORING 7.3 Activity logging The AsteRx SB Sx reports various events in the Receiver Messages window of the Admin menu that can be used to check receiver operations. The example in Figure 7-13 shows that four, 15 minutes SBF files have been successfully FTP pushed to a remote location. -
Page 56: Receiver Administration Operations
8 Receiver Administration Operations 8.1 Configurations A configuration is a collection of all settings and values that determine the behaviour of the receiver. The table below gives an overview of the AsteRx SB Sx ’s configurations. Persists after Writable Description Configuration... -
Page 57: Saving The Configuration
CHAPTER 8. RECEIVER ADMINISTRATION OPERATIONS 8.1.1 Saving the configuration After each change made to the configuration of the AsteRx SB Sx , the pop-up shown in Figure 8-1 will appear. Clicking on ‘Save’ will cause the new configuration to be applied the next time the receiver is powered. -
Page 58: Managing Configurations
In the Admin Configurations tab, the configuration of an AsteRx SB Sx can be easily saved to a PC as a text file. A saved configuration can also be uploaded to an AsteRx SB Sx . 1. Click the Admin tab. -
Page 59: How To Set The Asterx Sb Sx To Its Default Configuration
8.1.3 How to set the AsteRx SB Sx to its default configuration You can set the AsteRx SB Sx configuration to its default settings via the Admin Configurations tab as shown in Figure 8-4. Select RxDefault from the Source drop-down list and either Current or Boot in the Target menu. -
Page 60: Aste R Xsb S X
CHAPTER 8. RECEIVER ADMINISTRATION OPERATIONS 8.2 Resetting the AsteRx SB Sx When the AsteRx SB Sx is not operating as expected, a simple reset may resolve matters. The AsteRx SB Sx can be fully power-cycled using the front-panel button, however via the Admin Reset tab, different functionalities can be individually reset as shown in Figure 8-5. - Page 61 All information about previously known Bluetooth devices is Bluetooth erased. WiFiAccessPoints The list of known WiFi access points is erased. The current HTTPS certificate is removed and will be replaced by HTTPSCertificate self-signed certificate at boot. Table 8.2-2: AsteRx SB Sx Reset- Memory Erase Options...
- Page 62 file. We recommend that you read the release notes for the firmware upgrade beforehand in case there are any changes that may affect your use of the receiver. Permission files enable additional features on the AsteRx SB Sx and can be purchased via our Sales department.
- Page 63 Figure 8-7: The AsteRx SB Sx upgrade procedure If there were no problems with the upgrade the message Upgrade successful will appear. You can then check on the Admin About tab that the AsteRx SB Sx firmware or permission file has the correct, new version.
-
Page 64: Sb S
8.4 How to change IP settings of the AsteRx SB The IP settings of the AsteRx SB Sx can be configured on the Ethernet window of the Web Interface. By default, the AsteRx SB Sx is configured to use DHCP to obtain an IP address but, a static IP address can also be configured as shown in Figure 8-8. - Page 65 CHAPTER 8. RECEIVER ADMINISTRATION OPERATIONS Note that the IP settings will keep their value after a power cycle and even after a reset to factory default in order to avoid accidentally losing an Ethernet connection to the receiver.
-
Page 66: Ow To Configure Dynamic Dns
Step 1: Open a Dynamic DNS account To make use of this feature on the AsteRx SB Sx , you should first create an account with a Dynamic DNS provider to register a hostname for your receiver. The AsteRx SB Sx supports the following two services: •... -
Page 67: Sb S Firewall
8.6 How to control access using the AsteRx SB Sx Firewall You can control access to the AsteRx SB Sx using the receiver’s firewall in the Firewall window. By default, all Ethernet and WiFi ports are open (i.e. those defined on the IP Ports menu). -
Page 68: Xpert Console
CHAPTER 8. RECEIVER ADMINISTRATION OPERATIONS 8.7 Using the Expert Console Commands can be sent to the AsteRx SB Sx using the Expert Console window on the accessible via the Admin menu as shown in Figure 8-12 • The command responses will be shown the window below the label ‘Expert Console’. - Page 69 9 Security 9.1 How to manage access to the AsteRx SB Sx You can manage the access that users have to the AsteRx SB Sx in the User Administration window of the Admin menu. By default, all communication interfaces are assigned User-level access as shown in Figure 9-1.
- Page 70 CHAPTER 9. SECURITY Figure 9-2: Defining user access After defining the Users/Viewers and their access levels, they can then login on the web interface by clicking on Log in on the upper-right corner as shown in Figure 9-3. Figure 9-3: Logging in to the Web Interface...
-
Page 71: Ssh Key Authentication
By default, anonymous users have full access over FTP, SFTP and rsync to the files logged on the AsteRx SB Sx . FTP, SFTP and rsync access can be limited by configuring user access, as described in Section 9.1. For added security, user authentication for SFTP and rsync access can be configured using an SSH public key. - Page 72 • PinPoint-GIS Rx: a generic GIS system independent of any GIS tool set allowing you to store data into CSV files PinPoint-GIS is an extension of Septentrio’s web interface with a direct link to ArcGIS. Online via PinPoint-GIS Web and with a generic on-board data collection mechanism for any GIS workflow thanks to PinPoint-GIS Rx (not linked to ArcGIS accounts).
-
Page 73: Ntroduction Sing The Ste 10.2.1 Designing A Collection Project
CHAPTER 10. GIS COLLECTION WITH PINPOINT-GIS OR OTHER APPLICATIONS 10.2 Using the AsteRx SB Sx on-board simple data collector To be able to use PinPoint-GIS Web, your browser should be connected to the internet and the receiver should have the Data Collection permission option. - Page 74 CHAPTER 10. GIS COLLECTION WITH PINPOINT-GIS OR OTHER APPLICATIONS Adding a user-defined attribute On the project pop-up, click Designer/New attribute then select User to define a user-defined attribute. Fill in the name of the attribute and default value you want it to take.
-
Page 75: Performing A Collection
CHAPTER 10. GIS COLLECTION WITH PINPOINT-GIS OR OTHER APPLICATIONS 10.2.2 Performing a collection On the GNSS menu of the Web Interface, select PinPoint-GIS Web, click on PinPoint-GIS Rx and then the Manage button next to the project you want to use. You can then click on the Collector button to start a collection. -
Page 76: Downloading Collected Data
CHAPTER 10. GIS COLLECTION WITH PINPOINT-GIS OR OTHER APPLICATIONS 10.2.3 Downloading collected data On the GNSS menu of the Web Interface, select PinPoint-GIS Web, click on PinPoint-GIS Rx and then the Manage button next to the project you want download. The project window will pop-up where you can click on the CSV Export button. -
Page 77: Gis Web
CHAPTER 10. GIS COLLECTION WITH PINPOINT-GIS OR OTHER APPLICATIONS 10.3 Using PinPoint-GIS Web PinPoint-GIS Web allows you to access your ArcGIS Online maps. It works on any platform with a web browser and makes the bridge between GIS and accurate data collection. The following steps will guide you through the main functionalities of PinPoint-GIS Web. - Page 78 CHAPTER 10. GIS COLLECTION WITH PINPOINT-GIS OR OTHER APPLICATIONS Figure 10-8: Functions within PinPoint-GIS Web...
-
Page 79: Pwr-Com2&3/Usb
A Rear-panel port descriptions A.1 PWR-COM2&3/USB Figure A-1: Solder view of the 7-pin female PWR-COM2&3/USB socket on the rear panel of the AsteRx SB Sx The 7-pin connector type is an ODU MINI-SNAP F Circular Connector Series S40F1C-P07MCD0-500S. PIN #... -
Page 80: Com1-Gpio
APPENDIX A. REAR-PANEL PORT DESCRIPTIONS A.2 COM1-GPIO Figure A-2: Solder view of the 7-pin female COM1-GPIO socket on the rear panel of the AsteRx SB Sx The 7-pin connector type is an ODU MINI-SNAP F Circular Connector Series S40F1C-P07MCD0-500S. PIN #... -
Page 81: Eth
APPENDIX A. REAR-PANEL PORT DESCRIPTIONS A.3 ETH Figure A-3: Solder view of the 4-pin female ETH socket on the rear panel of the AsteRx SB Sx The 4-pin connector type is an ODU MINI-SNAP F Circular Connector Series S40F1C-P04MFG0-50OO. PIN #... - Page 82 SBF bock. PowerStatus Be aware that if you are using your own cables for powering the AsteRx SB Sx at low voltage (5V), care should be taken of voltage drops if the cables are too thin.
-
Page 83: Cons On The Web Interface
C.1 Status Icons on the Web Interface The icons on the right-hand side of the top banner quickly show the user the status of the AsteRx SB Sx . Table C.1-1: Web Interface Status Icons By default the Internet access is continuously checked every 1 minute and one of the icons will show up. - Page 84 Using your iOS mobile device as a personal hotspot can be useful for sharing the internet connection of your mobile device to the AsteRx SB Sx . In this case you need to configure the receiver in WiFi client mode and the web interface needs to be accessed in a different way (you will not be able to connect using 192.168.20.1).
- Page 85 APPENDIX D. CONNECTING TO THE WEB INTERFACE IN CLIENT WIFI MODE 3. Access the web interface via your mobile device: • iOS devices: easily access interface using http://asterxsb.local or http://asterxsb-xxxxxxx.local in your web browser. Where ‘xxxxxxx’ is the 7-digit serial number of the receiver. •...
Need help?
Do you have a question about the AsteRx SB Sx and is the answer not in the manual?
Questions and answers