Table of Contents
Advertisement
Quick Links
Advertisement
Table of Contents
Troubleshooting

Related Manuals for PerkinElmer RamanStation 400 Series


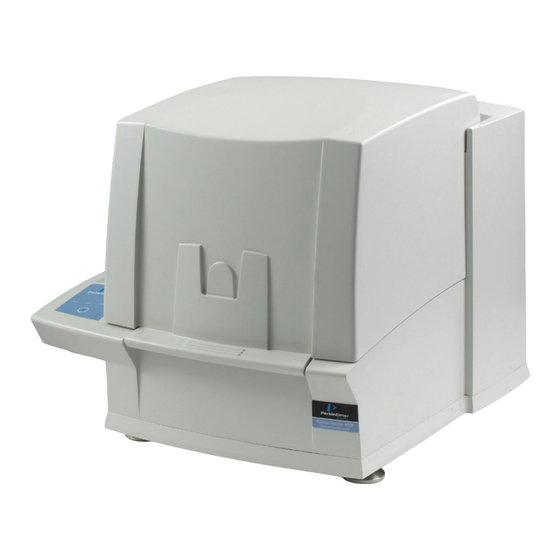
Summary of Contents for PerkinElmer RamanStation 400 Series
- Page 1 MOLECULAR SPECTROSCOPY RamanStation 400 Series Getting Started Guide...
- Page 2 The information contained in this document is subject to change without notice. Except as specifically set forth in its terms and conditions of sale, PerkinElmer makes no warranty of any kind with regard to this document, including, but not limited to, the implied warranties of merchantability and fitness for a particular purpose.
-
Page 3: Table Of Contents
RamanStation 400 Series Getting Started Guide . Table of Contents Introduction ....................5 About This Manual .................... 6 Conventions Used in this Manual ................ 7 Notes, Cautions and Warnings ..............7 Safety Practices ..................11 Overview ......................12 General Operating Conditions................13 Environmental Conditions .................14... - Page 4 4 . RamanStation 400 Series Getting Started Guide Fiber Optic Probe ..................77 Important: Read This First ................78 The Fiber Optic Probe (FOP) ................79 General Overview of the Fiber Optic Probe ..........79 Attaching and Removing the Fiber Optic Probe ..........80 Attaching the FOP ..................
-
Page 5: Introduction
Introduction... -
Page 6: About This Manual
About This Manual This Getting Started Guide contains all of the information that you will need to set up your RamanStation 400 Series Raman Spectrometer, and then start collecting spectra. The Getting Started Guide is divided into the following chapters:... -
Page 7: Conventions Used In This Manual
ALT+F. All eight-digit numbers are PerkinElmer part numbers unless stated otherwise. The term RamanStation 400 Series means the RamanStation 400 and the RamanStation 400F Raman Spectrometers. - Page 8 8 . RamanStation 400 Series Getting Started Guide We use the term CAUTION to inform you about situations that could result in serious damage to the instrument or other equipment. Details about these CAUTION circumstances are in a box like this one.
- Page 9 Introduction . We use the term WARNING to inform you about situations that could result in personal injury to yourself or other persons. Details about these circumstances are in a box like this one. WARNING Warning (Warnung) Bedeutet, daß es bei Nichtbeachten der genannten Anweisung zu einer Verletzung des Benutzers kommen kann.
- Page 10 10 . RamanStation 400 Series Getting Started Guide...
-
Page 11: Safety Practices
Safety Practices... -
Page 12: Overview
All information provided herein is for reference only. All information is believed to be correct and complete. PerkinElmer shall not be liable for errors contained herein nor damages concerned with the use of this document. PerkinElmer does not accept liability for the interpretation of information resulting, either directly or indirectly, from our spectrometers or associated software interfaces. -
Page 13: General Operating Conditions
Whenever it is likely that the RamanStation 400 Series is unsafe, make it inoperative. The RamanStation 400 Series may be unsafe if it: •... -
Page 14: Environmental Conditions
14 . RamanStation 400 Series Getting Started Guide Environmental Conditions The instrument has been designed to be safe under the following conditions: Indoor use; • • Altitude up to 2000 m; • Ambient temperatures of 5 °C to 40 °C;... -
Page 15: Fire Safety
Safety Practices . Fire Safety Ensure that there is at least 15 cm (6”) between the rear of the instrument and the • nearest wall. Ensure that the power supply unit (PSU) vents or fan do not become obstructed • (Figure 1). -
Page 16: Electrical Safety
16 . RamanStation 400 Series Getting Started Guide Electrical Safety The spectrometer comes assembled within a protective housing to prevent exposure to electrical hazards. There are also a number of exterior service panels that should only be removed by PerkinElmer Service Engineers. -
Page 17: Power Supplies
PSUs. Under no circumstances should you attempt to disassemble the PSU and carry out repairs. If the PSU has a fault, please contact your PerkinElmer Service Engineer. The entire unit must be replaced. WARNING Connect the PSUs to a three-wire (live, neutral and ground/earth) socket. -
Page 18: Emc Compliance
EC directive The RamanStation 400 and RamanStation 400F have been designed and tested to meet the requirements of the EC directive 2004/108/EC. The RamanStation 400 Series complies with the EMC standard EN61326, (EMC standard for electrical equipment for measurement, control and laboratory use) and EN55011 (ISM) Class A (rf emissions). -
Page 19: Laser Safety
Safety Practices . Laser Safety The RamanStation 400 Series complies with the requirements of IEC 60825-1:2007 and 21CFR 1040.10 FDA performance standards for laser products, except for deviations pursuant to Laser Notice No. 50, dated 26 July 2001. Use of controls or adjustments or the performance of any procedures other than those specified in this document may result in exposure to hazardous laser radiation. -
Page 20: Class 3B Safety Precautions
20 . RamanStation 400 Series Getting Started Guide Class 3B Safety Precautions When using the fiber optic probe you should follow Class 3B laser safety precautions such as wearing laser safety goggles and using door interlocks. For information on these precautions please refer to an appropriately trained laser safety officer within your own facility. - Page 21 • Use protective laser safety goggles, with an OD (optical density) of at least 3 at 785 nm, as a precaution against accidental exposure to the direct or reflected laser light. Suitable goggles are available from PerkinElmer (part number L1323518).
- Page 22 • Do not use the TFOP if it shows any sign of damage. • If repair or servicing is needed, call your PerkinElmer Service Representative for advice. Raman Triggered Fiber Optic Probe For further safety details, see the leaflet (L1321887) Calculation of Nominal Hazard Zones for use of Fiber Optic Probe The following calculations show how to calculate a nominal hazard zone.
-
Page 23: Internal Interlock System
27.3 Table 2 Nominal Ocular Hazard Distance (NOHD) for 785 nm NOTE: Other focal lengths are available; contact PerkinElmer for details. In particular, the use of an ultra-long working distance lens adaptor (part number L1320071) provides a working distance of 25 mm. Where different focal lengths are used, the NOHD should be calculated accordingly. -
Page 24: External Interlock System
24 . RamanStation 400 Series Getting Started Guide Magnetic actuator (MA) Magnetic proximity switch (MPS) Figure 4 The RamanStation 400 safety interlock system, showing the proximity of the MPS and MA when the sample lid is closed. Note that the MPS and MA are located inside the instrument enclosure. -
Page 25: Warning Labels
Safety Practices . Warning Labels When this label is attached to an instrument it means refer to the manual to find out the nature of the potential hazard and any actions which have to be taken. Labels on the Exterior of the RamanStation 400F The following labels are displayed on the exterior of the instrument. -
Page 26: Labels On The Exterior Of The Ramanstation 400
26 . RamanStation 400 Series Getting Started Guide Labels on the Exterior of the RamanStation 400 The following labels are displayed on the exterior of the instrument. Power Max. 100W DC Voltage Current Max. 4A 6.5A CLASS 1 CLASS 1... -
Page 27: Fuses
Safety Practices . Fuses Electrical hazard To prevent potential injury to yourself and damage to the instrument, switch OFF all components in the system and disconnect them from the line power supply before you alter, or make any new, electrical WARNING connections. - Page 28 28 . RamanStation 400 Series Getting Started Guide...
-
Page 29: Raman History, Theory And Instrumentation
Raman History, Theory and Instrumentation... -
Page 30: The History Of Raman Spectroscopy
30 . RamanStation 400 Series Getting Started Guide The History of Raman Spectroscopy Inelastic light scattering was first predicted in 1923 by A. G. Smekal in Germany. Research carried out by A. H. Compton discovered inelastic scattering of X-rays, which led the Indian scientist C. -
Page 31: Raman Theory
Raman History, Theory and Instrumentation . Raman Theory When photons from a monochromatic light source impinge on a sample, a small fraction are scattered in all directions. Some of the scattered photons are of the same energy as those of the incident beam, and hence the same frequency, giving rise to Rayleigh scattering (Figure 5). - Page 32 32 . RamanStation 400 Series Getting Started Guide The change between the incident radiation and the Stokes/Anti-Stokes radiation represents a change in the vibrational and/or rotational energy of the molecule. The frequency shifts from the frequency of the incident beam are displayed on the x-axis of a Raman spectrum, generally in relative wavenumbers (otherwise known as Raman Shift) and the intensity of the bands are displayed in arbitrary units on the y-axis.
-
Page 33: The Ramanstation 400 Series
Raman History, Theory and Instrumentation . The RamanStation 400 Series The RamanStation 400 Series are bench-top spectrometers with laser excitation wavelength at 785 nm. It has a sample compartment with high throughput capabilities. The RamanStation 400F can be used with a fiber optic probe. - Page 34 34 . RamanStation 400 Series Getting Started Guide Figure 9 Schematic of the RamanStation 400 Series Figure 10 Schematic of the optical head optical layout...
-
Page 35: Spectrograph Detector Systems
The Echelle Spectrograph Figure 11 Schematic of the Echelle spectrograph PerkinElmer’s Echelle detector is shipped in the RamanStation 400 and RamanStation 400F spectrometers. The system contains two components; the Echelle spectrograph and a two- dimensional CCD detector (Figure 11). The system works by dispersing the light in two dimensions by using two gratings. - Page 36 No light is lost, all the light goes onto the detector, and all the strips are read out simultaneously. The concept of an Echelle detector is not unique to PerkinElmer. Echelle detectors are commonly used in applications where high resolution...
-
Page 37: Preparing Your Facility
Preparing Your Facility... -
Page 38: Specifications
Class 1 Class 3B If the electricity supply does not conform to these specifications, please consult PerkinElmer prior to installation. If the supply of power is erratic please use an uninterruptible power supply (UPS). Incorrect shutdown, power fluctuations or brown-outs may damage the... -
Page 39: Pc Requirements
Preparing Your Facility . PC Requirements The following pages provide details of the requirements for the PC that will run the Spectrum software and communicate with the instrument. To ensure successful installation of the software, please check these requirements before starting the installation. Hardware Requirements The PC on which you install the software must meet the following minimum specifications: ®... -
Page 40: Finding A Suitable Location For The Instrument
40 . RamanStation 400 Series Getting Started Guide Finding a Suitable Location for the Instrument The following conditions should be observed: There must be a minimum of 4 power points (2 for the spectrometer, 2 for the PC). If •... -
Page 41: Instrument Dimensions
Preparing Your Facility . Instrument Dimensions The RamanStation 400 Series spectrometer weighs approximately 45 kg. Standard sample accessories can accept samples up to 0.5 kg. Laboratory benching must be strong enough to support the combined weight of the instrument and samples, typically 46 kg, without warping or wobbling. - Page 42 42 . RamanStation 400 Series Getting Started Guide...
-
Page 43: Installing Your Ramanstation 400
Installing Your RamanStation 400... -
Page 44: Unpacking The Instrument
When unpacked, check that you have the following parts and check for any physical damage. If there is any damage, do not continue with the installation. Contact your PerkinElmer Service Representative immediately. Part Number... - Page 45 RS232 Cable If you have a deep depletion CCD installed in your RamanStation 400 (L1320032/L1320033/ L1320034/L1320035) you will also receive: L1323525 Deep Depletion PSU L1323010 Recirculating Cooler L1321674 Tygon Tubing Your instrument will be installed by a PerkinElmer Service Engineer.
-
Page 46: Lifting The Instrument
Do not lift the RamanStation 400 using the instrument console located on the left hand side of the instrument. Always lift the instrument using the positions under the instrument base WARNING as shown in Figure 14. Figure 14 Appropriate lifting points on the RamanStation 400 Series... -
Page 47: Preparing The Stage
Installing Your RamanStation 400 . Preparing the Stage Removing the clamping assembly Before you use your instrument you must remove the clamping assembly which is fitted to the stage during shipping to prevent damage to the stage. Use the 5 mm Hex key to loosen the bolt in the center of the assembly and then remove the complete assembly from the stage. -
Page 48: Attaching The External Interlock Override
48 . RamanStation 400 Series Getting Started Guide Attaching the External Interlock Override The RamanStation 400F has two interlock switches, an internal interlock located on the inside of the sample compartment door, and an external interlock located on the rear panel. To... -
Page 49: Attaching The Fiber Port Cover Assembly
Installing Your RamanStation 400 . Attaching the Fiber Port Cover Assembly NOTE: This section is only applicable if you have a RamanStation 400F. The RamanStation 400F is classified as a Class 3B laser product according to the label attached to the instrument. However if required, the RamanStation 400F can be classified as a Class 1 laser product provided the following conditions are met: •... -
Page 50: Unpacking And Assembling The Pc
1. Connect the mains power cords from the PC and the monitor into the mains electrical supply, and then switch on. 2. If you are prompted to login to Windows when you start the PC, log in. If your PC was provided by PerkinElmer your username and password will be: Username: Administrator Password: Administrator 3. -
Page 51: Switching On The Instrument
The RamanStation 400 is supplied with two keys. One should be placed in the instrument the other should be stored in a safe place. Replacement keys (L1323503) can be obtained from PerkinElmer. A laser safety officer or Lab manager can control use of the instrument with these keys. - Page 52 52 . RamanStation 400 Series Getting Started Guide 5. Connect the instrument power supply (large PSU with 8 pin connector) to the RamanStation 400 MAIN POWER socket and then switch on (Figure 20). The instrument power cable has a red band around the end. The Main Power socket is indicated by a red dot.
-
Page 53: Installing Spectrum Software
Installing Your RamanStation 400 . Installing Spectrum Software Before you Start PC Requirements NOTE: We strongly suggest you read the starting on page 39 before attempting to install your software. NOTE: Before installing the software, we recommend that you read and print the Release Notes which can be found as a .rtf file and a .pdf file on the root of the CD, because they contain important information that may not be in this manual or the Spectrum Help. -
Page 54: Installation Procedure
54 . RamanStation 400 Series Getting Started Guide Installation Procedure NOTE: It is important to note that you must be logged on at Administrator level on Windows before installing the software. The Installation Wizard helps you install the software on your PC. - Page 55 Installing Your RamanStation 400 . 4. Click Next. The License Agreement page is displayed. 5. Read the license and if you accept the terms, select that option and then click Next. You will then be asked which products you want to install. 6.
- Page 56 56 . RamanStation 400 Series Getting Started Guide 7. Click Next. The Ready to Install the Program page is displayed. 8. Click Install to begin installing Spectrum. The Installing Spectrum Software page is displayed, which informs you of the status of...
- Page 57 Installing Your RamanStation 400 . When the installation is complete, the InstallShield Wizard Completed page is displayed. 9. Click Finish. Before you can collect spectra you must configure your Raman instrument. Raman Instrument Installation Disk 10. Place your (LX108925) into your CD drive. 11.
- Page 58 58 . RamanStation 400 Series Getting Started Guide 13. Click Next. The License Agreement page is displayed. 14. Read the license and if you accept the terms, select that option and then click Next. The Ready to Install the Program page is displayed.
- Page 59 Installing Your RamanStation 400 . 15. Click Install to begin installing the Raman instrument. The Installing Raman Instrument page is briefly displayed. During this installation, the DirectX Setup page is displayed. 16. Read the license and if you accept the terms, click Yes. The Installing Raman Instrument page is displayed again, which informs you of the status of the installation.
- Page 60 60 . RamanStation 400 Series Getting Started Guide 17. Click Next. The Raman Instrument Install Wizard opens at the Welcome page. 18. Click Start. The Enter Instrument Details page is displayed. 19. In the Instrument Alias field, enter a name for your Raman instrument.
- Page 61 If you have already installed PerkinElmer software on the PC, the PerkinElmer Login dialog is displayed. Login as a PerkinElmer Software Administrator. Use the Administrator User name that you use for the PerkinElmer software that is already installed on the PC. The default User name and Password are administrator.
- Page 62 62 . RamanStation 400 Series Getting Started Guide The Install PerkinElmer Raman Instrument page is displayed. 23. Attach your RamanStation 400 to the PC using the supplied USB 2.0 cable (L1320821). Figure 21 USB 2.0 cable NOTE: If you disconnect the instrument control USB cable and reattach it to a different USB port, then you will be prompted for the drivers.
- Page 63 26. Select Install from a list or specific location (Advanced) and then click Next. The Please choose your search and installation options page is displayed. 27. Select Include this location in the search, click Browse, and then navigate to C:\Program Files\PerkinElmer\ServiceIR\Raman.
- Page 64 64 . RamanStation 400 Series Getting Started Guide 28. Click Next. The Completing the Found New Hardware Wizard is displayed. 29. Click Finish. The Found New Hardware Wizard closes. 30. On the Install PerkinElmer Raman Instrument page, click Continue. The Instrument Installation Complete page is displayed.
- Page 65 Installing Your RamanStation 400 . 31. Click Finish. The Raman Instrument Installer closes. When the installation is complete, the InstallShield Wizard Completed page is displayed. 32. Click Finish. The Raman Instrument Installer Information dialog is displayed. 33. At this point: Click No.
- Page 66 66 . RamanStation 400 Series Getting Started Guide 36. To install the Videology USB2.0 Viewer, navigate to C:\Program Files\PerkinElmer\ServiceIR\Raman and double-click on Autorun.exe. The Welcome to Videology USB2.0 Camera Installation Wizard page is displayed. 37. Click Next. The Please Plug in Your Camera Now page is displayed.
- Page 67 Installing Your RamanStation 400 . 38. Click Next. The Your Camera is Successfully Installed page is displayed. 39. Click Finish. The Videology USB2.0 Camera Software Setup page is displayed. 40. Click Install Viewer. The Welcome to the InstallShield Wizard for Videology USB Viewer is displayed.
- Page 68 68 . RamanStation 400 Series Getting Started Guide 41. Click Next. The Choose Destination Location page is displayed. 42. If required, click Change and navigate to your chosen destination folder and then click Next. The Ready to Install the Program page is displayed.
- Page 69 Installing Your RamanStation 400 . When the installation is complete, the InstallShield Wizard Complete page is displayed. 44. Click Finish. 45. Restart your PC. This completes the installation of the Spectrum software. If appropriate, you should now install the triggered fiber optic probe drivers, as described in Raman Triggered Fiber Optic Probe leaflet (L1321887), and then connect the fiber optic cables from the triggered fiber optic probe to the RamanStation 400, as described for a...
-
Page 70: Moving The Instrument
70 . RamanStation 400 Series Getting Started Guide Moving the Instrument The RamanStation 400 weighs about 45 kg. Two people are needed to lift the instrument. WARNING Before moving your instrument you must install the supplied packing assembly to prevent damage to the stage. -
Page 71: Introduction To The Ramanstation 400
Introduction to the RamanStation 400... -
Page 72: Front Panel (Console)
72 . RamanStation 400 Series Getting Started Guide Front Panel (Console) The RamanStation 400 front panel (Figure 22) contains 3 LED indicators and 1 control button: Collect Spectrum Figure 22 Instrument control/status panel Description Power If the Power LED is illuminated, this indicates that the instrument is receiving power. -
Page 73: Sample Compartment
Introduction to the RamanStation 400 . Sample Compartment To open the sample compartment, lift the cover using the handle at the front of the RamanStation 400 as shown in Figure 23. Figure 23 Opening the sample compartment of the RamanStation 400... -
Page 74: Sample Accessories (For Motorized Xyz Stage)
74 . RamanStation 400 Series Getting Started Guide Sample Accessories (for Motorized XYZ Stage) To use your sample accessories to collect data, place them in the XYZ stage in the RamanStation 400 sample compartment (Figure 24). Alignment camera Sample accessory... - Page 75 Introduction to the RamanStation 400 . The Raman Polarization Accessory (L1320284) that can be fitted to the RamanStation 400 Series spectrometers enables you to collect polarized Raman data in the RamanStation 400 sample compartment. Figure 26 Raman Polarization Accessory If you have a RamanStation 400F instrument, you can collect data using a fiber optic probe Fiber Optic Probe (see on page 77 for more details), which enables the remote measurement...
- Page 76 76 . RamanStation 400 Series Getting Started Guide...
-
Page 77: Fiber Optic Probe
Fiber Optic Probe... -
Page 78: Important: Read This First
78 . RamanStation 400 Series Getting Started Guide Important: Read This First This section is only applicable if you have a RamanStation 400F that is fitted with a fiber optic probe, or is being utilized in a Class 3B mode of operation. -
Page 79: The Fiber Optic Probe (Fop)
NOTE: If you use the probe body in any chemical or aggressive environment you must use an immersion sleeve to protect the probe body. DO NOT ATTEMPT TO USE THE PROBE BODY IN SUCH AN ENVIRONMENT WITHOUT THE USE OF AN IMMERSION SLEEVE (L1320003). If required, contact PerkinElmer for further details. -
Page 80: Attaching And Removing The Fiber Optic Probe
80 . RamanStation 400 Series Getting Started Guide Attaching and Removing the Fiber Optic Probe The standard fiber optic probe is constructed such that a single armored cable bifurcates into an excitation cable and a collection cable. The excitation fiber transmits the laser energy, whereas the collection cable is a conduit for the Raman energy. -
Page 81: Removing The Fop
Fiber Optic Probe . Removing the FOP If it is necessary to remove the FOP, for example, for replacement or transportation, please follow this procedure carefully: 1. Ensure the attenuator cap is attached to the FOP. 2. Switch off the instrument and remove the main power cable and, if appropriate, the stage controller power cable. -
Page 82: Acquiring Spectra With The Fiber Optic Probe
82 . RamanStation 400 Series Getting Started Guide Acquiring Spectra with the Fiber Optic Probe The Raman Fiber Optic Probe (L1320002) has a tight focus spot that is approximately 7.5 mm away from the lens. The focused spot enables you to pinpoint the measurement area on the sample. - Page 83 However, immersion in solvents will cause serious damage. Ensure an immersion sleeve is in place before immersing your FOP; see Figure 28. Please contact PerkinElmer if you WARNING have any questions in relation to sampling using the FOP.
- Page 84 84 . RamanStation 400 Series Getting Started Guide...
-
Page 85: Using The Ramanstation 400
Using the RamanStation 400... -
Page 86: Introduction
86 . RamanStation 400 Series Getting Started Guide Introduction The RamanStation 400 and RamanStation 400F combined with the Spectrum software are very flexible instruments. This chapter demonstrates how to perform a number of tasks. The procedures provided may not be the most straightforward or simple for the task you wish to perform, so treat these Standard Operating Procedures (SOPs) as a starting point and with time you may wish to develop your own SOPs that better suit your specific mode of use. -
Page 87: General Sops
Using the RamanStation 400 . General SOPs SOP-1: Switching the System On 1. Switch on the PC and monitor. 2. Login to Windows. 3. Ensure the laser power key is in the ARM position on the rear panel of the instrument. 4. -
Page 88: Sop-2: Turning The Instrument Off
88 . RamanStation 400 Series Getting Started Guide 8. Start the Spectrum software. On the Windows start menu select Programs/PerkinElmer Applications/Spectrum. When you start the software the instrument will prepare for use by turning on the laser and cooling the detector to its operating temperature (usually −50 °C). - Page 89 Using the RamanStation 400 . The Scan and Instrument Setup dialog has a number of pages that enable you to setup and save the experimental parameters, choose the beam path and align the samples. 3. On the Experiment page, select the Set-up tab and then set the Scan time and Number of scans.
- Page 90 90 . RamanStation 400 Series Getting Started Guide Parameter Recommended Set Up Scan time 5 seconds (sample dependant) (Experiment page/Set-up tab) Number of scans 5 (sample dependant) (Experiment page/Set-up tab) −1 Spectral Information Range 95 – 3500 cm (Experiment page/Advanced tab) −1...
-
Page 91: Sop-4: Defining Scan Parameters And Starting Data Collection
Using the RamanStation 400 . SOP-4: Defining Scan Parameters and Starting Data Collection NOTE: If you are using a Triggered Fiber Optic Probe, refer to the Raman Triggered Fiber Optic Probe leaflet (L1321887) supplied with the probe for configuration and usage details. -
Page 92: Sop-5: Installing And Changing Sampling Holders
92 . RamanStation 400 Series Getting Started Guide SOP-5: Installing and Changing Sampling Holders (Motorized XYZ Stage only) This procedure describes changing sample holders on the motorized XYZ sample stage. The standard XYZ sample accessory holds a variety of sample holders. This SOP outlines selecting a 96 multi-well plate and then changing to the cuvette holder on the Versatile Sample Holder. - Page 93 Using the RamanStation 400 . 7. Ensure the lens snout is pointing towards the sample (the sample holder and snout should point down). 8. Close the sample compartment lid. The instrument can now be used to either perform an experimental setup routine (SOP-3) and/or collect spectral data (SOP-4).
-
Page 94: Sop-6: Sample Positioning Using The Motorized Xyz Sample Stage
94 . RamanStation 400 Series Getting Started Guide SOP-6: Sample Positioning using the Motorized XYZ Sample Stage You can use the Spectral Preview button in the Scan and Instrument Setup dialog to position your sample for optimum spectral collection efficiency. - Page 95 Using the RamanStation 400 . In relation to the RamanStation 400, these directions are as follows: moves the XYZ sample accessory stage in and out BACK/FWD moves the XYZ sample accessory stage left and right LEFT/RIGHT moves the XYZ sample accessory stage up and down UP/DOWN Figure 31 Stage Control panel To position your sample correctly you can open the sample compartment lid while in Spectral...
-
Page 96: Fiber Optic Probe Sops
96 . RamanStation 400 Series Getting Started Guide Fiber Optic Probe SOPs NOTE: The SOPs included on the following pages are only appropriate for a standard fiber optic probe. For details of how to acquire data using a triggered fiber optic probe, see Raman Triggered Fiber Optic Probe leaflet (L1321887). -
Page 97: Sop-8: Sample Positioning When Using A Fiber Optic Probe
Using the RamanStation 400 . SOP-8: Sample Positioning when using a Fiber Optic Probe You can use the Spectral Preview button to position your sample for optimum spectral collection efficiency. Sample positioning and alignment in preview mode allows you to position and focus on a specific area and to collect spectral data from that location. -
Page 98: Calibration And Performance Verification Sops
98 . RamanStation 400 Series Getting Started Guide Calibration and Performance Verification SOPs Several different automated calibration tests are included in the software, these are: Wavelength (x-axis) calibration uses the position of precisely known lines in a neon • emission spectrum to calibrate the detector. - Page 99 Then repeat the wavelength calibration verification to ensure that instrument has been brought back within specification. If the instrument fails the wavelength calibration verification again, please contact PerkinElmer.
-
Page 100: Sop-10: Wavelength Calibration Verification Of The Ramanstation 400
100 . RamanStation 400 Series Getting Started Guide SOP-10: Wavelength Calibration Verification of the RamanStation 400 1. Ensure the instrument is switched on by following SOP-1. 2. Open the Scan and Instrument Setup dialog, and on the Hardware tab ensure that the laser power is set to 100%. -
Page 101: Sop-11: Wavelength Calibration Of The Ramanstation 400
Using the RamanStation 400 . SOP-11: Wavelength Calibration of the RamanStation 400 Wavelength calibration should only be performed if the instrument has failed a wavelength calibration verification. 1. Ensure the RamanStation 400 is switched on. If not follow SOP-1. 2. Attach the external neon calibration accessory (L1320220) to the rear panel. Push the large connector into the socket labeled CAL ASSY, and carefully connect the small cable to the COL coupler . -
Page 102: Sop-13: Intensity Calibration Of The Ramanstation 400
NOTE: As intensity calibration is not required on a regular basis, NIST Standards are not included in the basic RamanStation 400 package. Standard Reference Materials can be purchased from PerkinElmer (L1321831). Your instrument will be intensity calibrated prior to shipping or during installation. -
Page 103: Summary
Using the RamanStation 400 . 6. Select Intensity Calibration Y-axis, and then click OK. The instrument will now perform the intensity calibration routine. This will take approximately 1 hour. After completing the intensity calibration routine, a report is generated on-screen, which gives details on the outcome of the intensity calibration. -
Page 104: Additional Parts And Upgrades
104 . RamanStation 400 Series Getting Started Guide Additional Parts and Upgrades Sampling Accessories Part Description Number L1323514 Quartz microscope slide, 25 × 75 × 1 mm L1323515 Quartz capillary tubes, 1.8 mm OD (pack of 25) B0631015 NIR rectangular cell with lid, Quartz SUPRASIL 300, light path 10 mm... -
Page 105: Fiber Optic Probes
Raman probe adjustable spacer kit – for use with L1320030 and L1320031 L1320070 Short immersion sleeve for TFOP – for use with L1320030 and L1320031 L1320071 Ultra-long working distance lens adaptor for FOP For information about customized working distance or cable length fiber optic probes, contact your PerkinElmer Sales Representative. - Page 106 106 . RamanStation 400 Series Getting Started Guide...
-
Page 107: Maintenance And Troubleshooting
Maintenance and Troubleshooting... -
Page 108: Maintenance
108 . RamanStation 400 Series Getting Started Guide Maintenance The system does not require regular maintenance other than occasional checking and cleaning. Cleaning the Spectrometer and Power Supply Units Switch off the mains voltage and disconnect the mains cord before cleaning. -
Page 109: Servicing The Spectrometer
Servicing the Fiber Optic Probe The FOP is designed to be maintenance free and should not be opened or adjusted by anyone other than a PerkinElmer Service Engineer. Contact PerkinElmer if you have any questions regarding maintenance or servicing of the FOP. -
Page 110: Troubleshooting
110 . RamanStation 400 Series Getting Started Guide Troubleshooting This section is a reference guide if you are having any problems with your instrument. Troubleshooting outlines what to do if your instrument or software malfunctions or crashes. Hardware Problem: During the installation procedure the USB devices are not recognized. - Page 111 2. Select Install from a list or specific location (Advanced) and then click Next. The Please choose your search and installation options page is displayed. 3. Select Include this location in the search, click Browse, and then navigate to C:\Program Files\PerkinElmer\ServiceIR\Raman. These options may be displayed automatically as you work through the wizard.
- Page 112 112 . RamanStation 400 Series Getting Started Guide 4. Click Next. The Completing the Found New Hardware Wizard is displayed. 5. Click Finish. The Found New Hardware Wizard closes. Problem: A motorized sample accessory does not go to the correct position when asked.
- Page 113 Maintenance and Troubleshooting . Solution 3 If solution 2 is not successful, go to the Spectral Preview tab in the Scan and Instrument Setup dialog, for all motor directions/positions in turn type 1, then press enter, once all positions have been set to 1 and all accessory movements are complete, disconnect the accessory from its electrical connector in the sample compartment (there is no need to physically remove the accessory).
-
Page 114: Software
114 . RamanStation 400 Series Getting Started Guide Software Problem: Software cannot communicate with motorized stage. Description When you open the Spectrum software the error message Unable to communicate with Stage. Assuming external controller not available. is displayed. Solution Disconnect the stage controller box power supply from the mains power socket, wait a few seconds, and then reconnect the PSU to the mains power socket. - Page 115 Maintenance and Troubleshooting . Problem: Detector cannot achieve operational temperature. Description During system initialization a message box stating, ‘Detector temperature could not be achieved’ is displayed. Solution Close and open the software. Problem: Need to upgrade to a new version of Raman Instrument Control. Description You must uninstall the current version of Raman Instrument Control before installing a new version (for example, if you have purchased an accessory...
-
Page 116: Decontamination
(8:30 a.m. – 7 p.m. EST ) (+1) 203-925-4602 (outside the USA) Customer Care Canada: 800-561-4646 Customer Care EU: 0800 40 858 (Brussels) 0800 90 66 42 (Monza) If you are located outside of these regions, please call your local PerkinElmer sales office for more information. -
Page 117: Weee Instructions For Perkinelmer Products
Customer Care department in your region. http://las.perkinelmer.com/OneSource/Environmental-directives.htm Products from other manufacturers may also form a part of your PerkinElmer system. These other manufacturers are directly responsible for the collection and processing of their own waste products under the terms of the WEEE Directive. Please contact these manufacturers directly before discarding any of their products. - Page 118 118 . RamanStation 400 Series Getting Started Guide...
Need help?
Do you have a question about the RamanStation 400 Series and is the answer not in the manual?
Questions and answers