Halma BEA LZR-WIDESCAN Mechanical Installation
Opening, presence, & safety sensor for industrial doors
Hide thumbs
Also See for BEA LZR-WIDESCAN:
- Programming manual (30 pages) ,
- Manual (20 pages) ,
- How to use manual (12 pages)
Advertisement
Quick Links
LZR
-WIDESCAN
®
OPENING, PRESENCE, & SAFETY SENSOR FOR INDUSTRIAL DOORS
WHAT'S IN THE BOX
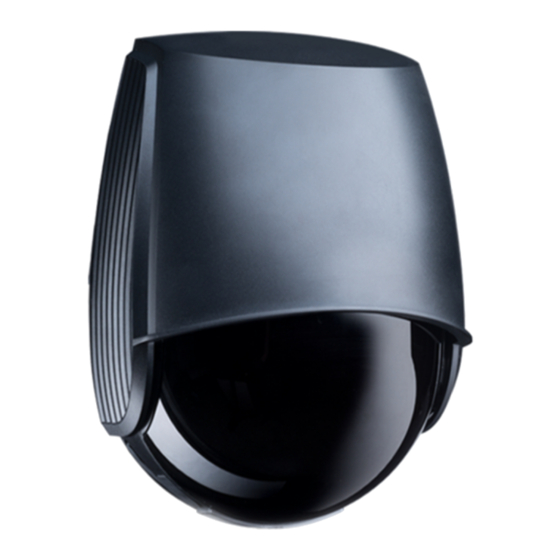
LZR-WIDESCAN
(see next page for full diagram)
OPTIONS SOLD SEPARATELY
50 ft
power cable (35.1555)
75.0047.01 LZR-WIDESCAN Mechanical Installation 20210726
30 ft
DOCUMENTS:
Mechanical Installation Guide (75.0047)
Programming Guide (75.0048)
power cable (35.1554)
LZR-WIDESCAN Menu Tree (78.8004)
mounting screws (50.0048)
Universal Mounting Bracket (10WBA)
MECHANICAL INSTALLATION
(MOUNTING & WIRING)
Visit website for
available languages of
this document.
Industrial Bracket (10INDBRACKET)
Download the
installation app!
WHAT YOU'LL NEED
• Phillips head screwdriver
• LZR-WIDESCAN mobile app (not required,
but highly recommended)
• BEA Remote Control
required for use with
Industrial Bracket and
Mini Bracket
Adapter Kit (10.1311)
Mini Bracket (10MINIBRACKET)
Page 1 of 12
Advertisement

Related Manuals for Halma BEA LZR-WIDESCAN


Summary of Contents for Halma BEA LZR-WIDESCAN
- Page 1 -WIDESCAN ® OPENING, PRESENCE, & SAFETY SENSOR FOR INDUSTRIAL DOORS MECHANICAL INSTALLATION (MOUNTING & WIRING) Visit website for Download the available languages of installation app! this document. WHAT'S IN THE BOX WHAT YOU'LL NEED • Phillips head screwdriver 30 ft DOCUMENTS: •...
-
Page 2: Technical Specifications
TECHNICAL SPECIFICATIONS Technology LASER scanner, time-of-flight measurement (7 laser curtains) Detection mode Motion, presence, height, and speed Width: 1.2 × mounting height Max. detection field adjustable, depending on user settings Depth: 1.2 × mounting height Thickness of first curtain ⁄ inch Typ. - Page 3 INSTALLATION & MAINTENANCE TIPS Avoid extreme vibrations. Do not cover the sensor. Avoid moving objects Keep the protection film during and light sources in the the mounting of the sensor. detection field. Remove it before launching a teach-in. Avoid exposure to sudden Do not use aggressive Avoid direct exposure to It is recommended to clean...
- Page 4 DESCRIPTION main connector protection film laser window USB cap LED display cover cover lock cable passage LCD screen 10. keypad 11. tilt angle adjustment screw (1) 12. parallel angle adjustment screw (2) 13. lateral angle lock screw (1) 14. mounting bracket 75.0047.01 LZR-WIDESCAN Mechanical Installation 20210726 Page 4 of 12...
-
Page 5: Determine Mounting Location
LZR-WIDESCAN MOBILE APP BEA, Inc. highly recommends downloading the LZR-WIDESCAN mobile app. The LZR-WIDESCAN mobile app is an incredibly useful tool for mechanical installation verification and setup/programming. See LZR-WIDESCAN Mobile App Registration (75.0029) for information regarding app registration and Bluetooth-pairing sensors. DETERMINE MOUNTING LOCATION 1. - Page 6 OPEN THE SENSOR UNLOCKED LOCKED Remove the cover completely before Before opening the sensor, make sure Pull the two legs on top in order to open the cover is not locked (red cover lock). installing the sensor. the cover. Be sure to not turn the lock too far, because the lock can break.
- Page 7 WIRING Connect the wires according to door manufacturer recommendations. The output functions can be configured if necessary (see page 9). See Appendix (page 17) for old harness wiring diagrams. POWER OUT 1 SAFETY OUT 2 PRESENCE RELAY MOTION/PULL-CORD WH-GN GN-GREY TEST *output status powered during non-detection with factory values Teach-in reminder:...
- Page 8 POSITION THE DETECTION FIELD (cont.) 2. ADJUST THE PARALLEL ANGLE To make the curtain parallel to the door, adjust one or both screws on the side of the sensor. If using the app, verify angle setting. 3. ADJUST THE TILT ANGLE To position the curtain closer or farther away from the door, adjust the screw at the top of the sensor.
- Page 9 POSITION THE DETECTION FIELD (cont.) 4. ADJUST THE LATERAL ANGLE Using the following instructions, launch the Position Wizard to position the detection field correctly in front of the door. This feature is required for any off-center mounting positions, but also useful for a center-mount to verify the centered position. a.
-
Page 10: Troubleshooting
TROUBLESHOOTING E1: CPU-XXX The sensor encounters an internal Replace sensor. problem E2: XXX PWR The internal power supply is faulty Verify that you are using the correct power supply. Replace sensor, if necessary. E2: IN SUPPLY The power supply is too low or too high Verify power supply (Diagnostics >... - Page 11 APPENDIX 75.0047.01 LZR-WIDESCAN Mechanical Installation 20210726 Page 11 of 12...
-
Page 12: How To Use The Remote Control
FORMER HARNESSES Previous EU harness Previous US harness POWER POWER OUTPUT 1 OUTPUT 1 OUTPUT 2 OUTPUT 2 RELAY RELAY TEST TEST HOW TO USE THE LCD Enter the LCD menu. Activate red spots Launch POSITION Select a folder, parameter, or value. on floor.
Need help?
Do you have a question about the BEA LZR-WIDESCAN and is the answer not in the manual?
Questions and answers