
Related Manuals for FlyTek MAXIMA


Summary of Contents for FlyTek MAXIMA
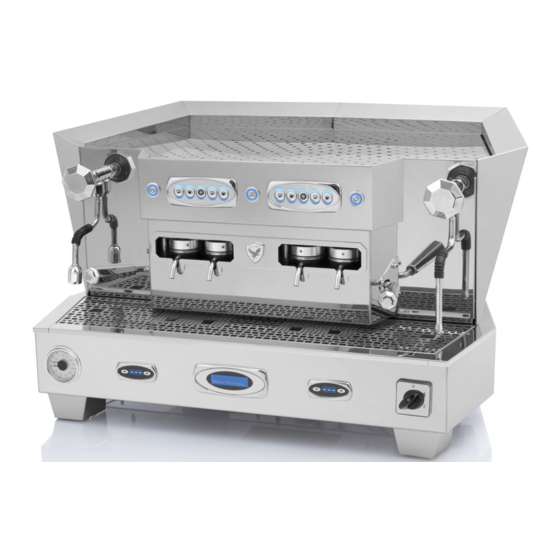
- Page 1 MAXIMA Manuale d’uso e manutenzione Operations and maintenance manual 100% MADE IN ITALY...
- Page 2 INDICE DELLE LINGUE - LANGUAGE INDEX Italiano ................. pag 4 English ................pag 15...
- Page 4 Anomalie e possibili soluzioni ....pag 10 Come fare il caffè ........pag 7 Condizioni di garanzia ......pag 13 Vi ringraziamo per aver scelto la macchina da caffè MaXima, un prodotto di alta qualità progettato, sviluppato, fabbricato e collaudato totalmente in Italia. Questo prodotto è una macchina da caffè a cialde ad utilizzo prevalentemente professionale. Vi ricordiamo di utilizzare esclusivamente le cialde del Vostro Fornitore; l’uso di cialde diverse da quelle per le quali la macchina è stata concepita possono dare uno scarso risultato della qualità...
- Page 5 INDICAZIONI GENERALI DI SICUREZZA Di seguito sono riassunte alcune indicazioni generali di sicurezza: • Leggere attentamente le istruzioni d’uso prima di procedere alla messa in funzione della macchina; • Non effettuare mai alcuna operazione con le mani umide o bagnate; • Non coprire mai la macchina, neppure parzialmente, con strofinacci o con teli di protezione; • Non mettere le mani in prossimità dei terminali di uscita caffè (rif. B), della lancia erogazione vapore (rif. M), della doccetta erogazione acqua calda (rif. N) e del ripiano superiore scalda-tazze (rif. G) durante il funzionamento; • Non immergere la macchina in acqua per la pulizia; •...
- Page 6 INSTALLAZIONE Estrarre la macchina dall’imballo e collocarla su un piano stabile, adatto a sostenerne il peso, in prossimità di una presa di corrente idonea. Conservare l’imballo in tutte le sue parti per eventuali futuri trasporti. COLLEGAMENTO ALLA RETE IDRICA Nella parte inferiore della macchina è situato il tubo in acciaio di carico acqua. Collegarlo ad idonea presa idrica con attacco 3/8F gas stringendo adeguatamente il dado, e quindi dare pressione di rete. RACCOMANDIAMO L’UTILIZZO DI UN FILTRO ADDOLCITORE-ANTICALCARE che deve essere periodicamente sostituito.
- Page 7 COME FARE IL CAFFÈ Con l’interruttore generale (rif. K) in posizione 1 oppure 2, premere uno o entrambi gli interruttori di accensione gruppo caffè (rif. E); appena accesi, inizia il rapido processo di riscaldamento dei relativi gruppi. Attendere che il valore numerico, espresso in gradi C° dai display temperatura (rif. C), si stabilizzi al di sopra degli 80°C: quando ciò si verifica vuol dire che i gruppi caffè sono in temperatura ottimale di esercizio e che sono quindi pronti all’uso. Entrambi i gruppi hanno un regolatore/display temperatura (rif. C) indipendente. Azionare una o entrambe le leve pressa-cialda (rif. F) sollevandole verso l’alto come indicato dalla freccia 1. Inserire una cialda in una delle apposite sedi e abbassare delicatamente la leva fino a scatto fine corsa, come indicato in figura dalla freccia 2. Porre un bicchierino in corrispondenza del terminale di uscita caffè (rif. B) dell’erogatore ove è stata inserita la cialda e premere uno dei due tasti corrispondenti (caffè corto oppure caffè lungo) della relativa pulsantiera (rif. D). Ad esempio, se si desidera ottenere un caffè corto utilizzando l’erogatore B1, si deve premere il tasto 0 della pulsantiera situata a sinistra: Se invece si desidera ottenere un caffè lungo utilizzando l’erogatore B3, si deve premere il tasto 6 della pulsantiera situata a destra. Una volta premuto uno dei tasti di erogazione, bisogna attendere circa tre secondi per l’inizio della fuoriuscita del caffè. Raggiunto il livello programmato, l’uscita del caffè si arresta automaticamente. Se si vuole fermare prima la fuoriuscita, è sufficiente premere di nuovo il tasto di erogazione. Una volta che il caffè è stato erogato si consiglia di rimuovere la cialda per evitare che,...
- Page 8 Utilizzare esclusivamente le cialde del Vostro Fornitore. L’uso di cialde diverse da quelle per le quali la macchina è stata concepita può non garantire la stessa qualità di erogazione. PROGRAMMAZIONE ELETTRONICA DELLE DOSI La macchina è stata tarata in fabbrica con una adeguata programmazione elettronica delle dosi, che tiene conto della pressatura e della macinatura specifica delle cialde distribuite dal Vostro Fornitore. Comunque, è possibile personalizzare e modificare tutte la quantità di caffè pre-impostate in questo modo: Tenere premuto il tasto 7 finchè il led non inizia a lampeggiare (da questo momento la programmazione deve essere eseguita entro 30 secondi). Per programmare TUTTI i “caffè corti” erogati dalla macchina, premere il tasto 0 (pulsantiera sinistra) per iniziare la fuoriuscita del caffè e premerlo nuovamente a dose raggiunta desiderata. Per programmare TUTTI i “caffè lunghi” erogati dalla macchina, premere il tasto 1 (pulsantiera sinistra) per iniziare la fuoriuscita del caffè e premerlo nuovamente a dose raggiunta desiderata. Per confermare e uscire dalla modalità di programmazione, premere nuovamente il tasto 7...
- Page 9 APPARATO VAPORE E ACQUA CALDA La Vostra MaXima è dotata di un potente apparato per la produzione di vapore e acqua calda. Per poter utilizzare tale apparato è necessario portare l’interruttore generale (rif. K) in posizione 2; ciò consentirà il riscaldamento dell’apposita caldaia dedicata. Attendere circa dieci minuti, durante i quali la caldaia andrà in pressione ideale di esercizio. Verificare, con la parte superiore del manometro (rif. O), che la pressione arrivi a circa 1,5 bar: quando ciò si verifica vuol dire che la caldaia è pronta ad erogare vapore e/o acqua calda. Per erogare vapore: inserire la lancia vapore (rif. M) all’interno di una tazza o altro recipiente contenente il liquido da scaldare o emulsionare (es. latte) e girare la manopola di erogazione vapore (rif. I) in senso antiorario fino a raggiungere la corretta intensità di vapore. Una volta ottenuto il risultato desiderato, girare la stessa manopola (rif. I) in senso orario fino ad arrestare completamente l’uscita del vapore. Per erogare acqua calda: posizionare una tazza –o altro recipiente adatto- sotto la doccetta dell’acqua calda (rif. N) e girare la manopola erogazione acqua calda (rif. J) in senso antiorario fino a raggiungere la corretta intensità del flusso. Una volta ottenuto il risultato desiderato, girare la stessa manopola (rif. J) in senso orario fino ad arrestare completamente l’uscita dell’acqua calda. Durante l’erogazione non toccare la lancia vapore e/o la doccetta dell’acqua calda, e non esporsi con il viso alle parti calde dell’apparecchio (pericolo di...
- Page 10 PULIZIA DEI GRUPPI CAFFÈ E DELLA LANCIA VAPORE I gruppi caffè devono essere puliti settimanalmente. Per fare ciò bisogna procedere ad effettuare una erogazione senza cialda. Porre bicchieri abbastanza capienti sotto tutti i terminali di uscita caffè e premere i relativi tasti di erogazione caffè lungo (1, 4, 6, 9); dopo circa tre secondi inizierà l’erogazione di acqua calda. Raggiunto il livello programmato, l’uscita di acqua si arresta automaticamente. La lancia vapore (optional) va pulita giornalmente, se utilizzata. A tale riguardo, inserire la lancia vapore (rif. M) all’interno di una tazza o altro recipiente contenente esclusivamente acqua pulita e girare la manopola di erogazione vapore (rif. I) in senso antiorario fino a raggiungere la massima intensità di vapore. Dopo un minuto girare nuovamente la stessa manopola in senso orario fino ad arrestare completamente l’uscita del vapore. Attendere che la lancia vapore si sia sufficientemente raffreddata, dopodichè procedere alla sua pulizia esterna tramite un panno morbido inumidito di acqua calda. Eliminare tutte le incrostazioni (ad esempio di latte) per evitare che vengano ostruiti i fori di uscita del vapore. PULIZIA DELLA MACCHINA Non utilizzare la lavastoviglie per pulire la macchina o suoi componenti. Si danneggiano irrimediabilmente! Non usare altresì...
- Page 11 PROBLEMA POSSIBILE CAUSA SOLUZIONE Erogazione del Mancanza di pressione di Verificare la rete idrica. caffè insufficiente o rete impossibile Macinatura troppo fine Utilizzare una cialda nuova. Rivolgersi al Fornitore delle cialde I caffè erogati sono Tazze ceramiche fredde Preriscaldare le tazze freddi anche se i gruppi con acqua calda, oppure sono accesi da diversi riponendole sul ripiano...
- Page 12 La Società costruttrice Tecno Meccanica S.r.l. con sede amministrativa sita in Via Marlianese 43, 51034 Serravalle Pistoiese (PT) ITALY Dichiara sotto la propria responsabilità che la macchina per il caffè espresso descritta in questo manuale: Modello: MaXima Alimentazione: 220v 50/60hz Anno di costruzione: vedi targa CE È conforme alle Direttive: 2006/42/CE relativa al ravvicinamento delle legislazioni degli Stati membri relative alle macchine, che sostituisce la Direttiva 98/37/CE;...
- Page 13 GARANZIA L’apparecchio è garantito per 1 anno dalla data di acquisto, salvo i termini di legge. La garanzia è limitata a difetti di fabbricazione o di materiali, non è estesa ai pezzi soggetti ad usura o a danneggiamenti alle parti delicate (interruttori, cavo di alimentazione, ecc.…), e NON è altresì estesa a danni conseguenti incuria od uso errato dell’apparecchio medesimo (ad esempio utilizzo di acqua con durezza superiore a 8°F e/o mancato utilizzo o sostituzione di idoneo filtro addolcitore, che possono causare incrostazioni di calcare). In caso di guasto coperto da garanzia, riportare l’apparecchio presso il Rivenditore dove lo stesso è stato acquistato, muniti di scontrino o fattura sulla quale deve essere riportato il numero di matricola, che deve corrispondere a quello posto sull’apparecchio. Solo in questo modo è garantito il ripristino gratuito delle funzionalità dell’apparecchio, mentre le spese di trasporto rimangono ad esclusivo carico del Cliente. La garanzia decade in caso di impiego improprio o manomissione, uso della forza e interventi non eseguiti da nostro personale specializzato. La nostra garanzia non limita comunque i diritti legali del Cliente.
-
Page 15: Table Of Contents
Cleaning off the machine ....... pag 21 Turning-on ..........pag 17 Anomalies and possible solutions .. pag 21 How to make coffee ........ pag 18 Warranty ............ pag 24 Thank you for purchasing the MAXIMA coffee machine, a top-quality product designed, developed, manufactured and tested entirely in Italy. This product is a pod coffee machine mainly for professional use. Remember to use exclusively the pods of your supplier; the use of pods different from those for which the machine was conceived may result in poor coffee quality. -
Page 16: General Safety Indications
GENERAL SAFETY INDICATIONS Some general safety indications are summarised below: • Carefully read the use instructions before operating the machine; • Do not carry out any operation with humid or wet hands; • Never cover the machine, not even partially, with cloths or protection cloths; • Do not place hands near the coffee output spouts (ref. B), steam wand (ref. M), hot water delivery nozzle (ref. N) and upper cup-warmer tray (ref. G) during operation; • Do not immerge the machine in water for cleaning; • This machine can be used by children not under 8 years of age only if adequately supervised, instructed regarding the safe use of the machine, and if they understand the relative risks. -
Page 17: Installation
INSTALLATION Remove the machine from the packaging and place it on a stable and horizontal surface, suitable to support its weight, near a suitable socket. Keep the packaging and all its parts for possible future transport. CONNECTION TO THE WATER NETWORK In the lower part of the machine there is a steel pipe for water loading. Connect it to a proper water inlet with 3/8F gas coupling adequately tightening the nut, then give network pressure. WE RECOMMEND THE USE OF A WATER SOFTENER – ANTI-SCALE FILTER that must be periodically replaced. If this is not done scale deposits may form inside the machine , these can prejudice the correct operation of the machine, apart from the validity of the warranty. -
Page 18: How To Make Coffee
HOW TO MAKE COFFEE With the general switch (ref. K) on position 1 or 2, press one or both coffee group switching on switches (ref. E); as soon as they are on, the rapid heating process of the relative groups starts. Wait for the numeric value, expressed in C° degrees on the temperature display (ref. C) to be stabilised over 80°C: when this occurs, it means that the coffee groups have reached the optimal operating temperature and are ready for use. Both groups have an independent adjuster/temperature display (ref. C). Activate one or both pod press levers (ref. F) lifting them upwards as indicated by arrow 1. Insert a pod in one of the proper seats and delicately lower the lever until the mechanical stop clicks, as indicated in the figure by arrow 2. Place a cup in correspondence of the coffee pouring spout (ref. B) where the pod was inserted and press one of the two correspondent keys (single espresso or double espresso) of the relative pushbutton panel (ref. D). For example, if you want to obtain a single espresso using pourer B1, you must press the 0 key of the left pushbutton panel: Instead, if you want a double espresso using pourer B3, you have to press key 6 of the right pushbutton panel. Once pressed one of the pouring keys, you need to wait three seconds for the coffee to start pouring. Once reached the programmed level, the pouring of the coffee stops automatically. If you want to stop the pouring sooner, just press the pouring key again. Once the coffee has been poured, we recommend removing the pod to prevent it from sticking when it dries. -
Page 19: Electronic Programming Of The Doses
Exclusively use the pods of your Supplier. The use of pods different from those for which the machine was conceived may not guarantee the same pouring quality. ELECTRONIC PROGRAMMING OF THE DOSES The machine was calibrated in the plant with an appropriate electronic programming of the doses, which keeps into account the pressing and the specific grinding of the pods distributed by your Supplier. However, it is possible to customise and modify all the preset coffee quantities in the following way: Keep key 7 pressed until the LED starts blinking (from this moment the programming must be executed within 30 seconds). To programme ALL the “single espressos” made by the machine, press the 0 key (left pushbutton panel) to start the pouring of the coffee and press it again once reached the desired dose. To programme ALL the “double espressos” made by the machine, press the 1 key (left pushbutton panel) to start the pouring of the coffee and press it again once reached the desired dose. To confirm and exit the programming mode, press key 7 again (all the LEDs become fixed). -
Page 20: Steam And Hot Water Device
STEAM AND HOT WATER DEVICE MaXima is equipped with a powerful device for the production of steam and hot water. To use such device, it is necessary to position the general switch (ref. K) on position 2; this will allow the heating of the specific dedicated boiler. Wait about ten minutes, during which the boiler will reach the ideal operating pressure. Check, with the upper part of the pressure gauge (ref. O), that the pressure reaches about 1.5 bars: when this occurs, the boiler is ready to deliver steam and/or hot water. To deliver steam: insert the steam wand (ref. M) inside a cup or other container containing the liquid to be heated or emulsified (i.e. milk) and turn the steam delivery knob (ref. I) counterclockwise until reaching the correct steam intensity. Once obtained the desired result, turn the same knob (ref. I) clockwise until stopping completely the steam delivery. To deliver hot water: position a cup –or other suitable container- under the hot water nozzle (ref. N) and turn the hot water delivery knob (ref. J) counterclockwise until reaching the correct flow intensity. Once obtained the desired result, turn the same knob (ref. J) clockwise until stopping completely the flow of hot water. During delivery never touch the steam wand and/or hot water nozzle, and do not approach your face to the hot parts of the machine (burns hazard). -
Page 21: Cleaning Of The Coffee Groups And Steam Wand
CLEANING OF THE COFFEE GROUPS AND STEAM WAND The coffee groups must be cleaned weekly. To do this you must proceed executing a pouring without pod. Lower the pod-press levers (ref. F), place cups with suitable capacity under all the coffee pouring spouts and press the relative double espresso coffee pouring keys (1, 4, 6, 9); after about three seconds the hot water pouring starts. Once reached the programmed level, the flow of water stops automatically. The steam wand (optional) must be cleaned daily, if used. In this regard, insert the steam wand (ref. M) inside a cup or other container containing exclusively clean water and turn the steam delivery knob (ref. I) counterclockwise until reaching the maximum steam intensity. After a minute turn the same knob again clockwise until completely stopping the steam delivery. Wait for the steam wand to be sufficiently cool, afterwards proceed with its external cleaning using a soft cloth wet with hot water. Remove all the deposits (of milk for example) to prevent the clogging of the steam outlet holes. CLEANING OF THE MACHINE Do not use the dishwasher to clean the machine or its components. They would be irremediably damaged! Also, do not use solvents and abrasive products or materials. - Page 22 ANOMALY POSSIBLE CAUSE SOLUTION Insufficient or impossible Lack of network pressure Check the water network. pouring of the coffee Grinding too fine Use a new pod. Contact the Supplier of the pods. The coffees poured are Cold ceramic cups Preheat the cups with hot cold even if the groups water, or place them on have been on for several the upper cup-warmer minutes tray.
- Page 23 DECLARATION OF CONFORMITY The manufacturing Company Tecno Meccanica S.r.l. with registered office located in Via Marlianese 43, 51034 Serravalle Pistoiese (PT), ITALY. Declares under its own responsibility that the espresso coffee machine described in this manual: Model: MaXima Power supply: 220v 50/60hz Year of construction: see CE marking Complies with the following Directives: 2006/42/EC on the approximation of the laws of the Member States relating to machinery, repeals Directive 98/37/EC; 2014/35/EU relative to electrical equipment designed for use within certain voltage limits; 2014/30/EU relating to electromagnetic compatibility (EMC), repeals Directive 2004/108/EEC The Administrator...
-
Page 24: Warranty
WARRANTY The machine is guaranteed for 1 year from the purchase date, unless otherwise provided for by law. The warranty is limited to the manufacturing or material defects, it is not valid for parts subject to wear or damages to delicate parts (switches, power supply cable, etc.…), and it is NOT extended to the damages deriving from negligence or incorrect use of the same machine (for example, use of water of hardness exceeding 8°F, and/or non-use or replacement of the suitable water softening filter that can cause scale). In case of failure covered under warranty, bring the machine back to the same Dealer where the machine was bought, together with the receipt or invoice on which the serial number corresponding to the one present on the machine is reported. Only this way the free of charge restore of the machine’s functions is guaranteed, while transport costs shall be at the Customer’s exclusive charge. The warranty does not apply in case of improper use or tampering, excessive force, and interventions not carried out by our qualified personnel. However, our warranty does not limit the Customer’s legal rights.
Need help?
Do you have a question about the MAXIMA and is the answer not in the manual?
Questions and answers