Advertisement
Advertisement
Table of Contents

Related Manuals for CAS NC-I


Summary of Contents for CAS NC-I
-
Page 2: Table Of Contents
CONTENTS TECHNICAL SPECIFICATION..........4 1. BLOCK DIAGRAM .............. 5 2. CONNECTOR DIAGRAM..........6 3. TEST MODE................7 4. CALIBRATION MODE............9 5. SET MODE ................14 6. PROGRAM DOWNLOAD ..........19 7. SCHEMATIC DIAGRAM..........22 8. PCB BOARD DIAGRAM...........26 9. DEVICE OF SPECIFICATION........29 10. -
Page 3: Technical Specification
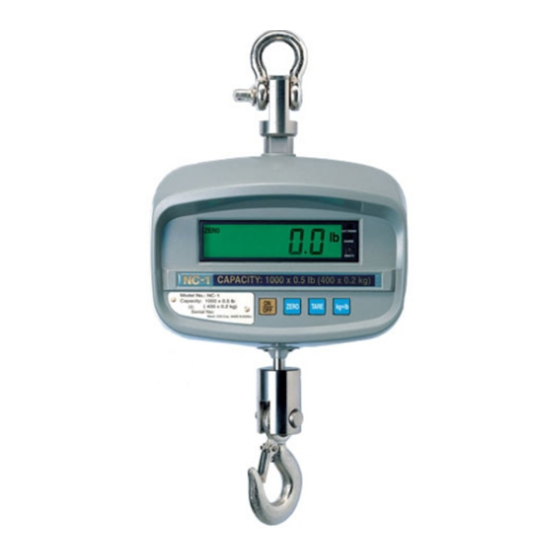
TECHNICAL SPECIFICATION Max Capacity 20 kg 30 kg 50 kg 100 kg 200 kg 500 kg Kilogram Division 10 g 10 g 20 g 50 g 100 g 200 g Max Capacity 250lb(125kg) 500lb(250kg) 1000lb(400kg) U.S.A version Division 0.1lb(0.05kg) 0.2lb(0.1kg) 0.5lb(0.2kg) Max Capacity 250lb... -
Page 4: Block Diagram
1. BLOCK DIAGRAM D IS P L A Y - M C U D R IV E R 3 2 .7 6 8 k h z (A D U C 8 4 5 ) (U P D 7 2 2 5 G ) P O W E R M A N A G E M E N T D IS P L A Y... -
Page 5: Connector Diagram
CONNECTOR DIAGRAM 2. CONNECTOR DIAGRAM (REMOCON&POWER) (LCD DATA) 6110-PNC-0909-0 DISPLAY PCB 6171-PC5-6170-0 CHARGER PCB (POWER&CHARGE) (BATTERY) ADAPTOR (BATTERY) (REMOCON&POW (LCD DATA) 6151-PNC-0420-A (ADAPTOR) (CAL PCB) J1(CAL) 6100-PNC-0909-0 BATTERY MAIN PCB (DOWNLOAD S/W) CN3(POWER&CHARGE) CN7(DOWNLOAD) CN5(LOADCELL) FIG 2. CONNECTOR DIAGRAM. -
Page 6: Test Mode
3. TEST MODE 1. How to enter TEST mode Pressing the ZERO key for 2 seconds in the normal mode, enter the test mode with display the message TEST 1 Press the HOLD key or kg◀▶ lb key to execute the test mode. (‘TEST 2~5’ is same sequence.) I f press the ON/OFF key in the test mode, test mode is ended and then enter the normal mode. - Page 7 TEST 1 FUNCTION : DISPLAY TEST LCD SCREEN DESCRIPTION ZERO KEY : Backlight HOLD KEY or Display TEST 1 state kg ◀ ▶ lb KEY Display all digits on the screen : execute test 1 TEST 2 FUNCTION : Load Cell and A/D Conversion TEST LCD SCREEN DESCRIPTION HOLD KEY or...
-
Page 8: Calibration Mode
TEST 5 FUNCTION : Key Test LCD SCREEN DESCRIPTION PUSH HOLD KEY or Display TEST 5 state kg ◀▶ lb KEY Pressing the key to test shows ZERO : execute test 5 (Power, Zero, Tare, HoLd) 4. CALIBRATION MODE How to enter calibration mode Remove the sealing bolt on the rear panel and put the switch to CAL ON. - Page 9 UNIT Function : Weight Unit Set (kg, lb, lb<->kg) LCD SCREEN DESCRIPTION Unit 0 0 : kg ZERO : Unit 1 Increase the value 1 : lb 2 : lb <-> kg (basic unit -> lb) Unit 2 ON/OFF : Save and go to next menu 3 : lb <->kg(basic unit ->...
- Page 10 Function : Minimum Division Set LCD SCREEN DESCRIPTION ZERO : Set value change (1.0→ 2.0→ 5.0→ 1.0) 1 lb TARE : Set value change ON/OFF : Go to next menu 0.01 lb 0.01 HOLD : Operate the Span Calibration Operate the Span Calibration. LoAd Function : Maximum Capacity Set LCD SCREEN...
- Page 11 Function : Setting the Weight in Span Calibration LCD SCREEN DESCRIPTION ZERO : Increase the value(1~9) TARE : Move the place(value*10) 500 kg ON/OFF : Go to ‘MIN’ menu HOLD : Go to below step 500 kg HOLD: LoAd Start the Span Calibration Load the weight which was set in ‘BAL’, and the press HOLD key.
- Page 12 CAL 0 ~ 1 Function : Span Calibration LCD SCREEN DESCRIPTION SPAN Span Calibration is starting. 55555 Auto detect Span A/D value(5EA) SAVE HOLD Long : Calibration data is saved CAL data is saving and go to initial mode. donE Press ‘HOLD’...
-
Page 13: Set Mode
5. SET MODE 1. How to enter & exit SET MODE How to enter SET Mode Turn on the power while pressing TARE key , after displaying the message and then enter the SET Mode. Return to the normal mode if you press the HOLD key or kg◀ ▶ lb key long. SET Menu (F0 - F6) Menu DESCRIPTION... - Page 14 FUNCTION : Setting the value of Digital-Filter LCD SCREEN SETTING VALUE DESCRIPTION 00 : Not use Digital-Filter ON/OFF KEY , (Speed of display TARE KEY conversion is fast) F0-04 HOLD KEY or kg ◀ ▶ lb KEY 09 : Speed of display conversion is slow FUNCTION : Setting the value of Digital-Filter LCD SCREEN...
- Page 15 FUNCTION : Setting the value of Digital-Filter SETTING LCD SCREEN DESCRIPTION VALUE Not use ON/OFF KEY , TARE KEY F4-00 HOLD KEY or kg ◀ ▶ lb KEY Use (Zero, Tare, Status) FUNCTION : Setting the value of Digital-Filter SETTING LCD SCREEN DESCRIPTION VALUE...
- Page 16 Description of HOLD Function 1. When the F5 is set to 00 Case 1 ( When the hold key is pressed in unloaded state) : Auto-Average Hold Function If you press the Hold key in unloaded state, after displaying the AH on and the Hold function Is started.
- Page 17 FUNCTION : Setting the value of Digital-Filter SETTING LCD SCREEN DESCRIPTION VALUE Not use ON/OFF KEY , Display all off in 3 minutes TARE KEY F6-00 HOLD KEY or Display all off in 6 minutes kg ◀ ▶ lb KEY Display all off in 9 minutes Ref.
-
Page 18: Program Download
6. PROGRAM DOWNLOAD(IC Writing) Turn off the power. Separate the front cover. You can see SW5 on the main PCB(FIG 2.) Turn on SW5. It’s ready for ‘Program Down loading’. Do operate download software .It’s called‘WSD’ ]’ You can see this dialog box. Click ‘Configuration’button. - Page 19 Click ‘Reset’button. Then you can see message like this dialog box. Click ‘Download’ button.
- Page 20 Select hex file Download is done. 13. If download is done, you must turn off SW5.(FIG 2)
-
Page 21: Schematic Diagram
SCHEMATIC DIAGRAM 7. SCHEMATIC DIAGRAM 1) Main schematic REMOCON_INPUT <POWER PART> ON*/OFF LM2575-5 POWER 4.7K 0.1uF V_BAT 2N2222 L4 100uH KDS184 ON*/OFF *ON/OFF LED_P LINE FILTER LED_R 4.7K LED_G 220uF/25V 0.1uF GND_BAT 1N5819 0.1uF 220uF/25V CON8 SW_ON* SW_ON* CAL_SW LED_R ZERO LED_G LED_P... - Page 22 SCHEMATIC DIAGRAM 2) Display schematic LCD_RST* 0.1uF 0.01uF SCK* UPD7225G C/D* RESET* BUSY* SYNC* 1000pF 1000pF 1000pF 1000pF COM0 COM0 COM1 COM1 COM2 COM2 COM3 COM3 180K 0.1uF VCL1 VCL2 NC_LCD VCL3 0.1uF 0.1uF 0.1uF 0.1uF 0.1uF 0.1uF 0.1uF 0.1uF 0.1uF B_LIGHT* LCD_RST*...
- Page 23 SCHEMATIC DIAGRAM 3) Charger schematic V_BAT V_BAT LED_COM 1N5819 POWER_LED LED_R LED_G CON8 1N5819 +12V LM317T 3.3/2W B240 V_BAT temp CON5273(02)_power_sw VOUT FDS6679 CON3 8K F 2K F 4K F 1.8K F 0.1uF PIC16F676 1.2K F battery_checking RA5/OSC1 AN0/RA0 0.1uF RA4/OSC2 AN1/RA1 Power_LED...
- Page 24 SCHEMATIC DIAGRAM 4) Cal schematic...
-
Page 25: Pcb Board Diagram
8. PCB BOARD DIAGRAM 1) Main PCB board(LED) - Page 26 2) Display PCB board...
- Page 27 3) Charger PCB board...
-
Page 28: Device Of Specification
9. DEVICE OF SPECIFICATION 1. MPU - ADUC845... - Page 32 2. OPAMP - OP2177/OP2277...
- Page 35 3. REGULATOR - LM2575...
- Page 42 4. RESET- TC1274...
- Page 46 4. RESET - TC1274...
-
Page 49: Error Message
Err 02 ■ Cause Initial A/D value of zero is too high or low, when the power is ON Or in the case of NC-I is lying on the flat ■ Management Check the A/D value (at ‘TEST 3’). If the load cell is damaged, replace the load cell... - Page 50 Err 11 (at Span calibration) ■ Cause The weight for span calibration is greater than 100% of the maximum capacity. ■ Management The weight for span calibration should be within 10~100% of the maximum capacity in ‘BAL’. Err 12 (at Span calibration) ■...
- Page 51 BAT or LobAt ■ Cause eed to recharge of battery (After display ‘LobAt’, the power is off automatically in 2 second) ■ Management Connect the adaptor with outlet of charge battery of rear part (Charging time is about 4~5 hours) oUEr ■...
-
Page 52: Partlist
11. PARTLIST NC-30N PART CORD NAME SPECIFICATION Q'TY REMARK PART NAME : CHARGER PCB ASS'Y 6151-PNC-0430-0 PCB-CAL 6151-PNC-0430-0 2005.09.21 7600-SLD-0002-0 SLIDE S/W INCA-2(DJMM-12V) CAL, POWER 7804-CCN-7303-0 CONNECTOR(WAFER) 5273-03 (LPH03-03) 7805-CCN-6703-0 CONNECTOR(WAFER) 03-5267 7840-W00-B215-0 CONNECTOR WIRE 2P*150mm(NC-N) connector wire of CAL 7840-W00-A215-A CONNECTOR WIRE 2P*150mm(NC-N) - Page 53 PART NAME : DISPLAY PCB ASS'Y 6110-PNC-0909-0 PCB-DISPLAY 6110-PNC-0909-0 2006.07 6224-I00-7225-0 IC(DRIVER) UPD 7225G00 7212-D00-8430-0 DTE 101710 ACP 1(NC) 7244-D00-0005-A E.L.INVERTER MTED-I-5C 7222-D00-0025-A E.L.BACK LIGHT MT-NC1-RO PIC- 7240-DRM-2043-0 REMOCON MODULE 12043TM(KSM64LM)NC,CASTON 6281-I00-1504-0 TRANSISTOR CHIP KTA1504 SY 7232-DRG-0003-0 LED LAMP ø3-(R,G) BL-BVT 201(ANODE) 7232-D00-0300-0 LED LAMP CLL302341(BVL-300E5G)
- Page 54 6527-ID3-4700-0 RESISTOR-CHIP 1/10W RR1220P-474D(470K) 6527-ID3-0470-0 RESISTOR-CHIP 1/10W RR1220P-473D(47 ㏀) 6527-ID0-0020-0 RESISTOR-CHIP 1/10W RR1220P-2R0D(2Ω) R25, 26 6527-ID3-0100-0 RESISTOR-CHIP 1/10W RR1220P-103D(10K) R28, 29 6527-ID0-1000-0 RESISTOR-CHIP 1/10W RR1220P-101D(100Ω) R19, 22 6527-ID3-1000-0 RESISTOR-CHIP 1/10W RR1220P-104D(100K) 6527-ID6-0010-0 RESISTOR-CHIP 1/10W RR1220P-105D(1M) 6540-LA3-0280-0 RESISTOR-PRECISION FLAY 28K000B R18, 23 6540-LA3-0010-0 RESISTOR-PRECISION FLAY 1K000B...
- Page 55 PART NAME : REMOCON MODULE PCB ASS'Y 1060-A00-0012-0 PCB CONTACT 8*8.4*8.6(C-Ⅲ) 6170-PCA-6160-0 PCB-REMOCON 6170-PCA-61600(C-Ⅲ) 6222-I00-9802-0 IC(REMOCON) KS 9802(THA) 6280-I00-1015-0 TRANSISTOR 2SA1015(1266) 6280-I00-1815-0 TRANSISTOR 2SC1815A(3198) 6294-ISW-4148-0 DIODE-SWITCHING 1N4148P 6515-CJ0-2200-0 RESISTOR 1/4W CFR 220Ω (±5%) 6515-CJ3-0100-0 RESISTOR 1/4W CFR 10K (±5%) CONDENSER- 6704-C16-0047-0 47uF/16V ELECTRIC...
- Page 56 1260-A00-0004-0 BOLT-SEALING M10*8 1261-A00-0001-0 BOLT-S/W M8*11(NC-1) 1502-A00-0405-0 SCREW-MACHINE(PH) M4*5 1502-A00-0408-0 SCREW-MACHINE(PH) M4*8 1502-MSU-0412-0 SCREW-MACHINE(PH) M4*12-SUS SCREW- 1503-MPN-0304-0 M3*4-NI MACHINE(WPH) 1505-MSU-0310-0 SCREW-MACHINE(TH) M3*07*10-SUS 1532-A00-0506-0 BOLT-WRENCH(ST) M5*6 1540-A00-0400-0 NUT(HEX) M4*0.7 M12*1.75-고장력 1540-MHO-1200-0 NUT(HEX) 1550-MSU-0408-0 WASHER(FLAT) ø4*ø8*0.8-SUS 1551-A00-1200-0 WASHER(SPR) ø12 1551-MSU-0400-0 WASHER(SPR) ø4*ø6.9*1-SUS 1564-A00-0206-0 RIVET TWIST ø2.6*6...
- Page 57 PART NAME : REMOCON CASE ASS'Y 1501-A00-0312-0 SCREW-MACHINE(FH) M3*12 2005-A00-0033-0 UPPER CASE 161*52*16.5(C-Ⅲ리모콘) 2005-A00-0034-0 LOWER CASE 161*52*11(C-Ⅲ리모콘) 2005-A00-0035-0 BATTERY COVER 60.5*32.4*11(CASTON리모콘) 2175-NC0-0033-0 RUBBER S/W NC-1(리모콘)영공 7520-P00-0030-0 BATTERY-MN R6-1.5V-AAM(REMOCON) 9505-A00-0000-0 손잡이 줄-리모콘 CASTON공용 PART NAME : C/T BOX ASS'Y 9100-NC0-0130-0 C/T BOX 485*340*240(NC) 9100-NC0-0W30-0 C/T BOX...
- Page 58 NC-50N PART CORD NAME SPECIFICATION Q'TY REMARK PART NAME : CAL PCB ASS'Y 6151-PNC-0430-0 PCB-CAL 6151-PNC-0430-0 2005.09.21 7600-SLD-0002-0 SLIDE S/W INCA-2(DJMM-12V) CAL, POWER 7804-CCN-7303-0 CONNECTOR(WAFER) 5273-03 (LPH03-03) 7805-CCN-6703-0 CONNECTOR(WAFER) 03-5267 7840-W00-B215-0 CONNECTOR WIRE 2P*150mm(NC-N) connector wire of CAL 7840-W00-A215-A CONNECTOR WIRE 2P*150mm(NC-N) connector wire of ADAPTOR 7840-W00-0330-0...
- Page 59 PART NAME : DISPLAY PCB ASS'Y 6110-PNC-0909-0 PCB-DISPLAY 6110-PNC-0909-0 2006.07 6224-I00-7225-0 IC(DRIVER) UPD 7225G00 7212-D00-8430-0 DTE 101710 ACP 1(NC) 7244-D00-0005-A E.L.INVERTER MTED-I-5C 7222-D00-0025-A E.L.BACK LIGHT MT-NC1-RO PIC- 7240-DRM-2043-0 REMOCON MODULE 12043TM(KSM64LM)NC,CASTON 6281-I00-1504-0 TRANSISTOR CHIP KTA1504 SY 7232-DRG-0003-0 LED LAMP ø3-(R,G) BL-BVT 201(ANODE) 7232-D00-0300-0 LED LAMP CLL302341(BVL-300E5G)
- Page 60 6527-ID3-4700-0 RESISTOR-CHIP 1/10W RR1220P-474D(470K) 6527-ID3-0470-0 RESISTOR-CHIP 1/10W RR1220P-473D(47 ㏀) 6527-ID0-0020-0 RESISTOR-CHIP 1/10W RR1220P-2R0D(2Ω) R25, 26 6527-ID3-0100-0 RESISTOR-CHIP 1/10W RR1220P-103D(10K) R28, 29 6527-ID0-1000-0 RESISTOR-CHIP 1/10W RR1220P-101D(100Ω) R19, 22 6527-ID3-1000-0 RESISTOR-CHIP 1/10W RR1220P-104D(100K) 6527-ID6-0010-0 RESISTOR-CHIP 1/10W RR1220P-105D(1M) 6540-LA3-0280-0 RESISTOR-PRECISION FLAY 28K000B R18, 23 6540-LA3-0010-0 RESISTOR-PRECISION FLAY 1K000B...
- Page 61 PART NAME : REMOCON MODULE PCB ASS'Y 1060-A00-0012-0 PCB CONTACT 8*8.4*8.6(C-Ⅲ) 6170-PCA-6160-0 PCB-REMOCON 6170-PCA-61600(C-Ⅲ) 6222-I00-9802-0 IC(REMOCON) KS 9802(THA) 6280-I00-1015-0 TRANSISTOR 2SA1015(1266) 6280-I00-1815-0 TRANSISTOR 2SC1815A(3198) 6294-ISW-4148-0 DIODE-SWITCHING 1N4148P 6515-CJ0-2200-0 RESISTOR 1/4W CFR 220Ω (±5%) 6515-CJ3-0100-0 RESISTOR 1/4W CFR 10K (±5%) CONDENSER- 6704-C16-0047-0 47uF/16V ELECTRIC...
- Page 62 1261-A00-0001-0 BOLT-S/W M8*11(NC-1) 1502-A00-0405-0 SCREW-MACHINE(PH) M4*5 1502-A00-0408-0 SCREW-MACHINE(PH) M4*8 1502-MSU-0412-0 SCREW-MACHINE(PH) M4*12-SUS 1503-MPN-0304-0 SCREW-MACHINE(WPH) M3*4-NI 1505-MSU-0310-0 SCREW-MACHINE(TH) M3*07*10-SUS 1532-A00-0506-0 BOLT-WRENCH(ST) M5*6 1540-A00-0400-0 NUT(HEX) M4*0.7 1540-MHO-1200-0 NUT(HEX) M12*1.75-고장력 1550-MSU-0408-0 WASHER(FLAT) ø4*ø8*0.8-SUS 1551-A00-1200-0 WASHER(SPR) ø12 1551-MSU-0400-0 WASHER(SPR) ø4*ø6.9*1-SUS 1564-A00-0206-0 RIVET TWIST ø2.6*6 1580-A00-0004-0 BEARING 51103(NC-1,C-1:500HD)
- Page 63 PART NAME : REMOCON CASE ASS'Y 1501-A00-0312-0 SCREW-MACHINE(FH) M3*12 2005-A00-0033-0 UPPER CASE 161*52*16.5(C-Ⅲ리모콘) 2005-A00-0034-0 LOWER CASE 161*52*11(C-Ⅲ리모콘) 2005-A00-0035-0 BATTERY COVER 60.5*32.4*11(CASTON리모콘) 2175-NC0-0033-0 RUBBER S/W NC-1(리모콘)영공 7520-P00-0030-0 BATTERY-MN R6-1.5V-AAM(REMOCON) 9505-A00-0000-0 손잡이 줄-리모콘 CASTON공용 PART NAME : C/T BOX ASS'Y 9100-NC0-0130-0 C/T BOX 485*340*240(NC) 9100-NC0-0W30-0 C/T BOX...
- Page 64 NC-100N PART CORD NAME SPECIFICATION Q'TY REMARK PART NAME : CAL PCB ASS'Y 6151-PNC-0430-0 PCB-CAL 6151-PNC-0430-0 2005.09.21 7600-SLD-0002-0 SLIDE S/W INCA-2(DJMM-12V) CAL, POWER 7804-CCN-7303-0 CONNECTOR(WAFER) 5273-03 (LPH03-03) 7805-CCN-6703-0 CONNECTOR(WAFER) 03-5267 7840-W00-B215-0 CONNECTOR WIRE 2P*150mm(NC-N) connector wire of CAL 7840-W00-A215-A CONNECTOR WIRE 2P*150mm(NC-N) connector wire of ADAPTOR 7840-W00-0330-0...
- Page 65 PART NAME : DISPLAY PCB ASS'Y 6110-PNC-0909-0 PCB-DISPLAY 6110-PNC-0909-0 2006.07 6224-I00-7225-0 IC(DRIVER) UPD 7225G00 7212-D00-8430-0 DTE 101710 ACP 1(NC) 7244-D00-0005-A E.L.INVERTER MTED-I-5C 7222-D00-0025-A E.L.BACK LIGHT MT-NC1-RO PIC- 7240-DRM-2043-0 REMOCON MODULE 12043TM(KSM64LM)NC,CASTON 6281-I00-1504-0 TRANSISTOR CHIP KTA1504 SY 7232-DRG-0003-0 LED LAMP ø3-(R,G) BL-BVT 201(ANODE) 7232-D00-0300-0 LED LAMP CLL302341(BVL-300E5G)
- Page 66 6527-ID3-4700-0 RESISTOR-CHIP 1/10W RR1220P-474D(470K) 6527-ID3-0470-0 RESISTOR-CHIP 1/10W RR1220P-473D(47 ㏀) 6527-ID0-0020-0 RESISTOR-CHIP 1/10W RR1220P-2R0D(2Ω) R25, 26 6527-ID3-0100-0 RESISTOR-CHIP 1/10W RR1220P-103D(10K) R28, 29 6527-ID0-1000-0 RESISTOR-CHIP 1/10W RR1220P-101D(100Ω) R19, 22 6527-ID3-1000-0 RESISTOR-CHIP 1/10W RR1220P-104D(100K) 6527-ID6-0010-0 RESISTOR-CHIP 1/10W RR1220P-105D(1M) 6540-LA3-0280-0 RESISTOR-PRECISION FLAY 28K000B R18, 23 6540-LA3-0010-0 RESISTOR-PRECISION FLAY 1K000B...
- Page 67 PART NAME : REMOCON MODULE PCB ASS'Y 1060-A00-0012-0 PCB CONTACT 8*8.4*8.6(C-Ⅲ) 6170-PCA-6160-0 PCB-REMOCON 6170-PCA-61600(C-Ⅲ) 6222-I00-9802-0 IC(REMOCON) KS 9802(THA) 6280-I00-1015-0 TRANSISTOR 2SA1015(1266) 6280-I00-1815-0 TRANSISTOR 2SC1815A(3198) 6294-ISW-4148-0 DIODE-SWITCHING 1N4148P 6515-CJ0-2200-0 RESISTOR 1/4W CFR 220Ω (±5%) 6515-CJ3-0100-0 RESISTOR 1/4W CFR 10K (±5%) CONDENSER- 6704-C16-0047-0 47uF/16V ELECTRIC...
- Page 68 1261-A00-0001-0 BOLT-S/W M8*11(NC-1) 1502-A00-0405-0 SCREW-MACHINE(PH) M4*5 1502-A00-0408-0 SCREW-MACHINE(PH) M4*8 1502-MSU-0412-0 SCREW-MACHINE(PH) M4*12-SUS 1503-MPN-0304-0 SCREW-MACHINE(WPH) M3*4-NI 1505-MSU-0310-0 SCREW-MACHINE(TH) M3*07*10-SUS 1532-A00-0506-0 BOLT-WRENCH(ST) M5*6 1540-A00-0400-0 NUT(HEX) M4*0.7 1540-MHO-1200-0 NUT(HEX) M12*1.75-고장력 1550-MSU-0408-0 WASHER(FLAT) ø4*ø8*0.8-SUS 1551-A00-1200-0 WASHER(SPR) ø12 1551-MSU-0400-0 WASHER(SPR) ø4*ø6.9*1-SUS 1564-A00-0206-0 RIVET TWIST ø2.6*6 1580-A00-0004-0 BEARING 51103(NC-1,C-1:500HD)
- Page 69 PART NAME : REMOCON CASE ASS'Y 1501-A00-0312-0 SCREW-MACHINE(FH) M3*12 2005-A00-0033-0 UPPER CASE 161*52*16.5(C-Ⅲ리모콘) 2005-A00-0034-0 LOWER CASE 161*52*11(C-Ⅲ리모콘) 2005-A00-0035-0 BATTERY COVER 60.5*32.4*11(CASTON리모콘) 2175-NC0-0033-0 RUBBER S/W NC-1(리모콘)영공 7520-P00-0030-0 BATTERY-MN R6-1.5V-AAM(REMOCON) 9505-A00-0000-0 손잡이 줄-리모콘 CASTON공용 PART NAME : C/T BOX ASS'Y 9100-NC0-0130-0 C/T BOX 485*340*240(NC) 9100-NC0-0W30-0 C/T BOX...
- Page 70 NC-200N PART CORD NAME SPECIFICATION Q'TY REMARK PART NAME : CAL PCB ASS'Y 6151-PNC-0430-0 PCB-CAL 6151-PNC-0430-0 2005.09.21 7600-SLD-0002-0 SLIDE S/W INCA-2(DJMM-12V) CAL, POWER 7804-CCN-7303-0 CONNECTOR(WAFER) 5273-03 (LPH03-03) 7805-CCN-6703-0 CONNECTOR(WAFER) 03-5267 7840-W00-B215-0 CONNECTOR WIRE 2P*150mm(NC-N) connector wire of CAL 7840-W00-A215-A CONNECTOR WIRE 2P*150mm(NC-N) connector wire of ADAPTOR 7840-W00-0330-0...
- Page 71 PART NAME : DISPLAY PCB ASS'Y 6110-PNC-0909-0 PCB-DISPLAY 6110-PNC-0909-0 2006.07 6224-I00-7225-0 IC(DRIVER) UPD 7225G00 7212-D00-8430-0 DTE 101710 ACP 1(NC) 7244-D00-0005-A E.L.INVERTER MTED-I-5C 7222-D00-0025-A E.L.BACK LIGHT MT-NC1-RO PIC- 7240-DRM-2043-0 REMOCON MODULE 12043TM(KSM64LM)NC,CASTON 6281-I00-1504-0 TRANSISTOR CHIP KTA1504 SY 7232-DRG-0003-0 LED LAMP ø3-(R,G) BL-BVT 201(ANODE) 7232-D00-0300-0 LED LAMP CLL302341(BVL-300E5G)
- Page 72 6527-ID3-4700-0 RESISTOR-CHIP 1/10W RR1220P-474D(470K) 6527-ID3-0470-0 RESISTOR-CHIP 1/10W RR1220P-473D(47 ㏀) 6527-ID0-0020-0 RESISTOR-CHIP 1/10W RR1220P-2R0D(2Ω) R25, 26 6527-ID3-0100-0 RESISTOR-CHIP 1/10W RR1220P-103D(10K) R28, 29 6527-ID0-1000-0 RESISTOR-CHIP 1/10W RR1220P-101D(100Ω) R19, 22 6527-ID3-1000-0 RESISTOR-CHIP 1/10W RR1220P-104D(100K) 6527-ID6-0010-0 RESISTOR-CHIP 1/10W RR1220P-105D(1M) 6540-LA3-0280-0 RESISTOR-PRECISION FLAY 28K000B R18, 23 6540-LA3-0010-0 RESISTOR-PRECISION FLAY 1K000B...
- Page 73 PART NAME : REMOCON MODULE PCB ASS'Y 1060-A00-0012-0 PCB CONTACT 8*8.4*8.6(C-Ⅲ) 6170-PCA-6160-0 PCB-REMOCON 6170-PCA-61600(C-Ⅲ) 6222-I00-9802-0 IC(REMOCON) KS 9802(THA) 6280-I00-1015-0 TRANSISTOR 2SA1015(1266) 6280-I00-1815-0 TRANSISTOR 2SC1815A(3198) 6294-ISW-4148-0 DIODE-SWITCHING 1N4148P 6515-CJ0-2200-0 RESISTOR 1/4W CFR 220Ω (±5%) 6515-CJ3-0100-0 RESISTOR 1/4W CFR 10K (±5%) CONDENSER- 6704-C16-0047-0 47uF/16V ELECTRIC...
- Page 74 1261-A00-0001-0 BOLT-S/W M8*11(NC-1) 1502-A00-0405-0 SCREW-MACHINE(PH) M4*5 1502-A00-0408-0 SCREW-MACHINE(PH) M4*8 1502-MSU-0412-0 SCREW-MACHINE(PH) M4*12-SUS 1503-MPN-0304-0 SCREW-MACHINE(WPH) M3*4-NI 1505-MSU-0310-0 SCREW-MACHINE(TH) M3*07*10-SUS 1532-A00-0506-0 BOLT-WRENCH(ST) M5*6 1540-A00-0400-0 NUT(HEX) M4*0.7 1540-MHO-1200-0 NUT(HEX) M12*1.75-고장력 1550-MSU-0408-0 WASHER(FLAT) ø4*ø8*0.8-SUS 1551-A00-1200-0 WASHER(SPR) ø12 1551-MSU-0400-0 WASHER(SPR) ø4*ø6.9*1-SUS 1564-A00-0206-0 RIVET TWIST ø2.6*6 1580-A00-0004-0 BEARING 51103(NC-1,C-1:500HD)
- Page 75 PART NAME : REMOCON CASE ASS'Y 1501-A00-0312-0 SCREW-MACHINE(FH) M3*12 2005-A00-0033-0 UPPER CASE 161*52*16.5(C-Ⅲ리모콘) 2005-A00-0034-0 LOWER CASE 161*52*11(C-Ⅲ리모콘) 2005-A00-0035-0 BATTERY COVER 60.5*32.4*11(CASTON리모콘) 2175-NC0-0033-0 RUBBER S/W NC-1(리모콘)영공 7520-P00-0030-0 BATTERY-MN R6-1.5V-AAM(REMOCON) 9505-A00-0000-0 손잡이 줄-리모콘 CASTON공용 PART NAME : C/T BOX ASS'Y 9100-NC0-0130-0 C/T BOX 485*340*240(NC) 9100-NC0-0W30-0 C/T BOX...
- Page 76 NC-500N PART CORD NAME SPECIFICATION Q'TY REMARK PART NAME : CAL PCB ASS'Y 6151-PNC-0430-0 PCB-CAL 6151-PNC-0430-0 2005.09.21 7600-SLD-0002-0 SLIDE S/W INCA-2(DJMM-12V) CAL, POWER 7804-CCN-7303-0 CONNECTOR(WAFER) 5273-03 (LPH03-03) 7805-CCN-6703-0 CONNECTOR(WAFER) 03-5267 7840-W00-B215-0 CONNECTOR WIRE 2P*150mm(NC-N) connector wire of CAL 7840-W00-A215-A CONNECTOR WIRE 2P*150mm(NC-N) connector wire of ADAPTOR 7840-W00-0330-0...
- Page 77 PART NAME : DISPLAY PCB ASS'Y 6110-PNC-0909-0 PCB-DISPLAY 6110-PNC-0909-0 2006.07 6224-I00-7225-0 IC(DRIVER) UPD 7225G00 7212-D00-8430-0 DTE 101710 ACP 1(NC) 7244-D00-0005-A E.L.INVERTER MTED-I-5C 7222-D00-0025-A E.L.BACK LIGHT MT-NC1-RO PIC- 7240-DRM-2043-0 REMOCON MODULE 12043TM(KSM64LM)NC,CASTON 6281-I00-1504-0 TRANSISTOR CHIP KTA1504 SY 7232-DRG-0003-0 LED LAMP ø3-(R,G) BL-BVT 201(ANODE) 7232-D00-0300-0 LED LAMP CLL302341(BVL-300E5G)
- Page 78 6527-ID3-4700-0 RESISTOR-CHIP 1/10W RR1220P-474D(470K) 6527-ID3-0470-0 RESISTOR-CHIP 1/10W RR1220P-473D(47 ㏀) 6527-ID0-0020-0 RESISTOR-CHIP 1/10W RR1220P-2R0D(2Ω) R25, 26 6527-ID3-0100-0 RESISTOR-CHIP 1/10W RR1220P-103D(10K) R28, 29 6527-ID0-1000-0 RESISTOR-CHIP 1/10W RR1220P-101D(100Ω) R19, 22 6527-ID3-1000-0 RESISTOR-CHIP 1/10W RR1220P-104D(100K) 6527-ID6-0010-0 RESISTOR-CHIP 1/10W RR1220P-105D(1M) 6540-LA3-0280-0 RESISTOR-PRECISION FLAY 28K000B R18, 23 6540-LA3-0010-0 RESISTOR-PRECISION FLAY 1K000B...
- Page 79 CONDENSER- 6710-CAP-P101-0 100PF/50V CERAMIC 6802-F00-0455-0 CERAMIC FILTER CSB 455 E PCB-REMOCON 6170-PCA-61600(C-Ⅲ) 6S70-PCA-6160-0 INSERT 7232-D00-0300-0 LED LAMP CLL30231(BVL-300E5G) 7235-D00-8925-0 IR-LED OSI-8925(C-2,3) PART NAME : BODY ASS'Y 1030-A00-0025-0 BATTERY HOLDER 67*47*21*1T(NC-1) 1030-A00-0041-0 BRACKET-KEY 108*35*1.2T(NC-1) 1030-A00-0042-0 BRACKET-LCD 179*64*1T(NC-1) 1030-A00-0043-0 BRACKET-JACK 46*41*1.8T(NC-1) 1030-A00-0044-A PCB-SHIELD CASE 181*117*1.5T(NC-1) 1030-A00-0045-0...
- Page 80 1551-A00-1200-0 WASHER(SPR) ø12 1551-MSU-0400-0 WASHER(SPR) ø4*ø6.9*1-SUS 1564-A00-0206-0 RIVET TWIST ø2.6*6 1580-A00-0004-0 BEARING 51103(NC-1,C-1:500HD) 1800-NC0-5033-0 NAME PLATE NC-500(영공) 1810-NC0-0033-0 SPEC PLATE NC-1(영공) 2000-A00-0057-A K/B SWITCH KNOB 11.4*11.4*6(DB,AD) 2050-NC0-0033-0 DISPLAY COVER PRINT NC-1(UN) 2170-NC0-0033-0 RUBBER S/W 108*36*1.5T(NC-1,HOLD) 2610-A00-0005-0 FOOT SJ-5027(NC-1) 2620-A00-0005-0 HOLE CAP 21.5*50*8(NC-1) 2620-A00-0006-0 LCD RUBBER...
- Page 81 PART NAME : REMOCON CASE ASS'Y 1501-A00-0312-0 SCREW-MACHINE(FH) M3*12 2005-A00-0033-0 UPPER CASE 161*52*16.5(C-Ⅲ리모콘) 2005-A00-0034-0 LOWER CASE 161*52*11(C-Ⅲ리모콘) 2005-A00-0035-0 BATTERY COVER 60.5*32.4*11(CASTON리모콘) 2175-NC0-0033-0 RUBBER S/W NC-1(리모콘)영공 7520-P00-0030-0 BATTERY-MN R6-1.5V-AAM(REMOCON) 9505-A00-0000-0 손잡이 줄-리모콘 CASTON공용 PART NAME : C/T BOX ASS'Y 9100-NC0-0130-0 C/T BOX 485*340*240(NC) 9100-NC0-0W30-0 C/T BOX...
-
Page 82: Explode View
12. EXPLODE VIEW...
Need help?
Do you have a question about the NC-I and is the answer not in the manual?
Questions and answers