Advertisement
Quick Links
Advertisement

Subscribe to Our Youtube Channel
Related Manuals for TOORX CLX-9000


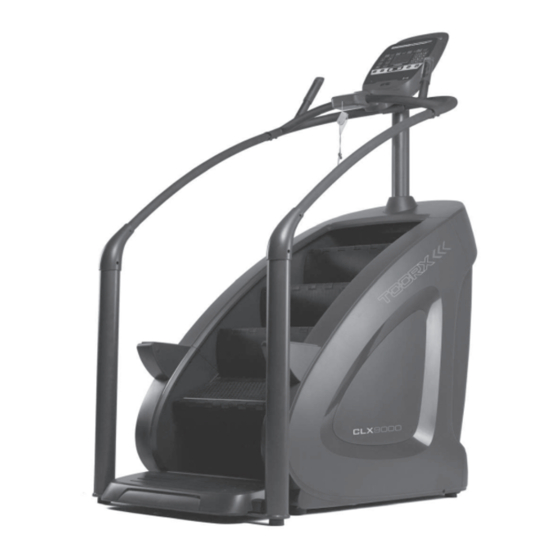
Summary of Contents for TOORX CLX-9000
- Page 1 INSTRUCTION...
-
Page 2: Assembly Steps
Assembly Steps Step 1 ①Connect the wires with same terminal. ②Mount the Decorative ring to console mast, using Bolt M8*20(1pc), M8*65(1pc) and φ8 flat washer(1pc). ③Fix the Column group, using M8*55 Bolts(3pcs) and φ8 flat washer(3pcs). Console mast M8*20 bolt φ8 flat washer M8*65 bolt φ8 flat washer... - Page 3 Assembly Steps Step 2 ①Fix the step base, use M8*20 Blots(2pcs), φ8 flats(2pcs) and M8*20 Blot(1pc) Step base M8*20 bolt φ8 flat washer M8*20 bolt M8*20 bolt φ8 flat washer...
- Page 4 Assembly Steps Step 3 ①Connect the wires with same terminal. ②Fix the side handlebar to upper handlebar with Decorative rings, use M8*20 Blots(4pcs) and φ8 flats(4pcs). ③Fix the handlebar group to console mast with strengthen base, use M8*20 blots(4pcs) and φ8 flats(4pcs). ④Fix the handlebar group to Column group, use M8*20 Blots.
- Page 5 Assembly Steps Step 4 ①Fix the Console, use M8*20 blots(4pcs) ②Fix handrail covers, use M4*25 screw(4pcs) and ST4.2*16 Screw(2pcs) Console ST4.2*16 Screw M8*20 bolt M4*25 screw M4*25 screw ST4.2*16 Screw Handrail covers Handrail covers Handrail covers Handrail covers...
-
Page 6: Console Description
Console description Display LED display console, show us following info rmation: Time(S): display from ”00:00-99:59” ; Default time for positive timing,Increment with each 1 second. Distance(Km): display from”0-99.9” ; Default distance is positive timing, increment with each 0.1Km Calorie (Koal): display from”0-99.9” default Calorie is positive timing, Increment with each 0.1 Kcal. - Page 7 Console description Number Name Details Blue(3seconds): Power On Breathing blue: Standby Flashing Blue: Searching bluetooth/ Logging into the system Green: System login succeeded Flashing Red(2sec): System login failed light language Yellow(60seconds): Pause state Blue(1Second):Cool Down Red(1second):Stop Red(2Second): Exit system Distance Heart Rate button to change ②...
-
Page 8: Quick Start
Operating Instructions Quick start Press button, all data starts counting, The bottom line of display bright. display lights and intensity adjustment linkage; press buttons - + to adjust intensity, the data can be switched. Press button, to clear all the data, display remind “ANYKEY TO CONTINUE OR PRESS OK TO QUIT”, press any key to continue use the unit, press button to quit. - Page 9 Operating Instructions Self-Editing program starting up Press Button, display remind ”USER PROGRAM” After the information finished, the first line of display is displayed. The first light flashes, setting with - +, each press 1lvl, or use numeric keypad to setting details, press to next step, when finish last step, press , display remind“ENTER TIME”,...
- Page 10 CLIMBMILL PARTS LIST Parts Parts Main Frame Handrail stanchion Support Frame(L) Leveling foot Support Frame(R) Handlebar assembly Base Frame Handlebar Upright Support Tube Heart rate front shell Step frame(L) heart rate back shell Step frame(R) Button shroud Top sprocket Light_Button Base Bottom sprocket button Horizontal support Frame...
- Page 11 CLIMBMILL PARTS LIST Parts Parts 1,24 Access Cover(R) 8,10 Cup holder Cover 1,25 8,11 Light Lens Left Side Inner Cover(F) 1,26 8,12 Anti Slip Mat Left Side Inner Cover(B) 1,27 8,13 LED display Right Side Inner Cover(F) 1,28 8,14 Right Side Inner Cover(B) 1,29 Step assembly 8,15...
- Page 12 ASSEMBLY 1.17 1.53 1.21 1.57 1.57 1.53 1.24 1.54 1.52 1.60 1.40 1.17 1.19 1.59 1.59 1.47 14.7 1.53 1.61 1.58 1.56 1.57 1.27 1.59 1.59 1.52 1.59 1.53 1.57 1.55 1.63 1.58 1.16 1.60 1.35 1.44 1.52 1.59 1.45 1.59 1.18 1.63...
- Page 13 ASSEMBLY 2 1.32 1.32 1.32 1.32 1.63 1.63 1.32 1.63 1.63 1.32 1.63 1.32 1.32 1.32 1.63 1.63 1.63 1.32 1.63 1.63 14.6 14.11 1.21 1.20 14.6 14.11 3.11.4 3.18 3.18 3.19 3.19 3.12 3.11.2 3.12 3.12 3.17 3.12 3.11.6 3.14 3.14 3.15...
- Page 14 ASSEMBLY 3 1.11.17 1.11.10 1.11.3 1.11.13 1.11.15 1.11.10 1.11.17 1.11.26 1.11.25 1.11.12 1.65 1.11.28 1.11.1 1.65 1.11.29 1.15 1.11.4 1.11.30 1.11.6 1.11.5 1.11.2 1.11.18 1.11.27 1.11.15 1.11.8 1.11.20 1.11.14 1.11.24 1.11.7 1.11.15 1.11.11 1.11.22 1.11.11 1.11.11 1.11.16 1.11.9 1.11.24 1.11.15 1.11.8 1.11.16 1.11.24...
- Page 15 GARLANDO SPA Via Regione Piemonte, 32 - Zona Industriale D1 15068 - Pozzolo Formigaro (AL) - Italy www.toorxprofessional.it contact@toorxprofessional.it...
Need help?
Do you have a question about the CLX-9000 and is the answer not in the manual?
Questions and answers