Table of Contents
Advertisement
Quick Links
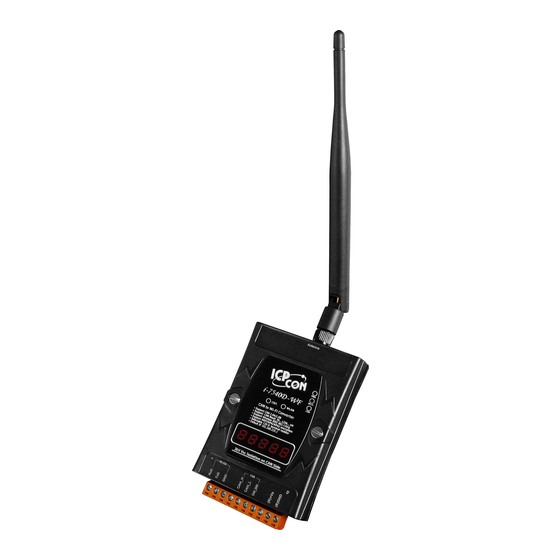
The I-7540D CAN-Ethernet Gateway
Warranty
All products manufactured by ICP DAS are under warranty
regarding defective materials for a period of one year from the date of
delivery to the original purchaser.
Warning
ICP DAS assumes no liability for damages resulting from the use
of this product. ICP DAS reserves the right to change this manual at
any time without notice. The information furnished by ICP DAS is
believed to be accurate and reliable. However, no responsibility is
assumed by ICP DAS for its use, or for any infringements of patents or
other rights of third parties resulting from its use.
Copyright
Copyright 2015 by ICP DAS. All rights are reserved.
Trademark
The names used for identification only may be registered
trademarks of their respective companies.
I-7540D CAN-Ethernet Gateway User's Manual (Version 1.8, March/2021)
User's Manual
1
Advertisement
Table of Contents
Troubleshooting

Related Manuals for ICP DAS USA I-7540D


Summary of Contents for ICP DAS USA I-7540D
- Page 1 Copyright Copyright 2015 by ICP DAS. All rights are reserved. Trademark The names used for identification only may be registered trademarks of their respective companies. I-7540D CAN-Ethernet Gateway User’s Manual (Version 1.8, March/2021)
-
Page 2: Table Of Contents
5-digits 7-Segment LED Displays ............20 Software Utilities ..................... 23 I-7540D Utility ....................24 3.1.1 Install & uninstall the I-7540D Utility ............25 3.1.2 How to configure the module parameters ..........31 3.1.3 How to set the Bus Timing Registers ............35 3.1.4... - Page 3 99$PPIPxxx… ....................89 4.24 99CRA ......................90 4.25 General Error codes for commands from port 10003 ......... 91 VxComm Applications ..................92 Overview ......................92 5.1.1 Architecture....................93 5.1.2 Ports mapping ................... 94 I-7540D CAN-Ethernet Gateway User’s Manual (Version 1.8, March/2021)
- Page 4 Installing the VxComm Driver ..............95 Adding an I-7540D and configuring the VxComm Driver......97 Removing an I-7540D ................... 103 Uninstalling the VxComm Driver..............105 Application with PISO-CAN 200/400 T ............107 Diagnostics and Troubleshooting ..............110 Diagnostics ..................... 110 Trouble Shooting ...................
-
Page 5: Introduction
UPS…etc. Using Ethernet for network in industrial area is appealing because the required cabling is already installed. The I-7540D from ICP DAS is a solution that enables CAN networks to be coupled together over the Internet/Ethernet, whereby remote monitoring and control is possible. -
Page 6: Features
Software configurable CAN and Ethernet communication parameters Program download port: COM1 or Ethernet Port Support CAN bus pair connection Provide the transparent communication between the CAN devices via Ethernet network. I-7540D CAN-Ethernet Gateway User’s Manual (Version 1.8, March/2021) -
Page 7: Specifications
Operating Environment Operating Temperature -25°C to +75°C Storage Temperature -30°C to +80°C Power Protection Power reverse polarity protection Frame Ground for ESD Protection Required Supply Voltage +10 to +30VDC (non-regulated) Power consumption 2.5W I-7540D CAN-Ethernet Gateway User’s Manual (Version 1.8, March/2021) - Page 8 CAN bus pair connection parameters configuration. Provides a quick testing function for transmitting/receiving CAN messages; Application: Factory Automation; Building Automation; Home Automation; Control system; Monitor system; Vehicle Automation; I-7540D CAN-Ethernet Gateway User’s Manual (Version 1.8, March/2021)
-
Page 9: Vxcomm Technology
Compared to the RS-485 network, these Ethernet network hubs are already in existence for system network. Therefore, the RS-232 devices can find the closest hub and link to the central computer with the help of the I-7540D. The Ethernet network is extremely popular and already existing for most applications, hence, this approach is a very successful. - Page 10 The VxComm technology can be used to simulate COM/CAN ports of the I-7540D to become a COM port of PC. With the help of VxComm driver, users can access the remote COM/CAN ports of the I-7540D just as them would access the PC’s COM port.
-
Page 11: Hardware
2. Hardware Block Diagram Figure 2-1 is a block diagram illustrating the functions on the I-7540D module. It provides the 2500Vrms Isolation in the CAN interface site. And hardware media in RS-232 interface is only adopted 5-wire connection. Figure 2-1: Block diagram of I-7540D I-7540D CAN-Ethernet Gateway User’s Manual (Version 1.8, March/2021) -
Page 12: Pin Assignment
Connector Bus Connector CAN Bus Power LED Status LED 7-segment LED displays Power Input Ethernet 10/100 RS-485 Port Base T INIT * pin RS-232 Port Figure 2-2: Pin assignment on the I-7540D I-7540D CAN-Ethernet Gateway User’s Manual (Version 1.8, March/2021) -
Page 13: Rs-485 & Power Supply Interface
2.2.1 RS-232 & RS-485 & Power supply Interface The I-7540D provides one RS-232 interface and one RS-485 interface with hardware flow control. The GND-signal of COM1 is shared with pin-9, GND. The pin assignment is shown in table 2-1. Table 2-1: COM Connector Pin Assignment... -
Page 14: Connect To Can Bus
2.2.2 Connect to CAN Bus In order to provide an easy CAN bus wiring, the I-7540D supplies one CAN port with two CAN bus connector interfaces. Each connecter built on the I-7540D looks like as figure 2-3 and table 2-2. -
Page 15: Ethernet Connect
The Ethernet (10/100 Base-TX) signals are routed to an RJ45 socket for easy connection using a standard CAT 3 or CAT 5 network cable. On power on of the I-7540D, it will auto-negotiate the network speed and connection. Table 2-3: Ethernet Connector Pin Assignment... -
Page 16: Terminator Resistor Settings
Cross Section Resistance (Ω) (meter) (Type) (mΩ/m) 0.25(23AWG)~ 0~40 124 (0.1%) 0.34mm (22AWG) 0.34(22AWG)~ 40~300 < 60 127 (0.1%) 0.6mm (20AWG) 0.5~0.6mm 300~600 < 40 150~300 (20AWG) 0.75~0.8mm 600~1K < 20 150~300 (18AWG) I-7540D CAN-Ethernet Gateway User’s Manual (Version 1.8, March/2021) - Page 17 If users want to use this terminator resistor, please open the I-7540D cover and use the JP3 jumper to activate the 120Ω terminator resistor built in the system, as in the figure 2-5. Note that the default setting is active.
-
Page 18: Led Indication
Firmware is running: flashing red The default shipping of I-7540D will be firmware inside, so the red indicator-LED of I-7540D will be ON 0.5 second then OFF 0.5 second periodically. 2.4.2 CAN bus indicator LED The I-7540D includes three single-color LED displays to indicate the status of module, network and I/O device. - Page 19 RX status. Therefore, when the device receives CAN messages, the RX-LED would be flashed. Table 2-8 RX led conditions Condition Description No data is being received Flashing red Data is being received Solid red Receive error messages I-7540D CAN-Ethernet Gateway User’s Manual (Version 1.8, March/2021)
-
Page 20: 5-Digits 7-Segment Led Displays
5-digits 7-Segment LED Displays The 5-digits 7-SEG LED will show as figure 2-6. Figure 2-6 7-SEG LED Displays The important information of I-7540D can be divided as follows: Group-ID 11111: IP information of this I-7540D Group-ID 22222: baud rate of all ports ... - Page 21 dHCP.2 DHCP function enable but not get an IP, using default setting If the DHCP function is enable, the I-7540D will get it’s IP from the DHCP server. Otherwise, it will use the IP in the EEPROM. The baud-rate format of COM ports are given as follows: ...
- Page 22 If any one client connects to this I-7540D, free-sockets will be decreased and used-sockets will be increased. If the free-sockets number is reduced to 0, then no extra client can link to this I-7540D. The default number of free-sockets is 24. Therefore, the I-7540D allows 24 clients link to it.
-
Page 23: Software Utilities
We support some software utilities for users to set and test the status of the I-7540D. I-7540D Utility The I-7540D Utility tool can be used to configure the operation condition between the CAN and Ethernet communications. Also it can be used to transmit or receive a CAN message for simple testing of the module’s functions. -
Page 24: I-7540D Utility
“I-7540D Utility”, please install the I-7540D Utility setup file and run the I-7540D.exe file. The screenshot of the startup screen for this Utility is given in the below figure. Connect the I-7540D’s Ethernet port with the PC’s Ethernet port via a standard CAT 3 or CAT 5 network cable. -
Page 25: Install & Uninstall The I-7540D Utility
40D-G Step 2: Execute the setup.exe file to install I-7540D Utility. Step 3: A “Welcome” window pops up to prompt user to begin the installation. See figure 3-2. Figure 3-2: Welcome dialog I-7540D CAN-Ethernet Gateway User’s Manual (Version 1.8, March/2021) - Page 26 Step 5: Click “Next” button and a “Ready to Install the Program” window will pop up to prompt user that the wizard is ready to begin the installation See figure 3-4. Figure 3-4: “Ready to Install the Program” dialog I-7540D CAN-Ethernet Gateway User’s Manual (Version 1.8, March/2021)
- Page 27 Step 6: Click “Install” button and start to install the I-7540D Utility to the system. After finishing the process, a “Complete” window will pop up to prompt users that the successful completion of the installation. And click “Finish” button to exit. See figure 3-5.
- Page 28 Uninstall I-7540D Utility You can uninstall I-7540D Utility software by the following means described below: Step 1: Click “Start” in the task bar, then click the “Control Panel” as shown in figure 3-7. Figure 3-7: Select settings Step 2: Click the “Add or Remove Programs” button icon to open the dialog. See figure 3-8.
- Page 29 Step 3: Find out the I-7540D Utility, and click the Change/Remove button. See figure 3-9. Figure 3-9: Click “Add/Remove Programs” Step 4: Select the “Remove” option button, and press the “Next” button to remove I-7540D Utility. See figure 3-10. Figure 3-10: “Modify, repair, or remove the program” dialog...
- Page 30 Step 5: Click the button “Yes” to remove the software as shown in figure 3-11. Figure 3-11: Click the button “Yes” to remove the software Step 6: Finally, click the “Finish” button to finish the uninstall process. Figure 3-12: “Maintenance Complete” dialog. I-7540D CAN-Ethernet Gateway User’s Manual (Version 1.8, March/2021)
-
Page 31: How To Configure The Module Parameters
PC and the I-7540D via the network cable 4. Click the “Connect” icon on the I-7540D Utility tool bar. The setting frame will be popped up. Key-in the IP of the I-7540D and press the “Connect” button in order to connect with it. - Page 32 5. Then the I-7540D configuration window will be brought out. The I-7540D Utility will show the communication information from the I-7540D module in the window, as shown in the following figure. I-7540D’s CAN Status Error code Response or not Time-Stamp value...
- Page 33 9. The “CAN Bus Pair Connection Status” frame showed the parameters of CAN pair connection. Note: After modify the CAN bus pair connection status of the I-7540D, the setting value will become effective after resetting the system. I-7540D CAN-Ethernet Gateway User’s Manual (Version 1.8, March/2021)
- Page 34 1. IP address first byte: 1~223, second and third Byte: 0~255, and last byte: 1~255. 2. Does not support IP address: 1.1.1.1. 3. If the IP address is used in UDP mode, the first byte: 1~255. I-7540D CAN-Ethernet Gateway User’s Manual (Version 1.8, March/2021)
-
Page 35: How To Set The Bus Timing Registers
Users can set arbitrary baud with these parameters. But users need to have the background of SJA1000 CAN controller and 82C251 CAN transceiver, and calculate the values of BT0 and BT1 by themselves (The clock frequency of CAN controller is 16MHz.). I-7540D CAN-Ethernet Gateway User’s Manual (Version 1.8, March/2021) -
Page 36: How To Set The Acceptance Code And Mask
~ bit13 of ID AccCode[1] and AccMask[1] bit7~bit0 bit12 ~ bit5 of ID AccCode[2] and AccMask[2] bit7~bit3 bit4 ~ bit0 of ID AccCode[3] and AccMask[3] bit2 AccCode[3] and AccMask[3] bit1~bit0 no use AccCode[3] and AccMask[3] I-7540D CAN-Ethernet Gateway User’s Manual (Version 1.8, March/2021) - Page 37 ID Value : xxxx xxxx xxxx xxxx xxxx xxxx 101x x will be accepted (Note: The mark “x” means don’t care. And the mark “h” behind the value means hex format.) I-7540D CAN-Ethernet Gateway User’s Manual (Version 1.8, March/2021)
-
Page 38: Enable Error Response
3.1.5 Enable Error Response Figure 3-16: Error Response When the I-7540D receives a command that it doesn’t accept, it will response syntax and/or communication error information to the host. These general error codes are shown in below table. AsciiToHex Description (Error code) The head character of the command string is invalid. -
Page 39: Enable Time-Stamp Response
3.1.6 Enable Time-stamp Response Figure 3-17: Time-Stamp Response When the time-stamp response is enabled, the I-7540D will send CAN message with it’s time-tick vale, hexadecimal eight ASCII chars for a unit of microsecond, to the host as it receive a CAN message. For example: "Mode"=0 =>... -
Page 40: How To Change Web Id/Password Configuration
3.1.7 How to change web ID/PASSWORD configuration The I-7540D module has a built-in web server that allows user to easily configure the module from a remote location using a regular web browser. When users want to modify the configuration of I-7540D via Setup web page, they need to fill these two fields, ID and PASSWORD, with correct values. - Page 41 If users want to change the ID and PASSWORD, they need to modify these two parameters by using Utility tool. The default setting of ID is “7540D”, and default PASSWORD is “icpdas7540D”. I-7540D CAN-Ethernet Gateway User’s Manual (Version 1.8, March/2021)
-
Page 42: How To Test The Module Transmission Performance
PC and the I-7540D via the network cable 5. Click the “Connect” icon on the I-7540D Utility tool bar. The setting frame will be popped up. Key-in the IP of the I-7540D and press the “Connect” button in order to connect with it. - Page 43 6. Select the “Test” tab in order to test the function of transmission and reception via the I-7540D module. In “Send CAN Message” frame, user can send the necessary CAN message to Ethernet port 10003 of 7540D. Then 7540D will transfer and transmit this message to CAN bus.
- Page 44 CAN message, these CAN message will be displayed on the “Receive” box. Start/stop time of timer mode Fixed period to send CAN message Figure 3-19: Timer mode to send CAN message I-7540D CAN-Ethernet Gateway User’s Manual (Version 1.8, March/2021)
-
Page 45: How To Use Can Bus Pair Connection
UDP/TCP function. User can refer the following application to use this function. Note: After setting “Enable CAN Bus Pair Connection”, all data send to this I-7540D via Ethernet port 10003 will become no effective. And the VxComm port of 7540D’s COM3(CAN port) will become no effective. - Page 46 Application 01: one-to-one communication CAN Bus Pair Connection by using UDP method (port: 57540). After setting “CAN Bus Pair connection Status” of the two I-7540D and re-start the system of them, CAN messages between “CAN Network 01” and “CAN Network 02”...
- Page 47 Application 02: one-to-many communication (broadcast) CAN Bus Pair Connection by using UDP method (port: 57540). 1. After setting “CAN Bus Pair connection Status” of these I-7540D and re-start the system of them, CAN messages on “CAN Network 01” will be sent to “CAN Network 02“...
- Page 48 Application 03: One acts as a server, the other acts as a client. CAN Bus Pair Connection by using TCP method (port: 10003). After setting “CAN Bus Pair connection Status” of the two I-7540D and re-start the system of them, CAN messages between CAN Network 01 and CAN Network 02 can be exchanged by TCP/IP protocol through Ethernet network.
-
Page 49: Minios7 Utility
MiniOS7 Utility is a tool for configuring, uploading files to all products embedded with ICPDAS MiniOS7. And it provides some PC diagnostic tools which can help users to diagnose the status of the I-7540D and other controllers. Supported connection ways ... -
Page 50: Install The Minios7 Utility
Step 2: Go to where you downloaded the file, and double-click on the installation file in Windows to execute it. Step 3: To finish the installation of the MiniOS7 Utility, click the Finish button to exit the setup process. I-7540D CAN-Ethernet Gateway User’s Manual (Version 1.8, March/2021) -
Page 51: Pc Diagnostic Tools
COM port, and show the data received from COM port on the screen of PC. The main function for 7188xw.exe is to DOWNLOAD files to the MiniOS7 system. Please download related files from our web site http://www.icpdas.com/en/download/index.php?root=&model=&kw=MiniOS7 %20Utility I-7540D CAN-Ethernet Gateway User’s Manual (Version 1.8, March/2021) - Page 52 And it can be used to test the Virtual COM technology. Set the Com Key-in the port parameters string that you of PC. want to send The send/receive messages will be displayed over here. I-7540D CAN-Ethernet Gateway User’s Manual (Version 1.8, March/2021)
- Page 53 Ethernet. Step 1: Run SendTCP in host-PC. Step 2: Input the IP of I-7540D and press the “Connect” button to connect with I-7540D. And then it will display “7188E3 is connected”. I-7540D CAN-Ethernet Gateway User’s Manual (Version 1.8, March/2021)
- Page 54 Step 3: Send command “10” to the I-7540D. And it will response “7188E3 message. Step 4: Select “Port 2” and “CR”. Then send “$02M” to read 7000 module’s ID which is connected to I-7540D’s COM2. If you enable 7000 module’s checksum function, select “CS_CR”.
- Page 55 7188E: Command-prompt mode program, used to send data to specific machines using TCP protocol. Usage: 7188e [-S:IP] [-P:Port]: Connect to a device by using TCP protocol. *Q: Quit program and disconnect. I-7540D CAN-Ethernet Gateway User’s Manual (Version 1.8, March/2021)
-
Page 56: Vxcomm Utility
The VxComm (Virtual Comm) Driver and VxComm Utility are very easy to install and use. This document shows how to install and configure the driver correctly. For more information, please refer to section 5, VxComm application. I-7540D CAN-Ethernet Gateway User’s Manual (Version 1.8, March/2021) -
Page 57: Supported Command List
Send or receive a standard remote frame. eIIIIIIIILDD…<CR> Send or receive an extended data frame. EIIIIIIIIL<CR> Send or receive an extended remote frame. Note: The I-7540D’s COM3 (CAN port) can only accept these 4 commands. I-7540D CAN-Ethernet Gateway User’s Manual (Version 1.8, March/2021) - Page 58 4. The #PPC, #PPIP, $PPCLLABC, $PPIPxxx…commands just can be used on the firmware version v1.06 or later. 5. The commands will write parameters into EEPROM and EEPROM is limited to 1,000,000 erase/write cycles I-7540D CAN-Ethernet Gateway User’s Manual (Version 1.8, March/2021)
-
Page 59: Tiiildd
Response: Valid command: No response Invalid command: ?<Error Code><CR> Note: It is necessary to enable the “Error Response” function in the I-7540D Utility, in order to receive Syntax and/or communication error information at the host PC. Example: Command (ASCII): t03F3112233<CR>... -
Page 60: Tiiil
Response: Valid command: No response Invalid command: ?<Error Code><CR> Note: It is necessary to enable the “Error Response” function in the I-7540D Utility, in order to receive Syntax and/or communication error information at the host PC. Example: Command (ASCII): T2E88<CR>... -
Page 61: Eiiiiiiiildd
Response: Valid command: No response Invalid command: ?<Error Code><CR> Note: It is necessary to enable the “Error Response” function in the I-7540D Utility, in order to receive Syntax and/or communication error information at the host PC. Example: Command (ASCII): e123456783112233<CR>... -
Page 62: Eiiiiiiiil
Response: Valid command: No response Invalid command: ?<Error Code><CR> Note: It is necessary to enable the “Error Response” function in the I-7540D Utility, in order to receive Syntax and/or communication error information at the host PC. Example: Command (ASCII): E010156786<CR>... - Page 63 Description: Read the I-7540D CAN Baud Rate and error flag message. Syntax: 99S Command character. Response: Valid Command: !CFFTTRRO<CR> Invalid command: ERROR Delimiter for valid command current baud rate setting of CAN CAN register CAN transmit error counter...
- Page 64 Command (ASCII): 99S Command (HEX): 39 39 53 Receive: !40C00000<CR> Obtain some current information on the I-7540D module. The response will show the following results: CAN baud rate=125K, CAN status register= transmission complete and transmit buffer is released, CAN transmit error counter=0, CAN receive error counter=0 and CAN FIFO= normal.
- Page 65 The error counter of reception and transmission will be set to zero. And the TX and RX LEDs will turn OFF. Example: Command (ASCII): 99C Command (HEX): 39 39 43 Note: This command can only be accepted by 7540D’s port 10000 I-7540D CAN-Ethernet Gateway User’s Manual (Version 1.8, March/2021)
- Page 66 99RA Description: Reboot the I-7540D module. Users can use this command to reboot the module in order to allow it to work in order again. Syntax: 99RA 99RA Command character Response: Valid Command: Reboot the I-7540D module. Invalid command: ERROR ...
- Page 67 4800 bps baud rate of RS-232 9600 bps baud rate of RS-232 19200 bps baud rate of RS-232 38400 bps baud rate of RS-232 57600 bps baud rate of RS-232 115200 bps baud rate of RS-232 I-7540D CAN-Ethernet Gateway User’s Manual (Version 1.8, March/2021)
- Page 68 Command (HEX): 39 39 23 50 30 31 Response: 0610B100 The response will show the following results: RS-232 baud rate=115.2K bps, data bits=8, stop bits=1, none parity. Note: This command can only be accepted by 7540D’s port 10000 I-7540D CAN-Ethernet Gateway User’s Manual (Version 1.8, March/2021)
- Page 69 4800 bps baud rate of RS-485 9600 bps baud rate of RS-485 19200 bps baud rate of RS-485 38400 bps baud rate of RS-485 57600 bps baud rate of RS-485 115200 bps baud rate of RS-485 I-7540D CAN-Ethernet Gateway User’s Manual (Version 1.8, March/2021)
- Page 70 Command (HEX): 39 39 23 50 30 32 Response: 06207111 The response will show the following results: RS-485 baud rate=9600 bps, data bits=8, stop bits=2, even parity. Note: This command can only be accepted by 7540D’s port 10000 I-7540D CAN-Ethernet Gateway User’s Manual (Version 1.8, March/2021)
- Page 71 100K baud rate of CAN 125K baud rate of CAN 250K baud rate of CAN 500K baud rate of CAN 800K baud rate of CAN 1000K baud rate of CAN User Defined I-7540D CAN-Ethernet Gateway User’s Manual (Version 1.8, March/2021)
- Page 72 The response will show the following results: CAN specification=2.0A, CAN baud rate=125Kbps, acceptance code register=00000000, acceptance mask register=FFFFFFFF, disable error response, disable timestamp response. Note: This command can only be accepted by 7540D’s port 10000 I-7540D CAN-Ethernet Gateway User’s Manual (Version 1.8, March/2021)
- Page 73 100K baud rate of CAN 125K baud rate of CAN 250K baud rate of CAN 500K baud rate of CAN 800K baud rate of CAN 1000K baud rate of CAN User Defined I-7540D CAN-Ethernet Gateway User’s Manual (Version 1.8, March/2021)
- Page 74 The response will show the following results: CAN specification=2.0A, CAN baud rate=User defined, BTR0=00, BTR1=14. Note: 1. This command can only be accepted by 7540D’s port 10000 2. Supported by the firmware v1.04 or later. I-7540D CAN-Ethernet Gateway User’s Manual (Version 1.8, March/2021)
-
Page 75: 99$P0105Bbdsp
4.12 99$P0105BBDSP Description: Change the RS-232 configuration of the I-7540D into EEPROM Syntax: 99$P0105BBDSP 99$P0105 Command character RS-232 Baud rate Data bit 0 = 7 bits data formation 1 = 8 bits data formation Stop bit 0 = 1 stop bit... - Page 76 Command (HEX): 39 39 24 50 30 31 30 35 30 42 31 30 30 Response: OK Set the setting of RS-232 baud rate= 115.2Kbps, data bits=8, stop bit=1, none parity bit into the I-7540D and the 7540D response “OK” command to mean that the configuration of RS-232 has been changed. Note: This command can only be accepted by 7540D’s port...
-
Page 77: 99$P0205Bbdsp
4.13 99$P0205BBDSP Description: Change the RS-485 configuration of the I-7540D into EEPROM Syntax: 99$P0205BBDSP 99$P0105 Command character RS-485 Baud rate Data bit 0 = 7 bits data formation 1 = 8 bits data formation Stop bit 0 = 1 stop bit... - Page 78 Command (HEX): 39 39 24 50 30 32 30 35 30 42 31 30 30 Response: OK Set the setting of RS-485 baud rate= 115.2Kbps, data bits=8, stop bit=1, none parity bit into the I-7540D and the 7540D response “OK” command to mean that the configuration of RS-485 has been changed. Note: This command can only be accepted by 7540D’s port...
-
Page 79: 99$P114Pbcc
4.14 99$P114PBCC…MM…ET Description: Change the CAN configuration of the I-7540D into EEPROM Syntax: 99$P114PBCCCCCCCCMMMMMMMMET 99$P114 Command character CAN specification 0 = 2.0A 1 = 2.0B CAN Baud rate CCCCCCCC 32 bits Acceptance Code Register (00000000~FFFFFFFF) MMMMMMMM 32 bits Acceptance Mask Register (00000000~FFFFFFFF) - Page 80 Set the setting of CAN specification=2.0A, CAN baud rate= 125 Kbps, acceptance code=00000000, acceptance mask=FFFFFFFF, disable error response, disable timestamp response into the I-7540D and the 7540D response “OK” command to mean that the configuration of CAN has been changed.
-
Page 81: 99$P1B04Ttrr
4.15 99$P1B04TTRR Description: Change the CAN Bus Timing Register of the I-7540D into EEPROM Syntax: 99$P1B04TTRR 99$P1B04 Command character Bus Timing Register 0 (00~FF) Bus Timing Register 1 (00~FF) Response: Valid Command: OK Invalid command: ERROR Example:... -
Page 82: 99#Pwid
Read the Web ID setting of the 7540D, and the 7540D responses the Web ID setting is “7540D”. Note: 1. This command can only be accepted by 7540D’s port 10000. 2. Supported by the firmware v1.05 or later. I-7540D CAN-Ethernet Gateway User’s Manual (Version 1.8, March/2021) -
Page 83: 99#Pwpw
Read the Web password setting of the 7540D, and the 7540D responses the Web password setting is “icpdas7540D”. Note: 1. This command can only be accepted by 7540D’s port 10000. Supported by the firmware v1.05 or later. I-7540D CAN-Ethernet Gateway User’s Manual (Version 1.8, March/2021) -
Page 84: 99$Pwidllxxxxx
“OK” command to mean that the configuration of Web ID data has been changed. Note: 1. This command can only be accepted by 7540D’s port 10000. Supported by the firmware v1.05 or later. I-7540D CAN-Ethernet Gateway User’s Manual (Version 1.8, March/2021) -
Page 85: 99$Pwpwllxxxxx
7540D responses “OK” command to mean that the configuration of Web ID data has been changed. Note: 1. This command can only be accepted by 7540D’s port 10000. Supported by the firmware v1.05 or later. I-7540D CAN-Ethernet Gateway User’s Manual (Version 1.8, March/2021) -
Page 86: 99#Ppc
7540D responses that enable can bus pair connection and act as a TCP server. Note: only be accepted by 7540D’s port 10000. This command can 2. Supported by the fi rmware v1.06 or later. I-7540D CAN-Ethernet Gateway User’s Manual (Version 1.8, March/2021) -
Page 87: 99#Ppip
Read the CAN bus pair connection destination IP of the 7540D, and the 7540D responses that destination IP address is “192.168.255.2”. Note: This command can only be accepted by 7540D’s port 10000. the fi Supported by rmware v1.06 or later. I-7540D CAN-Ethernet Gateway User’s Manual (Version 1.8, March/2021) -
Page 88: 99$Ppcllabc
Change the CAN bus pair connection configuration of the 7540D to “enable CAN bus pair connection” and act as a TCP client. Note: This command can only be accepted by 7540D’s port 10000. the fi Supported by rmware v1.06 or later. I-7540D CAN-Ethernet Gateway User’s Manual (Version 1.8, March/2021) -
Page 89: 99$Ppipxxx
Change the CAN bus pair connection destination IP of the 7540D to 192.168.255.2. Note: This command can only be accepted by 7540D’s port 10000. the fi Supported by rmware v1.06 or later. I-7540D CAN-Ethernet Gateway User’s Manual (Version 1.8, March/2021) -
Page 90: 99Cra
And the TX and RX LEDs will turn OFF. Example: Command (ASCII): 99CRA Command (HEX): 39 39 43 52 41 Note: This command can only be accepted by 7540D’s port 10000 the fi Supported by rmware v1.2.2 or later. I-7540D CAN-Ethernet Gateway User’s Manual (Version 1.8, March/2021) -
Page 91: General Error Codes For Commands From Port 10003
The head character of the command string is invalid. The length of the command string is invalid. The value of CAN identifier is invalid. The value of CAN data length is invalid. Reserved I-7540D CAN-Ethernet Gateway User’s Manual (Version 1.8, March/2021) -
Page 92: Vxcomm Applications
5. VxComm Applications Overview Installing the VxComm Driver Adding a I-7540D and configuring the VxComm Driver Removing a I-7540D Uninstalling the VxComm Driver Overview VxComm (Virtual Comm) Driver VxComm Utility are very easy to install and use. The first thing to do is to find the installation file in the web site. -
Page 93: Architecture
VxComm Driver creates COM port(s) and maps them to the COM port(s) of the I-7540D. The user's RS-232 client programs need only to change to the different COM port to access the serial devices that are allocated to the Internet or Ethernet network via the I-7540D. -
Page 94: Ports Mapping
Ports mapping Vxcomm Driver/Utility supports Port 1 to Port 3 in accessing COM1 to COM3 of the I-7540D. Another Port I/O is designed to access the I/O boards mounted on I-7540D, but it doesn’t use now. With the help of the... -
Page 95: Installing The Vxcomm Driver
The installation software can be obtained from the following location. https://www.icpdas.com/en/download/index.php?nation=US&kind1=& model=&kw=vxcomm Step 2: Go the where you download the installation file, and then double-click the file in Windows to execute it. I-7540D CAN-Ethernet Gateway User’s Manual (Version 1.8, March/2021) - Page 96 Select the “Yes, …” option and click the Finish button to restart your computer. Step 4: After rebooting the computer, the VxComm Utility will ask you to configure the virtual COM port(s). Please refer to the next section (5.3) for more information. I-7540D CAN-Ethernet Gateway User’s Manual (Version 1.8, March/2021)
-
Page 97: Adding An I-7540D And Configuring The Vxcomm Driver
Step 3: Before adding an I-7540D, ensure that the Check Duplicated IP and Connect to Server options are both checked. Type the IP address of the I-7540D and then click the Add Server button to add a new server. I-7540D CAN-Ethernet Gateway User’s Manual (Version 1.8, March/2021) - Page 98 Connect to Server option This option connects to the I-7540D and retrieves the name of device before adding it to the server window (left hand window). It is automatically checked by default. The following alert will be displayed if the Connect to Server option is not checked before clicking the Add Server button.
- Page 99 This option automatically sequentially assigns the ports with the available COM port numbers. Use 7188E/8000E current setting (Fixed Configuration) If using this Port Configuration function, you will not be able to dynamically change the Baud Rate and data format. I-7540D CAN-Ethernet Gateway User’s Manual (Version 1.8, March/2021)
- Page 100 Keep Alive Time (ms) field: After connecting to the μPAC-7186E, the VxComm Driver will automatically and periodically send commands to keep the I-7540D alive. The timer will be reset after each send/receive command/data success. The Keep-Alive mechanism will not work until the next timeout. The default setting of Keep-Alive time is about 7000 ms.
- Page 101 This TCP port is used to configure the Baud rate, data format, CTS/RTS control mode and Break, etc. Port7000 Port field: By default setting, the I-7540D use TCP port 9999 as the Port7000 port. This TCP port is reserved. I-7540D CAN-Ethernet Gateway User’s Manual (Version 1.8, March/2021)
- Page 102 Step 8: Click the Exit button to exit the VxComm Utility. Before exiting, the Re-starting the Driver dialog window will automatically display. Click the Re-start button to stop/start the driver. I-7540D CAN-Ethernet Gateway User’s Manual (Version 1.8, March/2021)
-
Page 103: Removing An I-7540D
Step 2: Click the server name you want to remove, and then click the Remove Server button. Step1 Step2 Step 3: The following window will be displayed, make sure of your choice, and then click the Yes button to remove it. I-7540D CAN-Ethernet Gateway User’s Manual (Version 1.8, March/2021) - Page 104 Step 4: Click the Exit button to finish this utility. I-7540D CAN-Ethernet Gateway User’s Manual (Version 1.8, March/2021)
-
Page 105: Uninstalling The Vxcomm Driver
Uninstalling the VxComm Driver Step 1: Select the "Control Panel". Step 2: Click the "Add or Remove Programs" to open the dialog. I-7540D CAN-Ethernet Gateway User’s Manual (Version 1.8, March/2021) - Page 106 Step 3: Find out the VxComm Driver, and click the “Remove” button. Step 4: Click the button “Yes” to remove the software Step 5: Finally, click the “OK” button to finish the uninstall process I-7540D CAN-Ethernet Gateway User’s Manual (Version 1.8, March/2021)
-
Page 107: Application With Piso-Can 200/400 T
6. Application with PISO-CAN 200/400 T In this chapter, we describe the I-7540D application in CAN network. On the CAN bus side, the device is the PISO-CAN200/400-T of ICP DAS. And here the I-7540D is a CAN-Ethernet gateway device. It allows users to send specific commands from It’s Ethernet port10003 to CAN bus. - Page 108 Step 2: Install the PISO-CAN200/400 PCI card. For more information, please see PISO-CAN user manual. Step 3: Setup the system of I-7540D by using the I-7540D’s utility tool. Here the parameters of I-7540D are setting as following figure. Figure 6-3: I-7540D Utility tool I-7540D CAN-Ethernet Gateway User’s Manual (Version 1.8, March/2021)
- Page 109 Step 4: Now, start to send and receive message between PC’s RS-232 port and CAN port by the I-7540D. The following figures display the sending and receiving messages t12381122334455667788 CAN card received messages Messages sent from RS-232 port by VxComm...
-
Page 110: Diagnostics And Troubleshooting
COM1 COM4 RXD1 (Real COM) (Virtual COM) TXD1 Path 2 Connect by a wire Step 2: Set COM1 of the I-7540D as virtual COM4 of the Host PC using the VxComm Utility. I-7540D CAN-Ethernet Gateway User’s Manual (Version 1.8, March/2021) - Page 111 Step 3: On the Tools menu of the MiniOS7 Utility, and then click the Send232 to open the Send232 application. Step 4: Select the COM4, and then click the Open button to open COM4 of the Host PC. I-7540D CAN-Ethernet Gateway User’s Manual (Version 1.8, March/2021)
- Page 112 The characters will be sent from COM4 of the Host PC to COM1 of the I-7540D (via Path 1), and will be immediately returned from COM1 of the I-7540D to COM4 of the Host PC (via Path 2) then displayed on the Receive text box of the Send232.
- Page 113 Step 3: Select the COM1, and then click the Open button to open COM4 of the Host PC. Step 4: Set COM1 of the I-7540D as virtual COM4 of the Host PC using the VxComm Utility. Step 5: Execute another Send232 application, and open the virtual COM4 of the Host PC.
- Page 114 Step 6: Type “COM1” in left hand window, and then click Send button. Data will be sent from COM1 of the Host PC through Path1 to COM1 of the I-7540D and will be immediately returned through Path2 to COM4 of the Host PC.
- Page 115 Example 3: External-Devices Testing Connect 7000 series modules to COM2 of the I-7540D. Set COM2 of the as virtual COM10 of the Host PC using the VxComm Utility. Thus, we can use the DCON Utility to search the 7000 series module through COM10.
- Page 116 Step 3: Click the COM Port to choose the COM port number, baud rate, and checksum. For example: COM10, 115200, 19200, 9600 and No-Checksum. (These settings depend on the settings of 7000 series module.) I-7540D CAN-Ethernet Gateway User’s Manual (Version 1.8, March/2021)
- Page 117 Step 4: Click the search icon. Step 5: If the VxComm Driver works properly, the DOCN Utility can search the module(s) connected to COM2 of the I-7540D. I-7540D CAN-Ethernet Gateway User’s Manual (Version 1.8, March/2021)
-
Page 118: Trouble Shooting
Solution 1: Check the power supply, network cable, IP address, subnet mask and gateway of the I-7540D. Problem 2: The client program still fails to open the COM port. Solution 2: Step1: Right click the My Computer icon and select the Manage option. I-7540D CAN-Ethernet Gateway User’s Manual (Version 1.8, March/2021) - Page 119 Step 2: Select the Device Manager icon from the Computer Management program. Step 3: Click Show hidden devices from the View menu I-7540D CAN-Ethernet Gateway User’s Manual (Version 1.8, March/2021)
- Page 120 Step 4: Select the Non-Plug and Play Drivers/Ynsernet item. Step 5: Right-click the mouse button on the Ynsernet item and click the Properties. I-7540D CAN-Ethernet Gateway User’s Manual (Version 1.8, March/2021)
- Page 121 Problem 3: The client programs successfully open the COM port, but fail to access the device. Solution 3: Check the power supply and wiring (RS-232: RXD, TXD; RS-485: D+, D-; GND) of the device. I-7540D CAN-Ethernet Gateway User’s Manual (Version 1.8, March/2021)
- Page 122 Right: t00150102030405<CR> If the I-7540D CAN baud rate is not the same as the CAN baud rate on the CAN network, the ER LED on the I-7540D will be flash with a constant frequency and the TX LED will solid green because the I-7540D cannot send any CAN messages to the CAN network.
Need help?
Do you have a question about the I-7540D and is the answer not in the manual?
Questions and answers