Table of Contents
Advertisement
Advertisement
Table of Contents

Related Manuals for LONGER RAY5


Summary of Contents for LONGER RAY5
- Page 1 Version 1.2...
- Page 2 Dear customer, Thank you for choosing LONGER products RAY5. Maybe you are familiar with the engraving machine or have bought a similar engraving machine before, we still highly recommend that you read this manual carefully. The installation techniques and precautions in this manual can help you avoid any unnecessary damage or frustration.
-
Page 3: Table Of Contents
Contents A. Safety Precautions ..................2 B. Product Information ..................8 Specifications ..................8 Components Introduction ..............9 Packing List ..................10 Machine assembly ................11 C. Machine Operation ..................16 Calibrating Machine ................. 16 Power Up ..................18 Touch Screen Operation ..............18 Wi-Fi Control operation .............. -
Page 4: Safety Precautions
A. Safety Precautions (1) The RAY5 engraves and cuts materials by the means of a high- energy diode laser beam. The hazards associated with a high-energy diode laser beam include the possibility of fires, generation of hazardous and/or irritating toxic fumes, but more importantly damage to eyes and skin. - Page 5 • DO NOT operate the laser without PPE protection for all persons nearby in the proximity of the RAY5. • DO NOT allow unsupervised access to the RAY5 to children. • DO NOT allow access near the RAY5 to pets.
- Page 6 NOT be considered 100% accurate and should be seen only as a warning system. During the working process of RAY5, if a flame is found, the machine will stop the laser and make a sound to indicate abnormal conditions. Please pay attention to the working status of the machine.
- Page 7 • DO NOT allow the USB cable to contact with the laser Beam. • DO NOT allow the 12v power cable to contact with the laser Beam. (6) During the engraving process of the RAY5 laser engraving machine, different materials may produce different pungent odors.
- Page 8 Fiber albeit with some fraying but this is not the case when it is coated. (9) The RAY5 has built in technology and algorithms to keep its users and the surrounding environment safe. This said it’s important to understand the RAY5 is not a toy and should be operated with care and respect.
- Page 9 12v, the minimum Amperage output should be 5 Amps. Higher amperage output Power Adapter can be used without risk of damage to your RAY5. • On inserting the power barrel into your motherboard it is possible that a small spark is visible. This is NOT hazardous to your machine and is caused by the 12v power inrush.
-
Page 10: Product Information
B. Product Information Specifications Machine Specifications Item Number RAY5 Working Area 400 x 400 mm (15.75 x 15.75 In) Z-Height Clearance 50 mm Min Engraving Speed 40 mm/min Max Engraving Speed 6000 mm/min Power Adapter Input Voltage (AC) 110-240 V, 50-60 Hz... -
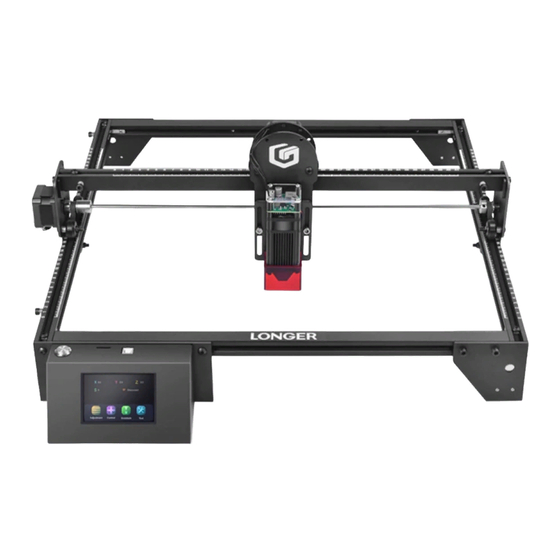
Page 11: Components Introduction
Components Introduction www.longer3d.com info@longer3d.com... -
Page 12: Packing List
Packing List www.longer3d.com info@longer3d.com... -
Page 13: Machine Assembly
Machine assembly • If you have any questions after receiving the product, please contact our customer service first. • Be cautious during assembly as some parts may have sharp edges. • Each unit of the engraving machine has been inspected and tested. - Page 14 www.longer3d.com info@longer3d.com...
- Page 15 www.longer3d.com info@longer3d.com...
- Page 16 www.longer3d.com info@longer3d.com...
- Page 17 www.longer3d.com info@longer3d.com...
-
Page 18: Machine Operation
C. Machine Operation (1) Calibrating Machine a) Place the machine on a flat table and make sure that the machine is stable and will not shake. b) Place the wood board to be engraved or cut under the laser c) Loosen the two thumb screws the front of laser head by hand. - Page 19 www.longer3d.com info@longer3d.com...
-
Page 20: Power Up
Connect the computer and the engraving machine through a USB computer (or insert a Micro SD card); d) To Turn ON your RAY5 by press the power switch (To Turn OFF your RAY5 by press the power switch once again.) (3) Touch Screen Operation RAY5 has a full-color 3.5-inch touch screen with a user-friendly user... - Page 21 b) Adjustment page 5% laser Power 50% laser Power Turnoff laser c) Control page Set zero position Unlock axis Home to zero Move distance Move X Y axis Move speed d) Engraving page www.longer3d.com info@longer3d.com...
- Page 22 e) Ready to engraving/cutting page Set zero position Start to engrave Work frame f) Engraving/cutting working page Working speed rate g) Set speed page 10% step 1% step Plus Minus Cancel www.longer3d.com info@longer3d.com...
-
Page 23: Wi-Fi Control Operation
Wi-Fi Control operation a) Tap tool icon on the home page b) Tap Wi-Fi icon on the top right corner of tool page Board: LGT RAY V1.2 Firmware: LGT RAY V1.1 c) Select Wi-Fi name on Wi-Fi list page d) Enter password and waiting for connect to the Wi-Fi you select. - Page 24 address) Wi-Fi name IP address Signal strength f) Enter the IP address in the browser of mobile phone or computer, then the control interface will pop up. g) Click SD File tag, it will change to SD file page. www.longer3d.com info@longer3d.com...
- Page 25 h) Upload .gcode/.nc files generated by “LaserGRBL” or “LightBurn” software(The two software are introduced in the following sections). Then go and play! www.longer3d.com info@longer3d.com...
-
Page 26: Lasergrbl Software Operation
Find LaserGRBL software in attached SD card(path: /software), Or download from the link: https://lasergrbl.com/download/ b) After installing laserGRBL, power up the RAY5, press the Power Switch button, and connect the laser engraver and computer via USB cable. c) Open LaserGRBL, select correct port(depend on your PC), baud rate: 115200. - Page 27 Usage a) Main Interface b) Open file and set parameters www.longer3d.com info@longer3d.com...
- Page 28 c) Start to engrave Place a board under the laser, then calibrate the laser. Move the laser head to the place you want. iii. Click “Frame” button to check the work frame. Click button to start engraving. Or you can save gcode file to SD card by click “File” >> “Quick Save”...
-
Page 29: Lightburn Software Operation
Find Lightburn software in SD card(path: /software) came with the package. Or just download from the link: https://lightburnsoftware.com/download/ b) After installing Lightburn, power up the RAY5, press the Power Switch button, and connect the laser engraver and computer via USB cable. - Page 30 Device Wizard” for help you setup machine. d) Select GRBL form the list, then click “Next” button e) Select Serial/USB and press “Next” button. f) Fill your Device Name, X, Y axis, then click “Enter” button Name: RAY5 X = 400 Y = 400 www.longer3d.com...
- Page 31 Select “Front Left” as your Origin X,Y and activate “Auto ‘Home’”, then click “Next” button. h) Select RAY5 and press Make Default. Your RAY5 is ready to be used in LightBurn software. Usage a) Main interface www.longer3d.com info@longer3d.com...
- Page 32 Select correct port(depends on your PC), then the RAY5 is connected to the computer. c) Click Menu “File” >> “Import image from disk”. Or just use draw tool on left column to make your pattern. www.longer3d.com info@longer3d.com...
- Page 33 d) set the name, speed, maximum power, mode, and other parameters in the cutting/layer; (engraving function and cutting function are only different in speed, power. Normally, the cutting speed parameter is slower) e) After placing the board under the laser, click Frame to check the laser path whether is completely inside of the board.
-
Page 34: Firmware Upgrading
More help information about lightburn, please refer to the link: https://lightburnsoftware.com/pages/tutorials Firmware Upgrading The Firmware of RAY5 continuously update for fixing bugs and add new features. software(“Flash Download Tools”) from a) Find the tool attached SD card(path: /firmware), or download form the link: https://www.espressif.com/en/support/download... - Page 35 SPI SPEED: 80 MHz SPI MODE: DOUT iii. Connect PC and RAY5 via USB cable. Select correct port. If the port cannot be found, please check whether the CH340 driver is installed. Select a baud rate greater than 115200 (the higher the baud rate, the faster the transmission speed, but the greater the chance of transmission error).
- Page 36 The completing icon shows below: www.longer3d.com info@longer3d.com...
- Page 37 Restart the RAY5, check the firmware version in touch screen. Everything done, Have fun! www.longer3d.com info@longer3d.com...
-
Page 38: Faq Manual
D. FAQ Manual Question1: Are there recommended engraving and cutting parameters? The common materials engraving and cutting parameters for RAY5 as the image below: If there is no information you need. Please wait for our updates in the future. Materials... -
Page 39: Question2: The Engraved Pattern Appear Jittery, Or Not Closed Circles
Question3: How about the warranty policy? For LONGER official stores and LONGER designated distributors, RAY5 has a One-year International Limited Manufacturer warranty from the date of purchase of RAY5. Please note the following warranty terms. One-year International Limited Manufacturer Warranty means that LONGER will provide the following free warranty services: •... - Page 40 Some parts of the RAY5 inevitably “get used up” over time. For these parts, specific conditions apply, unless failure has occurred due to a defect in materials or workmanship.
- Page 41 Note: · The warranty does not cover normal, expected wear and tear caused by using the RAY5 for its intended purpose. · In case we have provided a free replacement part, the warranty does not reset. The original warranty period still applies.
- Page 42 · Any damage caused by long-term lack of maintenance. · Using the RAY5 in improper conditions (temperature, dustiness...). · Upgrades, modifications, or add-ons that are not officially supported. Rest assured that our Technical Support Team is always available to help you out under any circumstances, even if the issue is not covered under warranty.
- Page 43 Thank you for purchasing LONGER products! Under normal usage and service, the products and its parts have a warranty period up to one year. If you encounter any problems, please send an email to support@ longer3d.com to report any issue with LONGER products.
Need help?
Do you have a question about the RAY5 and is the answer not in the manual?
Questions and answers
I lost my focusing column on my longer ray 5 10w what is the height of the column page 19 in manual
The focusing plate for the LONGER RAY5 10W is 3.8mm thick. This plate is used to set the correct focus by lowering the acrylic guard onto it and tightening the screws.
This answer is automatically generated
Longer ray 5 10W w trakcie wycinania zaczął hałasować jakby uderzał o krańcowe. pole robocze dobrze ustawione, dodam że mam go 5 miesięcy i nic takiego się nie działo można było kadrować i wracał do punktu początkowego.
The screeching noise on the LONGER RAY5 when moving along the X axis may be caused by mechanical issues such as misaligned or dry rails, loose belts, or obstructions on the axis. It is not related to the laser power or cutting settings, and can happen even if the working area is properly configured.
This answer is automatically generated
@Mr. Anderson Oś X czysta paski naciągnięte rama podokręcana, raczej podejrzewam awarię silnika napędzający ramie
So I have a new problem. I went into Lightburn as suggested to try to frame my picture that way but my computer is not connecting to the Laser. I have attatched a picture of the message I am getting.
To fix the connection issue between your LONGER RAY5 laser and your computer while using LightBurn, follow these steps:
1. Check COM Port: In LightBurn, go to the Laser window and ensure the correct COM port (e.g., COM4) is selected. This should match the port your laser is using in Device Manager.
2. Connect to Laser: After selecting the correct port, click "Connect" in LightBurn.
3. Check Console Output: Open the Console window in LightBurn to see if any messages confirm the connection.
4. Update or Reinstall Driver: If the laser still won’t connect, the serial driver may be corrupted. Try reinstalling the USB driver for your laser.
5. Verify Device Settings: Go to Edit > Device Settings in LightBurn and confirm the configuration matches your laser.
6. Avoid Conflicts: Make sure no other software (like LaserGRBL) is running and using the same COM port.
7. Reboot and Retry: Restart your computer and laser, then try connecting again in LightBurn.
If these steps do not work, the issue is likely with the configuration or driver on your computer.
This answer is automatically generated
When I try to frame what I am doing with my Longer ray5 40 watt using the sd card it goes back to the opening screen and does not let me frame it? Has anyone else had this issue
The Longer RAY5 may return to the opening screen when trying to frame using the SD card if the file name on the card contains special characters. The printer only recognizes file names with English letters, underscores, and spaces. To fix this, ensure all Gcode files have proper names, are saved in the root directory of the SD card, and the card is used only for Gcode files.
This answer is automatically generated
How do I set hard limits so my machine dont hit the sides and make loud noised?
To set hard limits on the LONGER RAY5 and prevent it from hitting the sides, you need to update the firmware to recognize the limit switch. Follow these steps:
1. Download the firmware package from LONGER’s website. The required file is ray5-FW-V1.2.4.1.
2. Install the firmware on the motherboard to enable limit switch detection.
3. Ensure the limit switch kit is properly installed.
4. Adjust homing and travel speeds if necessary to prevent collisions.
This will allow the firmware to recognize the limit switch and stop movement before hitting the frame.
This answer is automatically generated
My Longer Ray 5 has quit engraving. There appears to be no laser. The machine has less than 5 hours engraving time.
The Longer Ray 5 is not engraving and has no laser output when using LightBurn, but it works with LaserGRBL. This suggests a configuration issue in LightBurn. Possible reasons include:
1. Incorrect Laser Control Settings – LightBurn may not be sending the correct commands to turn on the laser.
2. Power Settings in LightBurn – The power level may be set too low or incorrectly configured.
3. Firmware Compatibility – The firmware version may not be fully compatible with LightBurn settings.
4. Connection Issues – The software may not be properly communicating with the laser.
To resolve this, check the LightBurn settings, ensure the correct device profile is selected, and verify laser power and control settings.
This answer is automatically generated