Table of Contents
Advertisement
Quick Links
Quick Start Guide
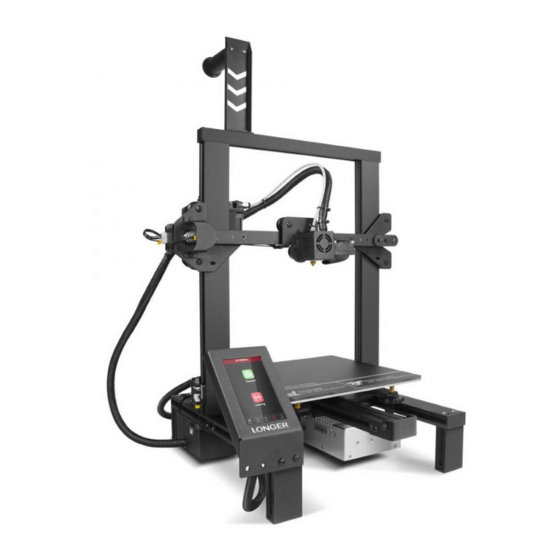
LONGER LK 4 PRO 3D FDM PRINTER
Thank you for choosing our products.
Please read this manual carefully before use.
Please reference more details on digital manual in TF card about the operation of printer
and installation of slicing software.
Please join our Facebook Group: Longer 3D Official Group
Email: Support@longer3d.com
If you have any question, please feel free to contact us as above.
*Copyright © Shenzhen Longer 3D Technology Co.,Ltd. All Rights Reserved
PACKIN G L IS T
Gantry
Z-axis motor
Filament holder
and coupler
TF card
Card reader
Screw rod
PO WER SW I T CH
Use the wrench to toggle the switch to the
RIGHT local voltage Before powered on.
Please check the RIGHT voltage to avoid to
burn down printer.
Touch screen
X-axis beam and frame base
Z-axis limited switch
Scraper
Power cable
Wrench
Cable tie
M5*20
M4*16 M5*6
� .
The working voltage is AC 115V or 230V. Please switch to the right input voltage on the
side of the printer to meet with local voltage. (Default Voltage is AC 230V).
� .
During printing, the temperature of nozzle will reach up to 250 ° C. To ensure your safety,
do not touch the moving parts or the high temperature nozzle kits when printer is printing.
� .
We suggest to turn off the printer for 1-3 hours if the printer is printing for more than 96
www.longer3d.com
hours continutely
� .
Recommend the best environment is temperature at 25 ° C and htumidity is 20% ~ 50%.
1
2
3
4
5
Filament holder
1
Extruder
2
Hot end
3
Hot bed
4
1
Test filament
Allen wrench
2
Install the motor
AT T EN T I O N
PR I N T ER I N TR O D U C T I O N
10
6
Touch screen
X-axis motor
5
9
Power supply
X-axis limited switch
6
10
E filament detector
Y-axis motor
7
11
E extrusion motor
Y-axis limited switch
8
12
IN STA L LAT I ON ST EPS
Preparation:
Gantry, X-axis beam and frame base
Preparation:
Coupler, motors and screws
7
8
9
11 12
13 14
Z-axis motor
13
Z-axis limited switch
14
Follow the direction of arrow and put the
gantry frame through the X-axis beam
carefully. Note: during installation,Do not
to tear the cables. After assembling, the
cables should be put behind.
FINISHED
Note: the frame with holes is on the left
2XM4*16
FINISHED
Advertisement
Table of Contents

Subscribe to Our Youtube Channel
Related Manuals for LONGER LK 4 PRO


Summary of Contents for LONGER LK 4 PRO
- Page 1 E extrusion motor Y-axis limited switch If you have any question, please feel free to contact us as above. *Copyright © Shenzhen Longer 3D Technology Co.,Ltd. All Rights Reserved PACKIN G L IS T IN STA L LAT I ON ST EPS...
- Page 2 Try to keep the nozzle and the platform at a proper distance. 1. Run the slicer of "LONGER 3D Slicer". 2. Modify printing parameters, import model file -> edit model -> export as Gcode file...
Need help?
Do you have a question about the LK 4 PRO and is the answer not in the manual?
Questions and answers