Advertisement
Quick Links
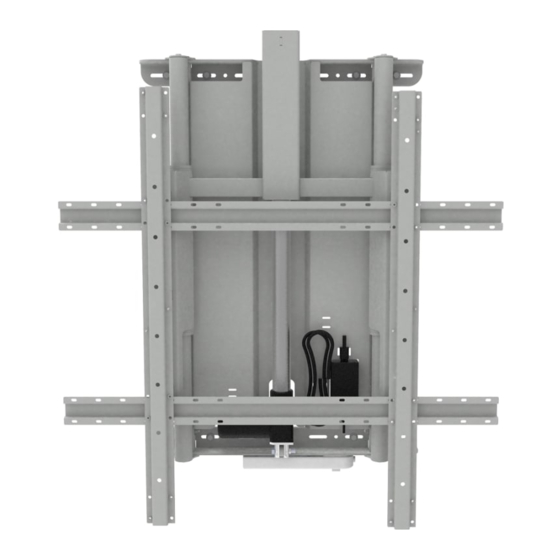
Height Adjustable Wall Mount - Wood Stud Wall Mounting Kit
HAWM-AC1
WARNING
NOTE:
Wall mounting hardware is not included.
Installer must supply wall mounting hardware as specified in this guide.
The following instructions are for mounting to wood stud walls. DO NOT mount to steel stud wall.
For concrete or cinder block walls please follow the assembly guide included with the HAWM.
Please Recycle
Assembly Guide
HAWM -AC1_2021_A
Check out our other products online at
www.copernicused.com
This product must be assembled by a qualified installer.
In its unassembled state, small parts present a hazard.
To be used under direct supervision of an adult.
Version A - Released August 26, 2021 - Copernicus Educational Products Inc.
For assistance, please contact us:
1-800-267-8494
Email info@copernicused.com
Have your packing slip ready for reference
Shown with SMART MX265
Flat Panel (sold separately)
Advertisement

Related Manuals for Copernicus HAWM-AC1


Summary of Contents for Copernicus HAWM-AC1
- Page 1 The following instructions are for mounting to wood stud walls. DO NOT mount to steel stud wall. For concrete or cinder block walls please follow the assembly guide included with the HAWM. Shown with SMART MX265 Flat Panel (sold separately) Please Recycle Version A - Released August 26, 2021 - Copernicus Educational Products Inc.
- Page 2 Lifetime easy. Please visit www.copernicused.com/warranty and complete the form within 10 business days from product Frame Warranty assembly. By registering your product, you will be entered into a draw to win Copernicus product. Make a Warranty Claim Lifetime We offer a Lifetime Warranty on almost everything we make. Please call 1-800-267-8494 or email info@copernicused.com to start your warranty claim.
- Page 3 This Wood Stud Mounting kit must be fastened to a wall constructed of wood 2x4 studs(1.5" x 3.5" actual dimensions or larger) and covered with drywall that is up to 5/8" thick. Save These Instructions! Version A - Released August 26, 2021 - Copernicus Educational Products Inc.
- Page 4 Power Strip Specifications strip or use an extension cord. Unplug when not in use. Turn off power strip before unplugging. Read the electrical specifications of any electronic equipment you are using with your Copernicus products. Electronic Failure to read these specifications and follow their instructions could result in damage to your equipment Equipment or personal injury.
- Page 5 Shear - 200lbs (91kg) Tension - 150lbs (68kg) Hardware Actual Size 1/4-20 x 2” Screw (43008) 1/4-20 x 3/4” Screw (430039) 1/4-20 Lock Nut (430101) 3/4” Flat Washer (430192) Version A - Released August 26, 2021 - Copernicus Educational Products Inc.
-
Page 6: Product Specifications
Do NOT mount the HAWM (with Wood Stud Mounting Kit) over a marker ledge that is deeper than 5” (127mm) 5” (127mm) Max Marker Ledge Depth: DO NOT install on steel studs. Version A - Released August 26, 2021 - Copernicus Educational Products Inc. - Page 7 Prepare HAWM for Wood Stud Mounting Kit Pry black plastic caps from bottom ONLY of HAWM Main Frame and recycle Bottom Thread Levelling Feet all the way into Support Legs Version A - Released August 26, 2021 - Copernicus Educational Products Inc.
- Page 8 Insert Support Legs into square holes on bottom of Main Frame and align holes HEIGHT POSITION A HEIGHT POSITION B HEIGHT POSITION C Fasten Support Legs to Main Frame Always use two holes per leg when fastening legs to Main Frame Version A - Released August 26, 2021 - Copernicus Educational Products Inc.
- Page 9 Note the orientation of the Wall Brackets below (8x) WALL BRACKET (8x) ORIENTATION - TOP: (8x) (8x) Tab is pointing up WALL BRACKET ORIENTATION - BOTTOM: Tab is pointing down Version A - Released August 26, 2021 - Copernicus Educational Products Inc.
-
Page 10: Select Mounting Location
Do NOT mount the HAWM (with Wood Stud Mounting Kit) over a marker ledge that 5” (12.7cm) is deeper than DO NOT install on steel studs. MAX 5” (127mm) Version A - Released August 26, 2021 - Copernicus Educational Products Inc. - Page 11 2. Level the HAWM in the mounting location before fastening to wall Align with wood stud center marks MAX 60” (152.4cm) 2-Person Task Trace mounting holes (8x) Version A - Released August 26, 2021 - Copernicus Educational Products Inc.
- Page 12 Drill 3/32” pilot hole for 1/4” lag screw (8x) Once the HAWM is fastened to the wall, return to the main assembly guide and complete steps 12 -14 to complete the assembly. Version A - Released August 26, 2021 - Copernicus Educational Products Inc.
Need help?
Do you have a question about the HAWM-AC1 and is the answer not in the manual?
Questions and answers