
Subscribe to Our Youtube Channel
Related Manuals for Binary B-120-HDMATRIX-4x4


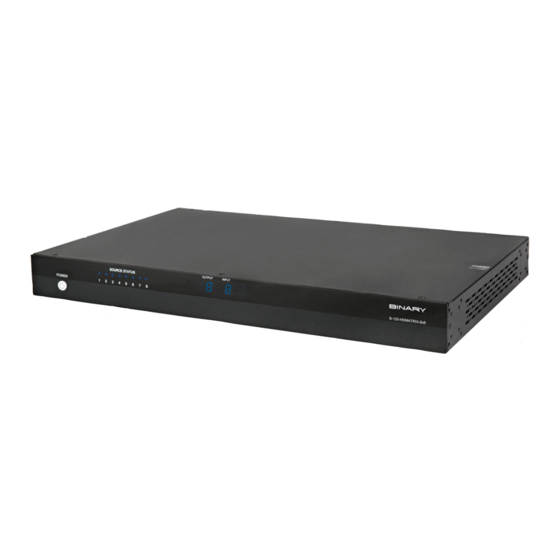
Summary of Contents for Binary B-120-HDMATRIX-4x4
- Page 1 HDMI MATRIX SWITCHER B-120-HDMATRIX-4x4/8x8 CONFIGURATION UTILITY MANUAL Source | M (HDMI Ou...
- Page 2 IMPORTANT SAFETY INSTRUCTIONS To reduce the risk of fire or electric shock, read and follow all instructions and warnings in this manual. Keep this manual for future reference. 1. Do not expose this apparatus to rain or moisture. Do not expose this equipment to dripping or splashing, and ensure that no objects filled with liquids, such as vases, are placed on the equipment.
-
Page 3: Table Of Contents
13.5. Front Panel Power Button Active ..............................13 14. Input/Output Operation ....................................13 14.1. Connection Status ....................................13 14.2. Input / Output Control ...................................14 15. Appendix: Configuration Utility Home Screens ............................14 15.1. B-120-HDMATRIX-4x4 ..................................14 15.2. B-120-HDMATRIX-8x8 ..................................15 16. Contacting Tech Support ....................................15 17. Warranty ..........................................15... -
Page 4: Overview
B-120-HDMATRIX-230-4x4 • B-120-HDMATRIX-230-8x8 3. PACKAGE CONTENTS Before you begin, make sure the following items are available and ready for use: • B-120-HDMATRIX-4x4/8x8 • B-120-HDMATRIX Installation Manual • PC running Windows XP or newer Windows OS • Serial Cable to connect the B-120-HDMATRIX to the PC •... -
Page 5: Downloading The Utility
• C:\My Documents\Binary\B-120-HDMATRIX\ConfigurationUtility 6. COMMUNICATING WITH THE B-120-HDMATRIX 6.1. Serial Connection The B-120-HDMATRIX and PC communicate over DB9 straight-through serial cable. Before connecting, verify that the pin configuration of the cable matches the diagram below. -
Page 6: Installation & Setup
7. INSTALLATION & SETUP 7.1. Basic Installation Diagram Complete the basic installation section to set up the matrix switcher for media distribution before completing any other setup. Use this diagram for reference during basic installation of the matrix switcher, sources, displays and wiring. 7.2. -
Page 7: Edid Configuration
8. EDID CONFIGURATION The purpose of EDID Configuration is to set the EDID for each input appropriately. This EDID will be passed to the connected source input. Unless the source has a fixed audio or video format, it will transmit content at the best audio and video formats that do not exceed the capabilities specified in the EDID. -
Page 8: Display Edid For All Inputs / Outputs
1. Click “READ” to display the information. 2. Click “SAVE” to save the file. 3. Browse to the location of your choice to save the configuration file. Suggested Folder Location: C:\My Documents\Binary\B-120-HDMATRIX\EDIDConfigurations FIGURE 3 4. Create a name for the file that clearly describes the contents. -
Page 9: Learn Edid To Input
8.4. Learn EDID to Input The following examples are for the B-120-HDMATRIX-8x8, but apply to all models. EDIDs are learned into the B-120-HDMATRIX via the HDMI and HDBaseT output connections. If you are learning from a connected display, the steps below can be followed to learn EDIDs from a display into the B-120-HDMATRIX: 1. -
Page 10: Auto Edid Learn
8.5. Auto EDID Learn The B-120-HDMATRIX includes an automatic function that will determine the EDID with the best quality video that will work with all connected displays. If all sources (Inputs) are to be viewable on all Displays (HDMI and HDBaseT Outputs), this function provides an easy mechanism for determining the EDIDs to store in all Inputs. -
Page 11: Firmware Update
10. FIRMWARE UPDATE The process to update firmware varies slightly between the 2 models; however the Main firmeware file type loaded is the same. Instructions for updating Firmware on a matrix are detailed on the Firmware Update Page for that product. Before beginning the Firmware Update process download and unzip the latest firmware update from the B-120-HDMATRIX product page for the matrix to be updated and store in a location you will remember on your PC. -
Page 12: Other Settings
Select to restore factory default settings for Inputs/Outputs Factory Values: EDIDs for all Inputs: 1080P60, 2 Channel Audio I/O: All Outputs set to Input 1 13. OTHER SETTINGS During the installation of a matrix, there are settings that provide Advanced Configuration not available via the remote control. -
Page 13: Matrix Control From Room Enable
will prevent the matrix from being powered OFF which may disrupt matrix control from an control system. 14. INPUT/OUTPUT OPERATION The operating status is displayed and control of inputs and outputs is performed with the grid on the left side of the screen. -
Page 14: Input / Output Control
4. Select the Input number in the top row. All boxes under that input will turn green. 15. APPENDIX: CONFIGURATION UTILITY HOME SCREENS The home screen for each version of the utility is provided in this section for reference. 15.1. B-120-HDMATRIX-4x4 FIGURE 8... -
Page 15: B-120-Hdmatrix8X8
17. WARRANTY 2 Year Limited Warranty This Binary product has a 2-Year limited warranty. This warranty includes parts and labor repairs on all components found to be defective in material or workmanship under normal conditions of use. This warranty shall not apply to products that have been abused, modified or disassembled. Products to be repaired under this warranty must be returned to SnapAV or a designated service center with prior notification and an assigned return authorization number (RA).. - Page 16 ® Rev: 151217-1615...
Need help?
Do you have a question about the B-120-HDMATRIX-4x4 and is the answer not in the manual?
Questions and answers