Table of Contents
Advertisement
Quick Links
Advertisement
Table of Contents

Subscribe to Our Youtube Channel
Related Manuals for Binary 120 Series


Summary of Contents for Binary 120 Series
- Page 1 HDMI MATRIX SWITCHER B-120-HDMATRIX-4x4 INSTALLATION MANUAL Source | M (HDMI Ou...
- Page 2 IMPORTANT SAFETY INSTRUCTIONS To reduce the risk of fire or electric shock, read and follow all instructions and warnings in this manual. Keep this manual for future reference. 1. Do not expose this apparatus to rain or moisture. Do not expose this equipment to dripping or splashing, and ensure that no objects filled with liquids, such as vases, are placed on the equipment.
-
Page 3: Table Of Contents
CONTENTS 1. Product Overview ........................................4 2. Features ............................................4 3. Package Contents ........................................4 4. Recommended for Installation .................................... 5 5. Device Layout ..........................................5 5.1. Front Panel of the B-120-HDMATRIX-4x4 Switcher ........................5 5.2. Rear Panel of the B-120-HDMATRIX-4x4 Switcher ........................6 6. -
Page 4: Product Overview
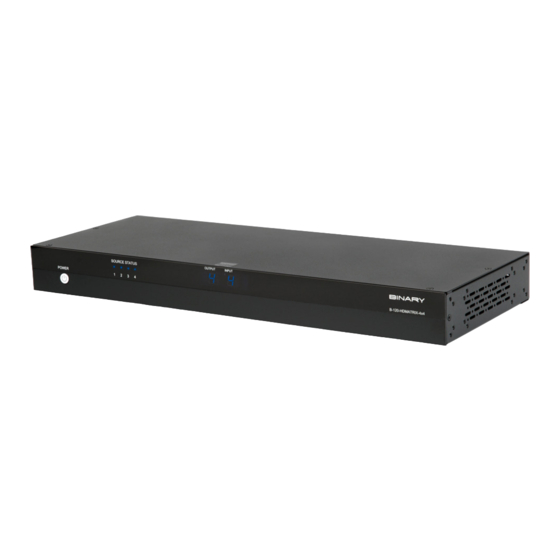
1. PRODUCT OVERVIEW Welcome to Binary™. This product is engineered to provide years of exceptional reliability. We appreciate your business, and we stand committed to providing our customers with the highest degree of quality and service in the industry. The B-120-HDMATRIX-4x4 is a state-of-the-art HDMI matrix switcher with HDMI outputs. It provides true matrix routing for HDMI signals. -
Page 5: Recommended For Installation
4. RECOMMENDED FOR INSTALLATION • Phillips screwdriver (for rack ear attachment) • Binary high-speed HDMI cables to connect sources to B-120-HDMATRIX-4x4 HDMI inputs • Control system to control operation of B-120-HDMATRIX-4x4 • Windows PC with Configuration Utility installed and RS-232 adapter •... -
Page 6: Rear Panel Of The B-120-Hdmatrix-4X4 Switcher
5.2. Rear Panel of the B-120-HDMATRIX-4x4 Switcher FIGURE 2: B-120-HDMATRIX-4x4 Switcher Layout (Rear View) A. Ethernet Port RJ45 port for connecting an ethernet Cat5e/6 cable for IP control of the B-120-HDMATRIX-4x4 B. RS-232 control port (DB9) To communicate with control system or Windows PC for serial control of matrix C. -
Page 7: Basic Instructions
6.2. Basic Instructions These are basic steps that must be taken to connect equipment to the inputs and outputs of the matrix switcher and configure the system for use. See the sections listed for full information on completing each step. 1. -
Page 8: Switcher Location And Placement
6.4. Switcher Location and Placement Binary matrix switchers are designed to deliver unsurpassed technology with superior performance. However, where you install the switcher could greatly affect the performance of the system, and the life of the unit. Here are some guidelines to follow when installing a B-120-HDMATRIX-4x4 switcher. -
Page 9: Rs-232 Control
6.7.1. RS-232 Control To control the B-120-HDMATRIX-4x4 with RS-232, the devices must connect using the correct pin configuration for the control system in use. The matrix switcher receives control data on pin 2 (RxD – Data Receive) and transmits control data on pin 3 (TxD-Data Transmit). -
Page 10: Edid Configuration
7. EDID CONFIGURATION The displays used within an installation usually vary from room to room, and some may not support all resolutions available from a source. It is necessary to make sure sources will provide a video and audio format compatible with all connected displays programmed to use them. -
Page 11: How To Configure Auto Edid
7.3.1. How to Configure Auto EDID To set up Auto EDID configuration, first make sure that all displays are powered on and connected to the matrix switcher. Then, press the following remote buttons in this order. Be sure to press each button within 10 seconds of the previous button-press to prevent the command from resetting. -
Page 12: How To Set Embedded Edid For A Single Input
7.4.2. How to Set Embedded EDID for a Single Input Example: Input =1 Embedded EDID=4 Display Readout (Example) 1. Press DEFAULT 2. Press Number Key (1-4) to select one Embedded EDID 3. Press INPUT 4. Press Number Key (1-4) to select the Input to which the EDID is applied 5. -
Page 13: How To Learn Edid To All Input
7.5.2. How to Learn EDID to All Input Example: Input=All EDID Learned from Output 4 Display Readout (Example) 1. Press LEARN L.-. 2. Press OUTPUT 3. Press Number Key (1-4) to select the Output the EDID is learned from 4. Press ENTER --(success) FF (fail) 7.6. -
Page 14: Matrix Control From Room Enable
9. FIRMWARE UPDATE Binary™ may occasionally release new firmware for theB-120-HDMATRIX-4x4 to address new standards and technology. It will never be necessary to perform an update to an existing, correctly functioning system, but during installation or service, it is recommended to check the installed version to be sure it is the newest available. -
Page 15: Ir Remote
10.1. IR Remote This section describes the correct button-push sequences to perform regular operations with the IR remote. The ENTER key must be pressed within 10 seconds of the last command in order to be processed. POWER Function Power on the matrix switcher Enter standby mode OUTPUT Number Keys... -
Page 16: Turn Off (Mute) Outputs
10.1.2. Turn Off (Mute) Outputs Mute one Output Example: Output=1 Display Readout (Example) 1. Press OUTPUT 2. Press Number Key (1-4) to select Output 3. Press OUTPUT OFF 4. Press ENTER Mute All Outputs Display Readout (Example) 1. Press OUTPUT 2. -
Page 17: Troubleshooting
Use the System Layout chart on the next page to record a description of each part of the system. If a problem cannot be solved using the methods listed here, fill out the System Layout Chart as completely as possible and contact Binary™ Tech Support for assistance at 866.838.5052. 11.1. General Troubleshooting Guidelines •... -
Page 18: Audio Issues
11.4. Audio Issues If a display on an output using 2-channel stereo audio is switched to an input with an EDID set to surround sound audio format, audio at the display speakers may be garbled, missing pieces of the audio track, or muted altogether. This symptom indicates that the display cannot down-convert the audio stream from the source. -
Page 19: Specifications
13. SPECIFICATIONS TECHNICAL HDMI Compliance HDMI 3D HDCP Compliance Video Bandwidth 6.75Gbps Input TMDS Signal 1.2 Volts (peak-to-peak) Input DDC Signal 5 Volts (peak-to-peak, TTL) ESD Protection (1) Human body model — ±15kV (air-gap discharge) & ±8kV (contact discharge) (2) Core chipset —... -
Page 20: Contacting Tech Support
15. WARRANTY 2-Year Limited Warranty Binary™ products have a 2-Year Limited Warranty. This warranty includes parts and labor repairs on all components found to be defective in material or workmanship under normal conditions of use. This warranty shall not apply to products that have been abused, modified, or disassembled. Products to be repaired under this warranty must be returned to a designated service center with an assigned return authorization (RA) number.
Need help?
Do you have a question about the 120 Series and is the answer not in the manual?
Questions and answers