Table of Contents
Advertisement
Advertisement
Table of Contents

Related Manuals for CEFLA NewTom VGi evo


Summary of Contents for CEFLA NewTom VGi evo
- Page 1 97050725 Rev. 6 05.02.2017...
- Page 2 This document is provided as a consultation manual intended for the device technicians. CEFLA s.c. follows a policy based on the constant development and update of the product. For this reason, it reserves the right to change the content of this manual without prior notice.
- Page 3 Adding of a new memory expansion, a new hardware on the connection bus, a printer, the replacement of the graphic display interface represents an important modification. Including the operative system and the applications already installed upon medical device delivery. Automatic updates of the operative system, changes to network connection parameters, modification and/or addition and/or removal of interface software with hardware (device driver) and/or services (e.g.
-
Page 4: Table Of Contents
SUMMARY ABOUT THIS MANUAL .......................... 1-1 .............................. 1-1 ONTENTS ............................1-1 TRUCTURE ........................... 1-1 TTACHED DOCUMENTS ......................1-2 ONVENTIONS USED IN THIS MANUAL ............................1-2 YPHOGRAPHY SAFETY INFORMATIONS ..........................2-1 ............................ 2-1 ENERAL SAFETY ..........................2-2 LECTRICAL SAFETY 2.2.1 Input power connection ........................2-4 ........................ - Page 5 ..........................9-24 ASER VOLTAGE ............................9-25 ONSOLLE ............................9-26 AILY HECK BOARDS LAYOUT ........................... 10-1 ............................ 10-1 ONTROL ............................10-3 NVERTER TROUBLESHOOTING ..........................11-1 NNT L NNT 8.0) .................. 11-2 OG ERROR VIEWER ONLY FROM ..........................11-3 HANTOM ANALYSIS EXTRANET SITE ............................. 12-1...
-
Page 6: About This Manual
This manual is intended only for trained personnel recognized by the manufacturer of the “NewTom VGi evo” device. Before servicing the “Newtom VGi evo” device, be sure to read and understand all the information under Chapter 2 “Safety information” and Chapter 3 “General information”. -
Page 7: Conventions Used In This Manual
If you must press two or more keys simultaneously, the key names are linked with a plus sign (+) Example: <Ctrl+Alt+D> Command Means that you must type the command exactly as shown, then supply the required item or value enclosed in brackets. NewTom VGi evo – Service Manual rev 6... -
Page 8: Safety Informations
To avoid fire or explosion, do not operate this device in an explosive environment or near flammable anesthetics. After service, reinstall all safety shields, guards, labels, and ground wires. Replace any safety device that is worn or defective. NewTom VGi evo – Service Manual rev 6... -
Page 9: Electrical Safety
Electrical safety Observe the following rules when working on electrical equipment. WARNING: The “Newtom VGi evo” is an equipment, containing high voltage devices and must be opened only by qualified personnel, authorized by CEFLA s.c. WARNING: Use only approved tools and test equipment. - Page 10 Do not under any circumstances remove the ground wire from any power plug. Do not service the following parts with the power on when they are removed from their normal operating places in a machine: X-Ray source X-Ray Detector All the electronic boards NewTom VGi evo – Service Manual rev 6...
-
Page 11: Input Power Connection
Check the power cord for: a) A third-wire ground connector in good condition. b) The power cord should be the appropriate type. Insulation must not be frayed or worn. Remove the cover. NewTom VGi evo – Service Manual rev 6... -
Page 12: Handling Electrostatic Discharge-Sensitive Devices
ESD damage. Grounding requirements Electrical grounding of the machine and computer is required for operator safety and correct system function. Proper grounding of the electrical outlet can verified by a certified electrician. NewTom VGi evo – Service Manual rev 6... -
Page 13: X-Ray Warnings
WARNING: In the “NewTom VGi evo” an X-Ray source is present. Each action, which causes the switching on of the NewTom 5G, must be performed by qualified personnel, trained on the dangers and risks connected with X-Rays for people. -
Page 14: General Information
Symbols on the package The following table illustrates the symbols used for the shipment of the equipment: Symbol Meaning FRAGILE THIS WAY UP KEEP AWAY FROM RAIN DO NOT STACK TEMPERATURE LIMITS NewTom VGi evo – Service Manual rev 6... -
Page 15: Symbols On The Labels
IEC 60417-5841 Defibrillation-proof type B applied part ISO 361 Ionizing radiations Directive WEEE - Waste from Electrical and Electronic 2002/96/CE Equipment Symbol Directive 93/42/CEE CE Mark EN 980:2008 Serial Number NewTom VGi evo – Service Manual rev 6... -
Page 16: Enabling The Service Level
To open the “General Setting” window proceed as following: Open the software and press <ALT + F10>. In the “Insert Password” window that will appear type “336699” and select the “OK” button. The “General Setting” window will appear. NewTom VGi evo – Service Manual rev 6... -
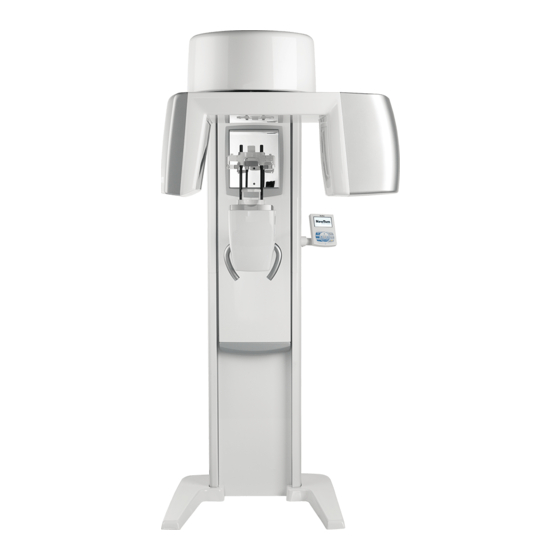
Page 17: System Overview
______________________________________________________________________________________ 4 System overview The “NewTom VGi evo” is a cone beam computed tomography x-ray system. It is intended for diagnostic use obtaining geometric information and radiologic density from two-dimensional and three- dimensional images of objects in the examined area. -
Page 18: Cables
The power supply cable is already connected inside the control box, but needs to be connected to the main power of the installation site by the installer. ATTENTION: The usage of accessories and cables different from the expected ones can results in a decay of the electromagnetic compatibility of the device! NewTom VGi evo – Service Manual rev 6... -
Page 19: Installating The System
Installating the system ______________________________________________________________________________________ 5 Installating the system For a detailed description of the installation procedure, refer to the attached document “VGi evo -Installation Manual” COD. 97070043. NewTom VGi evo – Service Manual rev 6... -
Page 20: Console Preparation
The computer must comply with the specifications described in the “Workstation Setup” annex document. For instructions, about settings and installation on Main or Secondary Workstations (workstations that are not directly connected with the machine) refer to document “97060818 - Workstation Setup Annex”. NewTom VGi evo – Service Manual rev 6... -
Page 21: Networking
Working in a workgroup means that different workstations have to share the same archives. In the case of “NewTom VGi evo” these data include the documents created from the software (RawData, Volumetric data, Studies, 2D images collections and Reports), the patients’ database and other files used by the application. -
Page 22: Calibrating The System
8) Calculate the total excursion along the X axes and enter it in the corresponding field. 9) Move the plate all the way to the FRONT by pressing the corresponding button on the console (see picture on the side). NewTom VGi evo – Service Manual rev 6... - Page 23 17) Write down the current position with reference to the horizontal ruler. 18) Calculate the total excursion along the Y axes and enter it in the corresponding field. 19) Select the “Store” button. NewTom VGi evo – Service Manual rev 6...
-
Page 24: Tin Calibration
6) Fix the calibration base and place the TIN phantom on it as showed in the side pictures (use the laser light to align the TIN on the center). NewTom VGi evo – Service Manual rev 6... - Page 25 The software will show the result of the analysis. In case any of the values is out of range (three asterisks next to that value), repeat the calibration process.. 11) Select File Close. NewTom VGi evo – Service Manual rev 6...
-
Page 26: Verifying The Calibration
(red circles). The phantom is aligned with the vertical dashed line as showed in the following picture (green circle) NewTom VGi evo – Service Manual rev 6... - Page 27 “Next” button and then the “Start” button. 10) Wait until the scan has been completed. When prompted by the software (see following picture) select “Yes”. NewTom VGi evo – Service Manual rev 6...
- Page 28 H FWHM – V FWHM: 1)Verify phantom didn’t move during acquisition 2)Repeat TIN calibration HFD: 1)Repeat scan 2)Repeat TIN calibration VFD: 1) Verify vertical alignment of the phantom 2) Repeat TIN calibration NewTom VGi evo – Service Manual rev 6...
-
Page 29: Head Rest Calibration
8x8 HiRes FOV. Pay particularly attention to center the phantom as better as possible. 3) Just before running the scan, the following message will appear. Select the “YES” button. 4) Run the scan NewTom VGi evo – Service Manual rev 6... -
Page 30: Laser Alignment
NIM040 board could burn (the laser body is 5Vdc and the mechanical structure is 0V) Once the laser line is aligned hold the module with the set screw (1). NewTom VGi evo – Service Manual rev 6... - Page 31 To move the line on the bottom, screw the bottom bolt or loose the top bolt. LEFT RIGHT Once the laser line is centered use some silicon drops to hold the bolts firmly. NewTom VGi evo – Service Manual rev 6 8-10...
-
Page 32: Calibration Backup
Installer of the current version of the iRysNNT software at the moment the unit was manufactured User manuals Technical manuals (in a zipped file with password "Cefla", for field engineer use only) NewTom VGi evo – Service Manual rev 6... -
Page 33: Maintenance Of The System
In order to obtain the TeamViewer login details select the Help Remote support menu. The “Remote support” window will appear (see below). NewTom VGi evo – Service Manual rev 6... -
Page 34: Replacing The Computer
Kv setup, mA setup, beam limiter calibration and geometric calibration.. 5) Verify system calibration Perform a QA scan and verify that all the results of the analysis are inside the expected ranges. NewTom VGi evo – Service Manual rev 6... -
Page 35: Rotating Arm
“Opening the “General Settings” window”). Select the “Configuration” tab. In the “Encoder Steps” field, type the new average of encoder steps. Close the window and when prompted by the software click “OK” to save the file. NewTom VGi evo – Service Manual rev 6... -
Page 36: Testing The Limit Switches
5) Verify that the “FC+“ led is on. Inductive limit switch 1) From the “Arm Movement Console” select the “Reset“ button and wait until the arm is stopped. 2) Verify that the “FC 0“ led is on. NewTom VGi evo – Service Manual rev 6... -
Page 37: Testing The Motor Controller Power Supply
1) Change the IP address of the grabber card (see next picture). In this sample, the new assigned IP address is 192.168.210.1 2) Create a file named “CustomPixDyn.txt” in the NNT working folder (usually “C:\NNT”). 3) Open the “CustomPixDyn.txt” file and type the following lines: NewTom VGi evo – Service Manual rev 6... - Page 38 ( NOTE: be sure you typed a space character after the string and before the IP value. 4) Restart the computer and the device. NewTom VGi evo – Service Manual rev 6...
-
Page 39: Replacing The X-Ray Source And Inverter
In case at the end of the blank procedure, the software advises that “…the number of defective pixels of the detector exceeds the specifications “ please refer to chapter “9.8 Uncorrected pixel management” 12. Perfom a complete calibration of the device (see chapter "8 Calibrating the system”). NewTom VGi evo – Service Manual rev 6... -
Page 40: Uncorrected Pixel Management
NNT previous than 8.0: Select Tools -> Open log error file and save as PDF. In the PDF file search for message just above the error and write down the complete file name. NewTom VGi evo – Service Manual rev 6... - Page 41 The converted Defect map image will appear. The pixels can have three different colors Black: Good pixels Gray: Ignored pixels (tipically the border of the image) White: Pixels that haven’t been corrected NewTom VGi evo – Service Manual rev 6...
- Page 42 11. Acquire an image. In this specific case there are two different shadows that appears inside the image (see following pictures). These shadows force the blank to fail. The position of the x-ray source or collimator must be adjusted until the two shadows disappear. NewTom VGi evo – Service Manual rev 6 9-10...
- Page 43 13. Following is the same defect map file open after the new adjustment of the x-ray source. It is possible to see that the white area previously located on the right side of the image disappeared, meaning the blank was successfully performed. NewTom VGi evo – Service Manual rev 6 9-11...
-
Page 44: Replacing The Flat Panel Detector
Invalidate and perform a new one Blank Acquisition Perform the Geometric Calibration (see the chapter#TIN Calibration”) d) Perform the Headrest calibration and check the calibration (see the chapter “#Head Rest Calibration”) NewTom VGi evo – Service Manual rev 6 9-12... -
Page 45: Regulating The Motor Controller For Vertical Scanner Motion
Please verify the model installed on the device and follow the correct procedure before starting: AMC A12A100 AMC 12A8 Regulation of the AMC A12A100 motor controller 1. Set the SW1 Dip Switches as folllowing: NewTom VGi evo – Service Manual rev 6 9-13... - Page 46 Moving the column in UP direction by the console. Wait a few seconds so that the speed is maximum (2nd gear) and verify that the voltage is still within the predetermined range 36Vdc ± 0.5V. If not, set again the Potentiometer n. 3 NewTom VGi evo – Service Manual rev 6 9-14...
- Page 47 SW1 – 4 OFFSET Set the potentiometers as folllowing: Potentiometer Setting Function COMPLETELY COUNTER-CLOCKWISE LOOP GAIN COMPLETELY CLOCKWISE CURRENT LIMIT COMPLETELY COUNTER-CLOCKWISE REFERENCE GAIN COMPLETELY COUNTER-CLOCKWISE + OFFSET / TEST 6 ROTATIONS CLOCKWISE NewTom VGi evo – Service Manual rev 6 9-15...
- Page 48 Moving the column in UP direction by the console. Wait a few seconds so that the speed is maximum (2nd gear) and verify that the voltage is still within the predetermined range 36Vdc ± 0.5V. If not, set again the Potentiometer n.3 NewTom VGi evo – Service Manual rev 6 9-16...
-
Page 49: K Vcurve
(TP2 and TP7) to a value of 0÷10 mV. SETTING THE SFS mA CURVE Enable the service mode, then in the scanner test window (TOOLS→SCANNER TEST) select the Small Focal Spot (button “SFS” selected) Select Calibration → mA Setup. NewTom VGi evo – Service Manual rev 6 9-17... - Page 50 15. Repeat previous steps from n° 5 to n°12. SETTING THE LFS mA CURVE 16. Select the Large Focal Spot (button “SFS” deselected) and repeat the above procedure from steps from n°3 to n°15. NewTom VGi evo – Service Manual rev 6 9-18...
- Page 51 This procedure will try to automatically calculate the min and max value and once done will automatically fill the whole mA table. This process will have to be repeated for all the available mA tables (SFS 110kV, SFS 75kV, LFS 110kV, LFS 75kV …). NewTom VGi evo – Service Manual rev 6 9-19...
-
Page 52: Adjusting The Collimator
After each adjustment acquire a new image by pressing the “Acquisition” button. Horizontal adjustment. Rotating the bracket plate will result in moving the collimated area to the left and/or to the right. NewTom VGi evo – Service Manual rev 6 9-20... - Page 53 In order to do that select the “Enable manual tuning” flag on the Beam limiter dialog… …then act on the single collimator positions as shown below. Once done acquire a new image pressing the “Acquisition” button. NewTom VGi evo – Service Manual rev 6 9-21...
- Page 54 Time (ms) Expected GL Position Standard 0° 10k – 15k Hi Res 0° 10k – 15k 10. Once all the FOVs has been correctly adjusted, close the “Movable Window Beam limiter”. NewTom VGi evo – Service Manual rev 6 9-22...
- Page 55 Maintenance of the system ______________________________________________________________________________________ NewTom VGi evo – Service Manual rev 6 9-23...
-
Page 56: Image By Image Check
LASER1, and between TP2 (GND) and TP10 (V Laser2) for LASER2. Laser voltage must be 3.3 Vdc. In case the voltage needs to be adjusted it can be done acting respectively on TRIM1 and TRIM2 on the same board. NewTom VGi evo – Service Manual rev 6 9-24... -
Page 57: Consolle
Error writing to internal flash Error writing to internal flash Error writing to internal flash Error writing to internal flash Error sending CANbus message Error sending CANbus message Icons not uploaded NewTom VGi evo – Service Manual rev 6 9-25... -
Page 58: Daily Check
(MEAN) and the difference between the maximum and minimum single mean are calculated (SD). Test N. 7: Switch the X-Ray system off. Test N. 8: Dark image acquisition. Test N. 9: The Arm moves to 0 degrees NewTom VGi evo – Service Manual rev 6 9-26... -
Page 59: Boards Layout
Boards Layout ______________________________________________________________________________________ 10 Boards Layout Control Box NewTom VGi evo – Service Manual rev 6 10-1... - Page 60 Boards Layout ______________________________________________________________________________________ NewTom VGi evo – Service Manual rev 6 10-2...
-
Page 61: Inverter
Boards Layout ______________________________________________________________________________________ Inverter NewTom VGi evo – Service Manual rev 6 10-3... -
Page 62: Troubleshooting
11 Troubleshooting Please use the official “Troubleshooting report” form (below an preview of Page 1) to report any problem to the manufacturer. The complete form can be downloaded from the extranet site (http://extranetmedical.cefla.it) NewTom VGi evo – Service Manual rev 6... -
Page 63: Nnt Log Error Viewer (Only From Nnt 8.0)
The NNT Log Viewer is an utility integrated in the NNT software, used to visualize error, messages, information that occurred in the usage of the scanner and/or NNT application. For a complete guide of this application please refer to the document “NNT Log Viewer Guide”. NewTom VGi evo – Service Manual rev 6 11-2... -
Page 64: Phantom Analysis
Make sure the calibration TIN is not damaged or warped. If the “Average Tin Error” value H FWHM & V FWHM in the Tin Report is higher than 1.00 pixel for the Full Field, the TIN must be replaced. NewTom VGi evo – Service Manual rev 6 11-3... -
Page 65: Extranet Site
Additional information can be downloaded from the dedicated extranet site http://extranetmedical.cefla.it. Only registered user can access to the site. If a new account is required please contact service.radiology@cefla.it. The site is mainly divided between the main menu on the left side and the products area on the right site. - Page 66 Extranet site ______________________________________________________________________________________ Clicking on a single product the corresponding window will pop up, listing all the available resources linked to that specific equipment. NewTom VGi evo – Service Manual rev 6 12-2...
- Page 67 NEWTOM™ is a commercial trademark of CEFLA s.c. All other products and brand names are registered trademarks or trademarks of their respective companies. NEWTOM™ VG series is manufactured by: CEFLA s.c. Phone: +39 045 8202727 Fax +39 045 8203040 e-mail: info@newtom.it...
Need help?
Do you have a question about the NewTom VGi evo and is the answer not in the manual?
Questions and answers