Table of Contents
Advertisement
Quick Links
Advertisement
Table of Contents

Subscribe to Our Youtube Channel
Related Manuals for CEFLA NewTom 5G Series


Summary of Contents for CEFLA NewTom 5G Series
- Page 1 97050266 Rev. 3 28.10.2016...
- Page 2 This document is provided as a consultation manual intended for the device technicians. CEFLA s.c. follows a policy based on the constant development and update of the product. For this reason, it reserves the right to change the content of this manual without prior notice.
-
Page 3: Table Of Contents
TABLE OF CONTENTS TARGET AND FIELD APPLICATION ......................1-1 PATIENT TABLE ............................2-1 2.1 P ..........................2-1 ATIENT ABLE ONSOLE 2.1.1 Console structure and definitions ....................2-1 2.1.1.1 Definition of “REST” position ........................2-1 2.1.1.2 Definition of “WORKING” position ......................2-1 2.1.1.3 Synchronized movement pantograph / longitudinal axis ................ -
Page 4: Target And Field Application
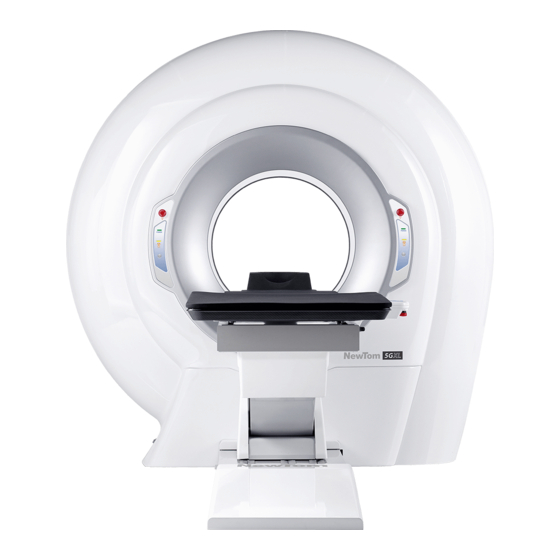
NewTom 5G series Patient Table. For more details about NewTom 5G series scanner unit, please refer to the “User Manual” document. “Patient Table User Procedures” and “User Manual” must be read and understood before you start using the NewTom 5G series. -
Page 5: Patient Table
2 Patient Table 2.1 Patient Table Console CAUTION: controls, adjustments, performance of procedures other than those specified herein may result in hazardous radiation exposure. 2.1.1 Console structure and definitions The patient table console includes a keypad with 14 buttons, 3 signal LEDs, a monochrome display and an emergency button. -
Page 6: Synchronized Movement Pantograph / Longitudinal Axis
slide the table inside or outside the gantry along the X axis, by pressing the corresponding buttons on the console. move the table transversely (along the Y axis) in order to move the patient to its left or to its right by pressing the corresponding buttons on the console. -
Page 7: Console Overview
2.1.1.4 Console overview Button Function Warning UP/DOWN Raise and lower the table The vertical position of the table be adjusted only during REST or WORKING position. maximum minimum positions are predefined. FORWARD/BACK Longitudinal movement The longitudinal position of the table toward the direction of the adjusted only... -
Page 8: Display Overview
Run the process to slide the Available only when the “P2” symbol patient outside the gantry appears on the display + / - Allow the adjustment of Function depends from the current page the back and/or leg rest on the display. plate. -
Page 9: Home Page
In the bottom part of each page the corresponding actions of the F1, MODE and F2 button are shown. After the device has been turned on, the LOGO page will appear for a few seconds followed by the main page (HOME page). 2.1.1.6 HOME Page This page shows the current status of the table and the available functions. - Page 10 POS page Pressing the MODE button will bring back to the HOME page. The TABLE page offer the possibility to move the back plate and the leg rest plate separately or simultaneously. The F1 and F2 button select/deselect back plate and leg rest plate, the central icon shows the current selection.
-
Page 11: Lock Page
2.1.1.7 LOCK Page When the table is remotely controlled the “locked console” icon could appear on the display. In such condition all the console buttons are disabled. LOCK page In case of fault condition an ERROR page will appear on the display, showing the error code and a brief description. -
Page 12: Complete Reset
2.1.2.2 Complete reset Some times the table, in addition to the daily reset, will require a complete reset. The procedure is transparent to the user. After pressing the P2 button, the table will automatically run the daily or the complete reset. In case the procedure is interrupted due to a fault or a button pressure, it can be restarted by pressing the “P2”... -
Page 13: Anti-Collision Safety
Once the P2 button has been pressed, the sequence will start performing all the necessary movements in order to bring the table to the REST position. In case the sequence is stopped due to a button selection, the HOME page will show the available sequences. Depending on the current position will be possible to complete the sequence by pressing the P2 button, or perform the reset procedure by pressing the P1 button. -
Page 14: Patient Table With Stretcher
3 Patient Table with stretcher 3.1 Patient Table console CAUTION: controls, adjustments, performance of procedures other than those specified herein may result in hazardous radiation exposure. 3.1.1 General overview and definitions The table console is composed from a 14 buttons (12 active buttons, lateral arrows not used), 3 signal LEDs, a monochrome display and an emergency button located on the bottom. -
Page 15: Definition Of "Exam Preparation Position
3.1.1.2 Definition of “EXAM PREPARATION position” "EXAM PREPARATION position", refer to the position in which the patient is ready to be centered inside the gantry before the exam. It is characterized by: Stretcher completely out of the gantry (with active limit switch) ... -
Page 16: Console Buttons Indications
3.1.2 Console buttons indications Button Function Warning UP/DOWN Raise and lower the table These movements are not allowed in case of "facilitated uphill position". The minimum / maximum excursions of the movements are limited to defaults values by active collision controls. -
Page 17: Console Structure
+ / - + / - buttons The function depends on the current page displayed on the screen LASER Laser ON / OFF buttons The button is active only if the communication 5G / PC is active F1 / MODE / F2 Navigation menu buttons The function depends by the icon displayed... -
Page 18: Displayed
3.1.4 Displayed pages 3.1.4.1 INFO page After the device has been switched on, the INFO page will appear for a few seconds . This page inslude the logo, the serial number and the console firmware version. After a few seconds the HOME page(see next picture) will automatically show up. INFOpage 3.1.4.2 HOME page This page always shows the current status of the table and the procedures that at the moment can be run. -
Page 19: Pos Page
In this case the only available movements are UP/DOWN and LEFT/RIGHT (using the corresponding buttons on the console panel, see Par. Errore. L'origine riferimento non è stata trovata.) In all the aforementioned pages the icons corresponding to the F1/F2 buttons refer to the POS and INFO pages. -
Page 20: Movement Sequences
3.1.5 Movement sequences 3.1.5.1 Exam preparation position sequence (P1) Allow to position the table before the execution of an exam (table ready for patient positioning). It is possible to perform this procedure if the the HOME page appear with the P1 icon (see next picture). HOME P1-P2 Page To run the processi is necessary to move the stretcher all the way out of the gantry and lock it. -
Page 21: Safety Controls
3.1.6 Safety controls 3.1.6.1 Collision safety During the table movements is activated collision monitoring: all movements which could cause contact with the structure of the gantry are inhibited, taking into account the absolute position of the stretcher. In exceptional cases, but it is not recommended, it is possible to disable the collision safety system, only by manual mode from the console and under the strict supervision of the operator. -
Page 22: Crushing Safety
3.1.6.2 Crushing safety In case during the movement the AntiPinch limit switches are activated the vertical movement (down) of the pantograph is inhibit. The following picture will appear Anti Pinch page The only available movement will be the vertical one of the pantograhp (UP) (see Par. Errore. L'origine riferimento non è... -
Page 23: Flowchart Of Available Commands
3.1.8 Flowchart of available commands – Patient Table User Procedures 3-10 NewTom 5G... - Page 24 NEWTOM™ 5G is a commercial trademark of CEFLA s.c. All other products and brand names are registered trademarks or trademarks of their respective companies. NEWTOM™ 5G is manufactured by: CEFLA s.c. Phone: +39 045 8202727 Fax +39 045 8203040 e-mail: info@newom.it...
Need help?
Do you have a question about the NewTom 5G Series and is the answer not in the manual?
Questions and answers