
Related Manuals for Sunjoy L-GZ238PST-10


Summary of Contents for Sunjoy L-GZ238PST-10
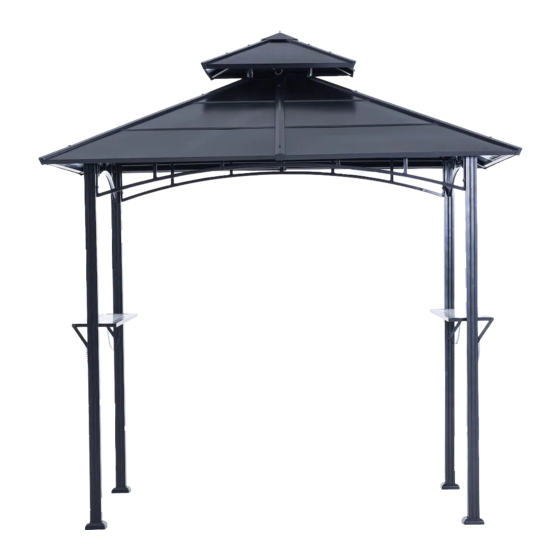
- Page 1 Assembly Instructions ITEM # L-GZ238PST-10 Questions, problems, missing parts? call our customer service department at 1-866-578-6569 from 8:00 am EST to 8:00 pm PST, or email to customer.care@sunjoygroup.com...
- Page 2 PACKAGE CONTENTS U1 U2...
- Page 3 PACKAGE CONTENTS PART DESCRIPTION QUANTITY Pole (1) Pole (2) Base Base cover Long screen Short screen Beam connector (middle) Beam connector (corner) (1) Beam connector (corner) (2) Small top frame Corner top beam Middle top beam Long and big roof panel (1) Long and big roof panel (2) Long and big roof panel (3) Long and big roof panel (4)
-
Page 4: Hardware Contents
HARDWARE CONTENTS M6×15 M6 Washer M6×25 M6×15 M6×55 M6 Nut M6×30 M6 Nut Φ8×180 Bolt Hex bolt Hex Bolt Bolt bolt with cap Stake Wrench Qty. 84 Qty. 181 Qty. 16 Qty. 16 Qty. 22 Qty. 22 Qty. 20 Qty. 1 Qty. - Page 5 PREPARATION Before beginning assembly of product, make sure all parts are present. Compare parts with package contents list and diagram above. If any part is missing or damaged, do not attempt to assemble the product. Contact customer service for replacement parts. Estimated Assembly Time: 90 minutes Tools Required for Assembly: Wrench (included) and Phillips Screwdriver (not included) ASSEMBLY INSTRUCTIONS...
- Page 6 ASSEMBLY INSTRUCTIONS 2. Connect the long screen (D) and short screen (E) to the pole (A1 and A2), securing with bolts (CC) and washers (BB). Hardware Used M6 Washer x 16 M6x25 Hex bolt x 16 3. Attach the beam connector (corner) (2) (G2) to the top of pole (A2), securing with blots (DD) and washers (BB).
- Page 7 ASSEMBLY INSTRUCTIONS Fig. 13 Fig. 14 Fig. 6 Fig. 7 Fig. 5 Fig. 8 Fig. 10 Fig. 9 Fig. 12 Fig. 11 5&6. Connect the corner top beam (I) to the beam connector (corner) (G1 and G2), securing them with blots (EE), washers (BB) and nuts (FF). Connect the other end of corner top beam (I) to the small top frame (H).
- Page 8 ASSEMBLY INSTRUCTIONS 7&8. Connect the middle top beam (J) to the small top frame (H) by blots (EE), washers (BB) and nuts (FF). Connect the other end of the middle top beam (J) to the beam connector (middle) (F). Hardware Used M6 Washer x 12 M6x55 Bolt...
- Page 9 ASSEMBLY INSTRUCTIONS 11&12. Connect the long side beam (N5) to the corner top beam (I), securing them with blots (AA), washers (BB). Connect the other end of long side beam (N5) to the middle top beam (J). Repeat this procedure for long and short beam (N6, O1, O2, O3).
- Page 10 ASSEMBLY INSTRUCTIONS Fig. 18 Fig. 17 Fig. 16 Fig. 15 Fig. 20 Fig. 21 Fig. 19 Fig. 22 15. Connect the long and big roof panel Hardware Used (K1, K2, K3, K4) and short and big M6x15 Bolt roof panel (L1, L2, L3) by using blots x 28 (AA) and washers (BB).
- Page 11 ASSEMBLY INSTRUCTIONS 16. Connect the corner covering of big top (P1&P2) Hardware Used and middle covering of big top (Q) by using blots (GG) and washers (BB). M6 Washer x 12 M6x30 Bolt x 12 17. Connect the long and small roof panel (M1) to the short and Small roof panel (M2), securing them with blots (AA), washers (BB).
- Page 12 ASSEMBLY INSTRUCTIONS 19. Lock one head of support bar (X) onto shelf (W) by using bolts (AA) and washers (BB) to lock. Hardware Used M6x15 Bolt M6 Washer 20. Connect shelf (W) with pole (A1, A2) by using bolts (DD) and washers (BB). Hardware Used A1 A2 M6 Washer...
-
Page 13: Care And Maintenance
CARE AND MAINTENANCE To extend the life of grill gazebo, do not use when there are high winds. Disassemble and pack away when the gazebo will not be used for an extended period. Ensure that the canopies and metal parts are all dry before packing away. SIX-MONTH LIMITED WARRANTY This limited warranty is extended to the original purchaser and applies to defects in material and workmanship of your item provided the item is maintained with care and used only for personal,... - Page 14 REPLACEMENT PARTS LIST PART DESCRIPTION Pole (1) Pole (2) Base Base cover Long screen Short screen Beam connector (middle) Beam connector (corner) (1) Beam connector (corner) (2) Small top frame Corner top beam Middle top beam Long and big roof panel (1) Long and big roof panel (2) Long and big roof panel (3) Long and big roof panel (4)
Need help?
Do you have a question about the L-GZ238PST-10 and is the answer not in the manual?
Questions and answers