Table of Contents
Advertisement
Quick Links
SLT / SLTX
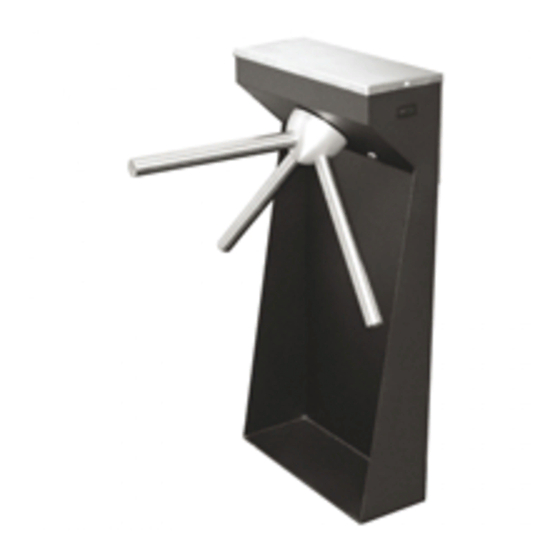
WAIST HIGH SLIMLINE SECURITY TURNSTILE
INSTRUCTIONS AND
MAINTENANCE GUIDE
Revision 1.5 – September 7, 2007
Serial Number: ______________________
Alvarado Manufacturing Company, Inc.
12660 Colony Street, Chino, CA 91710
(800) 423-4143 (909) 591-8431 Fax: (909) 628-1403
www.alvaradomfg.com
PUD1570
Advertisement
Table of Contents

Related Manuals for Alvarado SLT


Summary of Contents for Alvarado SLT
- Page 1 SLT / SLTX WAIST HIGH SLIMLINE SECURITY TURNSTILE INSTRUCTIONS AND MAINTENANCE GUIDE Revision 1.5 – September 7, 2007 Serial Number: ______________________ Alvarado Manufacturing Company, Inc. 12660 Colony Street, Chino, CA 91710 (800) 423-4143 (909) 591-8431 Fax: (909) 628-1403 www.alvaradomfg.com PUD1570...
-
Page 2: Table Of Contents
Alvarado – SLT / SLTX Turnstile TABLE OF CONTENTS IMPORTANT SAFETY PRECAUTIONS PAGE 3 TURNSTILE CONFIGURATION DESCRIPTIONS PAGE 4 OVERVIEW OF INSTALLATION STEPS, PAGE 5 CONCRETE SLAB REQUIREMENTS, & LAYOUT SPACING INSTALLATION INSTRUCTIONS PAGE 6 ELECTRICAL AND ACTIVATION WIRING INSTRUCTIONS... -
Page 3: Important Safety Precautions
WARNING: Always follow the installation and operating precautions, including the following: • Read this manual in its entirety before installing or operating the turnstile. If there are questions, you may contact Alvarado at (909) 591-8431, Monday through Friday, 6:00 AM to 4:30 PM PST. •... -
Page 4: Turnstile Configuration Descriptions
(included for both directions on all supplied. This is how the turnstile leaves the SLT models). One key lock for each passage factory unless specified otherwise. direction is located near the arms on the cabinet fascia. -
Page 5: Overview Of Installation Steps
Alvarado – SLT / SLTX Turnstile OVERVIEW OF INSTALLATION / SLAB REQUIREMENTS SLAB REQUIREMENTS MINIMUM THICKNESS: 4” LEVEL SOLID CONCRETE DO NOT INSTALL ON ASPHALT OVERVIEW OF INSTALLATION STEPS: TOOLS REQUIRED: A. Determine turnstile locations taking into Heavy Duty Drill account power and activation wiring 5/8”... -
Page 6: Installation Instructions
For Terrazzo, ceramic tile, or brick veneer installations add the thickness of the finished floor material to the anchor hole depth (Note: The anchoring package provided by Alvarado should ONLY be used to anchor the unit directly into the concrete slab). -
Page 7: Electrical And Activation Wiring Instructions
Alvarado – SLT / SLTX Turnstile ELECTRICAL AND ACTIVATION WIRING INSTRUCTIONS (SLTX Models Only) TOOLS REQUIRED: Wire Stripper PARTS REQUIRED: Wire Nuts INSTRUCTIONS: (NOTE: ONLY SKILLED ELECTRICIANS SHOULD CONNECT POWER) 1. Make sure that primary power to the unit is off. - Page 8 11. Repeat steps 9 and 10 a total of three times. 12. For bi-directionally controlled turnstiles (Model SLT-6X units ONLY), repeat steps 9 through 11 for the opposite direction and confirm correct functionality. 13. Re-attach the turnstile lid.
-
Page 9: Slt-4X-R Right Hand, Fail Lock
Alvarado – SLT / SLTX Turnstile SLT-4X-R RIGHT HAND FAIL LOCK FRAME CONFIGURATION SLT-4X-R, RIGHT HAND, FAIL LOCK WIRING DIAGRAM 18 VAC POWER IN TRANSFORMER P/N: 10-3003C (If ordered with the unit) FUSE 3/4 AMP 250 VAC 120 VAC... -
Page 10: Slt-4X-R-Fs Right Hand, Fail Safe
Alvarado – SLT / SLTX Turnstile SLT-4X-R-FS RIGHT HAND FAIL SAFE FRAME CONFIGURATION SLT-4X-R-FS, RIGHT HAND, FAIL SAFE WIRING DIAGRAM 18 VAC POWER IN TRANSFORMER P/N: 10-3003C (If ordered with the unit) FUSE 3/4 AMP 250 VAC 120 VAC... -
Page 11: Slt-4X-L Left Hand, Fail Lock
Alvarado – SLT / SLTX Turnstile SLT-4X-L LEFT HAND FAIL LOCK FRAME CONFIGURATION SLT-4X-L, LEFT HAND, FAIL LOCK WIRING DIAGRAM 18 VAC POWER IN TRANSFORMER P/N: 10-3003C (If ordered with the unit) FUSE 3/4 AMP 250 VAC 120 VAC... -
Page 12: Slt-4X-L-Fs Left Hand, Fail Safe
Alvarado – SLT / SLTX Turnstile SLT-4X-L-FS LEFT HAND FAIL SAFE FRAME CONFIGURATION SLT-4X-L-FS, LEFT HAND, FAIL SAFE WIRING DIAGRAM 18 VAC POWER IN TRANSFORMER P/N: 10-3003C (If ordered with the unit) FUSE 3/4 AMP 250 VAC 120 VAC... -
Page 13: Slt-6X Bi-Directional, Fail Lock
Alvarado – SLT / SLTX Turnstile SLT-6X BI-DIRECTIONAL FAIL LOCK FRAME CONFIGURATION SLT-6X, FAIL LOCK WIRING DIAGRAM 18 VAC POWER IN TRANSFORMER P/N: 10-3003C (If ordered with the unit) FUSE 3/4 AMP 250 VAC 120 VAC... -
Page 14: Slt-6X-Fs Bi-Directional, Fail Safe
Alvarado – SLT / SLTX Turnstile SLT-6X-FS BI-DIRECTIONAL FAIL SAFE SLT-6X-FS with Electric Key Switch Option FRAME CONFIGURATION SLT-6X-FS, FAIL SAFE WIRING DIAGRAM 18 VAC POWER IN TRANSFORMER P/N: 10-3003C (If ordered with the unit) KEY SWITCH ELECTRICAL KEY SWITCH... -
Page 15: Maintenance
Alvarado – SLT / SLTX Turnstile MAINTENANCE Inspect the installed turnstiles approximately 30 days after the initial installation. Thereafter, the frequency of maintenance will depend on usage and the environment. We suggest inspecting and lubricating the turnstile interior twice a year. Interior maintenance should be performed more frequently in high use applications and/or in dusty or humid environments. - Page 16 Alvarado – SLT / SLTX Turnstile 7. Springs – Inspect the springs for unusual wear and replace if worn or damaged. When replacing springs use only Alvarado supplied parts. 8. Solenoid - Do not oil the solenoid plunger. The solenoid plunger is designed to have a “dry” fit.
-
Page 17: Troubleshooting
Alvarado – SLT / SLTX Turnstile TROUBLESHOOTING ITEMS TO CHECK FIRST: • Always check for and remove any debris in or around the solenoid plunger (do not, however, lubricate the solenoid plunger. It is designed to operate “dry”). (SLTX only) •... - Page 18 Alvarado – SLT / SLTX Turnstile Turnstile does No power (fail safe unit) Verify that the rectifier is not relock (SLTX only) receiving approximately 18 The microswitch needs Adjust micro-switch (see Notes adjustment. below.) The microswitch or the Adjust or replace micro-switch microswitch arm is bent and/or arm.
- Page 19 Alvarado – SLT / SLTX Turnstile • (Failsafe units only) Maintain a spacing of 1.75” from the face of the solenoid to the face of the bracket. Bend the bracket to adjust. Check the 1.75” measure with both the plunger pulled in and with the plunger in the release position.
-
Page 20: Slt Plan & Elevation View Drawings
Alvarado – SLT / SLTX Turnstile SLT PLAN & ELEVATION VIEW DRAWINGS 40” Elevation (Front) View 34.13” Plan (Top) View 20” 15” 23.5”... -
Page 21: Exploded Parts Detail
The turnstile model shown is an SLT-6X Fail Lock unit. SLT SUB ASSEMBLIES A. SLT Frame Plate Sub Assembly B. SLT Head and Arms Sub Assembly C. SLT Hydraulic Closure Sub Assembly D. SLT Ratchet Sub Assembly E. SLT Compression Shoe Sub Assembly... - Page 22 Alvarado – SLT / SLTX Turnstile SLT EXPLODED PARTS DETAIL continued… SLT Frame Plate Sub Assembly See Page 25 for the corresponding Exploded View numbered parts listing. SLT Head and Arms Sub Assembly Exploded View...
- Page 23 Alvarado – SLT / SLTX Turnstile SLT EXPLODED PARTS DETAIL continued… SLT Hydraulic Closure Sub Assembly Exploded View See Page 25 for the corresponding numbered parts listing. SLT Ratchet Sub Assembly Exploded View...
- Page 24 Alvarado – SLT / SLTX Turnstile SLT EXPLODED PARTS DETAIL continued… See Page 25 for the corresponding numbered parts listing. SLT Compression Shoe Sub Assembly Exploded View SLT Microswitch Mounting Plate Sub Assembly Exploded View...
-
Page 25: Numbered Parts List For Exploded Parts Detail
These components are provided with the Hydraulic Closure Unit (#49) and are not available for individual purchase. * The turnstile model shown is an SLT-6X Fail Lock Unit with Key Overrides for both directions. ** These components are not available for individual purchase. Use Part # 04-7141 to reorder an SLT Ratchet & Main Shaft Assembly. -
Page 26: Lubrication Guide
Alvarado – SLT / SLTX Turnstile LUBRICATION GUIDE...
Need help?
Do you have a question about the SLT and is the answer not in the manual?
Questions and answers